android从4.2开始便添加了多用户功能,其具体的管理者为UserManager.
多用户模式的启用
系统判断当前设备是否支持多用户模式的依据是配置文件config.xml 中的
config_multiuserMaximumUsers 和config_enableMultiUserUI 配置项。
- <!-- Maximum number of supported users -->
- <integer name="config_multiuserMaximumUsers">4</integer>
- <!-- Whether UI for multi user should be shown -->
- <bool name="config_enableMultiUserUI">true</bool>
前者取值为整型,决定着当前设备支持的最大用户上限。默认值为1,即不支持多用户。
后者取值为布尔型,默认值为false。
如需启用多用户,则设置前者为大于1 的值,后者为true。
从上面的配置可知,当前设备已经打开多用户功能,且支持最大用户数为4,该值也可以用pm命令获取。

当然,在代码中的判断则是在UserManager.java中:
- public static int getMaxSupportedUsers() {
- // Don't allow multiple users on certain builds
- if (android.os.Build.ID.startsWith("JVP")) return 1;
- // Svelte devices don't get multi-user.
- if (ActivityManager.isLowRamDeviceStatic()) return 1;
- return SystemProperties.getInt("fw.max_users",
- Resources.getSystem().getInteger(R.integer.config_multiuserMaximumUsers));
- }
- public static boolean supportsMultipleUsers() {
- return getMaxSupportedUsers() > 1
- && SystemProperties.getBoolean("fw.show_multiuserui",
- Resources.getSystem().getBoolean(R.bool.config_enableMultiUserUI));
- }
多用户的操作目前未对普通应用开放,其相关API 都有hide 注解,并需要system权限。
此外,用户的添加和移除还需要android.Manifest.permission.MANAGE_USERS权限。
添加/切换/删除用户
为每个人创建一个用户,你可以很容易地与家人和朋友分享你的设备(手机/平板等),每个人可以拥有一块独立的设备空间,自定义屏幕、设定账户、应用、设置等其他更多的操作。这里我们只介绍主要的用户操作,添加、切换和删除,其他用户操作可以自行尝试。
添加用户
要创建一个新用户/访客,你必须处于机主模式下,能创建的用户数取决于设备的max users。
上面提到的pm命令可以用于查询当前设备支持的最大用户数。
打开settings-->users-->add user
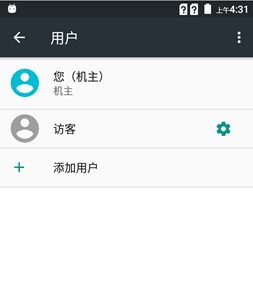
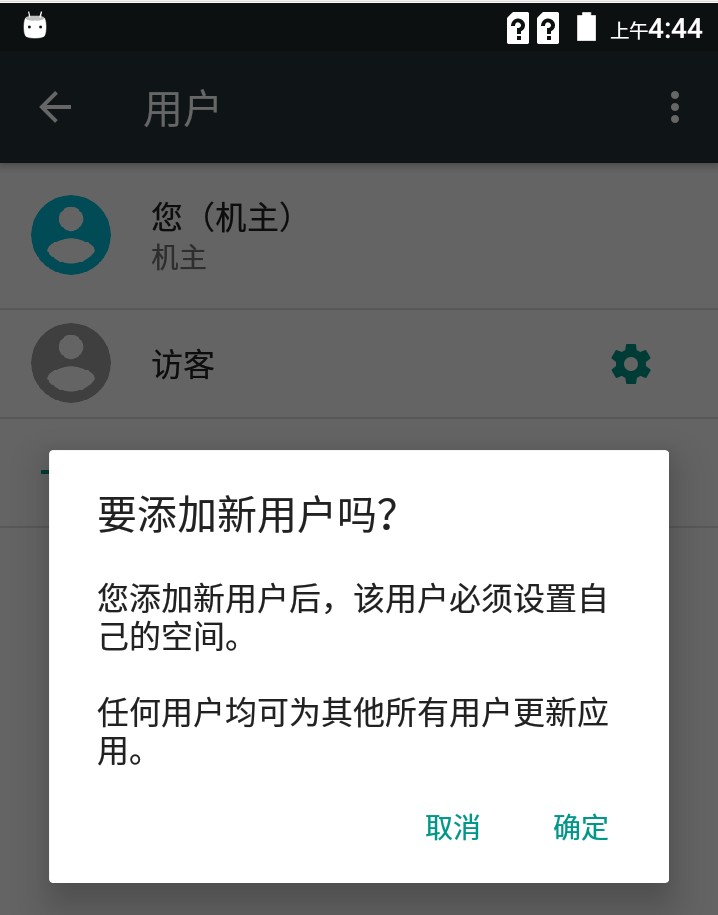
点击“添加用户”,点击“确定”。
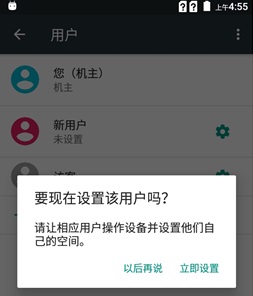
点击“立即设置”,切换到新用户,设置账户等其他细节。点击“以后再说”,下次切换到新用户时,再进行账户等其他细节设置。
切换用户
(1)第一种方式:
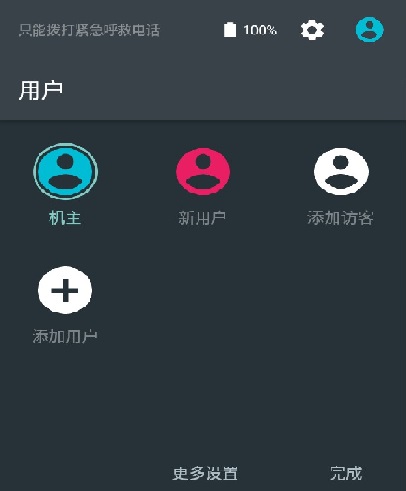
1.从设备顶端向下滑动屏幕,打开快速设置菜单,点击右上角的用户切换按钮。
2.在用户列表中,点击要切换的用户。
2)第二中方式:
1.打开设置。
2.点击“设备”列表下的“用户”,在用户列表中,点击要切换的用户。
删除同理
添加原理
用户添加是通过调用UserManager 的public UserInfo createUser(String name, int flags)方法进行的。
其具体实现在UserManagerService 的同名方法中。
- public UserInfo createUser(String name, int flags) {
- try {
- return mService.createUser(name, flags);
- } catch (RemoteException re) {
- Log.w(TAG, "Could not create a user", re);
- return ;
- }
- }
- // UserManagerService.java
- @Override
- public UserInfo createUser(String name, int flags) {
- checkManageUsersPermission("Only the system can create users");
- return createUserInternal(name, flags, UserHandle.USER_NULL);
- }
调用内部的createUserInternal方法:
- private UserInfo createUserInternal(String name, int flags, int parentId) {
- if (getUserRestrictions(UserHandle.getCallingUserId()).getBoolean(
- UserManager.DISALLOW_ADD_USER, false)) {
- Log.w(LOG_TAG, "Cannot add user. DISALLOW_ADD_USER is enabled.");
- return ;
- }
- if (ActivityManager.isLowRamDeviceStatic()) {
- return ;
- }
- final boolean isGuest = (flags & UserInfo.FLAG_GUEST) != 0;
- final boolean isManagedProfile = (flags & UserInfo.FLAG_MANAGED_PROFILE) != 0;
- final long ident = Binder.clearCallingIdentity();
- UserInfo userInfo = ;
- final int userId;
- try {
- synchronized (mInstallLock) {
- synchronized (mPackagesLock) {
- UserInfo parent = ;
- if (parentId != UserHandle.USER_NULL) {
- parent = getUserInfoLocked(parentId);
- if (parent == ) return ;
- }
- if (isManagedProfile && !canAddMoreManagedProfiles()) {
- return ;
- }
- if (!isGuest && !isManagedProfile && isUserLimitReachedLocked()) {
- // If we're not adding a guest user or a managed profile and the limit has
- // been reached, cannot add a user.
- return ;
- }
- // If we're adding a guest and there already exists one, bail.
- if (isGuest && findCurrentGuestUserLocked() != ) {
- return ;
- }
- userId = getNextAvailableIdLocked();
- userInfo = new UserInfo(userId, name, , flags);
- userInfo.serialNumber = mNextSerialNumber++;
- long now = System.currentTimeMillis();
- userInfo.creationTime = (now > EPOCH_PLUS_30_YEARS) ? now : 0;
- userInfo.partial = true;
- Environment.getUserSystemDirectory(userInfo.id).mkdirs();
- mUsers.put(userId, userInfo);
- writeUserListLocked();
- if (parent != ) {
- if (parent.profileGroupId == UserInfo.NO_PROFILE_GROUP_ID) {
- parent.profileGroupId = parent.id;
- scheduleWriteUserLocked(parent);
- }
- userInfo.profileGroupId = parent.profileGroupId;
- }
- final StorageManager storage = mContext.getSystemService(StorageManager.class);
- for (VolumeInfo vol : storage.getWritablePrivateVolumes()) {
- final String volumeUuid = vol.getFsUuid();
- try {
- final File userDir = Environment.getDataUserDirectory(volumeUuid,
- userId);
- prepareUserDirectory(mContext, volumeUuid, userId);
- enforceSerialNumber(userDir, userInfo.serialNumber);
- } catch (IOException e) {
- Log.wtf(LOG_TAG, "Failed to create user directory on " + volumeUuid, e);
- }
- }
- mPm.createNewUserLILPw(userId);
- userInfo.partial = false;
- scheduleWriteUserLocked(userInfo);
- updateUserIdsLocked();
- Bundle restrictions = new Bundle();
- mUserRestrictions.append(userId, restrictions);
- }
- }
- mPm.newUserCreated(userId);
- if (userInfo != ) {
- Intent addedIntent = new Intent(Intent.ACTION_USER_ADDED);
- addedIntent.putExtra(Intent.EXTRA_USER_HANDLE, userInfo.id);
- mContext.sendBroadcastAsUser(addedIntent, UserHandle.ALL,
- android.Manifest.permission.MANAGE_USERS);
- }
- } finally {
- Binder.restoreCallingIdentity(ident);
- }
- return userInfo;
- }
1.检查调用者是否具有所需权限。
2.对安装和软件包流程加锁,保证线程安全。
3.检查多用户环境是否到达用户数量限制。如果没有,创建用户实例。
4.为新用户创建相关目录。
5.序列化用户列表。
6. 发送用户建立广播, MountService 在收到此广播后, 调用createEmulatedVolumeForUserLocked 方法为用户建立相应的数据目录。
用户保存
用户创建后,会首先在/data/system/users/userlist.xml 文件中保存新增加用户的id,创建/data/system/users/ 用户id 目录,并将用户信息保存至其下的用户id.xml 文件中。
其内容包括一些基本的用户信息。
/data/system/users/userlist.xml:
- <?xml version='1.0' encoding='utf-8' standalone='yes' ?>
- <users nextSerialNumber="11" version="5">
- <guestRestrictions>
- <restrictions no_outgoing_calls="true" no_sms="true" />
- </guestRestrictions>
- <user id="0" />
- <user id="10" />
- </users>
用户切换流程
用户切换是通过调用ActivityManager 的public boolean switchUser(int userId)方法进行。一般通过 ActivityManagerNative.getDefault().switchUser(int userId)进行调用。
在调用时,系统进行以下操作:
1.检查调用者是否具有所需权限。
2.获取切换目标用户信息,并设定当前用户为目标用户
3.WindowsManagerService 设置当前用户,锁定屏幕
4.切换目标用户状态至启动
5.广播REPORT_USER_SWITCH_MSG 和USER_SWITCH_TIMEOUT_MSG 消息,设定用户切换和切换超时时间(2 秒),此超时时间用于限定REPORT_USER_SWITCH_MSG 广播全程时间。
6.切换Activity 堆栈至当前用户
7.广播ACTION_USER_SWITCHED 消息,各接收组件进行相应操作。 大部分具体操作,
比如存储目录切换、安全设置切换等,都在此广播后进行。
用户移除流程
用户移除是通过调用UserManager 的 public boolean removeUser(int userHandle)方法进行的。其具体实现同样是在UserManagerService 的同名方法中。
在调用时,系统进行如下操作:
1.检查调用者是否具有所需权限。
2.对软件包变化加锁
3.将用户id 加入待移除用户列表,将用户状态设为partial,这样,在下次系统启
动时,会清除此用户。
4.停止用户,杀掉用户相关进程。
5.发送用户移除的广播。广播成功后,删除用户描述文件和数据文件。
6.序列化用户列表
多用户的API接口
与其它系统服务的实现类似,用户管理也采用了经由Binder 调用的远程服务机制。
UserManager 为暴露给用户的接 口,UserManagerService 为接口的底层实现。
UserManager
UserManager 是暴露出来的应用程序接口。对于普通应用程序,提供用户数查询,用户状态判断和用户序列号查询等基本功能。普通应用没有用户操作权限。对于系统应用,UserManager 提供了创建/删除/擦除用户、用户信息获取、用户句柄获取等用户操作的接口。均由远程调用UserManagerService 服务的对应方法实现。
UserManagerService
与其它大部分Service 一样,UserManagerService 的实现采用了单例模式。在服务中,由组成为UserInfo 类的散列表mUsers 维护所有的用户状态。mUsers 在系统启动时由/data/system/users/userlist.xml 读取生成,并在运行期间动态改变。所有用户的添加、删除操作,都最终序列化回此文件中。
ActivityManagerService
ActivityManagerService 加入了多用户支持。负责维护设备中存在的所有用户状态。
服务以下述变量来记录当前处于“启动”状态的用户。
用户的启动状态对象为com.android.server.am.UserStartedState。其中指定的用
户状态有四种:
- // User is first coming up.
- public final static int STATE_BOOTING = 0;//用户启动
- // User is in the normal running state.
- public final static int STATE_RUNNING = 1;//运行中
- // User is in the initial process of being stopped.
- public final static int STATE_STOPPING = 2;//停止中
- // User is in the final phase of stopping, sending Intent.ACTION_SHUTDOWN.
- public final static int STATE_SHUTDOWN = 3;//用户关闭状态
完整的用户生命周期为:BOOTING->RUNNING->STOPPING->SHUTDOWN
用户必须处于RUNNING 状态时,才能作为切换的目标用户。所以在用户切换流程中,
首先要判断当前用户的状态, 并启动STOPPING/SHUTDOWN 状态的用户。
多用户模式的牵涉面
1锁屏界面
用户最先体验到多用户的入口位置即为锁屏界面。锁屏界面中加入了用户切换组件:
KeyguardMultiUserSelectorView 类。
该类在设备允许多用户存在的情况下,显示当前所有用户的列表。并在用户进行选择后,调用 ActivityManagerNative.getDefault().switchUser(int userId)方法进行用户切换。
2外部存储
对于每个用户,Android 都为其分配了单独的存储空间。标准的支持多用户的外部存储空间是由init.rc 定义的环境变量所指定。
- # See storage config details at <a
- href="http://source.android.com/tech/storage/">http://source.android.com/tech/
- storage/</a>
- mkdir /mnt/shell/emulated 0700 shell shell
- mkdir /storage/emulated 0555 root root
- export EXTERNAL_STORAGE /storage/emulated/legacy
- export EMULATED_STORAGE_SOURCE /mnt/shell/emulated
- export EMULATED_STORAGE_TARGET /storage/emulated
- # Support legacy paths
- symlink /storage/emulated/legacy /sdcard
- symlink /storage/emulated/legacy /mnt/sdcard
- symlink /storage/emulated/legacy /storage/sdcard0
- symlink /mnt/shell/emulated/0 /storage/emulated/legacy
而Environment 类中相应的获取外部存储目录的方法,也是由上述环境变量所获得。
对于每个用户,其标准外部存 储路径为:
EMULATED_STORAGE_TARGET/userid/
比如:
/storage/emulated/0 为主用户的外部存储路径。
3包管理器PackageManagerService
在多用户环境下,所有用户安装的应用仍然同以前一样,放置于/data/app 目录下。
但原先/data/data 的数据存储位置目前仅对主用户有效,其余用户的数据存储目录则位于/data/user/用户id/目录下。此目录的创建是在创建用户时由前述的MountService 完成的。
对于每个用户,系统都会以PackageuserState 类来维护其安装的软件状态。此列表以散列表的形式存在,由 PackageSettingBase 类维护。所有的包--用户关系和状态最终仍然序列化至/data/system/package.xml 中, 并保留 /data/system/packagebackup.xml 作为备份。
UserHandle
1.所有用户都可以接收到
- /** @hide A user handle to indicate all users on the device */ public static
- final UserHandle ALL = new UserHandle(USER_ALL);
2.当前用户可以接收到
- /** @hide A user handle to indicate the current user of the device */
- public static final UserHandle CURRENT = new UserHandle(USER_CURRENT);
3.当前用户或者该应用所属用户可以接收到
- /** @hide A user handle to indicate that we would like to send to the current
- * user, but if this is calling from a user process then we will send it * to
- the caller's user instead of failing with a security exception */
- public static final UserHandle CURRENT_OR_SELF = new UserHandle(USER_CURRENT_OR_SELF);
3.设备所有者(机主)可以接收到
- /** @hide A user handle to indicate the primary/owner user of the device */
- public static final UserHandle OWNER = new UserHandle(USER_OWNER);