硬件:RTX3070 i9-11900H 内存16G
目录
二、使用测试--predictor_example.ipynb
2.Object masks from prompts with SAM与Environment Set-up
6.Specifying a specific object with additional points
7.Specifying a specific object with a box
10.End-to-end batched inference
三、使用测试--automatic_mask_generator_example.ipynb
5.Automatic mask generation options
一、环境配置
首先从官方github上下载并解压在一个目录下,官方github网址:
GitHub - facebookresearch/segment-anything![]() https://github.com/facebookresearch/segment-anything下面进行环境配置:
https://github.com/facebookresearch/segment-anything下面进行环境配置:
1.conda创建虚拟环境,注意python版本大于等于3.8(官方要求python>=3.8)。
conda create -n segment python=3.8 -y2.激活刚刚创建的虚拟环境,安装pytorch,注意官方要求pytorch>=1.7torchvision>=0.8。
conda activate segmentpip install torch==1.10.1+cu113 torchvision==0.11.2+cu113 torchaudio==0.10.1+cu113 -f https://download.pytorch.org/whl/cu113/torch_stable.html3.本文在pycharm IDE中进行调试,在解压目录下打开pycharm并配置上刚刚配置好的环境,进行后续的环境配置。
pycharm调用conda虚拟环境

进入 pycharm终端terminal进行后续安装
pip install -e .
官方没有给出安装库的详细版本,按照官方给的指令进行执行
pip install opencv-python pycocotools matplotlib onnxruntime onnx至此,环境配置完成,后续问题通过程序的报错去补全环境缺失的库或者调整库的版本。
二、使用测试--predictor_example.ipynb
1.jupyter notebook准备操作
官方给的是jupyter notebook的测试流程,首先启动终端进入虚拟环境
conda activate segment进入官方编写的jupyter notebook的目录下,通过cd的方式,xxx根据实际目录调整
cd xxx:\xxx\segment-anything-main\segment-anything-main\notebooks注:网上有很多方式去在jupyter notebook调用虚拟环境,我认为最好是在虚拟环境中安装库,如果安装错了可以直接删除虚拟环境,留有容错率且保持conda base环境的简洁,尽量不要在conda base环境中安装多余的库,conda base环境只作为创建虚拟环境的base环境。
在虚拟环境中安装ipykernel,如果不安装,jupyter notebook无法识别到刚刚创建的虚拟环境,即使终端已经启动了虚拟环境。
pip install ipykernel将刚刚创建的虚拟环境写入jupyter notebook
模板:
python -m ipykernel install --user --name 虚拟环境名 --display-name "显示名"
实际操作:
python -m ipykernel install --user --name segment --display-name "segment"
启动jupyter notebook,启动后该终端不要关闭
jupyter notebook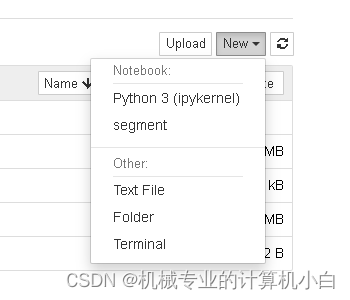
在此图可以发现segment虚拟环境,说明jupyter notebook识别环境配置成功,但是需要配置虚拟环境。
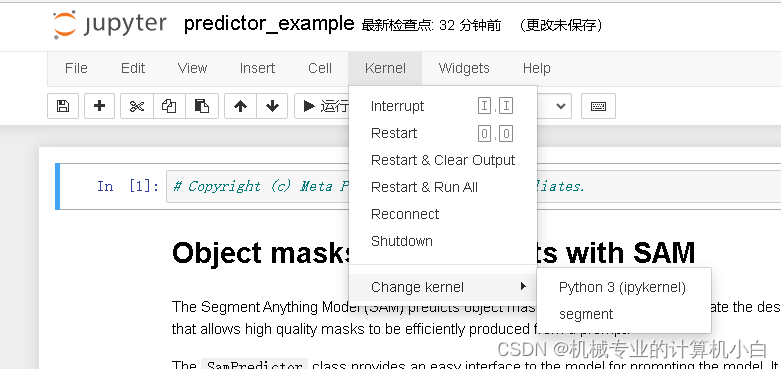
图中右侧可以看到虚拟环境名。

官方jupyter notebook给的比较详细,首先是predictor_example
接下来按照标题去看官方给的例子
2.Object masks from prompts with SAM与Environment Set-up
关于谷歌colab上运行的操作,由于是本机运行不需要这些操作。
3.Set-up
调用库并定义掩膜、点、矩形框的绘图函数。
4.Example image
为实例图片,通过Opencv读取并展示出来
5.Selecting objects with SAM
为检测测试,分为多个步骤
(1)下载训练好的网络模型,放在项目的model文件夹下,并修改程序中的路径

修改路径并添加转义符,模型种类不用修改用的是H大模型。
sam_checkpoint = "D:\\segment-anything-main\\segment-anything-main\\model\\sam_vit_h_4b8939.pth"
model_type = "vit_h"
(2)官方:First, load the SAM model and predictor. Change the path below to point to the SAM checkpoint. Running on CUDA and using the default model are recommended for best results。
翻译:首先,加载 SAM 模型和预测变量。更改下面的路径以指向 SAM 检查点。建议在 CUDA 上运行并使用默认模型以获得最佳结果。
步(1)已经做完了。
(3)官方:Process the image to produce an image embedding by calling SamPredictor.set_image. SamPredictor remembers this embedding and will use it for subsequent mask prediction.
翻译:通过调用 SamPredictor.set_image 处理图像以生成图像嵌入。SamPredictor会记住这个嵌入,并将其用于后续的掩码预测。
在Example image步骤引入的图片,调用了segment_anything/predictor.py中的SamPredictor类中的
set_image函数去接收opencv读取的图像。
(4)官方:To select the truck, choose a point on it. Points are input to the model in (x,y) format and come with labels 1 (foreground point) or 0 (background point). Multiple points can be input; here we use only one. The chosen point will be shown as a star on the image.
翻译:要选择卡车,请选择其上的一个点。点以 (x,y) 格式输入到模型,并带有标签 1(前景点)或 0(背景点)。可以输入多个点;这里我们只使用一个。所选点将在图像上显示为星星。
从这句话可以得知,需要给出一个提示点,提示点用图片坐标系下的坐标,其中左上角为零点,并给出这个点是前景还是背景。程序中给的是:
input_point = np.array([[500, 375]])
input_label = np.array([1])
程序中还将结果展示出来,在原图上加点,绘图的函数在Set-up步骤给出:
plt.imshow(image)
show_points(input_point, input_label, plt.gca())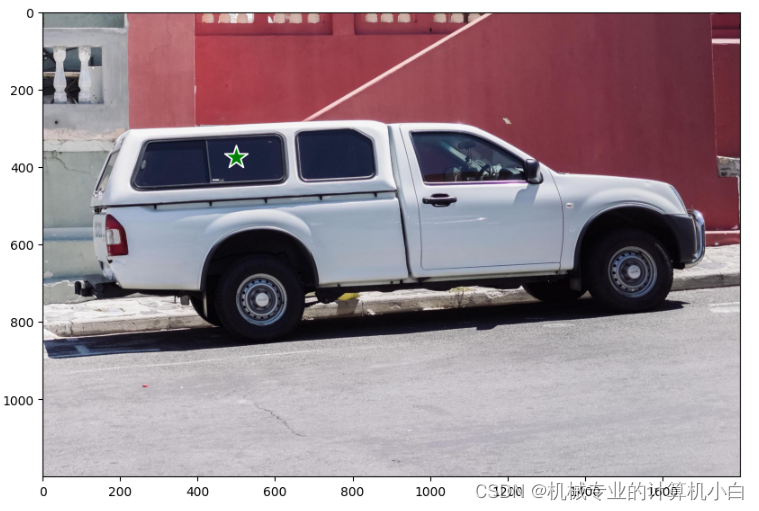
(5)官方:Predict with SamPredictor.predict. The model returns masks, quality predictions for those masks, and low resolution mask logits that can be passed to the next iteration of prediction.
翻译:使用 SamPredictor.predictor 进行预测。该模型返回掩码、这些掩码的质量预测以及可传递到下一个预测迭代的低分辨率掩码日志。
进入预测部分:
masks, scores, logits = predictor.predict(
    point_coords=input_point,
    point_labels=input_label,
    multimask_output=True,
)
预测的图像已经通过predictor.set_image(image)放入预测器,然后通过predictor.predict()放入提示点与点的标签。
其中multimask_output官方给出解释:With multimask_output=True (the default setting), SAM outputs 3 masks, where scores gives the model's own estimation of the quality of these masks. This setting is intended for ambiguous input prompts, and helps the model disambiguate different objects consistent with the prompt. When False, it will return a single mask. For ambiguous prompts such as a single point, it is recommended to use multimask_output=True even if only a single mask is desired; the best single mask can be chosen by picking the one with the highest score returned in scores. This will often result in a better mask.
翻译:使用 multimask_output=True(默认设置),SAM 输出 3 个掩码,其中分数给出了模型自己对这些掩码质量的估计。 此设置适用于不明确的输入提示,并帮助模型消除与提示一致的不同对象的歧义。 当为 False 时,它将返回一个掩码。 对于单点等不明确的提示,即使只需要一个掩码,也建议使用 multimask_output=True; 最好的单一面具可以通过选择得分最高的面具来选择。 这通常会产生更好的面具。
masks.shape # (number_of_masks) x H x W
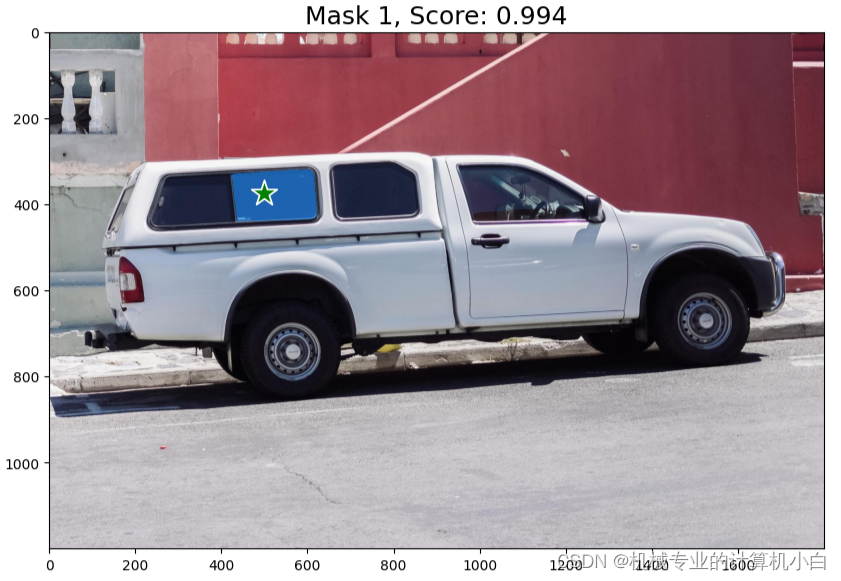
(3, 1200, 1800)输出的掩码,3个高为1200宽为1800的掩码,为了使用这些掩码,官方给出:
for i, (mask, score) in enumerate(zip(masks, scores)):
    plt.figure(figsize=(10,10))
    plt.imshow(image)
    show_mask(mask, plt.gca())
    show_points(input_point, input_label, plt.gca())
    plt.title(f"Mask {i+1}, Score: {score:.3f}", fontsize=18)
    plt.axis('on')
    plt.show()
如何实现掩码的显示?参照show_mask()函数中的mask_image = mask.reshape(h, w, 1) * color.reshape(1, 1, -1),具体来说,代码中的reshape函数将mask数组转换为一个形状为(h, w, 1)的三维数组,其中第三维大小为1,表示掩码值。然后,将color数组转换为一个形状为(1, 1, N)的三维数组,其中前两维大小为1,第三维大小为N,表示颜色值。最后,将这两个三维数组进行逐元素相乘,得到一个形状为(h, w, N)的三维数组mask_image,其中第i行第j列的元素表示第i行第j列的像素的颜色值,如果对应的掩码值为N,则该像素的N。这种操作通常用于将掩码应用到图像上,以实现图像的遮罩效果。
官方原有的结果:
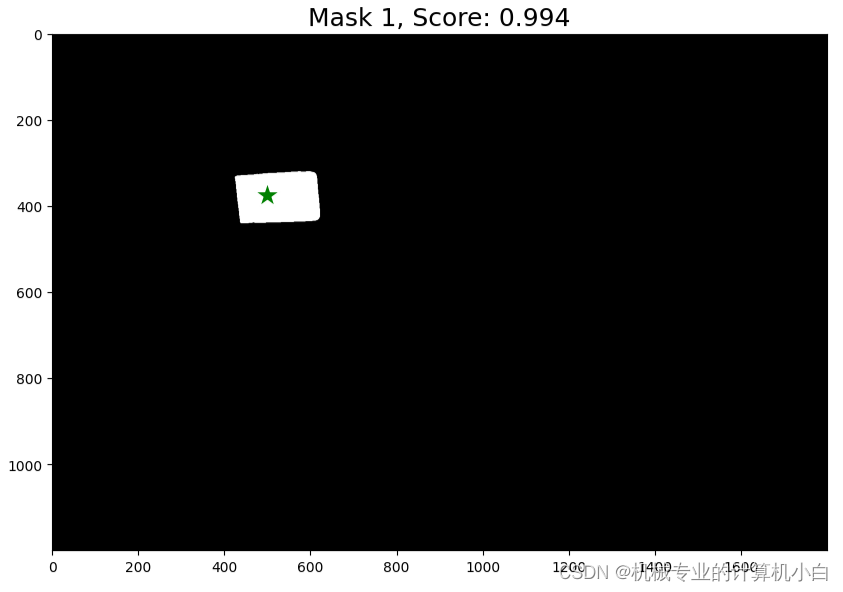
尝试1:通过理解遮罩的显示,我将其进行修改,实现了二值化处理:
通过show_mask修改为show_mask1,展示掩码函数修改颜色,全白透明度改为1
def show_mask1(mask, ax, random_color=False):
    if random_color:
        color = np.concatenate([np.random.random(3), np.array([0.6])], axis=0)
    else:
#         color = np.array([30/255, 144/255, 255/255, 0.6])
        color = np.array([255/255, 255/255, 255/255, 1])
    h, w = mask.shape[-2:]
    mask_image = mask.reshape(h, w, 1) * color.reshape(1, 1, -1)
    ax.imshow(mask_image)
背景设为黑色。
for i, (mask, score) in enumerate(zip(masks, scores)):
    plt.figure(figsize=(10,10))
    image1 = np.zeros((1200, 1800), dtype=np.int8)
    plt.imshow(image1,cmap="gray")
    show_mask1(mask, plt.gca())
    show_points(input_point, input_label, plt.gca())
    plt.title(f"Mask {i+1}, Score: {score:.3f}", fontsize=18)
    plt.axis('on')
    plt.show()
二值化结果。
尝试2:根据官方结果改的返回最大分数掩膜:
plt.figure(figsize=(10,10))
plt.imshow(image)
show_mask(masks[np.argmax(scores)], plt.gca())
show_points(input_point, input_label, plt.gca())
plt.title(f"Best Mask Score: {scores[np.argmax(scores)]:.3f}", fontsize=18)
plt.axis('on')
plt.show() 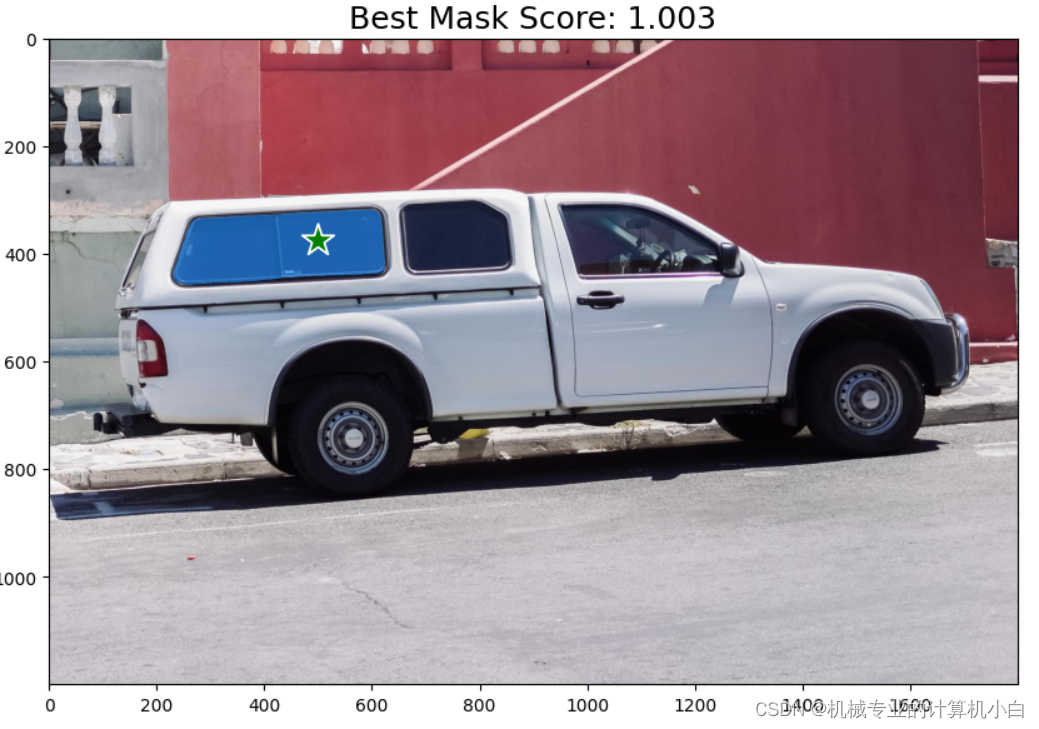
6.Specifying a specific object with additional points
指定具有附加点的特定对象
官方: The single input point is ambiguous, and the model has returned multiple objects consistent with it. To obtain a single object, multiple points can be provided. If available, a mask from a previous iteration can also be supplied to the model to aid in prediction. When specifying a single object with multiple prompts, a single mask can be requested by setting `multimask_output=False`.
翻译:单个输入点不明确,模型返回了与其一致的多个对象。要获得单个对象,可以提供多个点。如果可用,还可以将先前迭代中的掩码提供给模型以帮助预测。指定具有多个提示的单个对象时,可以通过设置“multimask_output=False”来请求单个掩码。
官方给出了两种方式,一种是两点标签全为前景1,一种是一点标签为前景1一点标签为背景0,在此处提示点的标签有了意义。
全为前景1的情况
一种是一点标签为前景1一点标签为背景0
7.Specifying a specific object with a box
使用框指定特定对象
本文去测试矩形框的表达形式
input_box = np.array([425, 600, 700, 875])四个值代表着矩形框的左上角与右下角坐标(x,y),调用show_points()函数显示点,直观证明。
plt.figure(figsize=(10, 10))
plt.imshow(image)
show_mask(masks[0], plt.gca())
show_box(input_box, plt.gca())
input_point1 = np.array([[425, 600]])
input_label1 = np.array([1])
input_point2 = np.array([[700, 875]])
input_label2 = np.array([1])
show_points(input_point1, input_label2, plt.gca())
show_points(input_point2, input_label2, plt.gca())
plt.axis('on')
plt.show()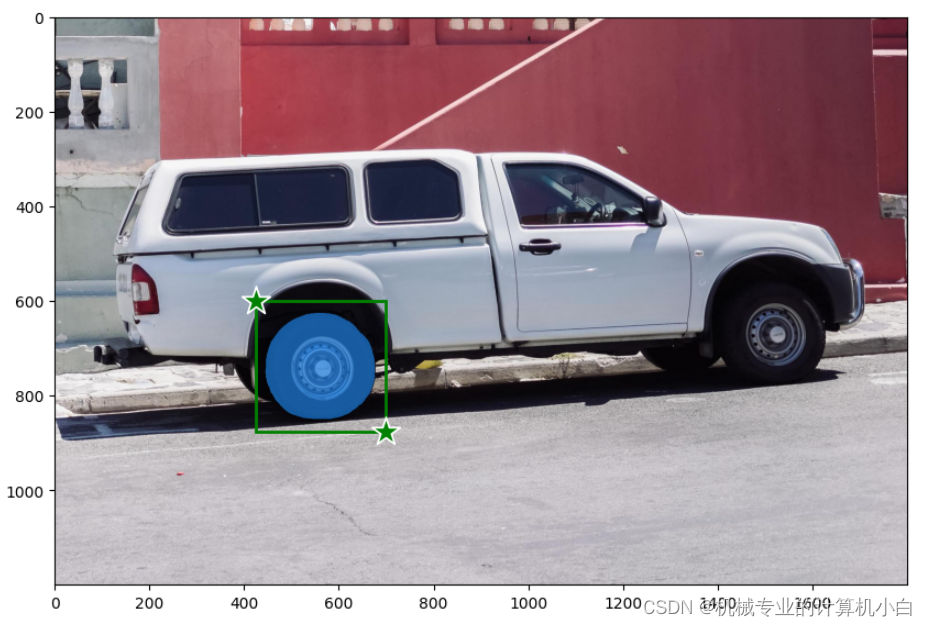
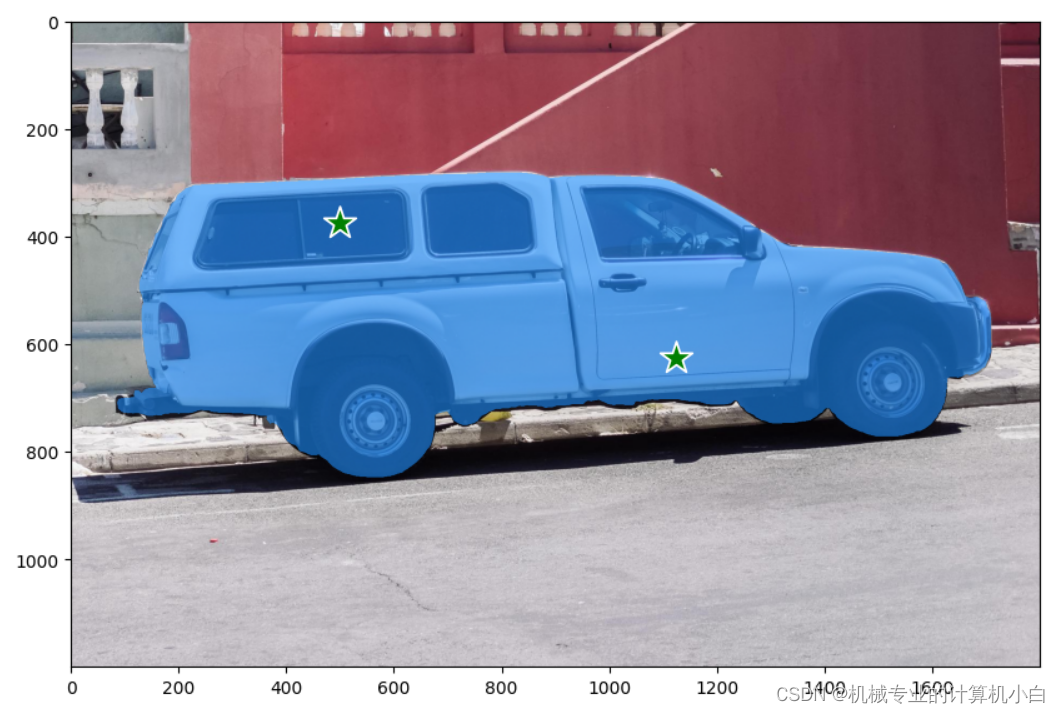
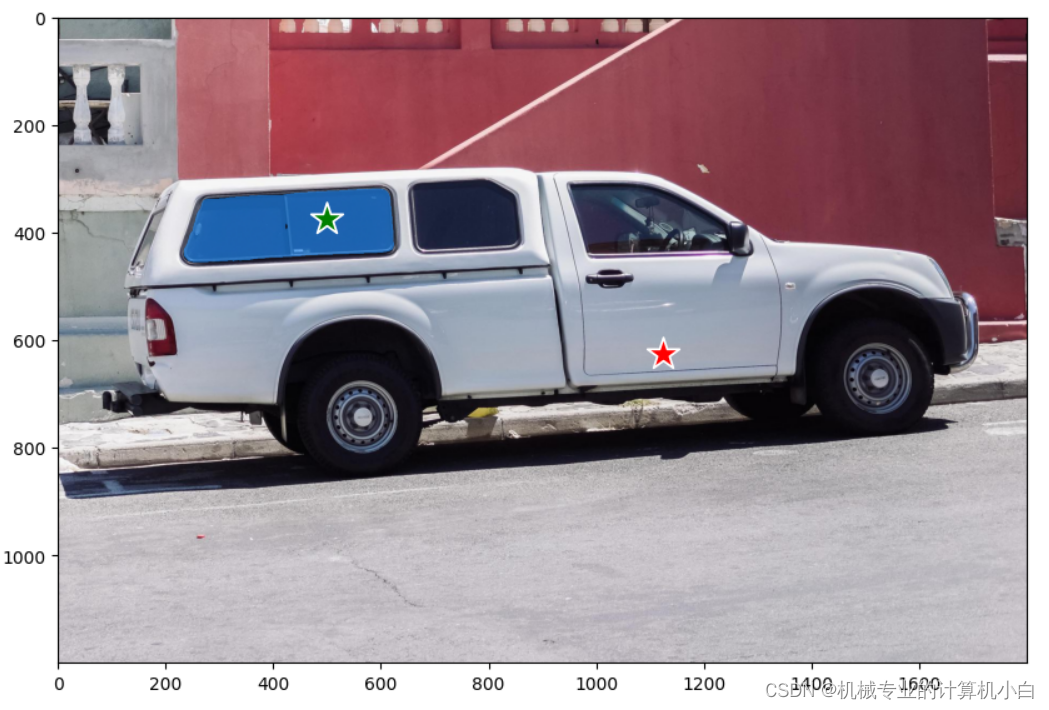
8.Combining points and boxes
组合点和框
在提示矩形框的基础上加入提示点,官方给汽车的轮毂加入标签为背景0的提示点
input_box = np.array([425, 600, 700, 875])
input_point = np.array([[575, 750]])
input_label = np.array([0])
我将其修改为前景1,进行测试
input_box = np.array([425, 600, 700, 875])
input_point = np.array([[575, 750]])
input_label = np.array([1])
9.Batched prompt inputs
批处理提示输入
官方:SamPredictor can take multiple input prompts for the same image, using predict_torch method. This method assumes input points are already torch tensors and have already been transformed to the input frame. For example, imagine we have several box outputs from an object detector.
翻译:SamPredictor可以使用predict_torch方法为同一图像获取多个输入提示。此方法假定输入点已经是tensor张量,并且已经转换为输入帧。例如,假设我们有几个来自对象检测器的盒子输出。
input_boxes = torch.tensor([
    [75, 275, 1725, 850],
    [425, 600, 700, 875],
    [1375, 550, 1650, 800],
    [1240, 675, 1400, 750],
], device=predictor.device)
官方:Transform the boxes to the input frame, then predict masks. SamPredictor stores the necessary transform as the transform field for easy access, though it can also be instantiated directly for use in e.g. a dataloader (see segment_anything.utils.transforms).
翻译:将框转换为输入帧,然后预测遮罩。SamPredictor将必要的转换存储为转换字段,以便于访问,尽管它也可以直接实例化以用于例如数据加载器(请参阅segment_anything.utils.transforms)。
多个矩形框需要先进行转换
transformed_boxes = predictor.transform.apply_boxes_torch(input_boxes, image.shape[:2])使用for循环,显示所有的掩膜和矩形框
for mask in masks:
    show_mask(mask.cpu().numpy(), plt.gca(), random_color=True)
for box in input_boxes:
    show_box(box.cpu().numpy(), plt.gca())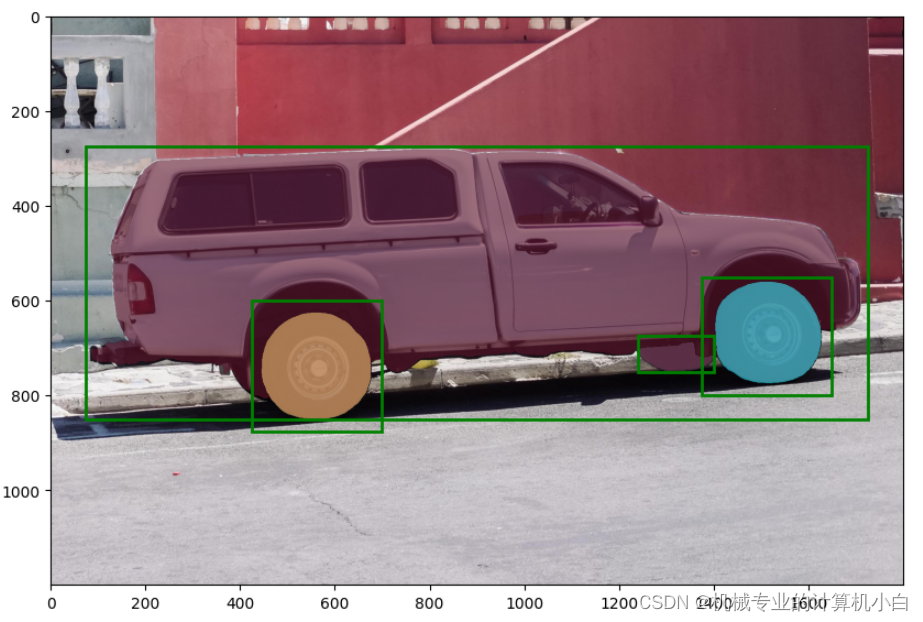
我尝试将上一步的提示点加入其中
transformed_boxes = predictor.transform.apply_boxes_torch(input_boxes, image.shape[:2])
masks, _, _ = predictor.predict_torch(
    point_coords=input_point,
    point_labels=input_label,
    boxes=transformed_boxes,
    multimask_output=False,
)
出现报错,不允许这么做。
10.End-to-end batched inference
端到端批量推理
官方:If all prompts are available in advance, it is possible to run SAM directly in an end-to-end fashion. This also allows batching over images.
翻译:如果所有提示都提前可用,则可以以端到端的方式直接运行 SAM。这也允许对图像进行批处理。
本文测试此部分直接爆显存了,8G显存都不够!简单的应用不需要批量处理。尽量使用单张图片进行处理。
三、使用测试--automatic_mask_generator_example.ipynb
Automatically generating object masks with SAM使用 SAM 自动生成对象遮罩
官方:
Since SAM can efficiently process prompts, masks for the entire image can be generated by sampling a large number of prompts over an image. This method was used to generate the dataset SA-1B.
The class SamAutomaticMaskGenerator implements this capability. It works by sampling single-point input prompts in a grid over the image, from each of which SAM can predict multiple masks. Then, masks are filtered for quality and deduplicated using non-maximal suppression. Additional options allow for further improvement of mask quality and quantity, such as running prediction on multiple crops of the image or postprocessing masks to remove small disconnected regions and holes.
翻译:
由于 SAM 可以有效地处理提示,因此可以通过对图像上的大量提示进行采样来生成整个图像的掩码。 该方法用于生成数据集 SA-1B。 SamAutomaticMaskGenerator 类实现了此功能。 它通过在图像上方的网格中对单点输入提示进行采样来工作,SAM 可以从每个提示中预测多个掩码。 然后,使用非最大抑制对掩码进行质量过滤和重复数据删除。 其他选项允许进一步改进蒙版质量和数量,例如对图像的多个裁剪运行预测或后处理蒙版以删除小的不连接区域和孔洞。
从翻译可知生成数据集 SA-1B用的这个方法,达到大量生成数据集功能,在论文中也有说明。
还是通过标题的形式去测试
1.Environment Set-up
这是在谷歌colab上的操作,本文本机测试不需要这一步。
2.Set-up
导入了一些必要的库,同时给出绘制多个掩膜的函数,不同于之前的Set-up,之前是绘制点、绘制矩形和绘制单个掩膜函数,从此处得知与之前功能是不同的。
def show_anns(anns):
    if len(anns) == 0:
        return
    sorted_anns = sorted(anns, key=(lambda x: x['area']), reverse=True)
    ax = plt.gca()
    ax.set_autoscale_on(False)

    img = np.ones((sorted_anns[0]['segmentation'].shape[0], sorted_anns[0]['segmentation'].shape[1], 4))
    img[:,:,3] = 0
    for ann in sorted_anns:
        m = ann['segmentation']
        color_mask = np.concatenate([np.random.random(3), [0.35]])
        img[m] = color_mask
    ax.imshow(img)
3.Example image
导入图片,与之前相同,通过opencv去导入
4.Automatic mask generation
自动生成掩膜,此掩膜为一个字典,其中包含如下键
['segmentation', 'area', 'bbox', 'predicted_iou', 'point_coords', 'stability_score', 'crop_box']
segmentation: the maskarea: the area of the mask in pixelsbbox: the boundary box of the mask in XYWH formatpredicted_iou: the model's own prediction for the quality of the maskpoint_coords: the sampled input point that generated this maskstability_score: an additional measure of mask qualitycrop_box: the crop of the image used to generate this mask in XYWH format
把之前画矩形框和点的函数导入进来,绘制出预测矩形框
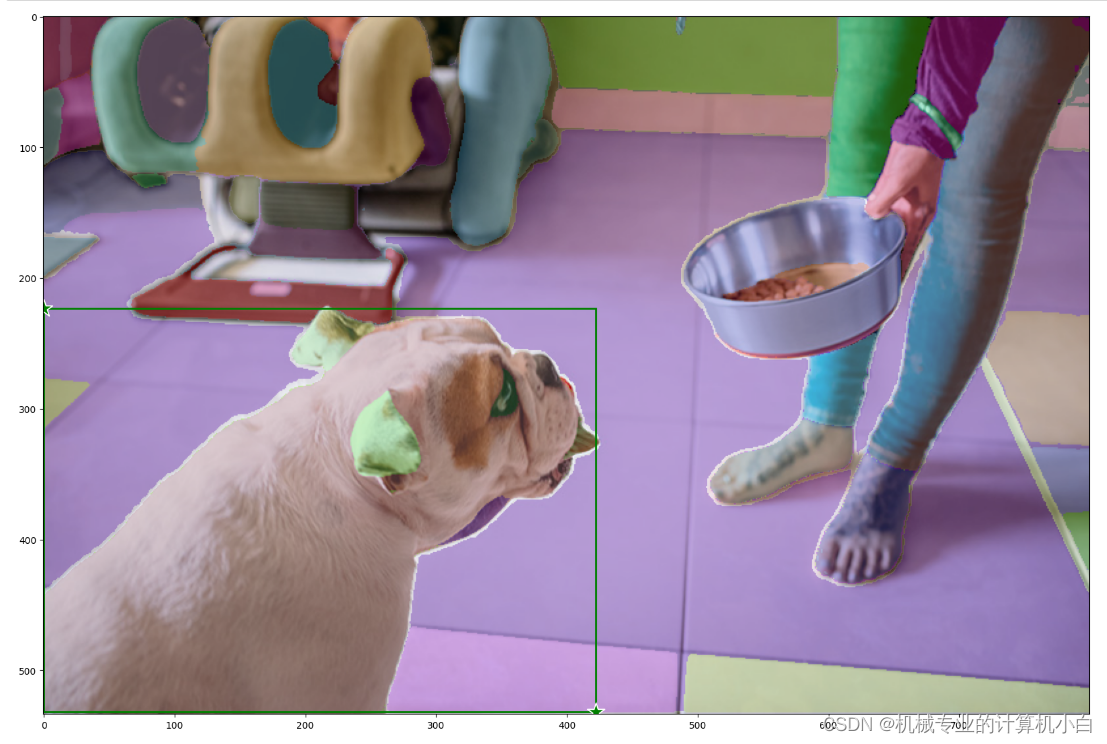
5.Automatic mask generation options
自动掩模生成选项
官方:There are several tunable parameters in automatic mask generation that control how densely points are sampled and what the thresholds are for removing low quality or duplicate masks. Additionally, generation can be automatically run on crops of the image to get improved performance on smaller objects, and post-processing can remove stray pixels and holes. Here is an example configuration that samples more masks:
翻译:自动掩码生成中有几个可调参数,用于控制采样点的密度以及去除低质量或重复掩码的阈值。 此外,生成可以在图像的裁剪上自动运行以提高较小对象的性能,并且后处理可以去除杂散像素和孔洞。 以下是对更多掩码进行采样的示例配置:
说明自动掩膜生成可以调参。