yolov5_obb旋转框检测的优化版本,算法直接预测旋转框的角度,并替换box loss为kld或probloss。训练后的模型可直接进行稀疏训练、剪枝和微调,剪枝后的通道为8的倍数,以供工程加速。跟踪部分参考了yolov7_obb的跟踪版本。github地址:
https://github.com/yzqxy/yolov5_obb_prune_tracking
如果对你有帮助记得点个星星,鼓励一下博主!
一、旋转框标注和数据格式转换
1、标注软件:roLabelImg
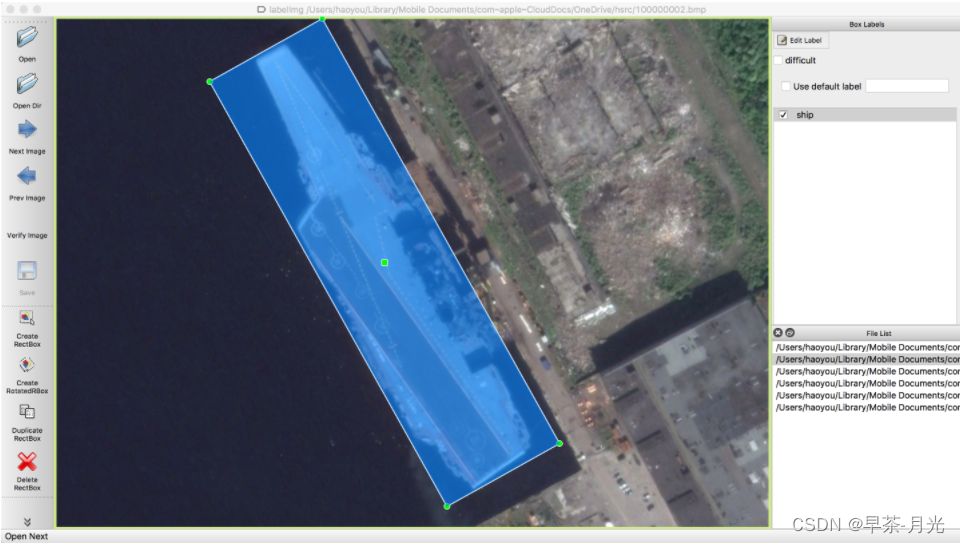
图片来源(https://blog.csdn.net/weixin_38346042/article/details/129314975)
软件快捷键如下:
1) w: 创建水平矩形目标框
2) e: 创建旋转矩形目标框
3) zxcv: 旋转目标框,键z和建x是逆时针旋转,键c和键v是顺时针旋转
2、数据格式转换
标注存储xml文件
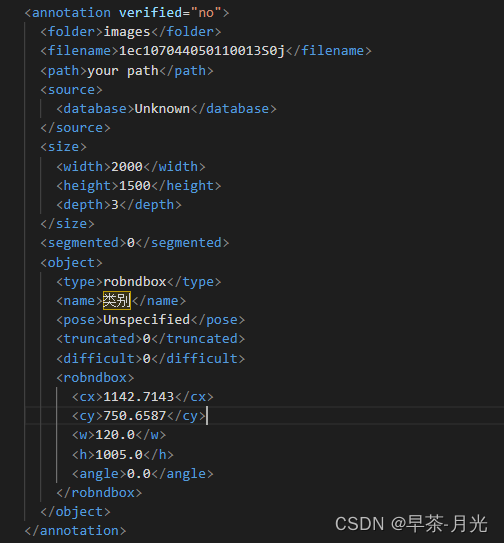
将xml转成yolov5_obb可训练的txt格式------将旋转框的中心点,宽高和角度的存储形式转换成四个角点坐标表现形式

# 文件名称   :roxml_to_dota.py
# 功能描述   :把rolabelimg标注的xml文件转换成dota能识别的xml文件,
#             再转换成dota格式的txt文件
#            把旋转框 cx,cy,w,h,angle,或者矩形框cx,cy,w,h,转换成四点坐标x1,y1,x2,y2,x3,y3,x4,y4
import os
import xml.etree.ElementTree as ET
import math

cls_list=['你的类别']
def edit_xml(xml_file, dotaxml_file):
    """
    修改xml文件
    :param xml_file:xml文件的路径
    :return:
    """
    tree = ET.parse(xml_file)
    objs = tree.findall('object')
    for ix, obj in enumerate(objs):
        x0 = ET.Element("x0")  # 创建节点
        y0 = ET.Element("y0")
        x1 = ET.Element("x1")
        y1 = ET.Element("y1")
        x2 = ET.Element("x2")
        y2 = ET.Element("y2")
        x3 = ET.Element("x3")
        y3 = ET.Element("y3")
        # obj_type = obj.find('bndbox')
        # type = obj_type.text
        # print(xml_file)

        if (obj.find('robndbox') == None):
            obj_bnd = obj.find('bndbox')
            obj_xmin = obj_bnd.find('xmin')
            obj_ymin = obj_bnd.find('ymin')
            obj_xmax = obj_bnd.find('xmax')
            obj_ymax = obj_bnd.find('ymax')
            #以防有负值坐标
            xmin = max(float(obj_xmin.text),0)
            ymin = max(float(obj_ymin.text),0)
            xmax = max(float(obj_xmax.text),0)
            ymax = max(float(obj_ymax.text),0)
            obj_bnd.remove(obj_xmin)  # 删除节点
            obj_bnd.remove(obj_ymin)
            obj_bnd.remove(obj_xmax)
            obj_bnd.remove(obj_ymax)
            x0.text = str(xmin)
            y0.text = str(ymax)
            x1.text = str(xmax)
            y1.text = str(ymax)
            x2.text = str(xmax)
            y2.text = str(ymin)
            x3.text = str(xmin)
            y3.text = str(ymin)
        else:
            obj_bnd = obj.find('robndbox')
            obj_bnd.tag = 'bndbox'  # 修改节点名
            obj_cx = obj_bnd.find('cx')
            obj_cy = obj_bnd.find('cy')
            obj_w = obj_bnd.find('w')
            obj_h = obj_bnd.find('h')
            obj_angle = obj_bnd.find('angle')
            cx = float(obj_cx.text)
            cy = float(obj_cy.text)
            w = float(obj_w.text)
            h = float(obj_h.text)
            angle = float(obj_angle.text)
            obj_bnd.remove(obj_cx)  # 删除节点
            obj_bnd.remove(obj_cy)
            obj_bnd.remove(obj_w)
            obj_bnd.remove(obj_h)
            obj_bnd.remove(obj_angle)

            x0.text, y0.text = rotatePoint(cx, cy, cx - w / 2, cy - h / 2, -angle)
            x1.text, y1.text = rotatePoint(cx, cy, cx + w / 2, cy - h / 2, -angle)
            x2.text, y2.text = rotatePoint(cx, cy, cx + w / 2, cy + h / 2, -angle)
            x3.text, y3.text = rotatePoint(cx, cy, cx - w / 2, cy + h / 2, -angle)


        # obj.remove(obj_type)  # 删除节点
        obj_bnd.append(x0)  # 新增节点
        obj_bnd.append(y0)
        obj_bnd.append(x1)
        obj_bnd.append(y1)
        obj_bnd.append(x2)
        obj_bnd.append(y2)
        obj_bnd.append(x3)
        obj_bnd.append(y3)

        tree.write(dotaxml_file, method='xml', encoding='utf-8')  # 更新xml文件


# 转换成四点坐标
def rotatePoint(xc, yc, xp, yp, theta):
    xoff = xp - xc;
    yoff = yp - yc;
    cosTheta = math.cos(theta)
    sinTheta = math.sin(theta)
    pResx = cosTheta * xoff + sinTheta * yoff
    pResy = - sinTheta * xoff + cosTheta * yoff
    return str(int(xc + pResx)), str(int(yc + pResy))


def totxt(xml_path, out_path):
    # 想要生成的txt文件保存的路径,这里可以自己修改

    files = os.listdir(xml_path)
    i=0
    for file in files:

        tree = ET.parse(xml_path + os.sep + file)
        root = tree.getroot()

        name = file.split('.')[0]

        output = out_path +'\\'+name + '.txt'
        file = open(output, 'w')
        i=i+1
        objs = tree.findall('object')
        for obj in objs:
            cls = obj.find('name').text
            box = obj.find('bndbox')
            x0 = int(float(box.find('x0').text))
            y0 = int(float(box.find('y0').text))
            x1 = int(float(box.find('x1').text))
            y1 = int(float(box.find('y1').text))
            x2 = int(float(box.find('x2').text))
            y2 = int(float(box.find('y2').text))
            x3 = int(float(box.find('x3').text))
            y3 = int(float(box.find('y3').text))
            if x0<0:
                x0=0
            if x1<0:
                x1=0
            if x2<0:
                x2=0
            if x3<0:
                x3=0
            if y0<0:
                y0=0
            if y1<0:
                y1=0
            if y2<0:
                y2=0
            if y3<0:
                y3=0
            for cls_index,cls_name in enumerate(cls_list):
                if cls==cls_name:
                    file.write("{} {} {} {} {} {} {} {} {} {}\n".format(x0, y0, x1, y1, x2, y2, x3, y3, cls,cls_index))
        file.close()
        # print(output)
        print(i)

if __name__ == '__main__':
    # -----**** 第一步:把xml文件统一转换成旋转框的xml文件 ****-----
    roxml_path = r" 已标注并需要转换的xml文件"
    dotaxml_path = r'存储dota格式的xml文件的输出路径'  #
    out_path = r'存储data格式yolov5_obb可训练的txt文件的路径'
    filelist = os.listdir(roxml_path)
    for file in filelist:
        edit_xml(os.path.join(roxml_path, file), os.path.join(dotaxml_path, file))

    # -----**** 第二步:把旋转框xml文件转换成txt格式 ****-----
    totxt(dotaxml_path, out_path)
二、v5_obb检测(旋转框)
整理好即将上传GitHub。
1、环境安装
环境安装跟着原版的yolov5_obb来
https://github.com/hukaixuan19970627/yolov5_obb/blob/master/docs/install.md
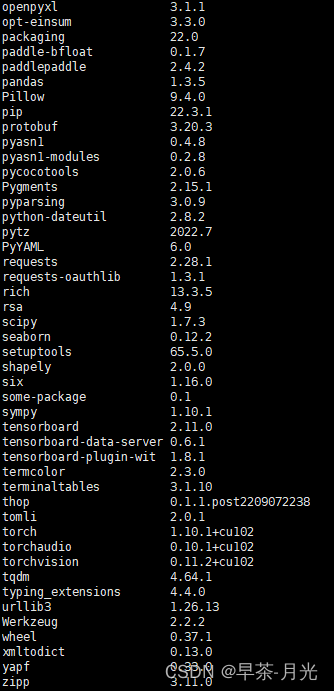
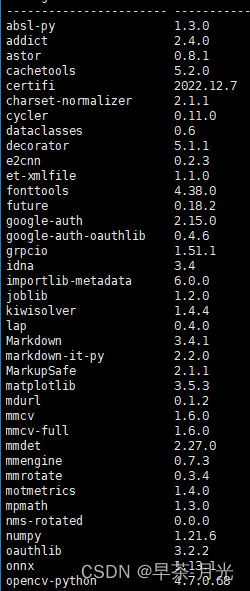
除此之外需要安装mmcv,需要调用它编译好的旋转框iou计算函数。以下是博主的环境,python版本为3.7.15。
2、数据配置与读取
数据集配置部分,用的是yolov5obb_demo.yaml。
path: dataset/你的路径/ # dataset root dir
train: train.txt #images   # train images (relative to 'path')
val: val.txt #images  # val images (relative to 'path')
test: val.txt  #images # test images (optional)


nc: 1  # number of classes
names: ['你的类别',]
顺带一提,如果跑公开数据集DOTA,由于DOTA数据集中照片分辨率过大,需要用到DOTA_devkit文件夹里的imgsplit.py对图像进行切分后进行训练,这块好久没弄了,各位读者自行研究一下。
数据读取dataset部分,需要注意两点:
1、verify_image_label函数,确保你的gt读取无误,原版979行有些许问题,改成如下:
for label in labels:
	if isinstance(cls_name_list,dict):
	       cls_id=list(cls_name_list.values()).index(label[8])
	   elif isinstance(cls_name_list,list):
	       cls_id=cls_name_list.index(label[8])
	   else:
	       raise TypeError(f'type of cls_name_list is {

      type(cls_name_list) },while dict or list is expected')
2、gt旋转框的数据格式是4个角点的表现形式,网络改预测框的x,y,w,h和θ,并直接预测θ,不需要像原版把角度映射成一个180维度的高斯分布,原版效果一般且不利于工程部署。因此需要修改poly2rbox函数,将use_gaussian置为False,use_pi置为TRUE。
 rboxes = poly2rbox(polys=labels[:, 1:],
                                 num_cls_thata=hyp['cls_theta'] if hyp else 180,
                                 radius=hyp['csl_radius'] if hyp else 6.0,
                                 use_pi=True, use_gaussian=False)
得到的robxes格式为[x, y, w, h, theta] 并将角度限制在 [-pi/2, pi/2)区间内。
3、输出头修改
既然直接预测角度而不是预测角度的高斯分量,则原版用180维度输出预测角度改成1即可。
  # self.no = nc + 5 + 180  # number of outputs per anchor
  self.no = nc + 5 + 1  # number of outputs per anchor
4、loss计算(重点)
kld loss参考的v7_obb大佬的代码分享,后续的跟踪也是,respect。
https://github.com/Egrt/yolov7-obb
https://zhuanlan.zhihu.com/p/603765606
GWD loss到KLD loss的理解可以阅读以下文章
https://zhuanlan.zhihu.com/p/372357305?utm_id=0
https://zhuanlan.zhihu.com/p/380016283
class KLDloss(nn.Module):

    def __init__(self, taf=1.0, fun="sqrt"):
        super(KLDloss, self).__init__()
        self.fun = fun
        self.taf = taf
        self.pi = 3.141592
    def forward(self, pred, target): # pred [[x,y,w,h,angle], ...]
        #assert pred.shape[0] == target.shape[0]

        pred = pred.view(-1, 5)
        target = target.view(-1, 5)

        delta_x = pred[:, 0] - target[:, 0]
        delta_y = pred[:, 1] - target[:, 1]

        pre_angle_radian = pred[:, 4]
        targrt_angle_radian = target[:, 4]


        # pre_angle_radian =  self.pi *(((pred[:, 4] * 180 / self.pi ) + 90)/180)
        # targrt_angle_radian = self.pi *(((target[:, 4] * 180 / self.pi ) + 90)/180)

        delta_angle_radian = pre_angle_radian - targrt_angle_radian

        kld =  0.5 * (
                        4 * torch.pow( ( delta_x.mul(torch.cos(targrt_angle_radian)) + delta_y.mul(torch.sin(targrt_angle_radian)) ), 2) / torch.pow(target[:, 2], 2)
                      + 4 * torch.pow( ( delta_y.mul(torch.cos(targrt_angle_radian)) - delta_x.mul(torch.sin(targrt_angle_radian)) ), 2) / torch.pow(target[:, 3], 2)
                     )\
             + 0.5 * (
                        torch.pow(pred[:, 3], 2) / torch.pow(target[:, 2], 2) * torch.pow(torch.sin(delta_angle_radian), 2)
                      + torch.pow(pred[:, 2], 2) / torch.pow(target[:, 3], 2) * torch.pow(torch.sin(delta_angle_radian), 2)
                      + torch.pow(pred[:, 3], 2) / torch.pow(target[:, 3], 2) * torch.pow(torch.cos(delta_angle_radian), 2)
                      + torch.pow(pred[:, 2], 2) / torch.pow(target[:, 2], 2) * torch.pow(torch.cos(delta_angle_radian), 2)
                     )\
             + 0.5 * (
                        torch.log(torch.pow(target[:, 3], 2) / torch.pow(pred[:, 3], 2))
                      + torch.log(torch.pow(target[:, 2], 2) / torch.pow(pred[:, 2], 2))
                     )\
             - 1.0


        if self.fun == "sqrt":
            kld = kld.clamp(1e-7).sqrt()
        elif self.fun == "log1p":
            kld = torch.log1p(kld.clamp(1e-7))
        else:
            pass

        kld_loss = 1 - 1 / (self.taf + kld)

        return kld_loss
在kld loss上进一步优化使用了probiou_loss ,可以提不少点,代码参考的是百度的PP-YOLO-E-R(吐槽一下,百度的环境真的很难配,会出现奇奇怪怪的版本问题,不过技术还是牛逼的),博主后续会更新anchor_free方法yolov8_obb,也参考了一些PP-YOLO-E-R方法。
def gbb_form(boxes):
    xy, wh, angle = torch.split(boxes, [2, 2, 1], dim=-1)
    return torch.concat([xy, wh.pow(2) / 12., angle], dim=-1)


def rotated_form(a_, b_, angles):
    cos_a = torch.cos(angles)
    sin_a = torch.sin(angles)
    a = a_ * torch.pow(cos_a, 2) + b_ * torch.pow(sin_a, 2)
    b = a_ * torch.pow(sin_a, 2) + b_ * torch.pow(cos_a, 2)
    c = (a_ - b_) * cos_a * sin_a
    return a, b, c


def probiou_loss(pred, target, eps=1e-3, mode='l1'):
    """
        pred    -> a matrix [N,5](x,y,w,h,angle - in radians) containing ours predicted box ;in case of HBB angle == 0
        target  -> a matrix [N,5](x,y,w,h,angle - in radians) containing ours target    box ;in case of HBB angle == 0
        eps     -> threshold to avoid infinite values
        mode    -> ('l1' in [0,1] or 'l2' in [0,inf]) metrics according our paper

    """

    gbboxes1 = gbb_form(pred)
    gbboxes2 = gbb_form(target)

    x1, y1, a1_, b1_, c1_ = gbboxes1[:,
                                     0], gbboxes1[:,
                                                  1], gbboxes1[:,
                                                               2], gbboxes1[:,
                                                                            3], gbboxes1[:,
                                                                                         4]
    x2, y2, a2_, b2_, c2_ = gbboxes2[:,
                                     0], gbboxes2[:,
                                                  1], gbboxes2[:,
                                                               2], gbboxes2[:,
                                                                            3], gbboxes2[:,
                                                                                         4]

    a1, b1, c1 = rotated_form(a1_, b1_, c1_)
    a2, b2, c2 = rotated_form(a2_, b2_, c2_)

    t1 = 0.25 * ((a1 + a2) * (torch.pow(y1 - y2, 2)) + (b1 + b2) * (torch.pow(x1 - x2, 2))) + \
         0.5 * ((c1+c2)*(x2-x1)*(y1-y2))
    t2 = (a1 + a2) * (b1 + b2) - torch.pow(c1 + c2, 2)
    t3_ = (a1 * b1 - c1 * c1) * (a2 * b2 - c2 * c2)
    t3 = 0.5 * torch.log(t2 / (4 * torch.sqrt(F.relu(t3_)) + eps))

    B_d = (t1 / t2) + t3
    # B_d = t1 + t2 + t3

    B_d = torch.clip(B_d, min=eps, max=100.0)
    l1 = torch.sqrt(1.0 - torch.exp(-B_d) + eps)
    l_i = torch.pow(l1, 2.0)
    l2 = -torch.log(1.0 - l_i + eps)

    if mode == 'l1':
        probiou = l1
    if mode == 'l2':
        probiou = l2

    return probiou
loss 计算部分
     device = targets.device
        lcls = torch.zeros(1, device=device)
        lobj = torch.zeros(1, device=device)
        box_loss = torch.zeros(1, device=device)
        tcls, tbox, indices, anchors = self.build_targets(p, targets)  # targets


        # Losses # 依次遍历三个feature map的预测输出pi
        for i, pi in enumerate(p):  # layer index, layer predictions
            b, a, gj, gi = indices[i]  # image, anchor, gridy, gridx
            tobj = torch.zeros_like(pi[...,0], dtype=pi.dtype,device=device)  # target obj

            n = b.shape[0]  # number of targets
            if n:
                prediction_pos = pi[b, a, gj, gi]  # prediction subset corresponding to targets, (n_targets, self.no)

                xy      = prediction_pos[:, :2].sigmoid() * 2. - 0.5
                wh      = (prediction_pos[:, 2:4].sigmoid() * 2) ** 2 * anchors[i]
                angle   = (prediction_pos[:, 4:5].sigmoid() - 0.5) * math.pi
                pbox = torch.cat((xy, wh, angle), 1)


                #方法一 KLDloss
                # kldloss = self.kld_loss_n(pbox,tbox[i])
                # box_loss +=kldloss.mean()
                #  # Objectness
                # tobj[b, a, gj, gi] = (1.0 - self.gr) + self.gr * (1 - kldloss).detach().clamp(0).type(tobj.dtype)  # iou ratio
                # 方法二 probloss
                probloss = probiou_loss(pbox,tbox[i])
                box_loss +=probloss.mean()
                # Objectness
                tobj[b, a, gj, gi] = (1.0 - self.gr) + self.gr * (1 - probloss).detach().clamp(0).type(tobj.dtype)  # iou ratio
4、评估
1、非极大值抑制部分,需要对模型预测的角度进行后处理再输出
   theta_pred=x[:, 4]
   # theta_pred = (theta_pred - 90) / 180 * pi # [n_conf_thres, 1] θ ∈ [-pi/2, pi/2)
   # theta_pred=torch.sigmoid(theta_pred)
   theta_pred = (theta_pred-0.5)*math.pi # [n_conf_thres, 1] θ ∈ [-pi/2, pi/2)
2、原版评估模块先将预测框转成4个角点的poly格式,然后利用poly2hbb函数获取旋转框的最大外接矩形框,最后xywh2xyxy函数再将xywh坐标转成xyxy格式,预测框和gt框都处理完之后在经过process_batch进行匹配
   poly = rbox2poly(pred[:, :5]) # (n, 8)
   pred_poly = torch.cat((poly, pred[:, -2:]), dim=1) # (n, [poly, conf, cls])
   hbbox = xywh2xyxy(poly2hbb(pred_poly[:, :8])) # (n, [x1 y1 x2 y2])
   pred_hbb = torch.cat((hbbox, pred_poly[:, -2:]), dim=1) # (n, [xyxy, conf, cls])

   pred_polyn = pred_poly.clone() # predn (tensor): (n, [poly, conf, cls])
   scale_polys(im[si].shape[1:], pred_polyn[:, :8], shape, shapes[si][1])  # native-space pred
   hbboxn = xywh2xyxy(poly2hbb(pred_polyn[:, :8])) # (n, [x1 y1 x2 y2])
   pred_hbbn = torch.cat((hbboxn, pred_polyn[:, -2:]), dim=1) # (n, [xyxy, conf, cls]) native-space pred


   # Evaluate
   if nl:
       # tbox = xywh2xyxy(labels[:, 1:5])  # target boxes
       tpoly = rbox2poly(labels[:, 1:6]) # target poly
       tbox = xywh2xyxy(poly2hbb(tpoly)) # target  hbb boxes [xyxy]
       scale_coords(im[si].shape[1:], tbox, shape, shapes[si][1])  # native-space labels
       labels_hbbn = torch.cat((labels[:, 0:1], tbox), 1)  # native-space labels (n, [cls xyxy])
       correct = process_batch(pred_hbbn, labels_hbbn, iouv)
       if plots:
           confusion_matrix.process_batch(pred_hbbn, labels_hbbn)
   else:
       correct = torch.zeros(pred.shape[0], niou, dtype=torch.bool)
可以将其替换成直接计算旋转框iou的方式来评估,比最大外接矩形框的评估方式更加精确。
三、v5_obb模型剪枝(旋转框)
剪枝部分参考了:
https://blog.csdn.net/IEEE_FELLOW/article/details/117236025
https://github.com/midasklr/yolov5prune/tree/v6.0
需要注意的是prune.py中obtain_bn_mask函数,为了满足剪枝后的通道数为8的倍数,做了额外的处理,你也可舍弃这个操作。
   #获取bn_mask并处理为8的整数倍
   mask = obtain_bn_mask(bn_module, thre)
四、v5_obb使用mmrotate评估(旋转框)
更改以下路径以后,直接运行eval_rotate_PR.py即可,该脚本搬的mmrotate的评估方法。
   weights='your model path'
   img_path='your data path'
   label_path='your label path'
   cls_name_list=['your cls']
五、v5_obb跟踪(旋转框)
跟踪参考v7_obb大佬的代码分享。
https://github.com/Egrt/yolov7-obb
https://zhuanlan.zhihu.com/p/603765606
直接运行track_predict.py即可实现跟踪效果。可修改测试视频以及输出路径。博主提供了一个可供测试的视频和车辆旋转框检测模型,不过模型是用原版的yolov5_obb训练的,读者可自己替换为最新的模型,并替换YoloDeepSort文件夹中的yolov5结构。
 video_path      = "test_video/test12.avi"
 video_save_path = "test_video/output.mp4"
 video_fps       = 10

 device = torch.device('cuda' if torch.cuda.is_available() else 'cpu')
 half='False'
 weights='runs/car/weights/last.pt'
 model = DetectMultiBackend(weights, device=device, dnn=False)
 model.model.half() if half else model.model.float()
六、v8_obb
后续博主会再更新,目前v8n的效果感觉还达不到超越此v5版本的效果。