import cv2 as cv
import numpy as np
import matplotlib.pyplot as plt
img = cv.imread("../SampleImages/pomeranian.png", cv.IMREAD_COLOR)
rows,cols = img.shape[:2]
print(rows,cols)
#opencv中的透射变换,需要一个3x3透射变换矩阵
#这个矩阵可以通过cv.getPerspectiveTransform(src,dst)获得
#src是原图中的4个点的坐标,dst是目标图像中的4个点的坐标(任意三个点不共线)
#参考资料:https://blog.csdn.net/qq_50394133/article/details/123832496
srcPts = np.float32([[56,65],[368,52],[28,387],[389,390]])
dstPts = np.float32([[100,145],[300,100],[80,290],[310,300]])
M_perspective = cv.getPerspectiveTransform(srcPts,dstPts)
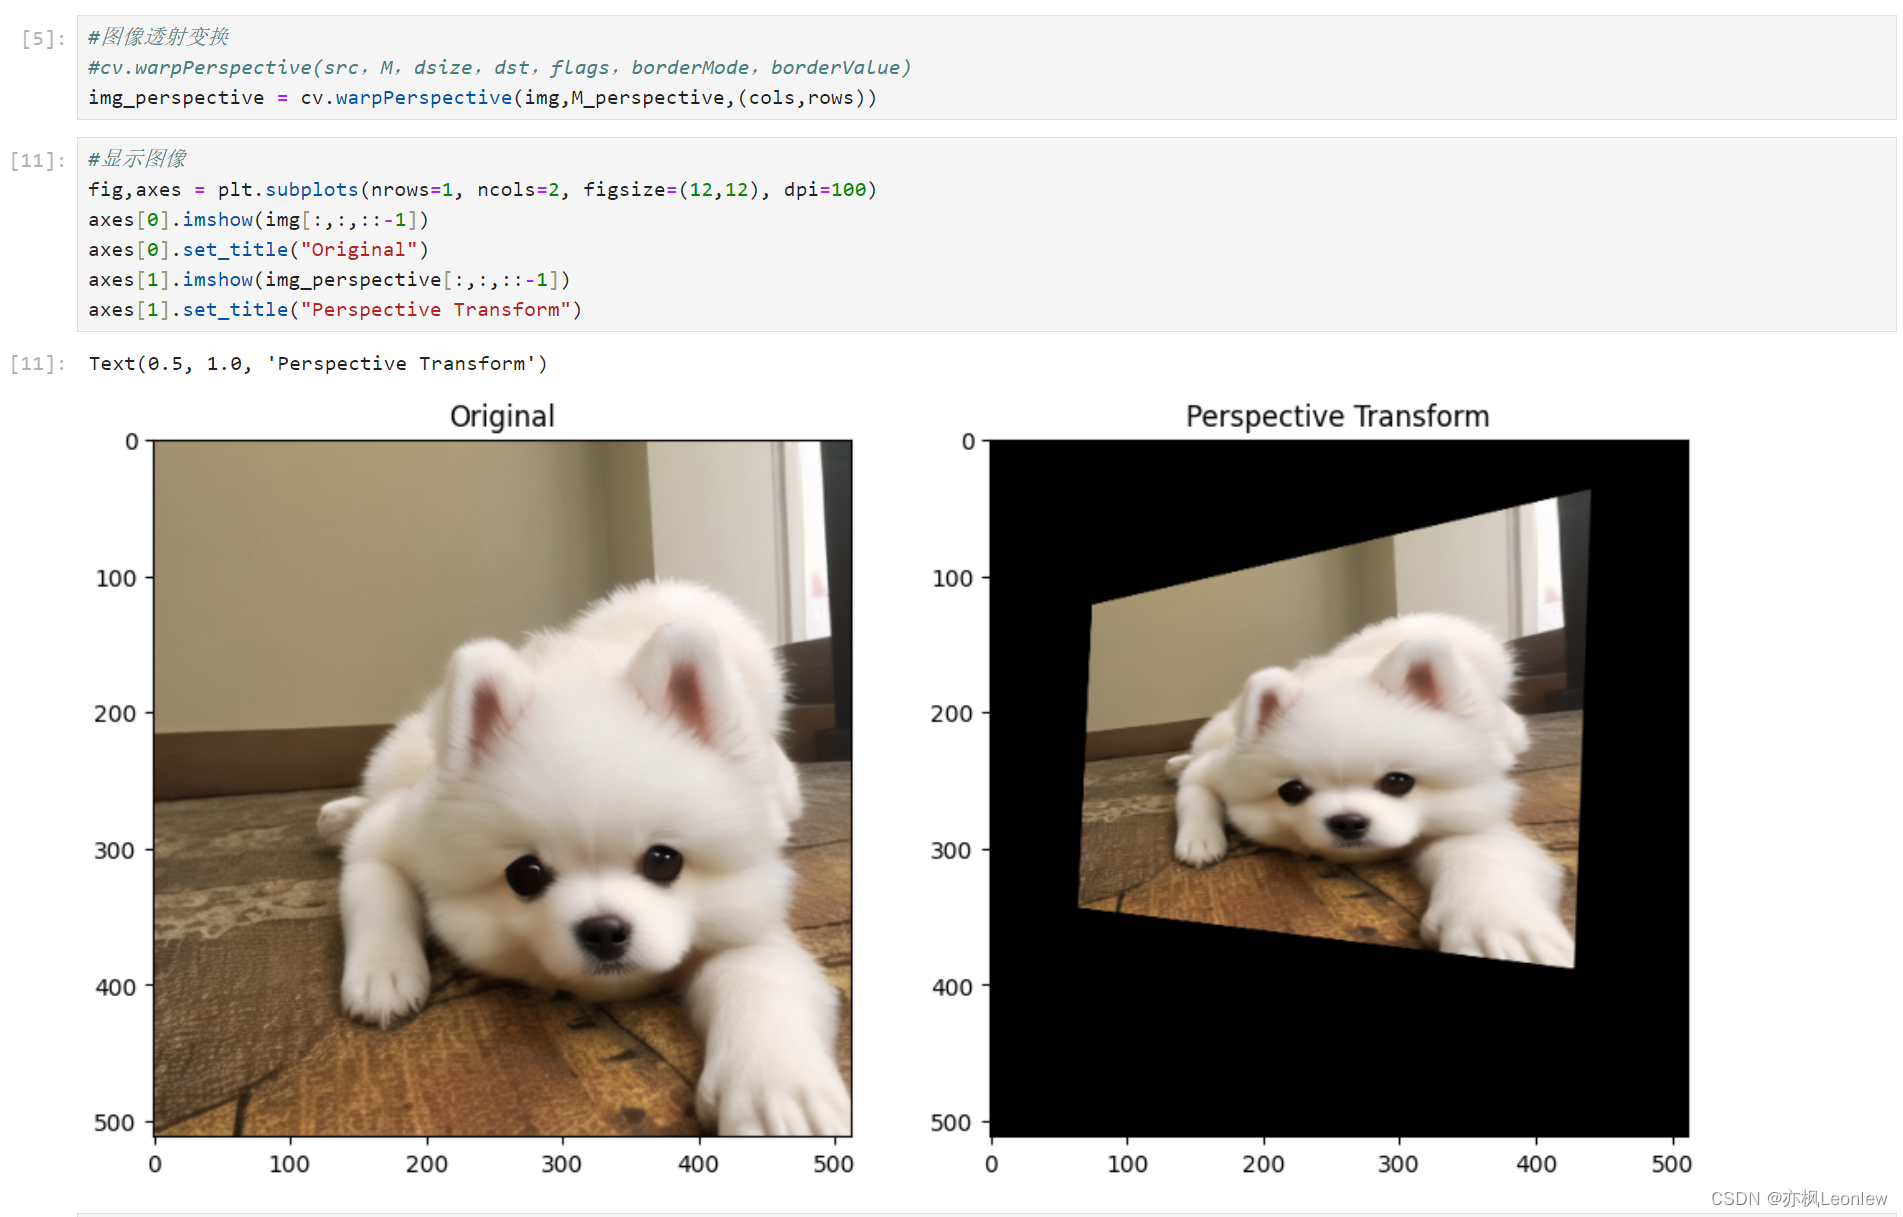
#图像透射变换
#cv.warpPerspective(src,M,dsize,dst,flags,borderMode,borderValue)
img_perspective = cv.warpPerspective(img,M_perspective,(cols,rows))
#显示图像
fig,axes = plt.subplots(nrows=1, ncols=2, figsize=(12,12), dpi=100)
axes[0].imshow(img[:,:,::-1])
axes[0].set_title("Original")
axes[1].imshow(img_perspective[:,:,::-1])
axes[1].set_title("Perspective Transform")