文章目录
一、前言
本文将详细介绍Linux系统下如何安装Docker
二、Docker安装
1、Docker及系统版本
官网奉上:https://www.docker.com/
Docker从17.03版本之后分为CE(Community Edition: 社区版)和EE(Enterprise Edition: 企业版)。相对于社区版本,企业版本强调安全性,但需付费使用。这里我们使用社区版本即可。
Docker支持64位版本的CentOS 7和CentOS 8及更高版本,它要求Linux内核版本不低于3.10。
查看Linux版本的命令这里推荐两种:lsb_release -a或cat /etc/redhat-release。
lsb_release -a查看效果:
[ ~]$ lsb_release -a
LSB Version: :core-4.1-amd64:core-4.1-noarch
Distributor ID: CentOS
Description: CentOS Linux release 7.6.1810 (Core)
Release: 7.6.1810
Codename: Core
cat /etc/redhat-release查看版本效果:
[~]$ cat /etc/redhat-release
CentOS Linux release 7.6.1810 (Core)
显然,当前Linux系统为CentOS7。再查一下内核版本是否不低于3.10。
查看内核版本有三种方式:
● cat /proc/version
● uname -a
● uname -r
三种形式都可以查看到内容版本,比如:
[ ~]$ uname -r
3.10.0-1160.45.1.el7.x86_64
可以看到,当前Linux内核版本满足Docker的需要。
2、Docker的自动化安装
Docker官方和国内daocloud都提供了一键安装的脚本,使得Docker的安装更加便捷。
官方的一键安装方式:
curl -fsSL https://get.docker.com | bash -s docker --mirror Aliyun
国内 daocloud一键安装命令:
curl -sSL https://get.daocloud.io/docker | sh
执行上述任一条命令,耐心等待即可完成Docker的安装。
3、Docker手动安装
手动安装Docker分三步:卸载、设置仓库、安装。
3.1、卸载Docker(可选)
第一步,卸载历史版本。这一步是可选的,如果之前安装过旧版本的Docker,可以使用如下命令进行卸载:
yum remove docker \
                  docker-client \
                  docker-client-latest \
                  docker-common \
                  docker-latest \
                  docker-latest-logrotate \
                  docker-logrotate \
                  docker-selinux \
                  docker-engine-selinux \
                  docker-engine \
                  docker-ce
3.2、设置源仓库
第二步,设置仓库。新主机上首次安装Docker Engine-Community之前,需要设置Docker仓库。此后可从仓库安装和更新Docker。
在设置仓库之前,需先按照所需的软件包。yum-utils提供了yum-config-manager,并且device mapper存储驱动程序需要device-mapper-persistent-data和lvm2。
$ sudo yum install -y yum-utils \
  device-mapper-persistent-data \
  lvm2
执行上述命令,安装完毕即可进行仓库的设置。使用官方源地址设置命令如下:
$ sudo yum-config-manager \
    --add-repo \
  	http://mirrors.aliyun.com/docker-ce/linux/centos/docker-ce.repo
通常,官方的源地址比较慢,可将上述的源地址替换为国内比较快的地址:
● 阿里云:http://mirrors.aliyun.com/docker-ce/linux/centos/docker-ce.repo
● 清华大学源:https://mirrors.tuna.tsinghua.edu.cn/docker-ce/linux/centos/docker-ce.repo
仓库设置完毕,即可进行Docker的安装。
3.3、Docker安装
执行一下命令,安装最新版本的 Docker Engine-Community 和 containerd。
sudo yum install -y docker-ce docker-ce-cli containerd.io
docker-ce为社区免费版本。稍等片刻,docker即可安装成功。但安装完成之后的默认是未启动的,需要进行启动操作。
如果不需要docker-ce-cli或containerd.io可直接执行如下命令:
yum install -y docker-ce
至此,完成Docker安装。
3.4、Docker启动
启动Docker的命令:
sudo systemctl start docker
3.5、验证是否安装成功
通过运行hello-world镜像来验证是否正确安装了Docker Engine-Community。
3.5.1、拉取镜像
sudo docker pull hello-world

3.5.2、查看镜像
sudo docker images

3.5.3、运行镜像
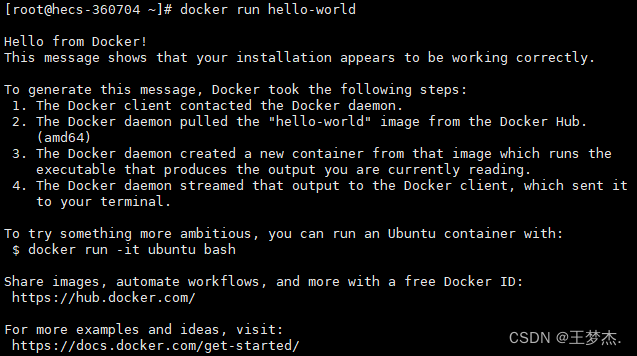
如果执行之后,控制台显示如下信息,则说明Docker安装和启动成功:
[root@hecs-360704 ~]# docker run hello-world

Hello from Docker!
This message shows that your installation appears to be working correctly.

To generate this message, Docker took the following steps:
 1. The Docker client contacted the Docker daemon.
 2. The Docker daemon pulled the "hello-world" image from the Docker Hub.
    (amd64)
 3. The Docker daemon created a new container from that image which runs the
    executable that produces the output you are currently reading.
 4. The Docker daemon streamed that output to the Docker client, which sent it
    to your terminal.

To try something more ambitious, you can run an Ubuntu container with:
 $ docker run -it ubuntu bash

Share images, automate workflows, and more with a free Docker ID:
 https://hub.docker.com/

For more examples and ideas, visit:
 https://docs.docker.com/get-started/
……
除了启动Docker,一些其他启动相关的命令:
● 守护进程重启:systemctl daemon-reload
● 重启Docker服务:systemctl restart docker / service docker restart
● 关闭Docker服务:docker service docker stop / docker systemctl stop docker
3.6、删除Docker
删除安装包:
yum remove docker-ce
删除镜像、容器、配置文件等内容:
rm -rf /var/lib/docker