html控件集合。
1、button
a、可以直接用input,type=“button”
<html xmlns="http://www.w3.org/1999/xhtml">
<head>
<meta http-equiv="Content-Type" content="text/html; charset=utf-8" />
<title>无标题文档</title>
</head>
<script>
function fun(){
      //这里写你要执行的语句
    alert("这是调用函数");}
</script>
<body>
<input type="button" onclick="fun()" value="wocaocaocaocao"></input>
</body>
</html>
b、可以用button
<script>
function fun(){
      //这里写你要执行的语句
    alert("这是调用函数");}
</script>
<body>
<button onclick="fun()">wocaocaocao</button>
</body>
2、text
可以在事件里赋值
<script>
function fun(){
      //这里写你要执行的语句
	document.getElementById("txt1").value="abcd";
    alert(document.getElementById("txt1").value);}

</script>
<body>
<button onclick="fun()">wocaocaocao</button>
<input type="text" id="txt1" value=""/>
</body>
3.radio的用法
<script>
function baidu(){
  var radios = document.getElementsByName("a");
  for ( var i = 0; i < radios.length; i++) {
  if (radios[i].checked==true) {
      i++;
   alert("你选中的是第"+i+"个单选框。值为:"+radios[--i].value);
   }
  }
 }
</script>
<body>
<input type="radio" name="a" value="1"/>1
<input type="radio" name="a" value="2"/>2
<input type="radio" name="a" value="3"/>3
<input type="radio" name="a" value="4"/>4
<input type="button" onClick="baidu()" value="按下"/>
</body>
4.<\br>
<br> 可插入一个简单的换行符。
<br> 标签是空标签(意味着它没有结束标签,因此这是错误的:<br></br>)。在 XHTML 中,把结束标签放在开始标签中,也就是 <br />。
5.checkbox的用法
<script>
function allCheck(node1){
                var node=document.getElementsByName("mm");
                for (var x = 0; x < node.length; x++) {
                    node[x].checked=node1.checked;
                }
            }
function chose(node){
                var flag=true;//用于遍历是否是全部变量设置
                var allM=document.getElementsByName("all")[0];
                var node=document.getElementsByName("mm");
                for (var x = 0; x < node.length; x++) {
                    if(node[x].checked==false){//只要有一个没选中,就退出遍历,标记设置为false
                        flag=false;
                        break;
                    }
                }
                if(flag){
                    allM.checked=true;
                }else{
                    allM.checked=false;
                }
            }
function sumall(){
                var sum=0;
                var names=document.getElementsByName("mm");
                for(var x=0;x<names.length;x++){
                    if(names[x].checked){//选中的全部加起来
                        sum=sum+parseInt(names[x].value);//将选中的值解析出来
                    }
                }
                document.getElementById("spanid").innerHTML=("总和为 "+sum+" 元").fontcolor("red");

            }
</script>
<body>
商品列表:<br/>
        笔记本电脑<input type="checkbox" name="mm" value="3000" onclick="chose(this)" />3000
        台式机<input type="checkbox" onclick="chose(this)" name="mm" value="2900"/> 2900
        路由器<input type="checkbox" onclick="chose(this)" name="mm" value="90"/> 90
        <br/>
        家常用品<input type="checkbox" onclick="chose(this)" name="mm" value="500"/>500
        洗衣机<input type="checkbox" onclick="chose(this)" name="mm" value="5600"/> 5600
        <br/>全选<input type="checkbox"  name="all" onclick="allCheck(this)"  />
        <br/><input type="button" value="查看金额" name="btn" onclick="sumall()"/> <span id="spanid"></span>
</body>
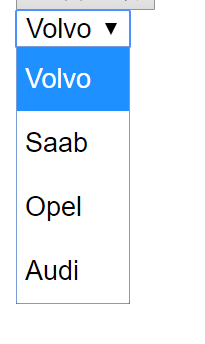
6.select控件
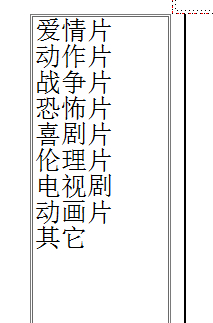
如果 multiple="false",那么select就是相当于wpf中的combobox,如果multiple="true",那么select控件就相当于listbox。
<select>
  <option value ="volvo">Volvo</option>
  <option value ="saab">Saab</option>
  <option value="opel">Opel</option>
  <option value="audi">Audi</option>
</select>
<select name="list" multiple="true"  size="25"   >
<option   value= "1 "   > 爱情片 </option>
<option   value= "2 "   > 动作片 </option>
<option   value= "3 "   > 战争片 </option>
<option   value= "4 "   > 恐怖片 </option>
<option   value= "5 "   > 喜剧片 </option>
<option   value= "6 "   > 伦理片 </option>
<option   value= "7 "   > 电视剧 </option>
<option   value= "8 "   > 动画片 </option>
<option   value= "9 "   > 其它 </option>
</select>
listbox 的 一个应用案例:
http://blog.csdn.net/So_CooL/article/details/1211440
7、表格
HTML 表格实例:
| First Name | Last Name | Points |
|---|---|---|
| Jill | Smith | 50 |
| Eve | Jackson | 94 |
| John | Doe | 80 |
| Adam | Johnson | 67 |
在线实例
表格
这个例子演示如何在 HTML 文档中创建表格。
(可以在本页底端找到更多实例。)
HTML 表格
表格由 <table> 标签来定义。每个表格均有若干行(由 <tr> 标签定义),每行被分割为若干单元格(由 <td> 标签定义)。字母 td 指表格数据(table data),即数据单元格的内容。数据单元格可以包含文本、图片、列表、段落、表单、水平线、表格等等。
表格实例
实例
<
table
border
=
"
1
"
>
<
tr
>
<
td
>
row 1, cell 1
</
td
>
<
td
>
row 1, cell 2
</
td
>
</
tr
>
<
tr
>
<
td
>
row 2, cell 1
</
td
>
<
td
>
row 2, cell 2
</
td
>
</
tr
>
</
table
>
在浏览器显示如下::
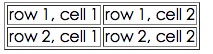
HTML 表格和边框属性
如果不定义边框属性,表格将不显示边框。有时这很有用,但是大多数时候,我们希望显示边框。
使用边框属性来显示一个带有边框的表格:
实例
<
table
border
=
"
1
"
>
<
tr
>
<
td
>
Row 1, cell 1
</
td
>
<
td
>
Row 1, cell 2
</
td
>
</
tr
>
</
table
>
HTML 表格表头
表格的表头使用 <th> 标签进行定义。
大多数浏览器会把表头显示为粗体居中的文本:
实例
<
table
border
=
"
1
"
>
<
tr
>
<
th
>
Header 1
</
th
>
<
th
>
Header 2
</
th
>
</
tr
>
<
tr
>
<
td
>
row 1, cell 1
</
td
>
<
td
>
row 1, cell 2
</
td
>
</
tr
>
<
tr
>
<
td
>
row 2, cell 1
</
td
>
<
td
>
row 2, cell 2
</
td
>
</
tr
>
</
table
>
在浏览器显示如下:
