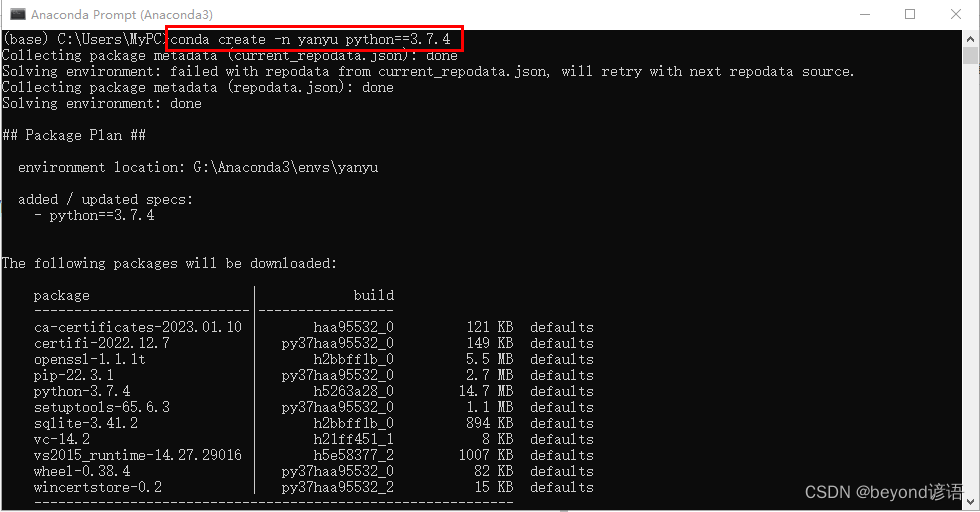
一、创建新的环境空间
conda create -n yanyu python==3.7.4
当然其他的版本也可以指定,建议3.6-3.8
yanyu为新的环境空间名称,可自定义修改
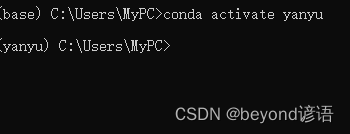
conda activate yanyu
切换一下环境空间
删除环境空间,需要先切换到base,conda activate base,然后删除即可,conda remove -n yanyu --all
这里的yanyu为环境空间的名称
二、安装sklearn并验证
安装相关包
可以利用清华源进行加速在命令后面加入-i https://pypi.tuna.tsinghua.edu.cn/simple
pip install numpy -i https://pypi.tuna.tsinghua.edu.cn/simple
pip install scipy -i https://pypi.tuna.tsinghua.edu.cn/simple
pip install matplotlib -i https://pypi.tuna.tsinghua.edu.cn/simple
pip install pandas -i https://pypi.tuna.tsinghua.edu.cn/simple
pip install scikit-learn -i https://pypi.tuna.tsinghua.edu.cn/simple
验证
python
import sklearn
不报错表示导入成功,安装成功
quit()退出python编译

三、安装PySide并验证
安装
pip install pyside2 -i https://pypi.douban.com/simple/
pip install pyqt5-tools -i https://pypi.tuna.tsinghua.edu.cn/simple
pip install -i https://pypi.tuna.tsinghua.edu.cn/simple --trusted-host pypi.tuna.tsinghua.edu.cn pypiwin32
验证
python
from PySide2.QtWidgets import QApplication, QMessageBox,QFileDialog,QMainWindow
不报错表示导入成功,安装成功
quit()退出python编译

四、安装OpenCV并验证
安装
这里安装opencv版本为3.4.1.15,因为3.4.2之后版本中有些算法申请了专利,开始收费了。
pip install opencv-python==3.4.1.15 -i https://pypi.tuna.tsinghua.edu.cn/simple
验证
python
import cv2
不报错表示导入成功,安装成功
quit()退出python编译

五、安装pytorch并验证
这里是安装的CPU版本的torch,仅为了学习使用,若想安装GPU版本的torch,可参考博文:GPU版PyTorch对应安装教程
安装
pip3 install torch torchvision torchaudio
验证
python
import torch
不报错表示导入成功,安装成功
quit()退出python编译

六、安装有关word的包并验证
安装
pip install python-docx -i https://pypi.tuna.tsinghua.edu.cn/simple

验证
python
from docx import Document
不报错表示导入成功,安装成功
quit()退出python编译

七、安装项目相关的包
pip install tqdm -i https://pypi.tuna.tsinghua.edu.cn/simple
pip install tensorboard -i https://pypi.tuna.tsinghua.edu.cn/simple
pip install jupyter_contrib_nbextensions -i https://pypi.tuna.tsinghua.edu.cn/simple
jupyter contrib nbextension install --user
pip install jupyter_nbextensions_configurator -i https://pypi.tuna.tsinghua.edu.cn/simple
安装jupyter
pip install jupyter
运行jupyter
jupyter notebook
绑定jupyter中的kernel
切换环境空间conda activate base在base下运行,python -m ipykernel install --user --name yanyu --display-name beyondyanyu
其中yanyu为环境空间的名称,beyondyanyu为将来在jupyter中切换kernel时显示的名称
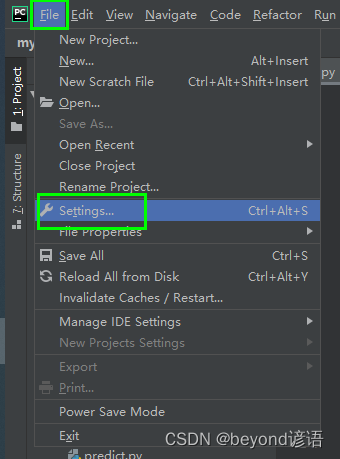
八、配置PyCharm
①,File —> Settings
②,Python Interpreter --> Show All

③,点击 +号
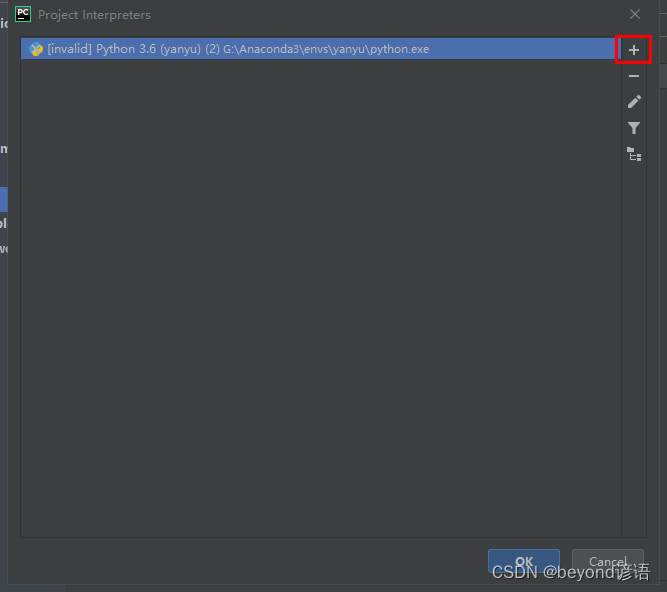
④,Conda Environment —> Existing environment 选择自己创建的环境空间位置
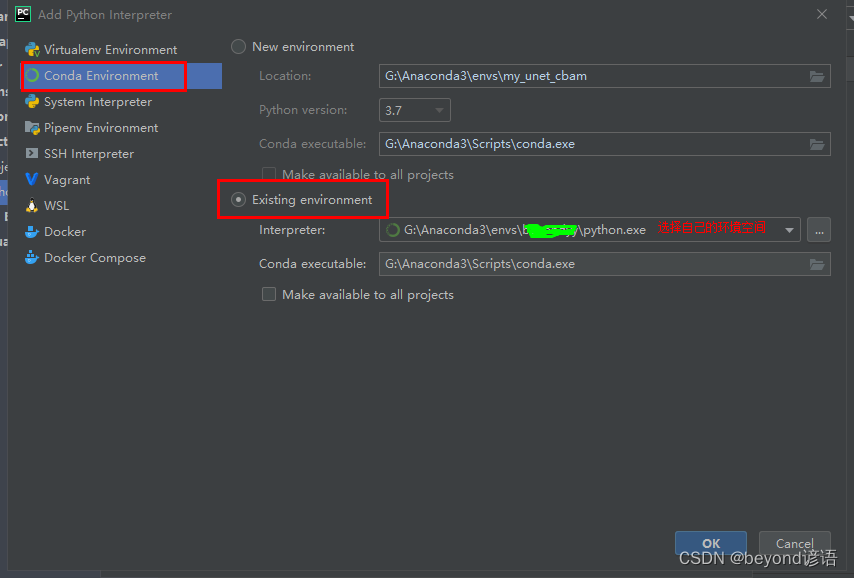
⑤,最后OK,Apply即可
大功告成!!!