在前面使用了RestTemplate和Ribbon来实现了服务消费者,Feign 是一个集成了Ribbon和Eureka的组件,通过声明的方式,就可以实现Http客户端,简化了http客户端(服务消费者)。对于Feign,我们只要记得两个特点就行了:1、整合了ribbon实现了负载均衡 2、通过注解方式实现http客户端接口。
本次实践就之前的基础上,来创建一个基于Feign的消费者
一、实践环境
1、 使用之前的Eureka注册中心和两个服务(21111和31111)端口
2、 通过Feign实现消费者
3、 比较通过RestTemplate和 Feign实现的消费差别
二、实践步骤
1、 创建一个springcloudFeignConsumer工程
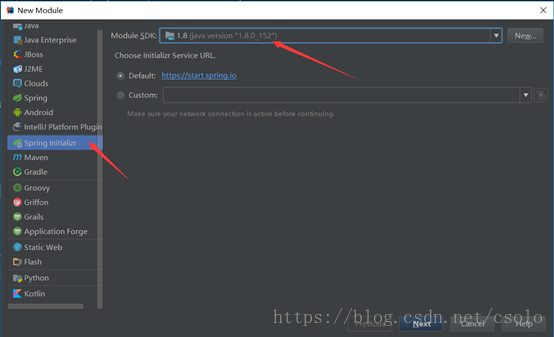
下一步

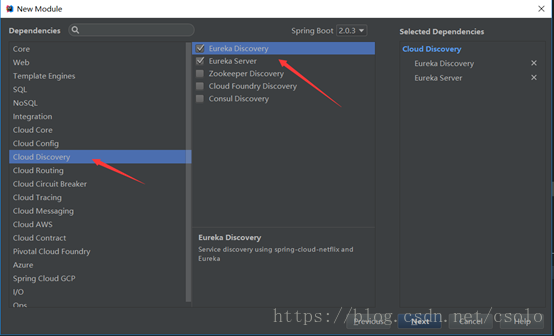
选择依赖cloud Discovery
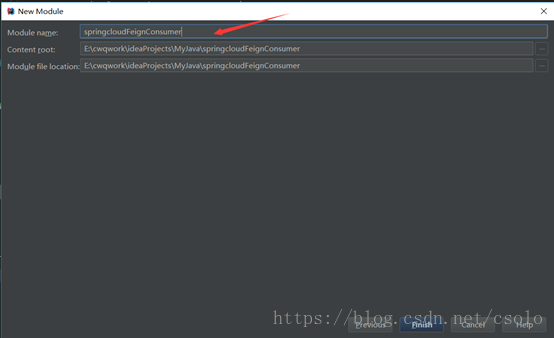
输入工程名 springcloudFeignConsumer
生成工程后,maven 会自动的去获取依赖,我们还需要添加Feign插件,编辑pom.xml,添加Feign插件:
<dependency>
   <groupId>org.springframework.cloud</groupId>
   <artifactId>spring-cloud-starter-feign</artifactId>
   <version>1.4.4.RELEASE</version>
</dependency>
2、 入口程序添加注解
现在,我们在工程生成的入口程序SpringcloudApplication.java上使用注解
package com.study.springcloud;

import org.springframework.boot.SpringApplication;
import org.springframework.boot.autoconfigure.SpringBootApplication;
import org.springframework.cloud.client.discovery.EnableDiscoveryClient;
import org.springframework.cloud.openfeign.EnableFeignClients;

@EnableFeignClients
@EnableDiscoveryClient
@SpringBootApplication
public class SpringcloudApplication {

   public static void main(String[] args) {
      SpringApplication.run(SpringcloudApplication.class, args);
   }
}
3、创建一个服务接口
创建一个接口 HelloService ,添加注解@FeignClient来指定服务名,绑定服务
package com.study.springcloud;

import org.springframework.cloud.openfeign.FeignClient;
import org.springframework.web.bind.annotation.RequestMapping;

@FeignClient("service-sayHello")
//通过@FeginClient 来指定服务名,绑定服务
public interface HelloService {

    @RequestMapping("/hello")  //通过spring mvc 注解来绑定服务提供的Rest接口
    String sayHello();
}
3、 创建一个Controller
创建一个Controller,来实现对Feign客户端的调用。通过@Autowired 来注入 HelloService实例
package com.study.springcloud;

import org.springframework.beans.factory.annotation.Autowired;
import org.springframework.web.bind.annotation.RequestMapping;
import org.springframework.web.bind.annotation.RequestMethod;
import org.springframework.web.bind.annotation.RestController;

@RestController
public class ConsumerController {

    @Autowired
    HelloService helloService;

    @RequestMapping(value = "/feign-consumer", method = RequestMethod.GET)
    public String helloConsumer(){
        return  helloService.sayHello();
    }
}
4、 修改配置文件
server.port=44111
# 重点需要注意spring.application.name,这个是在以后服务与服务之间相互调用是根据这个name
spring.application.name=feign-consumer
eureka.instance.hostname=localhost
eureka.client.service-url.defaultZone=http://center1:11111/eureka/,http://center2:11112/eureka/
5、启动注册中心和服务
将注册中心和服务都启动起来,正常情况下,应该在localho:11111 端口看到服务启动的情况
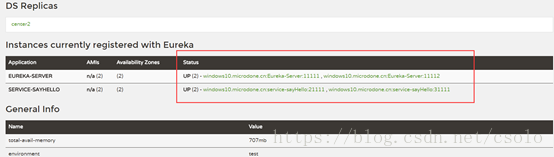
接着把feign-consumer也启动起来
三 实践测试
http://localhost:44111/feign-consumer 这样就可以访问服务service-sayhello
