概述
通过微信小程序的云开发实现一个个人免费的商品展示推广程序
详细
微信云开发小商城
前期准备:appid,小程序开发工具
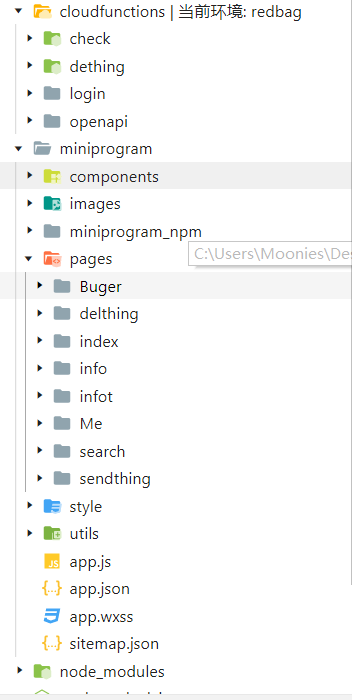
项目结构图:
页面效果:
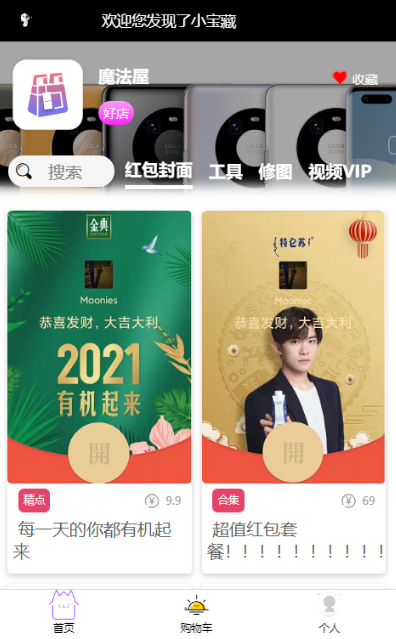

页面布局:通过分割左右页面,封装单个页面样式搭建,其中single是封装的商品的单个组件
 <view class="of-content">
    <view class="of-ct-area">
      <view class="leftcont">
        <view class="itemlist" wx:for="{

   {bgleftC}}" wx:key="index">
          <single shops="{

   {item}}" />
        </view>
      </view>
      <view class="rightcont">
        <view class="itemlist" wx:for="{

   {bgrightC}}" wx:key="index">
          <view class="item-img">
            <single shops="{

   {item}}" />
          </view>
        </view>
      </view>
    </view>
  </view>
动画弹出框:
使用微信官方的 Animation API:
1)缓慢向上弹出商品购买框
  uptab() {
    var animation = wx.createAnimation({
      duration: 500,
      timingFunction: 'ease',
      delay: 0
    })
    animation.translateY(0).step()
    this.setData({
      animationData: animation.export() //动画实例的export方法导出动画数据传递给组件的animation属性
    })
  },
2)缓慢向下隐藏商品购买框
 dowmtab() {
    var animation = wx.createAnimation({
      duration: 700,
      timingFunction: 'ease',
      delay: 0
    })
    animation.translateY('100vh').step()
    this.setData({
      animationData: animation.export() //动画实例的export方法导出动画数据传递给组件的animation属性
    })
  },
管理中心:
登录会校验是否为用户本人,从而显示商品的操作流程,这里是通过检验用户的微信昵称来实现的。
商品发布页面
<view class="sendyna">
  <view class="picbox">
    <image class="pic" src="{

   {item}}" bind:longpress="deletePic" data-index="{

   {index}}" mode="aspectFill" wx:for="{

   {imgdatas}}" wx:key="index" />
    <view class="add-btn" bind:tap="addPic" wx:if="{

   {imgdatas.length<3}}">+</view>
  </view>

  <view class="priceB">
    <view class="one">
      现价 <input class="inputstyle" type="number" placeholder="现价" bindinput="bindNew"></input>
    </view>
    <view class="one">
      原价 <input class="inputstyle" type="number" placeholder="原价" bindinput="bindOld"></input>
    </view>
  </view>
  <view class="spanB">
    标签 <input class="inputstyle" placeholder="标签" bindinput="bindspan"></input>
  </view>
  <view class="radios">
    <radio-group bindchange="choosetype" class="radioss">
      <radio value="0" checked="{

   {typeindex==0}}">红包</radio>
      <radio value="1" checked="{

   {typeindex==1}}">VIP</radio>
      <radio value="2" checked="{

   {typeindex==2}}">修图</radio>
      <radio value="3" checked="{

   {typeindex==3}}">修图</radio>
    </radio-group>
  </view>
  <view class="input-text">
    <textarea class="input-area" placeholder="说点什么吧..." placeholder-class="textarea-placeholder" adjust-position="{

   {true}}" maxlength="1000" bindinput="inputContent">
    </textarea>
  </view>
  <view class="sendbtn" bind:tap="sendMoment">发表</view>
</view>
发布流程部分逻辑,因小程序发布文本与图片均要检测,这里使用了云开发中的云函数来实现免费校验
 const fileID = []
    imgdatas.forEach(val => {
      console.log(val);
      let uppath = this.getimgpath(val)
      wx.cloud.uploadFile({
        cloudPath: uppath,
        filePath: val, // 文件路径
        success: res => {
          console.log(res);
          if (res.statusCode == 200) {
            fileID.push(res.fileID)
            if (imgdatas.length == fileID.length) {
              console.log('图片上传成功');
              thinginfo.imglist = fileID
              thinginfo.imgdatas = imgdatas

              // console.log(thinginfo);
              this.checkcont(thinginfo)
            }
          } else {
            wx.showToast({
              title: '上传图片失败',
            })
          }
        }
      })
    })
wx.cloud.callFunction({
name: "check",
data: detail,
success: res => {
console.log(res);
const _id = res.result._id;
if (_id) {
wx.hideLoading();
wx.showToast({
title: '发送成功',
icon: "none"
});
wx.navigateBack({
delta: 1
})
} else {
wx.showToast({
title: '发布失败!',
icon: "none"
});
}
},
fail: err => {
console.log(err);
}
})