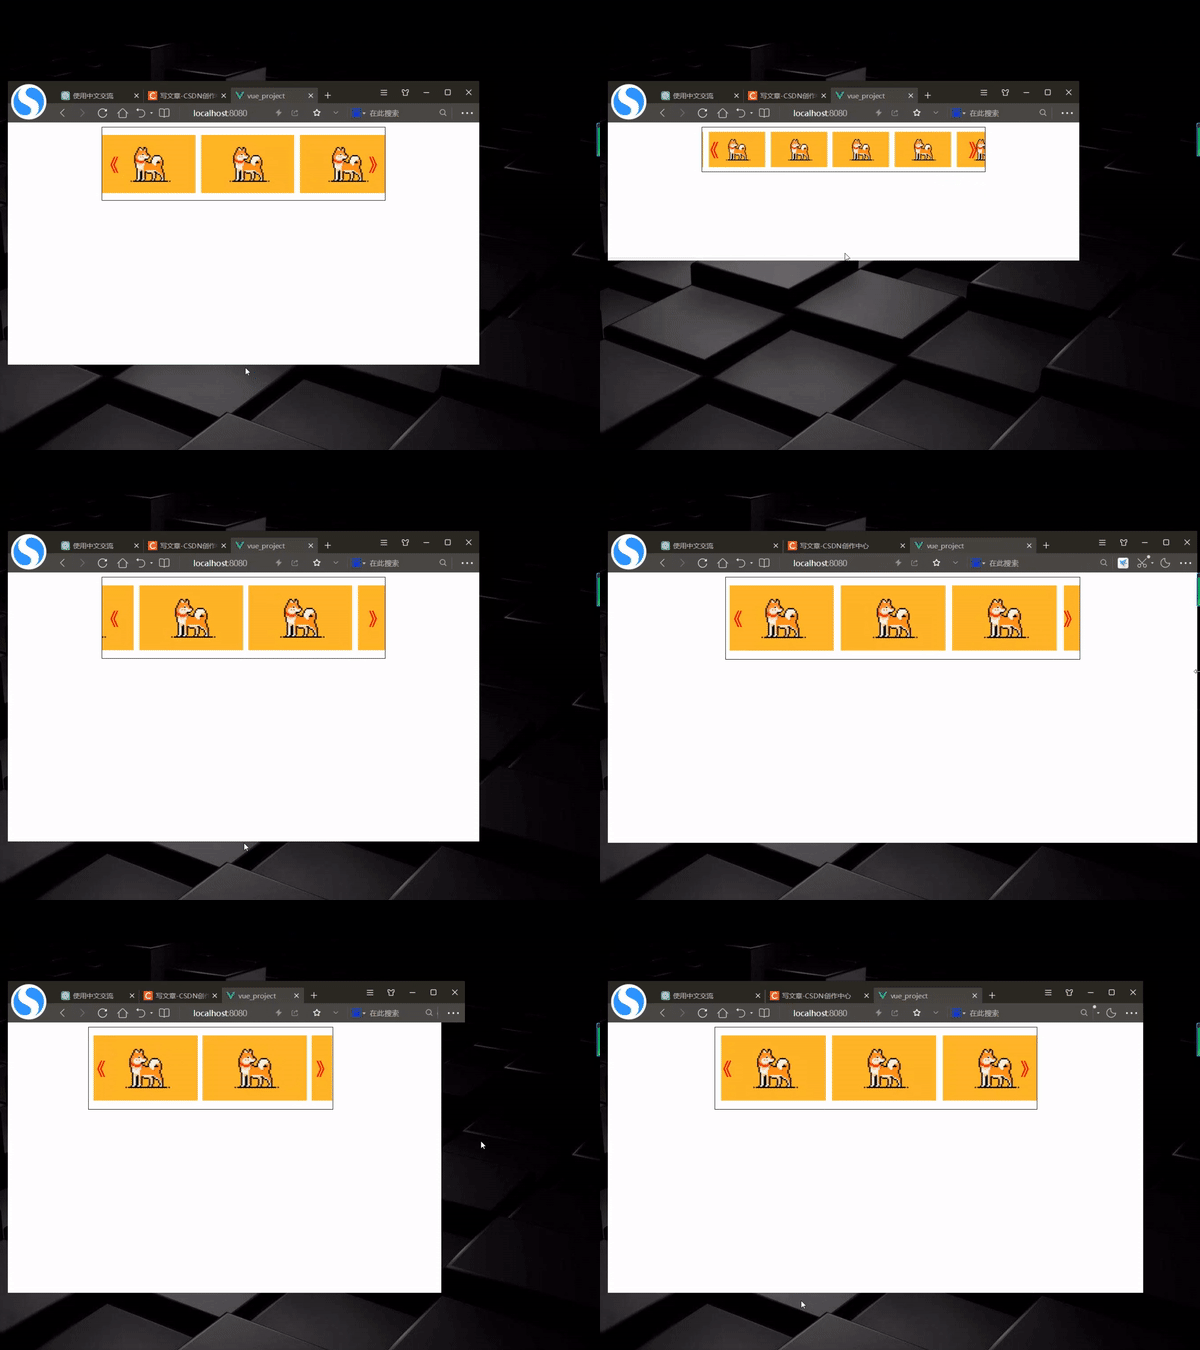
写了个适应性比较强的Vue的组件,有需要的可以直接取用。
点个关注,给你带来更多花里胡哨的组件与代码∠( ᐛ 」∠)_
先看效果:

自动轮播、悬停放大、按键控制,看起来似乎没什么特比的,接下来我就讲一讲这个组件设计上的独特之处。
首先是大小的自适应,该组件会根据引用处父组件的位置调整自身大小,
也就是说无论父组件大小如何,该组件总能以相对正常的形式显示。

甚至连箭头的相对位置都没有改变。
其次,该组件可以适应任何大小的图片,即使图片大小并不统一也同样可以实现逐张滚动。

接下来说说实现思路。
1. 首先,在 data 中定义了 `photoList` 数组,用于存储要轮播的图片路径,以及 `currentIndex` 表示当前显示图片的索引。
  data() {
    return {
      photoList: [photo, photo2, photo, photo, photo2, photo2, photo],
      currentIndex: 0,
      time: null,
    };
  },
2. 在 `mounted` 钩子中,设置一个定时器 `this.time`,每隔 3 秒触发一次 `moveRight` 方法,使得图片自动向右轮播。
  mounted() {
    this.time = setInterval(() => {
      if (this.currentIndex < photo.length) {
        this.moveRight();
      }
    }, 3000);
  },
3. `moveLeft` 和 `moveRight` 方法用于切换图片的索引,使得图片向左或向右滚动。
    moveLeft() {
      if (this.currentIndex > 0) {
        this.currentIndex = this.currentIndex - 1;
      }
    },
    moveRight() {
      if (this.currentIndex < this.photoList.length - 1) {
        this.currentIndex = this.currentIndex + 1;
      }
    },
4. `stopScroll` 方法用于清除定时器 `this.time`,当鼠标移入轮播容器时,停止图片的自动滚动。
5. `startScroll` 方法用于重新启动定时器 `this.time`,当鼠标移出轮播容器时,继续图片的自动滚动。
    //鼠标移入停止滚动
    stopScroll() {
      clearInterval(this.time);
      console.log("停止滚动");
    },

    //鼠标移出继续滚动
    startScroll() {
      this.time = setInterval(() => {
        if (this.currentIndex < photo.length) {
          this.moveRight();
        }
      }, 3000);
      console.log("继续滚动");
    },
6. 使用 `@mouseenter` 和 `@mouseleave` 事件监听鼠标进入和移出事件,分别调用 `stopScroll` 和 `startScroll` 方法,实现图片在鼠标悬停时停止滚动,在鼠标移出时继续滚动。
<template>
  <div class="room" @mouseenter="stopScroll" @mouseleave="startScroll">
    <div class="back">
      <img v-for="(item, index) in photoList" :key="index" :src="item" />
    </div>
    <span class="left" @click="moveLeft">《</span>
    <span class="right" @click="moveRight">》</span>
  </div>
</template>
7. 使用 `watch` 监听 `currentIndex` 的变化,在图片切换时更新 `.back` 元素的 `transform` 样式,使得图片容器向左滚动,从而展示当前图片,由于偏移量是直接读取了子元素相对容器左侧的距离,所以即使图片宽度不同每次也都能正常轮播。
  watch: {
    currentIndex(newValue) {
      const parentElement = document.querySelector(".back");
      const childrenElement = parentElement.children;
      parentElement.style.transform =
        "translateX(" + -childrenElement[newValue].offsetLeft + "px)";
    },
  },
8. 在样式中,设置 `.room` 容器为相对定位,限制其内容的显示范围;设置 `.back` 容器为绝对定位,用于容纳图片并实现水平滚动效果;设置 `.left` 和 `.right` 元素为绝对定位,分别表示左右箭头,用于点击切换图片。同时使用 `transition` 实现图片切换的动画效果。
附完整代码,使用时记得修改图片路径:
<template>
  <div class="room" @mouseenter="stopScroll" @mouseleave="startScroll">
    <div class="back">
      <img v-for="(item, index) in photoList" :key="index" :src="item" />
    </div>
    <span class="left" @click="moveLeft">《</span>
    <span class="right" @click="moveRight">》</span>
  </div>
</template>

<script>
import photo from "../../image/02.jpg";
import photo2 from "../../image/02 - 副本.jpg";
export default {
  data() {
    return {
      photoList: [photo, photo2, photo, photo, photo2, photo2, photo],
      currentIndex: 0,
      time: null,
    };
  },
  methods: {
    moveLeft() {
      if (this.currentIndex > 0) {
        this.currentIndex = this.currentIndex - 1;
      }
    },
    moveRight() {
      if (this.currentIndex < this.photoList.length - 1) {
        this.currentIndex = this.currentIndex + 1;
      }
    },
    stopScroll() {
      clearInterval(this.time);
      console.log("停止滚动");
    },

    //鼠标移出继续滚动
    startScroll() {
      this.time = setInterval(() => {
        if (this.currentIndex < photo.length) {
          this.moveRight();
        }
      }, 3000);
      console.log("继续滚动");
    },
  },
  mounted() {
    this.time = setInterval(() => {
      if (this.currentIndex < photo.length) {
        this.moveRight();
      }
    }, 3000);
  },
  watch: {
    currentIndex(newValue) {
      const parentElement = document.querySelector(".back");
      const childrenElement = parentElement.children;
      parentElement.style.transform =
        "translateX(" + -childrenElement[newValue].offsetLeft + "px)";
    },
  },
};
</script>

<style scoped>
.room {
  width: 100%;
  height: 100%;
  overflow: hidden;
  position: relative;
}
.back {
  height: 100%;
  display: flex;
  align-items: center;
  flex-wrap: nowrap;
  transition: 0.5s;
}
.back img {
  height: 80%;
  margin: 0 1%;
  transition: 0.5s;
}
.back img:hover {
  height: 100%;
  margin: 0 0;
}
.room span {
  position: absolute;
  top: 50%;
  color: red;
  font-size: 30px;
  font-weight: 700;
  transform: translateY(-50%);
  cursor: pointer;
}
.left {
  left: 0%;
}
.right {
  right: 0%;
}
</style>