目录
前言
本文章主要记录一下,日常开发中,常需要进行打包升级的步骤。
一、client如何打包升级?
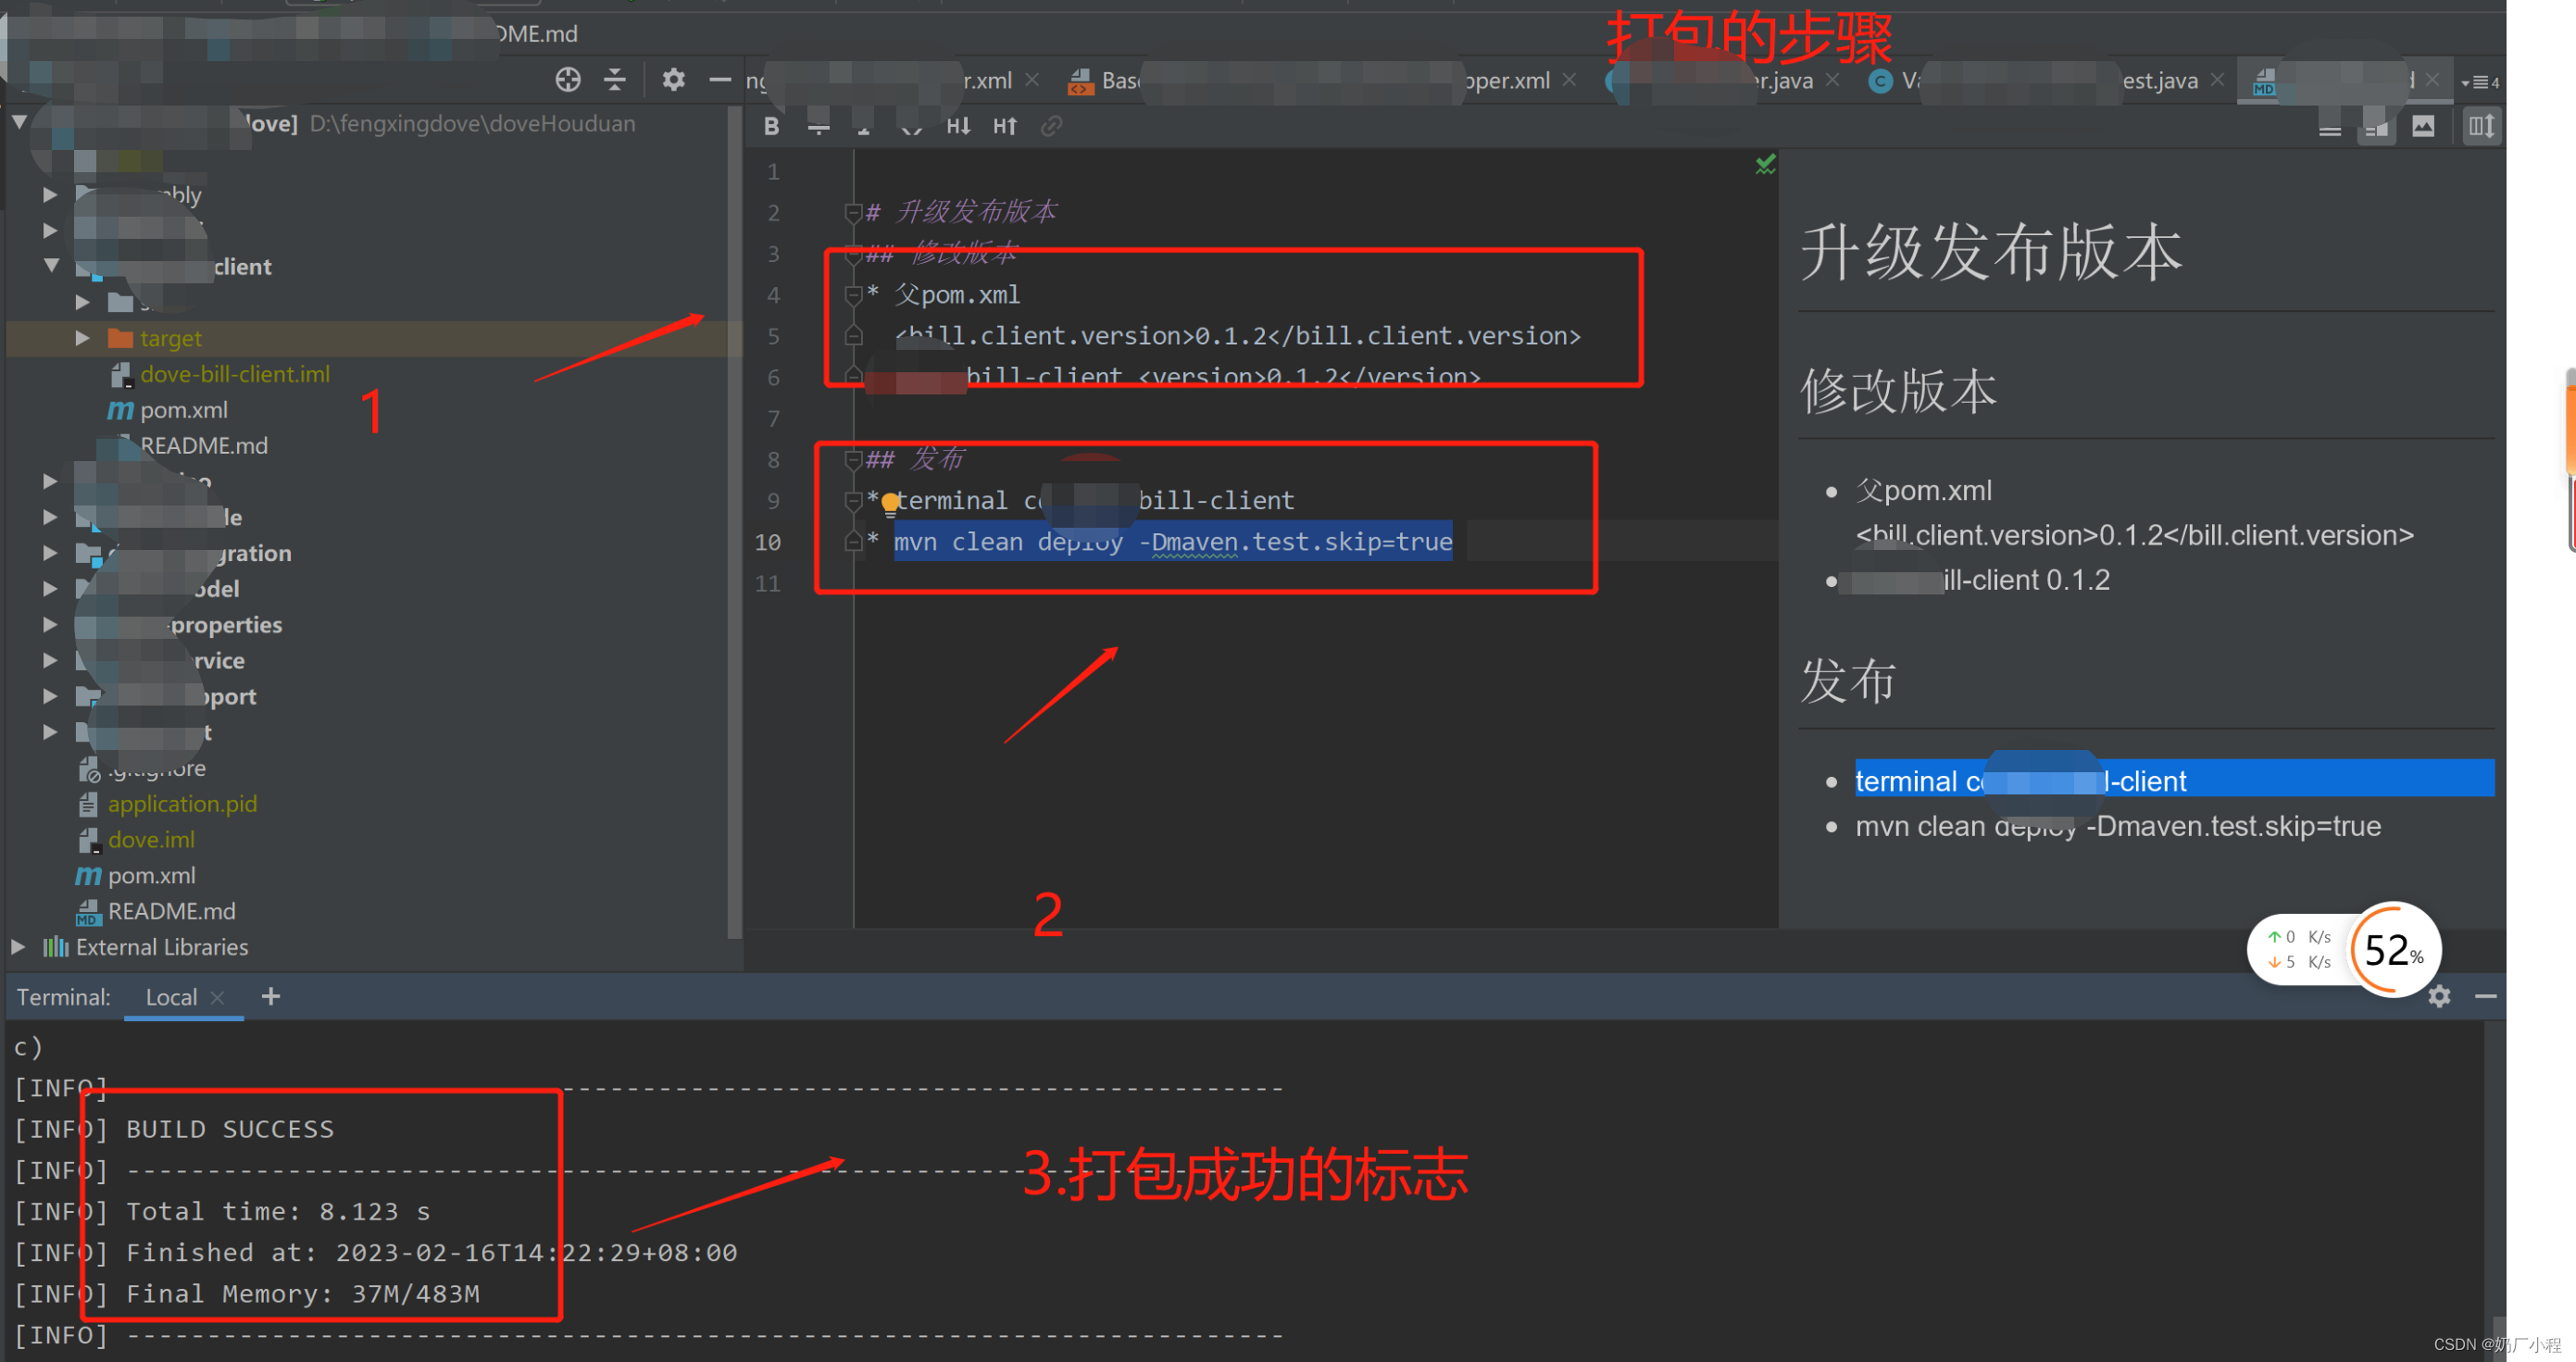
# 升级发布版本
## 修改版本
* 父pom.xml
  <bill.client.version>0.1.2</bill.client.version>
* test-bill-client <version>0.1.2</version>

## 发布
* terminal cd test-bill-client
* mvn clean deploy -Dmaven.test.skip=true
二、使用步骤
1.先进行改版本
#首先,在父的pom.xml里,先写了依赖
            <dependency>
                <groupId>com.fxtesrch.milk</groupId>
                <artifactId>test-bill-client</artifactId>
                <version>${bill.client.version}</version>
            </dependency>
然后,我们进行了某些client的内容更改时,这时就要重写打包升级,否则别的系统调用 了你的client没有更新,就会报错。
第1,在父pom里进行版本号的更改。
 #第2,在父的pom.xml里进行bill.client.version进行版本号的更改
   <properties>
        <project.build.sourceEncoding>UTF-8</project.build.sourceEncoding>
        <pro.version>1.0-SNAPSHOT</pro.version>
        <bill.client.version>0.1.5</bill.client.version>
    </properties>
第2,在子pom里进行版本号的更改
#在子pom.xml中进行版本号的修改
  <groupId>com.fxtesrch.milk</groupId>
    <artifactId>test-bill-client</artifactId>
    <version>0.1.5</version>
<!--    <version>0.1.2</version>-->
    <packaging>jar</packaging>
代码如下(示例):
import numpy as np
import pandas as pd
import matplotlib.pyplot as plt
import seaborn as sns
import warnings
warnings.filterwarnings('ignore')
import  ssl
ssl._create_default_https_context = ssl._create_unverified_context
2.执行打包升级命令
## 发布
* terminal cd test-bill-client
* mvn clean deploy -Dmaven.test.skip=true
还有一点需要注意的,因为它是通过maven的形式进行上错到远端的,所以,要填远端的地址,才能上传对应的地方。

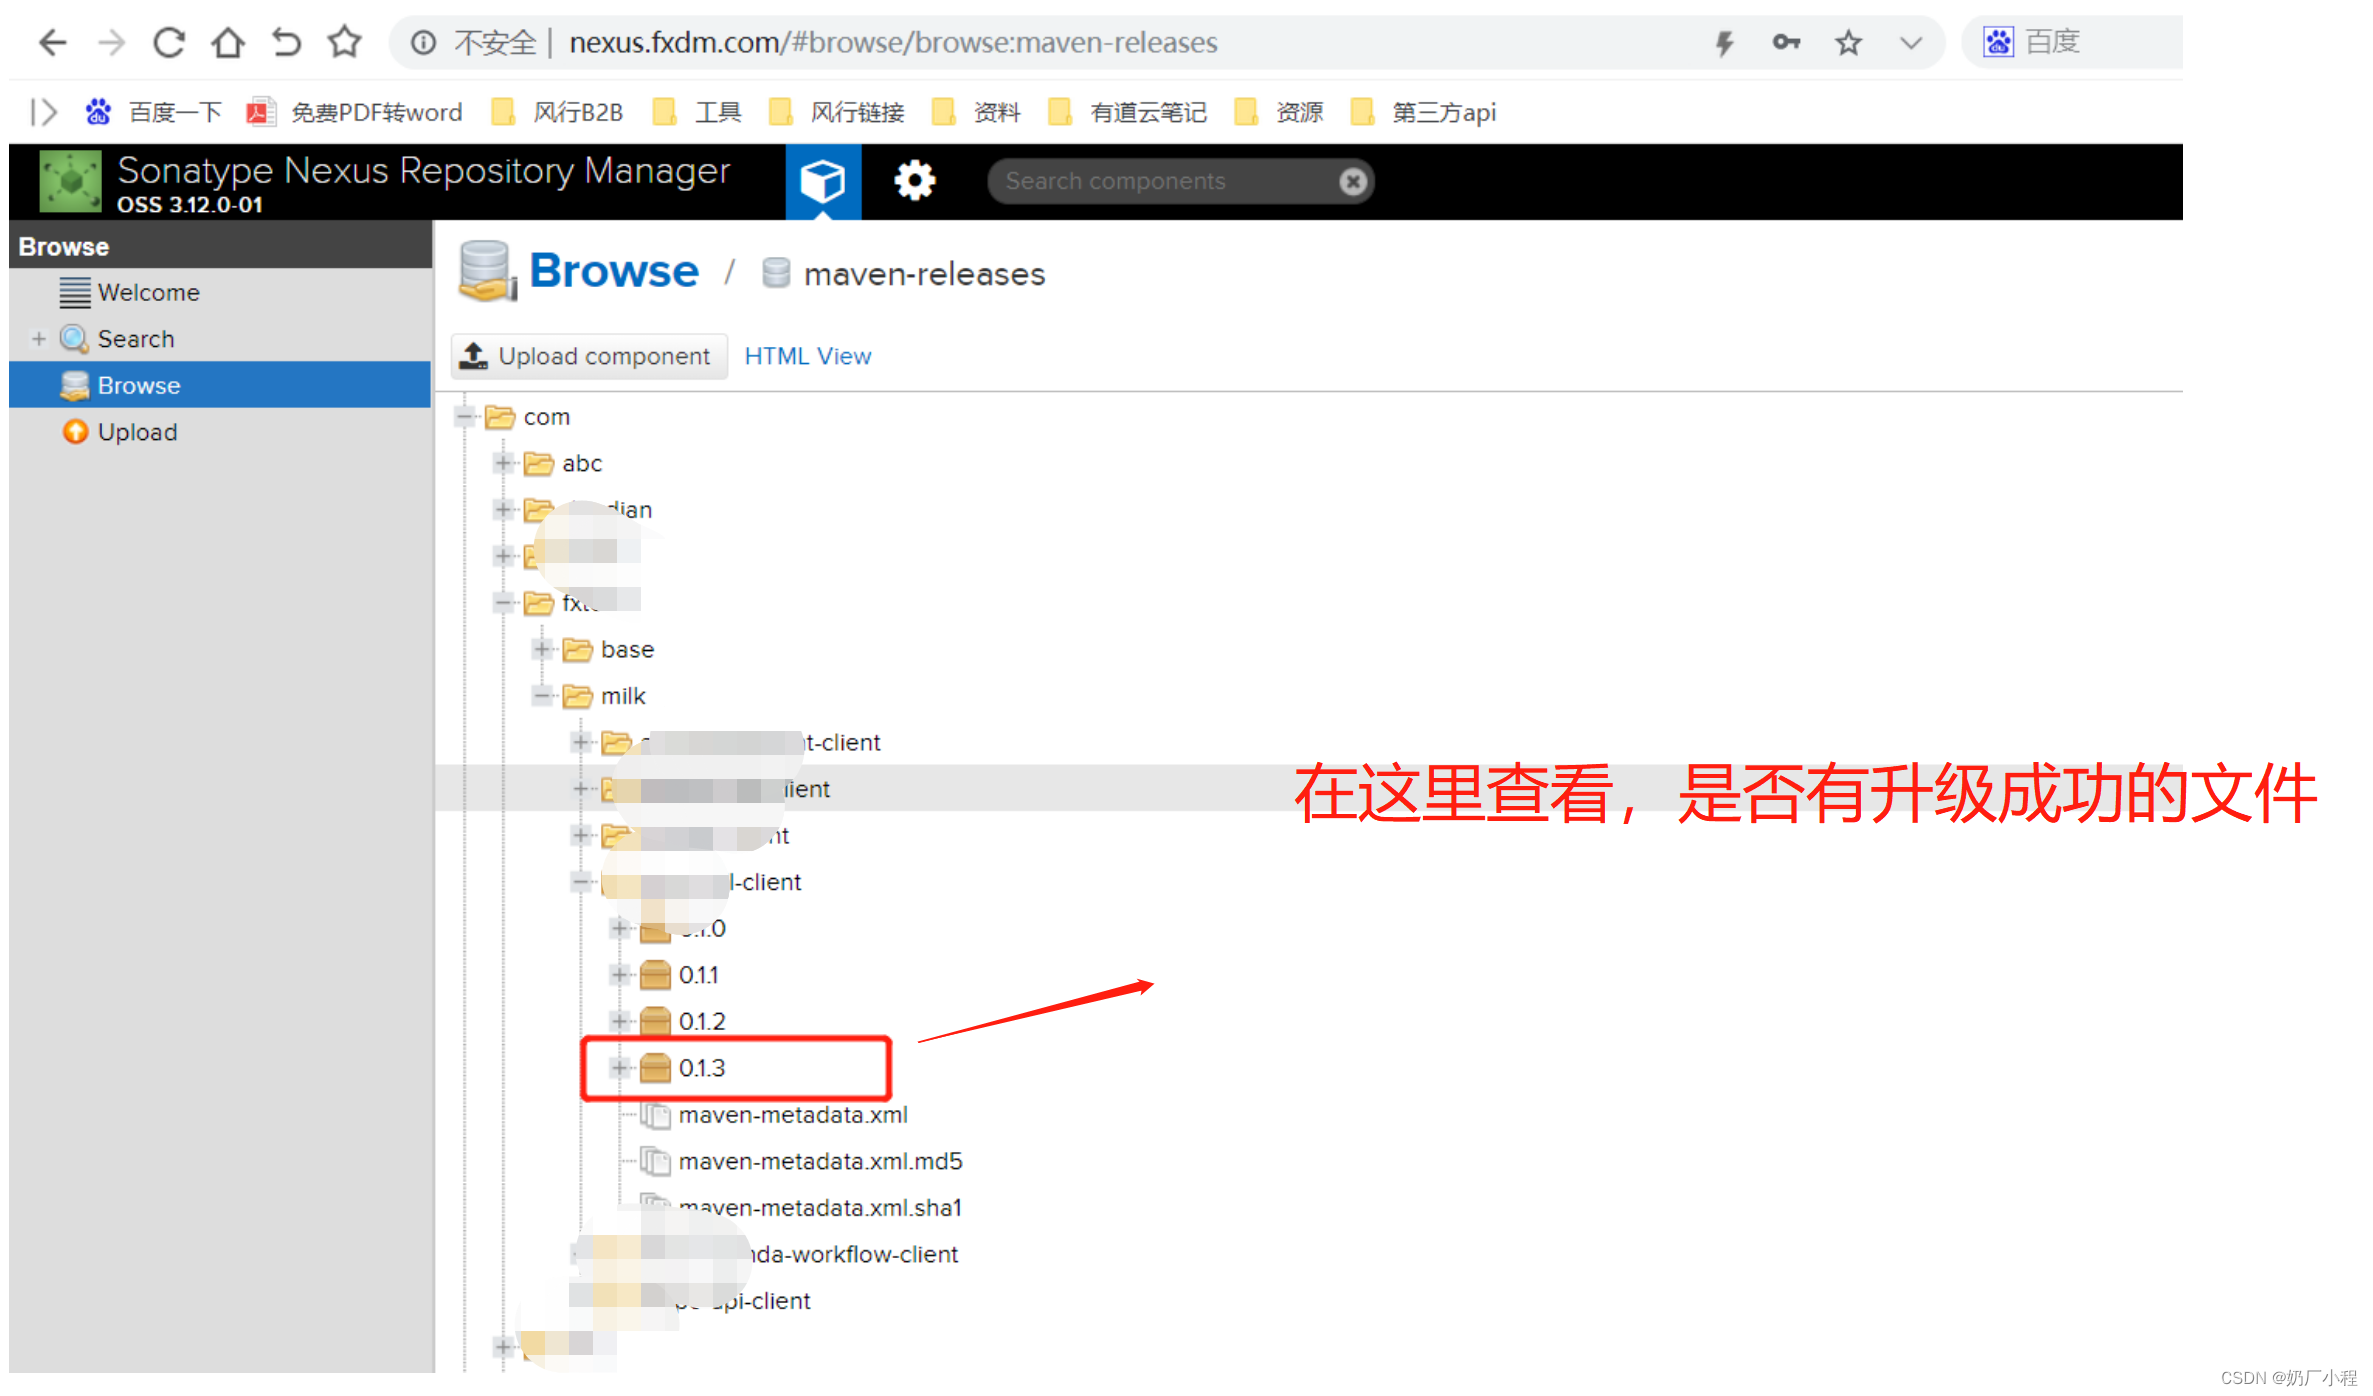
如何查看是否打包成功:
整体的流程图:
代码如下(示例):
data = pd.read_csv(
    'https://labfile.oss.aliyuncs.com/courses/1283/adult.data.csv')
print(data.head())
该处使用的url网络请求的数据。
总结
本文章主要记录一下,日常开发中,常需要进行打包升级的步骤。