一、
Uniapp 是一个使用 Vue.js 进行开发的跨平台应用开发框架,可以同时开发一套代码,直接编译出运行在 H5、微信小程序、支付宝小程序、百度小程序、字节跳动小程序、APP 等多个平台的应用。在 Uniapp 项目开发中,需要用到以下语言和插件:
1. 语言
- HTML5:用于页面结构的构建。
- CSS3:用于页面样式的编写。
- JavaScript:用于页面交互和逻辑的编写。
- Vue.js:用于组件化的开发。
2. 插件
- HBuilderX:Uniapp 官方开发工具,集成了多个前端开发工具,提供了全套的开发环境和调试工具。
- Uniapp 原生 API:封装了微信小程序、支付宝小程序等多个平台的原生 API,可以直接调用。
- uni-ui:开源的 Vue.js UI 组件库,提供了多种 UI 组件,方便开发者快速构建页面。
- uView UI:Uniapp 生态圈的一款 UI 组件库,拥有比 uni-ui 更加丰富的组件和更高的自定义性。
- uni-simple-router:Uniapp 中比较常用的路由插件,用于页面的跳转。
- uniStorage:Uniapp 自己封装的本地存储 API,提供类似于 localStorage 的功能。
- Axios:用于前端发送 HTTP 请求和获取响应。
- Promise 封装插件(如 fly.js):可以更好地兼容 Uniapp 中 axios 的请求拦截器和响应拦截器。
Uniapp 还提供了很多插件和框架,以上插件只是其中的一部分,具体使用可以根据项目需求进行选择。
下面是一个使用Uniapp开发的世界风景小程序的部分示例代码,包括登录界面、注册页面和主页。由于需要连接后端数据库实现用户的登录和注册,因此这里我将主要介绍前端界面的实现方式:
1. 登录界面
登录界面一般包括输入用户名和密码的表单,以及登录按钮。在提交表单时,会通过AJAX向后端接口发送请求进行登录验证。
<template>
  <view class="login">
    <form class="form" @submit.prevent="submitLoginForm">
      <input type="text" name="username" v-model="username" placeholder="请输入用户名" required>
      <input type="password" name="password" v-model="password" placeholder="请输入密码" required>
      <button type="submit">登录</button>
    </form>
  </view>
</template>
<script>
export default {
data() {
return {
username: '',
password: ''
};
},
methods: {
// 提交登录表单
submitLoginForm() {
// 发送登录请求到后端接口
uni.request({
url: 'http://localhost/login',
method: 'POST',
data: {
username: this.username,
password: this.password
},
success: res => {
if (res.statusCode === 200 && res.data.code === 0) {
// 登录成功,跳转到主页
uni.navigateTo({ url: '/pages/home/home' });
} else {
uni.showToast({
icon: 'none',
title: '用户名或密码错误,请重新输入'
});
}
},
fail: err => {
uni.showToast({
icon: 'none',
title: '登录失败,请检查网络'
});
}
});
}
}
};
</script>2. 注册页面
注册页面包括输入用户名、密码和确认密码的表单和提交按钮。在提交表单时,会通过AJAX向后端接口发送请求进行注册。
<template>
  <view class="register">
    <form class="form" @submit.prevent="submitRegisterForm">
      <input type="text" name="username" v-model="username" placeholder="请输入用户名" required>
      <input type="password" name="password" v-model="password" placeholder="请输入密码" required>
      <input type="password" name="confirm_password" v-model="confirm_password" placeholder="请再次输入密码" required>
      <button type="submit">注册</button>
    </form>
  </view>
</template>
<script>
export default {
data() {
return {
username: '',
password: '',
confirm_password: ''
};
},
methods: {
// 提交注册表单
submitRegisterForm() {
if (this.password !== this.confirm_password) {
uni.showToast({ icon: 'none', title: '两次输入的密码不一致,请重新输入' });
return;
}
// 发送注册请求到后端接口
uni.request({
url: 'http://localhost/register',
method: 'POST',
data: {
username: this.username,
password: this.password
},
success: res => {
if (res.statusCode === 200 && res.data.code === 0) {
uni.navigateTo({ url: '/pages/login/login' });
} else {
uni.showToast({ icon: 'none', title: '注册失败,请检查输入是否正确' });
}
},
fail: err => {
uni.showToast({ icon: 'none', title: '注册失败,请检查网络' });
}
});
}
}
};
</script>3. 主页
主页是展示世界风景的页面,可以分为导航栏和内容栏,我们通过 mescroll-uni 组件集成上下拉刷新加载更多功能,动态展示世界各地美景。
<template>
  <mescroll-uni :options="options" @up="loadMore" @down="refresh">
    <div class="list">
      <vue-swipe :auto="3000">
        <vue-swipe-item v-for="(item, index) in bannerList">
          < img class="img" :src="item.image" />
          <div class="caption"> {

   { item.title }} </div>
        </vue-swipe-item>
      </vue-swipe>
      <div class="categorys">
        <div class="category" v-for="(item, index) in categoryList" :key="index">
          < img class="img" :src="item.image" />
          <div class="name">{

   { item.name }}</div>
        </div>
      </div>
      <div class="scenic-list">
        <div class="scenic" v-for="(item, index) in scenicList" :key="index">
          < img class="img" :src="item.image" />
          <div class="name">{

   { item.name }}</div>
        </div>
      </div>
    </div>
    <div slot="downwarp">正在刷新...</div>
    <div slot="upwarp">正在加载更多...</div>
  </mescroll-uni>
</template>
js自己写
<script>
  // 引入组件和API
  import MescrollUni from 'mescroll-uni';
  import VueSwipe from 'vue-swipe';
  export default {
    data() {
      return {
        bannerList: [], // 轮播图列表
        categoryList: [], // 分类列表
        scenicList: [], // 景点列表
        options: {
          // mescroll-uni 配置项
          down: {
            auto: true //自动下拉刷新一次
          },
          up: {
            auto: false // 不自动加载
          }
        }
      };
    },
    components: {
      MescrollUni,
      VueSwipe
    },
    computed: {
      mescroll: function() {
        return this.$refs.mescrollUni.mescroll;
      }
    },
    mounted() {
      this.getBannerList();
      this.getCategoryList();
      this.getScenicList(false);
    },
methods: {
      // 获取轮播图列表
      getBannerList() {
        uni.request({
          url: 'http://localhost/banners',
          method: 'GET',
          success: res => {
            if (res.statusCode === 200 && res.data.code === 0) {
              this.bannerList = res.data.data;
            } else {
              uni.showToast({ icon: 'none', title: '获取轮播图失败' });
            }
          },
          fail: err => {
            uni.showToast({ icon: 'none', title: '获取轮播图失败,请检查网络' });
          }
        });
      },
      // 获取分类列表
      getCategoryList() {
        uni.request({
          url: 'http://localhost/categories',
          method: 'GET',
          success: res => {
            if (res.statusCode === 200 && res.data.code === 0) {
this.categoryList = res.data.data;
            } else {
              uni.showToast({ icon: 'none', title: '获取分类列表失败' });
            }
          },
          fail: err => {
            uni.showToast({ icon: 'none', title: '获取分类列表失败,请检查网络' });
          }
        });
      },
      // 获取景点列表
      getScenicList(isRefresh) {
        uni.request({
          url: 'http://localhost/scenics',
          method: 'GET',
          data: {
            page: isRefresh ? 1 : this.mescroll.page.num, // 如果是刷新就从第一页开始获取数据
            size: 10 // 一页显示多少个数据
          },
未写全
以下是一个简单的 `uniapp` 的实例教程。
首先,新建一个 `uniapp` 项目,在 `pages` 目录下新建一个 `index.vue` 文件。在 `index.vue` 页面中添加如下代码:
<template>
  <view class="container">
    <text class="title">{

   { message }}</text>
    <button class="btn" @click="changeMessage">Change Message</button>
  </view>
</template>

<script>
export default {
  data() {
    return {
      message: 'Hello World!'
    }
  },
  methods: {
    changeMessage() {
      this.message = 'Hello Uniapp!'
    }
  }
}
</script>

<style>
.container {
  text-align: center;
}

.title {
  font-size: 30px;
  margin-top: 50px;
}

.btn {
  font-size: 20px;
  display: inline-block;
  margin-top: 50px;
  padding: 15px 30px;
  border-radius: 20px;
  background-color: #007aff;
  color: #fff;
}
</style>
运行结果
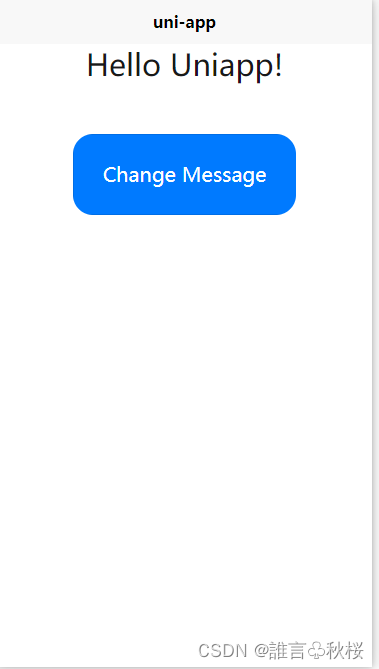
以上代码中,我们创建了一个有一个 `text` 元素和一个 `button` 元素的 `uniapp` 页面。点击按钮,可以切换页面上的文字内容。
在代码中,我们使用了 `data` 属性来存放数据,使用 `methods` 属性来存储方法
使用Uniapp开发的个人中心界面代码示例。
HTML5代码:
<template>
  <view class="home">
    <view class="header">
      <image class="avatar" src="../../static/avatar.png" mode="aspectFill" />
      <view class="userinfo">
        <view>{

   { username }}</view>
        <view>用户ID:{

   { userId }}</view>
      </view>
    </view>
    <view class="menu-list">
      <view class="menu-item" @click="goToOrders">
        <icon class="iconfont icon-dingdan"></icon>
        <view class="text">我的订单</view>
        <icon class="iconfont icon-arrow-right"></icon>
      </view>
      <view class="menu-item" @click="goToAddress">
        <icon class="iconfont icon-address"></icon>
        <view class="text">收货地址</view>
        <icon class="iconfont icon-arrow-right"></icon>
      </view>
      <view class="menu-item" @click="goToSettings">
        <icon class="iconfont icon-settings"></icon>
        <view class="text">个人设置</view>
        <icon class="iconfont icon-arrow-right"></icon>
      </view>
    </view>
  </view>
</template>
<script>
export default {
data() {
return {
username: 'John',
userId: '123456'
};
},
methods: {
goToOrders() {
// 跳转到订单页面
uni.navigateTo({ url: '/pages/orders/orders' });
},
goToAddress() {
// 跳转到收货地址页面
uni.navigateTo({ url: '/pages/address/address' });
},
goToSettings() {
// 跳转到个人设置页面
uni.navigateTo({ url: '/pages/settings/settings' });
}
}
};
</script>在这段代码中,我们通过一个header和一个menu-list来完成个人中心页面的展示。其中header包括用户头像、用户名和用户ID。menu-list中又包括了我的订单、收货地址和个人设置几个菜单。在各个菜单项中,使用@click来绑定点击事件,并在事件处理函数中通过uni的navigateTo函数完成页面跳转。这里需要注意的是,在实际的代码中,我们需要进行一些状态管理、权限控制等,保证系统的健壮性和安全性。
使用Uniapp开发的个人中心界面代码示例。
<template>
  <view class="home">
    <view class="header">
      <view class="userinfo">
        <view class="avatar-wrapper" @click="toLogin">
          <image class="avatar" :src="avatar" mode="aspectFill" />
          <view v-if="!isLogin">点击登录</view>
        </view>
        <view>
          <view v-if="isLogin">{

   { username }}</view>
          <view v-if="isLogin">用户ID:{

   { userId }}</view>
        </view>
      </view>
      <view class="logout" v-if="isLogin" @click="logout">注销</view>
    </view>
    <view class="menu-list">
      <view class="menu-item" @click="gotoHistory">
        <icon class="iconfont icon-history"></icon>
        <view class="text">浏览记录</view>
        <icon class="iconfont icon-arrow-right"></icon>
      </view>
      <view class="menu-item" @click="gotoFavorites">
        <icon class="iconfont icon-favorites"></icon>
        <view class="text">我的收藏</view>
        <icon class="iconfont icon-arrow-right"></icon>
      </view>
      <view class="menu-item" @click="gotoSettings">
        <icon class="iconfont icon-settings"></icon>
        <view class="text">个人设置</view>
        <icon class="iconfont icon-arrow-right"></icon>
      </view>
    </view>
  </view>
</template>
<script>
export default {
data() {
return {
isLogin: false,
username: '',
userId: '',
avatar: '../../static/avatar.png'
};
},
onShow() {
// 判断用户是否已登录
const token = uni.getStorageSync('token');
if (token) {
this.isLogin = true;
this.username = uni.getStorageSync('username');
this.userId = uni.getStorageSync('userId');
this.avatar = uni.getStorageSync('avatar');
} else {
this.isLogin = false;
this.username = '';
this.userId = '';
this.avatar = '../../static/avatar.png';
}
},
methods: {
toLogin() {
// 跳转到登录页面
if (!this.isLogin) {
uni.navigateTo({ url: '/pages/login/login' });
}
},
logout() {
// 清除登录状态
uni.removeStorageSync('token');
uni.removeStorageSync('userId');
uni.removeStorageSync('username');
uni.removeStorageSync('avatar');
this.isLogin = false;
this.username = '';
this.userId = '';
this.avatar = '../../static/avatar.png';
},
gotoHistory() {
// 跳转到浏览记录页面
if (this.isLogin) {
uni.navigateTo({ url: '/pages/history/history' });
} else {
uni.showToast({ icon: 'none', title: '请先登录' });
}
},
gotoFavorites() {
// 跳转到收藏页面
if (this.isLogin) {
uni.navigateTo({ url: '/pages/favorites/favorites' });
} else {
uni.showToast({ icon: 'none', title: '请先登录' });
}
},
gotoSettings() {
// 跳转到个人设置页面
if (this.isLogin) {
uni.navigateTo({ url: '/pages/settings/settings' });
} else {
uni.showToast({ icon: 'none', title: '请先登录' });
}
}
}
};
</script>在这段代码中,我们通过添加登录和注销功能实现了在页面中动态展示用户的头像、用户名和用户ID。通过toLogin函数可以让用户点击上传头像,并通过后台校验实现登录。注销当前用户的登录状态时,我们清除了相关的缓存信息。另外,我们还添加了浏览记录和收藏的两个菜单项,并在点击菜单项时通过gotoXXX函数跳转到对应的页面。在代码中,我们使用了uni-storage来缓存登录信息,但在实际场景中,我们需要进行状态管理、权限控制等,以保证系统的健壮性和安全性。
二、
使用uni-ui中自带的uni-icons来进行图标的添加,将uni-icons放在main.js中的全局组件中,在主页的vue文件中通过flex布局来实现图标的置底。
具体步骤如下:
1. 在main.js中引入并注册uni-icons:
// main.js
import uniIcons from '@/components/uni-icons/uni-icons.vue'

Vue.component('uni-icons' ,uniIcons);
```

2. 在主页的vue文件中,添加uni-icons,放在页面底部。

```
<template>
  <view>
    <!-- 页面主体内容 -->
    <view class="main-content">
      <text>这里是主体内容</text>
    </view>

    <!-- 底部图标 -->
    <view class="bottom-icons">
      <uni-icons type="messagefill"></uni-icons>
      <uni-icons type="homefill"></uni-icons>
      <uni-icons type="contactfill"></uni-icons>
    </view>
  </view>
</template>

<script>
export default {
  data() {
    return {};
  },
};
</script>

<style>
/* 底部图标布局 */
.bottom-icons {
  display: flex;  /* 使用flex布局 */
  align-items: center;  /* 垂直居中对齐 */
  justify-content: space-between;  /* 两侧对齐 */
  height: 100rpx;  /* 设置高度 */
  padding: 0 20rpx;  /* 设置左右内边距 */
}

/* uni-icons样式 */
uni-icons {
  font-size: 50rpx;  /* 设置字体大小 */
  color: #999;  /* 设置图标颜色 */
}
</style>
然后你就可以运行(编译)该uniapp项目,查看主页图标是否已被成功置底。
注意:需要下载资源包
三、
下面是一个简单的示例代码,展示如何使用uniapp框架来编写一个主页:
<template>
  <div class="home">
    <div class="header">
      <h1>Welcome to my app</h1>
    </div>
    <div class="content">
      <ul>
        <li v-for="item in items" :key="item.id">
          {

   { item.title }}
        </li>
      </ul>
    </div>
    <div class="footer">
      <p> 2021 My App</p >
    </div>
  </div>
</template>

<script>
export default {
  data() {
    return {
      items: [
        { id: 1, title: 'Item 1' },
        { id: 2, title: 'Item 2' },
        { id: 3, title: 'Item 3' }
      ]
    }
  }
}
</script>

<style scoped>
.home {
  width: 100%;
  height: 100vh;
  display: flex;
  flex-direction: column;
  justify-content: space-between;
}

.header {
  background-color: #333;
  color: #fff;
  text-align: center;
  padding: 10px;
}

.content {
  flex: 1;
}

.footer {
  background-color: #333;
  color: #fff;
  text-align: center;
  padding: 10px;
}
</style>
在这个示例中,我们使用了uniapp提供的模板语法来渲染页面内容。我们定义了一个数据项`items`,并使用v-for指令将它们展示为一个列表。我们还使用了uniapp提供的样式语法来定义页面的样式。
当你在uniapp中创建一个新项目时,uniapp将为你自动生成一个主页,你可以在此基础上进行修改和定制。祝你好运!
3个Uniapp语言编写的APP页面示例
1. 登录页面
<template>
  <view class="login">
    <form class="login-form" @submit.prevent="login">
      <input type="text" placeholder="请输入用户名" v-model="username">
      <input type="password" placeholder="请输入密码" v-model="password">
      <button type="submit">登录</button>
    </form>
  </view>
</template>

<script>
export default {
  data() {
    return {
      username: '',
      password: '',
    }
  },
  methods: {
    login() {
      // 处理登录逻辑
    },
  },
}
</script>

<style scoped>
.login {
  display: flex;
  justify-content: center;
  align-items: center;
  height: 100vh;
}

.login-form {
  display: flex;
  flex-direction: column;
  padding: 20px;
  background-color: #f5f5f5;
  border-radius: 10px;
}

input {
  margin-bottom: 10px;
  padding: 10px;
}

button {
  padding: 10px;
  background-color: #007aff;
  border: none;
  border-radius: 5px;
  color: #fff;
  cursor: pointer;
}
</style>
登录页面包含一个表单,用户输入用户名和密码后,点击登录按钮可以触发登录逻辑
2. 列表页面
<template>
  <view class="list">
    <ul>
      <li v-for="item in items" :key="item.id">
        <div>{

   { item.title }}</div>
        <div>{

   { item.content }}</div>
      </li>
    </ul>
  </view>
</template>

<script>
export default {
  data() {
    return {
      items: [
        {
          id: 1,
          title: '标题1',
          content: '内容1',
        },
        {
          id: 2,
          title: '标题2',
          content: '内容2',
        },
        {
          id: 3,
          title: '标题3',
          content: '内容3',
        },
      ],
    }
  },
}
</script>


<style scoped>
.list {
  padding: 20px;
}

li {
  margin-bottom: 20px;
  padding: 20px;
  background-color: #f2f2f2;
  border-radius: 10px;
}
</style>
列表页面展示了一个包含多个列表项的列表,每个列表项包含标题和内容。
3. 详情页面
<template>
  <view class="detail">
    <div>{

   { item.title }}</div>
    <div>{

   { item.content }}</div>
  </view>
</template>

<script>
export default {
  data() {
    return {
      item: {
        id: 1,
        title: '标题1',
        content: '内容1',
      },
    }
  },
}
</script>

<style scoped>
.detail {
  padding: 20px;
}
</style>
详情页面展示了一个具体的列表项详情,包含标题和内容。
四、AJAX是一种用于创建交互式Web应用程序的技术,它允许Web应用程序通过异步的JavaScript和XML(或JSON)与Web服务器进行通信,可以在不刷新页面的情况下更新部分页面内容。下面是一个使用AJAX获取数据并更新页面的基本示例
<!DOCTYPE html>
<html>
<head>
 <title>Ajax 示例</title>
 <script src="https://cdnjs.cloudflare.com/ajax/libs/jquery/3.5.1/jquery.min.js"></script>
</head>
<body>
 <h1>浏览器客户端通过Ajax获取服务器数据示例</h1>
 <div id="data"></div>
 <button onclick="fetchData()">获取数据</button>
 <script>
 function fetchData() {
  $.ajax({
    url: "data.php", // 服务器响应的地址
    type: "GET", // 请求方法
    dataType: "json", // 请求数据类型
    success: function(response) { // 成功回调函数
      $("#data").html(response.message); // 将服务器响应的数据更新到页面上
    },
    error: function(xhr) { // 请求失败回调函数
      alert("请求失败,请检查网络连接。");
    }
  });
 }
 </script>
</body>
</html>
上面例子中,通过点击按钮触发fetchData()函数,将异步的请求发送到服务器,根据服务器响应的数据类型返回一个对象,并将相应的数据更新到页面中。
案例:
<template>
  <div class="scenery">
    <div class="header">
      <h1>美丽的风景</h1>
      <p>探索世界各地的壮观景色</p >
    </div>
    <div class="gallery">
      <div class="card" v-for="(item, index) in sceneryList" :key="index">
        < img :src="item.image" alt="scenery">
        <div class="overlay">
          <h3>{

   { item.title }}</h3>
          <p>{

   { item.location }}</p >
          <router-link :to="item.link">查看详情</router-link>
        </div>
      </div>
    </div>
  </div>
</template>
<script>
export default {
  data() {
    return {
      sceneryList: [
        {
          title: "瑞士阿尔卑斯山",
          location: "瑞士",
          image: "https://cdn.pixabay.com/photo/2016/01/08/11/57/mountain-1123785_960_720.jpg",
          link: "/scenery/swiss-alps"
        },
        {
          title: "加拿大班芙国家公园",
          location: "加拿大",
          image: "https://cdn.pixabay.com/photo/2015/03/26/09/54/mountain-690104_960_720.jpg",
          link: "/scenery/banff-national-park"
        },
        {
          title: "挪威峡湾",
          location: "挪威",
          image: "https://cdn.pixabay.com/photo/2018/06/09/17/34/norway-3462553_960_720.jpg",
          link: "/scenery/norwegian-fjords"
        },
        {
          title: "新西兰弗朗茨·约瑟夫冰川",
          location: "新西兰",
          image: "https://cdn.pixabay.com/photo/2017/03/02/22/26/new-zealand-2110587_960_720.jpg",
          link: "/scenery/franz-josef-glacier"
        }
      ]
    };
  }
};
</script>

<style>
.scenery {
  padding: 20px;
}

.header {
  text-align: center;
  margin-bottom: 20px;
}

.gallery {
  display: flex;
  flex-wrap: wrap;
  justify-content: space-between;
}

.card {
  position: relative;
  width: calc(33.33% - 10px);
  margin-bottom: 20px;
}

.card img {
  width: 100%;
  height: 200px;
  object-fit: cover;
  border-radius: 5px;
}
.overlay {
  position: absolute;
  bottom: 0;
  left: 0;
  right: 0;
  padding: 10px;
  background-color: rgba(0, 0, 0, 0.5);
  color: #fff;
  border-bottom-left-radius: 5px;
  border-bottom-right-radius: 5px;
}

.overlay h3 {
  margin: 0;
  font-size: 20px;
  font-weight: bold;
}

.overlay p {
  margin: 5px 0;
  font-size: 14px;
}

.overlay a {
  display: block;
  margin-top: 10px;
  color: #fff;
  text-decoration: underline;
}
</style>
这是一个简单的主页面,展示了一个风景图库,以及每个风景的标题、位置、图像和详细信息的链接。它使用了Vue的基本语法和样式来实现,可以轻松地自定义样式和添加更多数据。
在项目中,AJAX通常用于实现异步加载页面内容、实时更新数据、请求服务器资源等功能。下面是一个简单的使用AJAX请求服务器API并更新页面内容的示例:
<!DOCTYPE html>
<html>
<head>
 <title>使用AJAX请求服务器API</title>
 <script src="https://cdnjs.cloudflare.com/ajax/libs/jquery/3.5.1/jquery.min.js"></script>
</head>
<body>
 <h1>使用AJAX请求服务器API并更新页面内容</h1>
 <div id="data"></div>
 <script>
 $(document).ready(function() {
  $.ajax({
   type: "GET",
   url: "https://api.example.com/data", // API地址
   dataType: "json",
   success: function(response) {
    $("#data").html(response.message); // 将服务器响应的数据更新到页面上
   },
   error: function(xhr) {
    alert("请求失败,请检查网络连接。");
   }
  });
 });
 </script>
</body>
</html>
在此示例中,我们使用了jQuery库发送一个GET请求来获取服务器API的数据。通过成功回调函数将数据显示在页面上。在实际的项目中,我们通常会将AJAX请求封装在一个函数中,以便在多个页面中重复使用,而不是在每个页面都编写相同的代码
要掌握AJAX,需学习以下内容:
1. HTML:HTML(Hypertext Markup Language)是编写Web页面的标准语言,可以创建网页结构和内容。学习HTML的基础语法和标签,以便在页面中使用AJAX。
2. CSS:CSS(Cascading Style Sheets)是Web页面的样式表语言,用于定义页面的外观和样式。学习如何使用CSS来装饰和定位页面元素。
3. JavaScript:JavaScript是一种面向对象的编程语言,用于创建交互式Web应用程序。学习JavaScript的基础语法和DOM操作,以便使用AJAX来更新页面内容。
4. jQuery:jQuery是一个流行的JavaScript库,可以简化编写AJAX的代码,提高开发效率。学习使用jQuery的Ajax函数来发送异步请求和处理响应。
5. 后端技术:AJAX通常与服务器端的脚本语言(如PHP、Python、Java)一起使用。学习如何在服务器上设置AJAX服务端接口,以便在客户端使用AJAX调用这些接口。
以下是一个简单的AJAX示例,使用jQuery的Ajax函数向服务器请求数据并将响应写入页面元素中:
<!DOCTYPE html>
<html>
<head>
 <title>AJAX示例</title>
 <script src="https://code.jquery.com/jquery-3.6.0.min.js"></script>
</head>
<body>
 <div id="result">数据将在此处显示</div>
 <button id="btn">点击获取数据</button>
 <script>
 $(function(){
  $("#btn").click(function(){
   $.ajax({
    url: "data.php",
    type: "POST",
    data: { name: "John", age: 30 },
    dataType: "html",
    success: function(response){
     $("#result").html(response);
    },
    error: function(xhr, status, error){
     alert("请求数据失败");
    }
   });
  });
 });
 </script>
</body>
</html>
上述示例使用了jQuery的$.ajax()方法来发送一个AJAX请求,并使用回调函数处理响应。在按钮被点击时,使用AJAX请求发送一个POST请求,带有一些数据,然后将响应数据写入页面元素中。
学习ajax需要掌握以下内容:
1. 基础知识:HTTP协议、XMLHttpRequest对象、AJAX的异步交互原理等;
2. 前端技术:HTML、CSS、JavaScript等基础的前端技术;
3. 后端技术:后端开发语言如PHP、Java等;
4. 数据库:数据库的基本增删改查操作;
5. 网络安全:对网络安全的基本了解,如XSS、CSRF、SQL注入等;
6. 框架及插件:jQuery等相关框架和插件的使用。
运用ajax可以实现网页无需刷新便可进行数据的异步传输和动态更新。通过ajax,可以实现许多互联网应用程序的实时更新,如智能推荐、即时聊天等功能。
ajax的语言代码包括了HTML、CSS、JavaScript以及后端开发语言。下面是ajax需要的知识点的基本代码表达形式:
1. 发送异步请求:


var xhr = new XMLHttpRequest();
xhr.open('GET', 'http://localhost/demo', true);
xhr.send();
2. 处理响应数据:

xhr.onreadystatechange = function() {
    if (xhr.readyState == 4 && xhr.status == 200) {
        var data = xhr.responseText;
        console.log(data);
    }
}
3. 发送POST请求:
var xhr = new XMLHttpRequest();
xhr.open('POST', 'http://localhost/demo', true);
xhr.setRequestHeader('Content-Type', 'application/x-www-form-urlencoded');
xhr.send('username=zhangsan&age=20');
4. 使用jQuery发送异步请求:


$.ajax({
    url: 'http://localhost/demo',
    type: 'GET',
    data: {username: 'zhangsan', age: 20},
    success: function(data){
        console.log(data)
    }
})
Ajax(Asynchronous JavaScript and XML)是一种Web开发技术,允许前端页面可以异步地与后端服务器进行数据通信,而不必刷新整个页面,极大地提高了用户体验。
Ajax的主要知识点包括:
1. XMLHttpRequest对象:通过该对象,前端可以向后端发送HTTP请求,并处理后端返回的HTTP响应。
示例代码:
var xhttp = new XMLHttpRequest();
xhttp.onreadystatechange = function() {
  if (this.readyState == 4 && this.status == 200) {
    // 处理后端返回的数据
  }
};
xhttp.open("GET", "ajax_info.txt", true);
xhttp.send();
2. HTTP请求方式:通过HTTP请求方式,前端可以向后端发送不同类型的请求,如GET、POST、PUT等。
示例代码:
var xhttp = new XMLHttpRequest();
xhttp.open("POST", "ajax_handler.php");
xhttp.setRequestHeader("Content-type", "application/x-www-form-urlencoded");
xhttp.send("username=admin&password=123456");
3. 数据格式:通过数据格式,前端可以与后端进行数据交换,如JSON格式。
var xhttp = new XMLHttpRequest();
xhttp.onreadystatechange = function() {
  if (this.readyState == 4 && this.status == 200) {
    var data = JSON.parse(this.responseText);
    // 处理后端返回的JSON数据
  }
};
xhttp.open("GET", "ajax_handler.php", true);
xhttp.send();
4. 回调函数:通过回调函数,前端可以异步地处理后端返回的数据。
示例代码:
function ajax(url, successCallback, failCallback) {
  var xhttp = new XMLHttpRequest();
  xhttp.onreadystatechange = function() {
    if (this.readyState == 4) {
      if (this.status == 200) {
        successCallback(this.responseText);
      } else {
        failCallback(this.status);
      }
    }
  };
  xhttp.open("GET", url, true);
  xhttp.send();
}

ajax("ajax_handler.php", function(data) {
  // 处理后端返回的数据
}, function(status) {
  // 处理请求失败的情况
});
这些代码主要代表了如下意思:
1. 创建一个XMLHttpRequest对象,并发送HTTP请求;
2. 使用不同的HTTP请求方式向后端发送请求;
3. 使用不同的数据格式与后端进行数据交换;
4. 通过回调函数处理后端返回的数据。
Ajax的知识点包括:
1. XMLHttpRequest对象的使用
2. Ajax请求和响应的处理
3. 服务器端数据的处理和返回
以下是一个基本的Ajax请求的代码示例:
// 创建XMLHttpRequest对象
var xhr = new XMLHttpRequest();

// 监听请求完成事件
xhr.onreadystatechange = function() {
  if (xhr.readyState === 4 && xhr.status === 200) {
    // 处理响应数据
    console.log(xhr.responseText);
  }
};

// 发送请求
xhr.open('GET', 'http://example.com/data.json');
xhr.send();
代码注释:
1. 创建一个XMLHttpRequest对象
2. 监听请求完成事件,并在请求完成时处理响应数据
3. 使用open方法打开一个GET请求,并发送请求
以下是一个完整的Ajax请求的代码示例:
// 创建XMLHttpRequest对象
var xhr = new XMLHttpRequest();

// 监听请求完成事件
xhr.onreadystatechange = function() {
  if (xhr.readyState === 4 && xhr.status === 200) {
    // 处理响应数据
    var responseData = JSON.parse(xhr.responseText);
    console.log(responseData);
  }
};

// 准备发送请求的数据
var requestData = {
  name: 'John',
  age: 30
};

// 将请求数据转换为URL编码格式
var requestDataString = '';
for (var key in requestData) {
  if (requestData.hasOwnProperty(key)) {
    requestDataString += key + '=' + encodeURIComponent(requestData[key]) + '&';
  }
}

// 发送请求
xhr.open('POST', 'http://example.com/api');
xhr.setRequestHeader('Content-Type', 'application/x-www-form-urlencoded');
xhr.send(requestDataString);
代码注释:
1. 创建一个XMLHttpRequest对象
2. 监听请求完成事件,并在请求完成时处理响应数据
3. 准备需要发送的数据
4. 将请求数据转换为URL编码格式,方便服务器端解析
5. 使用POST方法发送请求,并设置请求头的Content-Type为application/x-www-form-urlencoded,告诉服务器端数据格式
6. 发送请求数据并等待响应,响应数据会在监听到请求完成事件时处理
五、网络协议的代码实现主要涉及到发送请求和响应处理。
发送HTTP请求的代码实现可以参考以下示例:
var xhr = new XMLHttpRequest(); // 创建 XMLHttpRequest 对象
xhr.open('GET', 'http://www.example.com/', true); // 初始化 HTTP 请求
xhr.onreadystatechange = function() { // 获取响应结果
    if (xhr.readyState === 4 && xhr.status === 200) {
        console.log(xhr.responseText); // 打印响应结果
    }
};
xhr.send(); // 发送 HTTP 请求
上面的代码通过创建 XMLHttpRequest 对象,初始化 HTTP 请求,并在响应处理函数中获取响应结果并打印出来。
发送HTTPS请求的代码实现与HTTP请求基本相同,只需要将请求地址的HTTP改为HTTPS即可:
var xhr = new XMLHttpRequest(); // 创建 XMLHttpRequest 对象
xhr.open('GET', 'https://www.example.com/', true); // 初始化 HTTPS 请求
xhr.onreadystatechange = function() { // 获取响应结果
    if (xhr.readyState === 4 && xhr.status === 200) {
        console.log(xhr.responseText); // 打印响应结果
    }
};
xhr.send(); // 发送 HTTPS 请求
需要注意的是,HTTPS请求需要使用SSL/TLS协议进行加密通信,因此需要使用 HTTPS的请求地址。同时,对于HTTPS请求,还需要在服务器端配置SSL/TLS证书。
六、vue
Vue是一款流行的JavaScript前端框架,需要掌握以下技能和知识点:
1. HTML、CSS、JavaScript基础:Vue框架建立在这些技术的基础之上;
2. Vue基础语法:如模板语法、Vue实例、组件等;
3. Vue生命周期:掌握Vue的生命周期,能够在不同生命周期中进行相应操作;
4. Vue组件通信:Vue组件之间可以通过props、emit、$emit等方式进行通信;
5. Vue路由:Vue路由可以实现单页应用的路由跳转;
6. Vuex:Vuex是Vue框架提供的全局状态管理工具,可以让不同组件之间共享状态。
接下来是Vue的代码实现:
1. Vue基础语法
<!-- HTML模板 -->
<div id="app">
  <p>{

   { message }}</p>
</div>

// JavaScript代码
var app = new Vue({
  el: '#app',
  data: {
    message: 'Hello, Vue!'
  }
})
2. Vue组件
<!-- HTML模板 -->
<template>
  <div>
    <p>{

   { message }}</p>
  </div>
</template>

// JavaScript代码
Vue.component('my-component', {
  data: function () {
    return {
      message: 'Hello, Vue Component!'
    }
  },
  template: '<p>{

   { message }}</p>'
})
3. Vue路由
// JavaScript代码
const router = new VueRouter({
  routes: [
    { path: '/', component: Home },
    { path: '/about', component: About }
  ]
})

const app = new Vue({
  router
}).$mount('#app')
4. Vuex
const store = new Vuex.Store({
  state: {
    count: 0
  },
  mutations: {
    increment (state) {
      state.count++
    }
  }
})

const app = new Vue({
  store,
  methods: {
    increment () {
      this.$store.commit('increment')
    }
  }
})
在项目中,我们可以运用Vue实现单页应用,通过组件化开发提高代码复用性,通过路由进行页面跳转,通过Vuex实现全局状态共享,从而提高开发效率和代码质量。
技术要点:
- Vue2语言:Vue.js是一种渐进式框架,可以根据需要逐渐采用其不同的特性和库。Vue.js可以用于单页或多页应用程序的开发,是一种响应式、模块化、易于理解的框架。
- MySQL数据库:MySQL是一种流行的关系型数据库管理系统,可用于访问和管理数据。
- Ajax:Ajax是一种客户端与服务器之间异步通信的技术。使用Ajax,可以在不重新加载整个页面的情况下,通过发送异步请求和接收响应来更新页面内容。
- Node.js:Node.js是用于服务器端JavaScript应用程序的开源、跨平台的运行时环境。Node.js允许使用JavaScript在服务器端编写应用程序。可以使用Node.js与MySQL数据库进行交互,并创建API来处理HTTP请求。
学习资源:
- Vue.js官方文档:https://cn.vuejs.org/v2/guide/
- MySQL官方文档:https://dev.mysql.com/doc/
- Node.js官方文档:https://nodejs.org/en/docs/
- AJAX入门教程:https://www.runoob.com/ajax/ajax-tutorial.html
希望这些资源对您有所帮助,祝您成功完成这个项目!
提供一个大致的Vue.js项目结构,帮助您更好地理解如何使用Vue.js和Ajax完成此项目:
1. 首先,在项目根目录下创建以下文件:
```
- index.html // 主页
- register.html // 注册页面
- detail.html // 分页详情页面
- about.html // 关于页面
- contact.html // 联系页面
- login.html // 登录页面
- js/
- vue.min.js // Vue.js文件
- main.js // 用于注册Vue.js实例和Vue组件
- api.js // 包含向后端API发送请求的函数的模块
- css/
- main.css // 主要样式表
```
2. 在 `index.html` 和 `register.html` 中包含必要的HTML代码、链接和表单元素,使它们能够实现相应的功能。
3. 在 `main.js` 中创建Vue.js实例并注册Vue.js组件,使用Vue.js Router将不同的页面链接到不同的组件。
4. 创建 `api.js` 模块,包含向后端API发送请求的函数,例如获取风景数据的函数、发送登录和注册表单的函数等等。这些函数应该使用Ajax发送HTTP请求,并返回响应数据。
5. 在Vue.js组件中使用 `api.js` 中的函数,从后端API获取数据并将其显示在页面上。
在这个项目中,您需要了解Vue.js、Vue.js Router、Ajax、API设计和相应的后端技术(如PHP和MySQL)来完成。在代码中包含Vue.js文件并使用它,使用Vue.js Router设置页面链接和组件,发送登录和注册表单并将响应数据显示在页面上等技术细节将完成您的项目。
下面是一个基于Vue.js 2的世界风景网页项目示例,包括注册页面、登录页面、主页和5个详情页:
1. 文件结构:


├── App.vue
├── main.js
├── components/
│   ├── Header.vue
│   ├── Footer.vue
│   └── ...
├── pages/
│   ├── Home.vue
│   ├── Login.vue
│   ├── Register.vue
│   └── Detail1.vue
│   └── Detail2.vue
│   └── Detail3.vue
│   └── Detail4.vue
│   └── Detail5.vue
├── router/
   └── index.js
2. 在 `main.js` 中创建Vue.js实例、引入Vue Router、设置路由和页面组件。
import Vue from 'vue'
import App from './App.vue'
import router from './router'

Vue.config.productionTip = false

new Vue({
  router,
  render: h => h(App),
}).$mount('#app')
3. 在 `router/index.js` 中定义页面路由。
import Vue from 'vue'
import Router from 'vue-router'
import Home from '../pages/Home.vue'
import Login from '../pages/Login.vue'
import Register from '../pages/Register.vue'
import Detail1 from '../pages/Detail1.vue'
import Detail2 from '../pages/Detail2.vue'
import Detail3 from '../pages/Detail3.vue'
import Detail4 from '../pages/Detail4.vue'
import Detail5 from '../pages/Detail5.vue'

Vue.use(Router)
const routes = [
  {
    path: '/',
    name: 'home',
    component: Home
  },
  {
    path: '/login',
    name: 'login',
    component: Login
  },
  {
    path: '/register',
    name: 'register',
    component: Register
  },
{
    path: '/detail1',
    name: 'detail1',
    component: Detail1
  },
  {
    path: '/detail2',
    name: 'detail2',
    component: Detail2
  },
  {
    path: '/detail3',
    name: 'detail3',
    component: Detail3
  },
  {
    path: '/detail4',
    name: 'detail4',
    component: Detail4
  },
  {
    path: '/detail5',
    name: 'detail5',
    component: Detail5
  }
]
const router = new Router({
  mode: 'history', // 使用 history 模式,去除路径上的 # 号
  base: process.env.BASE_URL,
  routes
})

export default router
4. 在组件中引入其他组件(如 `Header.vue` 和 `Footer.vue`),在模板中使用router-link导航至不同的页面。
<template>
  <div>
    <Header />
    <router-view />
    <Footer />
  </div>
</template>

<script>
import Header from '../components/Header.vue'
import Footer from '../components/Footer.vue'

export default {
  name: 'App',
  components: {
    Header,
    Footer
  }
}
</script>
5. 在相应的页面组件中使用API获取数据并显示在页面上。
<template>
  <div class="detail">
    <h1>{

   { title }}</h1>
    < img :src="imageUrl" alt="">
    <p>{

   { description }}</p >
  </div>
</template>

<script>
import { getDetails } from '../api'

export default {
  name: 'Detail1',
  data () {
    return {
      title: '',
      imageUrl: '',
      description: ''
    }
  },
mounted () {
    getDetails('detail1')
      .then(data => {
        this.title = data.title
        this.imageUrl = data.imageUrl
        this.description = data.description
      })
      .catch(err => {
        console.error(err)
      })
  }
}
</script>
6. 在 `api.js` 中定义发送Ajax请求的函数。
const baseUrl = 'http://localhost:8080/api/'

export function getDetails (detailName) {
  return fetch(baseUrl + detailName)
    .then(res => res.json())
    .then(data => {
      return {
        title: data.title,
        imageUrl: data.imageUrl,
        description: data.description
      }
    })
    .catch(err => {
      console.error(err)
      return {}
    })
}

export function login (data) {
  return fetch(baseUrl + 'login', {
    method: 'POST',
    body: JSON.stringify(data)
  })
    .then(res => res.json())
    .then(data => {
      if (data.status === 'success') {
        // 登录成功,保存token
        localStorage.setItem('token', data.token)
        return true
      } else {
        throw new Error(data.message)
      }
    })
    .catch(err => {
      console.error(err)
      return false
    })
}

export function register (data) {
  return fetch(baseUrl + 'register', {
    method: 'POST',
    body: JSON.stringify(data)
  })
    .then(res => res.json())
    .then(data => {
      if (data.status === 'success') {
        return true
      } else {
        throw new Error(data.message)
      }
    })
    .catch(err => {
      console.error(err)
      return false
    })
}
7. 在登录和注册页面中使用API发送登录请求和注册请求。
<template>
  <div class="login">
    <h1>登录</h1>
    <form @submit.prevent="login">
      <input type="text" v-model="username" placeholder="用户名">
      <input type="password" v-model="password" placeholder="密码">
      <button type="submit">登录</button>
    </form>
  </div>
</template>

<script>
import { login } from '../api'

export default {
  name: 'Login',
  data () {
    return {
      username: '',
      password: ''
    }
  },
  methods: {
    login () {
      login({ username: this.username, password: this.password })
.then(success => {
          if (success) {
            this.$router.push('/')
          } else {
            alert('用户名或密码错误')
          }
        })
    }
  }
}
</script>
以上是一个完整的Vue.js项目示例,其中包括注册页面、登录页面、主页和5个详情页。您可以继续完善它,添加更多的功能和样式。
案例
1. 登录页面:
模板代码:
<template>
  <div class="login-container">
    <h1>登录</h1>
    <div class="login-form">
      <div class="form-group">
        <label>用户名:</label>
        <input type="text" v-model="username" />
      </div>
      <div class="form-group">
        <label>密码:</label>
        <input type="password" v-model="password" />
      </div>
      <div class="form-group">
        <button @click="login">登录</button>
      </div>
      <div class="form-group">
        <router-link to="/register">注册</router-link>
      </div>
    </div>
  </div>
</template>

<script>
export default {
  data() {
    return {
      username: '',
      password: '',
    };
  },
  methods: {
    async login() {
      try {
        const response = await this.$http.post('/api/login', {
          username: this.username,
          password: this.password,
});
        if (response.data.success) {
          this.$router.push('/home');
        }
      } catch (error) {
        console.error(error);
      }
    },
  },
};
</script>
2. 注册页面:
模板代码:
<template>
  <div class="register-container">
    <h1>注册</h1>
    <div class="register-form">
      <div class="form-group">
        <label>用户名:</label>
        <input type="text" v-model="username" />
      </div>
      <div class="form-group">
        <label>密码:</label>
        <input type="password" v-model="password" />
      </div>
      <div class="form-group">
        <button @click="register">注册</button>
      </div>
      <div class="form-group">
        <router-link to="/login">返回登录</router-link>
      </div>
    </div>
  </div>
</template>

<script>
export default {
  data() {
    return {
      username: '',
      password: '',
    };
  },
  methods: {
    async register() {
      try {
        const response = await this.$http.post('/api/register', {
          username: this.username,
          password: this.password,
        });
        if (response.data.success) {
          this.$router.push('/home');
        }
      } catch (error) {
        console.error(error);
      }
    },
  },
};
</script>
3. 主页:
模板代码:
<template>
  <div class="home-container">
    <h1>员工信息管理系统</h1>
    <nav>
      <router-link to="/employees">员工管理</router-link>
      <router-link to="/departments">部门管理</router-link>
      <router-link to="/jobs">职位管理</router-link>
      <router-link to="/salaries">薪资管理</router-link>
      <router-link to="/attendance">考勤管理</router-link>
      <router-link to="/performance">绩效管理</router-link>
    </nav>
    <router-view></router-view>
  </div>
</template>

<script>
export default {
};
</script>
以下是一个简单的公司人员管理系统的代码结构和思路。
1. 创建Vue项目和安装相关依赖:
使用Vue CLI创建一个新项目,并安装以下依赖:
npm install axios vue-router2. 创建组件和路由:
创建以下组件:Login.vue、Register.vue、Home.vue、Pagination.vue和Detail.vue。
在router/index.js文件中添加路由:
import Login from '@/components/Login'
import Register from '@/components/Register'
import Home from '@/components/Home'
import Pagination from '@/components/Pagination'
import Detail from '@/components/Detail'

export default new VueRouter({
  routes: [
    { path: '/', redirect: '/login' },
    { path: '/login', component: Login },
    { path: '/register', component: Register },
    { path: '/home', component: Home },
    { path: '/pagination/:page', component: Pagination, props: true },
    { path: '/detail/:id', component: Detail, props: true }
  ]
})
3. 创建API接口:
使用Node.js和Express框架创建API接口,在app.js文件中添加以下代码:
const express = require('express')
const bodyParser = require('body-parser')
const mysql = require('mysql')

const app = express()
const port = 3000

const db = mysql.createConnection({
  host: 'localhost',
  user: 'root',
  password: '',
  database: 'company'
})

app.use(bodyParser.json())

app.post('/login', (req, res) => {
  const { username, password } = req.body

  const sql = `SELECT * FROM users WHERE username = '${username}' AND password = '${password}'`

  db.query(sql, (err, result) => {
    if (err) throw err

    if (result.length > 0) {
      res.json({ success: true })
    } else {
      res.json({ success: false })
    }
  })
app.post('/register', (req, res) => {
  const { username, password, email, phone } = req.body

  const sql = `INSERT INTO users (username, password, email, phone) VALUES ('${username}', '${password}', '${email}', '${phone}')`

  db.query(sql, (err, result) => {
    if (err) throw err

    res.json({ success: true })
  })
})

app.get('/employees', (req, res) => {
  const { page, limit } = req.query
  const offset = (page - 1) * limit
const sql = `SELECT * FROM employees LIMIT ${limit} OFFSET ${offset}`

  db.query(sql, (err, result) => {
    if (err) throw err

    res.json(result)
  })
})

app.get('/employee/:id', (req, res) => {
  const { id } = req.params

  const sql = `SELECT * FROM employees WHERE id = ${id}`
db.query(sql, (err, result) => {
    if (err) throw err

    res.json(result[0])
  })
})

app.put('/employee/:id', (req, res) => {
  const { id } = req.params
  const { name, email, phone, department } = req.body

  const sql = `UPDATE employees SET name = '${name}', email = '${email}', phone = '${phone}', department = '${department}' WHERE id = ${id}`

  db.query(sql, (err, result) => {
    if (err) throw err

    res.json({ success: true })
  })
})

app.delete('/employee/:id', (req, res) => {
  const { id } = req.params

  const sql = `DELETE FROM employees WHERE id = ${id}`

  db.query(sql, (err, result) => {
    if (err) throw err

    res.json({ success: true })
  })
})
app.listen(port, () => {
  console.log(`Server listening on port ${port}`)
})
4. 创建前端页面:
在Login.vue和Register.vue组件中,创建登录和注册表单,并使用axios发送POST请求到后端API接口。
在Home.vue组件中,使用axios发送GET请求到后端API接口获取公司人员信息,并使用Pagination.vue组件实现分页功能。在Pagination.vue组件中,使用watch属性监听页码的变化,并发送GET请求获取对应页的公司人员信息。
在Detail.vue组件中,使用axios发送GET请求获取公司人员的详细信息,并使用axios发送PUT请求更新公司人员信息,或使用axios发送DELETE请求删除公司人员信息。
5. 创建数据库:
使用MySQL创建以下两个表:
users表:
CREATE TABLE users (
  id INT(11) NOT NULL AUTO_INCREMENT,
  username VARCHAR(255) NOT NULL,
  password VARCHAR(255) NOT NULL,
  email VARCHAR(255) NOT NULL,
  phone VARCHAR(255) NOT NULL,
  PRIMARY KEY (id)
);
employees表:
CREATE TABLE employees (
  id INT(11) NOT NULL AUTO_INCREMENT,
  name VARCHAR(255) NOT NULL,
  email VARCHAR(255) NOT NULL,
  phone VARCHAR(255) NOT NULL,
  department VARCHAR(255) NOT NULL,
  PRIMARY KEY (id)
);
6. 整合前后端:
使用npm run serve启动前端服务器,使用node app.js启动后端服务器,将前端和后端整合起来实现一个完整的公司人员管理系统。
以上就是一个简单的公司人员管理系统的代码结构和思路。希望能对您有所帮助!
七、
一个简单的后台管理系统,主要用到html,css,JavaScript,ajax和Vue2语言。
# 前置准备
您需要先安装Node.js和Vue-cli,以便启动Vue服务器。
# 文件结构
```
backend/
---- index.html
---- index.js
---- style.css
---- vue.js
```
<!DOCTYPE html>
<html>
  <head>
    <title>后台管理系统</title>
    <link rel="stylesheet" href="style.css">
  </head>
  <body>
    <div id="app">
      <!-- Vue 应用的根挂载点 -->
    </div>
    <script src="https://cdn.jsdelivr.net/npm/vue/dist/vue.js"></script>
    <script src="vue.js"></script>
    <script src="index.js"></script>
  </body>
</html>
# style.css
```
/* 样式表 */
```# vue.js
import Vue from 'vue'
import App from './App.vue'
new Vue({
el: '#app',
render: h => h(App)
})
# index.js
import Vue from 'vue'
import axios from 'axios'
import App from './App.vue'
Vue.prototype.$http = axios
new Vue({
el: '#app',
render: h => h(App)
})# App.vue
```
<template>
<div>
<form @submit.prevent="addUser">
<input type="text" v-model="username">
<button type="submit">添加新用户</button>
</form>
<table>
<thead>
<tr>
<th>ID</th>
<th>用户名</th>
<th>操作</th>
</tr>
</thead>
<tbody>
<tr v-for="user in users" :key="user.id">
<td>{
{ user.id }}</td>
<td>{
{ user.username }}</td>
<td>
<a @click="editUser(user)">编辑</a >
<a @click="deleteUser(user)">删除</a >
</td>
</tr>
</tbody>
</table>
</div>
</template>
<script>
export default {
data () {
return {
username: '',
users: []
}
},
mounted () {
this.fetchUsers()
},
methods: {
fetchUsers () {
this.$http.get('/api/users').then(response => {
this.users = response.data
})
},
addUser () {
this.$http.post('/api/users', { username: this.username }).then(response => {
this.username = ''
this.fetchUsers()
})
},
editUser (user) {
// 打开编辑用户的模态框
},
deleteUser (user) {
if (confirm('确定删除该用户吗?')) {
this.$http.delete('/api/users/' + user.id).then(response => {
this.fetchUsers()
})
}
}
}
}
</script>这个管理系统实现了用户的添加、编辑和删除操作。利用Vue,我们只需要对数据进行操作,视图的更新就会自动进行,从而实现前端与后端的数据交互。
八、
测试的方法有很多种,其中最常见的包括:
1. 接口测试:主要测试不同软件的接口是否正常工作,包括数据传输、数据格式、数据返回等方面。
2. 开发测试:主要由程序开发人员负责,用来测试程序中各个部分的正确性和稳定性。
3. 黑盒测试:以用户操作为中心,不涉及具体的编码和实现细节,主要关注软件输出是否与用户需求相符。
4. 白盒测试:主要通过代码分析和逻辑验证的方式,测试系统的正确性和稳定性。
5. 性能测试:主要测试软件的性能表现,包括响应时间、并发数、吞吐量等等。
6. 功能测试:主要验证软件中各个功能模块的正确性和完整性。
测试代码的具体格式,需要根据具体的测试类型和测试工具来进行编写。例如,接口测试可以使用Python编写,而性能测试可能需要使用特定的测试工具和语言。
在运用测试方法时,需要根据具体的需求和测试目标来选择不同的测试类型,并在合适的测试环境中进行测试。比如说,性能测试需要在高并发环境下进行,而开发测试需要在开发周期的不同阶段进行。测试环境的选择和搭建也是测试工作中非常重要的一部分。
黑盒测试指在不考虑内部结构和实现的情况下,主要对软件系统的功能、接口、输入以及输出等方面进行测试,以验证系统是否符合用户需求和设计要求。
白盒测试则是针对软件系统内部结构和代码进行测试,主要用于验证代码的正确性和缺陷,例如代码的分支覆盖率和路径覆盖率等。
功能测试主要测试软件系统的各项功能和业务流程,以验证系统是否满足用户需求。
性能测试主要测试软件系统的性能和可扩展性,包括响应时间、负载能力等指标。
测试开发是指使用代码编写自动化测试用例以及测试框架和工具,以提高测试效率和质量。测试开发工程师需要具备良好的编程技能、测试理论知识和数据库知识等。
接口测试是指对软件系统的接口进行测试,包括接口的请求和响应,参数的正确性和合法性。
以下是Python代码的简单示例,用以说明对于性能测试中的响应时间,代码的编写方式:
import time

start_time = time.time()                  # 记录测试开始时间
# 执行需要测试的代码
end_time = time.time()                    # 记录测试结束时间
response_time = end_time - start_time      # 计算相应时间
print("The response time is: %.2f" % response_time)   # 打印结果
以上是一个简单的Python代码示例,调用`time`模块中的函数,利用开始和结束时间计算相应时间,并将其打印输出。这个示例可以用于测量Web应用程序的响应时间,从而评估程序的性能。不同的测试用例和测试类型需要不同的代码编写方式,具体取决于测试目标和测试工具
九、jQuery的知识点包括
1. DOM操作
2. 事件处理
3. Ajax请求
4. 动画效果
5. 工具函数
以下是一个基本的jQuery代码示例:
// 等待文档加载完成
$(document).ready(function() {

  // 获取元素并改变样式
  $('#myElement').css('color', 'red');

  // 添加事件处理
  $('#myButton').click(function() {
    // 发送Ajax请求
    $.ajax({
      url: 'http://example.com/api',
      method: 'GET',
      success: function(responseData) {
        // 处理响应数据
        console.log(responseData);
      }
    });

    // 应用动画效果
    $('#myElement').slideUp();
  });

  // 使用工具函数
  var now = $.now();
  console.log(now);

});
代码注释:
1. 等待文档加载完成后执行代码
2. 使用选择器获取元素,并使用css函数改变样式
3. 添加按钮点击事件处理,并在事件处理函数中发送Ajax请求,处理响应数据,应用动画效果
4. 使用工具函数$.now()获取当前时间戳
十、ES6
ES6语言的知识点包括:
1. 块级作用域
2. 箭头函数 3. 模板字符串 4. 解构赋值
5. 默认参数 6. Rest参数 7. 扩展运算符
8. 类和继承 9. Promise对象 10. 模块化
以下是一个使用ES6语言的代码示例:
// 块级作用域
{
  let a = 1;
  const b = 2;
}
console.log(a); // 报错,a未定义
console.log(b); // 报错,b未定义

// 箭头函数
const sum = (a, b) => a + b;
console.log(sum(1, 2)); // 3

// 模板字符串
const name = 'John';
const message = `Hello, ${name}!`;
console.log(message); // Hello, John!

// 解构赋值
const person = {
  name: 'John',
  age: 30
};
const { name, age } = person;
console.log(name); // John
console.log(age); // 30

// 默认参数
const greet = (name = 'John') => `Hello, ${name}!`;
console.log(greet()); // Hello, John!

// Rest参数
const average = (...numbers) => {
  const sum = numbers.reduce((total, num) => total + num, 0);
  return sum / numbers.length;
};
console.log(average(1, 2, 3)); // 2

// 扩展运算符
const numbers = [1, 2, 3];
const result = [...numbers, 4, 5];
console.log(result); // [1, 2, 3, 4, 5]

// 类和继承
class Person {
  constructor(name, age) {
    this.name = name;
    this.age = age;
  }

  greeting() {
    console.log(`Hello, my name is ${this.name} and I'm ${this.age} years old.`);
  }
}

class Student extends Person {
  constructor(name, age, grade) {
    super(name, age);
    this.grade = grade;
  }
study() {
    console.log(`I'm studying in grade ${this.grade}.`);
  }
}

const john = new Student('John', 15, 9);
john.greeting(); // Hello, my name is John and I'm 15 years old.
john.study(); // I'm studying in grade 9.

// Promise对象
const fetchData = () => {
  return new Promise((resolve, reject) => {
    setTimeout(() => {
      resolve('Data fetched successfully.');
    }, 2000);
  });
};

fetchData()
  .then(data => console.log(data))
  .catch(error => console.log(error));

// 模块化
// math.js
export const sum = (a, b) => a + b;
export const difference = (a, b) => a - b;

// app.js
import { sum, difference } from './math.js';
console.log(sum(1, 2)); // 3
console.log(difference(2, 1)); // 1
代码注释:
1. 使用let和const声明的变量具有块级作用域
2. 使用箭头函数定义函数,简化函数定义方式
3. 使用模板字符串拼接字符串,比传统字符串拼接更方便
4. 使用解构赋值获取对象的属性,减少冗余代码
5. 定义函数时可设置默认参数,简化函数调用方式
6. 使用Rest参数接收任意数量的参数,方便处理可变数量的参数
7. 使用扩展运算符展开数组或对象,方便处理数组或对象
8. 使用class定义类和继承,简化面向对象编程
9. 使用Promise对象处理异步操作,避免回调函数的嵌套
10. 使用模块化管理代码,避免全局变量污染,提高代码可维护性
十一、 ECharts
1. ECharts知识点、内容、代码如何编写?
ECharts是一个强大的数据可视化工具,支持多种图表类型,包括折线图、柱状图、饼状图、地图等。关键知识点包括:
- ECharts安装与导入:可以通过npm安装,也可以直接引入CDN。导入时需要注意版本兼容性。
- 数据格式:ECharts支持多种数据格式,常见的有数组、对象、CSV文件、JSON文件等。
- 图表基本设置:包括图表大小、标题、图例、坐标系等,可以通过配置项进行设置。
- 图表类型与样式:不同类型的图表有不同的配置项,如折线图有平滑曲线、填充区域、标记点等。可以通过设置样式进行自定义。
下面是一个简单的柱状图代码示例:
// 引入echarts
var echarts = require('echarts');

// 初始化echarts实例
var myChart = echarts.init(document.getElementById('myChart'));

// 配置项
var option = {
    title: {
        text: '柱状图示例'
    },
    xAxis: {
        type: 'category',
        data: ['苹果', '华为', '小米', 'OPPO', 'VIVO']
    },
    yAxis: {
        type: 'value'
    },
    series: [{
        name: '销量',
        type: 'bar',
        data: [20, 30, 40, 10, 25]
    }]
};
// 渲染图表
myChart.setOption(option);
2. Webgl是什么?代码怎么写,知识点有哪些?
WebGL是一种基于OpenGL ES 2.0的3D图形库,可以在Web浏览器中渲染硬件加速的交互式3D应用程序和游戏。知识点包括:
- WebGL上下文的获取:可以通过canvas元素获取WebGLRenderingContext对象,设置宽高等属性。
- 着色器:WebGL通过着色器来对三维场景中的点、线、面进行着色和光照处理,包括顶点着色器和片元着色器。
- 缓冲区:由于WebGL直接与GPU交互,数据需要与GPU共享,需要使用VBO(顶点缓冲对象)和IBO(索引缓冲对象)进行数据传递。
- 坐标系:WebGL的坐标系是以视口中心为原点,向右为x正方向,向上为y正方向,向外为z正方向。
下面是一个简单的WebGL绘制三角形代码示例:
// 获取canvas和WebGL上下文
var canvas = document.getElementById('myCanvas');
var gl = canvas.getContext('webgl');

// 顶点着色器
var vsSource = `
    attribute vec4 aVertexPosition;
    void main() {
        gl_Position = aVertexPosition;
    }
`;

// 片元着色器
var fsSource = `
    void main() {
        gl_FragColor = vec4(1.0, 1.0, 1.0, 1.0);
    }
`;
// 初始化着色器
var vertexShader = gl.createShader(gl.VERTEX_SHADER);
gl.shaderSource(vertexShader, vsSource);
gl.compileShader(vertexShader);

var fragmentShader = gl.createShader(gl.FRAGMENT_SHADER);
gl.shaderSource(fragmentShader, fsSource);
gl.compileShader(fragmentShader);

var program = gl.createProgram();
gl.attachShader(program, vertexShader);
gl.attachShader(program, fragmentShader);
gl.linkProgram(program);

gl.useProgram(program);

// 设置顶点坐标数据
var vertices = [
    -0.5, -0.5, 0.0,
    0.5, -0.5, 0.0,
    0.0, 0.5, 0.0
];
// 将顶点坐标数据传入缓冲区
var positionBuffer = gl.createBuffer();
gl.bindBuffer(gl.ARRAY_BUFFER, positionBuffer);
gl.bufferData(gl.ARRAY_BUFFER, new Float32Array(vertices), gl.STATIC_DRAW);

// 获取顶点着色器中的变量位置
var positionAttributeLocation = gl.getAttribLocation(program, 'aVertexPosition');

// 启用顶点属性
gl.enableVertexAttribArray(positionAttributeLocation);

// 将缓冲区中的数据传入顶点着色器
gl.bindBuffer(gl.ARRAY_BUFFER, positionBuffer);
gl.vertexAttribPointer(positionAttributeLocation, 3, gl.FLOAT, false, 0, 0);

// 清空画布
gl.clearColor(0.0, 0.0, 0.0, 1.0);
gl.clear(gl.COLOR_BUFFER_BIT);

// 绘制三角形
gl.drawArrays(gl.TRIANGLES, 0, 3);
3. OpenGL是什么,知识点有哪些?
OpenGL是一种跨平台的3D图形库,可用于创建高质量的交互式3D应用程序和游戏。知识点包括:
- OpenGL上下文的创建:通常使用GLUT(OpenGL Utility Toolkit)库创建OpenGL窗口。
- 着色器:OpenGL通过着色器对三维场景中的点、线、面进行着色和光照处理,包括顶点着色器和片元着色器。
- 缓冲区:需要使用VBO(顶点缓冲对象)和IBO(索引缓冲对象)进行数据传递。
- 纹理:纹理是一种类似贴图的技术,可以使3D模型表面呈现更加逼真的质感。
下面是一个简单的OpenGL绘制三角形代码示例:
#include <GL/glut.h>

void display() {
    glClear(GL_COLOR_BUFFER_BIT);

    glBegin(GL_TRIANGLES);
    glColor3f(1.0f, 0.0f, 0.0f);
    glVertex3f(-0.5f, -0.5f, 0.0f);
    glColor3f(0.0f, 1.0f, 0.0f);
    glVertex3f(0.5f, -0.5f, 0.0f);
    glColor3f(0.0f, 0.0f, 1.0f);
    glVertex3f(0.0f, 0.5f, 0.0f);
    glEnd();

    glFlush();
}

int main(int argc, char **argv) {
    glutInit(&argc, argv);
    glutInitDisplayMode(GLUT_SINGLE | GLUT_RGB);
    glutInitWindowSize(400, 400);
    glutCreateWindow("OpenGL Triangle");

    glClearColor(0.0f, 0.0f, 0.0f, 1.0f);
    glMatrixMode(GL_PROJECTION);
    glLoadIdentity();
    gluOrtho2D(-1.0, 1.0, -1.0, 1.0);

    glutDisplayFunc(display);
    glutMainLoop();

    return 0;
}