| 简单描述 |
在未使用IOC管理对象时,想要使用某个对象需要通过new关键字创建对象实例,这种实现方式是耦合性较强的实现方式,使用了Spring提供的IOC机制管理,那么现在想获得bean该如何获取呢?
| bean实例化三种方式 |
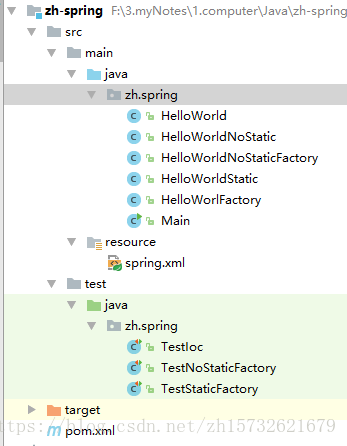
以下例子的结构如下:
1.使用类的无参数构造创建
创建一个HelloWorld类,使用默认的构造函数(无参构造)
public class HelloWorld {
    private String name;

    public void setName(String name) {
        this.name = name;
    }

    public void hello(){
        System.out.println("hello:" + name);
    }
}
在spring.xml中添加配置:
<?xml version="1.0" encoding="UTF-8"?>
<beans xmlns="http://www.springframework.org/schema/beans"
       xmlns:xsi="http://www.w3.org/2001/XMLSchema-instance"
       xsi:schemaLocation="http://www.springframework.org/schema/beans http://www.springframework.org/schema/beans/spring-beans.xsd">

    <!--使用无参构造创建对象-->
    <bean id="helloWorld" class="zh.spring.HelloWorld"></bean>
</beans>
创建测试类,进行测试:
public class TestIoc {
    @Test
    public void testHello(){
        //加载spring配置文件,创建对象
        ApplicationContext context = new ClassPathXmlApplicationContext("classpath:spring.xml");
        //得到配置创建的对象
        HelloWorld helloWorld =(HelloWorld) context.getBean("helloWorld");
        helloWorld.setName("huan");
        helloWorld.hello();
    }
}
2.使用静态工厂创建对象
IOC的底层原理即是通过反射+工厂实现的,同样创建一个类:
public class HelloWorldStatic {
    private String name;

    public void setName(String name) {
        this.name = name;
    }

    public void hello(){
        System.out.println("hello:" + name);
    }
}
创建静态工厂:
public class HelloWorlFactory {
    public static HelloWorldStatic getHelloBean(){
        return new HelloWorldStatic();
    }
}
在spring.xml中添加相应的配置:
<!--使用静态工厂创建对象-->
    <bean id="helloWorldStatic" class="zh.spring.HelloWorlFactory" factory-method="getHelloBean"></bean>
写相应的测试类:
public class TestStaticFactory {
    @Test
    public void testHelloStatic(){
        //加载spring配置文件,创建对象
        ApplicationContext context = new ClassPathXmlApplicationContext("classpath:spring.xml");
        //得到配置创建的对象
        HelloWorldStatic helloWorldStatic =(HelloWorldStatic) context.getBean("helloWorldStatic");
        helloWorldStatic.setName("huan");
        helloWorldStatic.hello();
    }
}
3.使用实例工厂创建
创建类:
public class HelloWorldNoStatic {
    private String name;

    public void setName(String name) {
        this.name = name;
    }

    public void hello(){
        System.out.println("hello:" + name);
    }
}
创建实例工厂:
public class HelloWorldNoStaticFactory {
    public HelloWorldNoStatic getHelloBean(){
        return new HelloWorldNoStatic();
    }
}
spring.xml中添加相应的配置:
<!--使用实例工厂创建对象-->
    <bean id="helloWorldNoStaticFactory" class="zh.spring.HelloWorldNoStaticFactory"></bean>
    <bean id="helloWorldNoStatic" factory-bean="helloWorldNoStaticFactory" factory-method="getHelloBean"></bean>
写一个测试类进行测试:
public class TestNoStaticFactory {
    @Test
    public void testHello(){
        //加载spring配置文件,创建对象
        ApplicationContext context = new ClassPathXmlApplicationContext("classpath:spring.xml");
        //得到配置创建的对象
        HelloWorldNoStatic helloWorldNoStatic =(HelloWorldNoStatic) context.getBean("helloWorldNoStatic");
        helloWorldNoStatic.setName("huan");
        helloWorldNoStatic.hello();
    }
}| 注解管理 |
1. 注解扫描
1.1 开启类注解扫描
<context:component-scan base-package=""></context:component-scan>1.2开启属性注解扫描
<context:annotation-config></context:annotation-config>1.3使用注解创建bean
Spring一共提供了四个注解,分别是:
- @component :通用注解
- @controller :web层使用注解
- @service :业务层使用注解
- @repository:持久层使用注解
使用方法,在类上加注解,属性value指定bean的名称,value可以省略直接写成@Controller(“helloWorld”):
@Controller(value = "helloworld")
public class HelloWorld {
    private String name;

    public void setName(String name) {
        this.name = name;
    }

    public void hello(){
        System.out.println("hello:" + name);
    }
}
注解注入属性两种方法:
①使用@Autowired,这种方式是根据类名找到类对象
@Autowired
private HelloWorld helloWorld;
②使用@Resource(name=”XXX”):name值为注解创建对象value值,可以指定注入哪个对象
@Resource(name = "helloworld")
private HelloWorld helloWorld;
1.4 配置文件+注解混合使用
在spring配置文件中加配置,id为注入对象时对应的bean名称
<context:component-scan base-package="zh.spring"/>
<bean id="helloWorld" class="zh.spring.HelloWorld"/>
注入对象时,应使用以上介绍的两种注解注入属性的两种方式。在目前的项目中使用注解还是相对较多的,比较简单。