一、自定义页面请求响应
Web 组件支持在应用拦截到页面请求后自定义响应请求能力。开发者通过onInterceptRequest()接口来实现自定义资源请求响应 。自定义请求能力可以用于开发者自定义 Web 页面响应、自定义文件资源响应等场景。
Web 网页上发起资源加载请求,应用层收到资源请求消息。应用层构造本地资源响应消息发送给 Web 内核。Web 内核解析应用层响应信息,根据此响应信息进行页面资源加载。
在下面的示例中,Web 组件通过拦截页面请求“https://www.intercept.com/test.html”,在应用侧代码构建响应资源,实现自定义页面响应场景。
● 前端页面 example.html 代码。
<!DOCTYPE html><html><head><meta charset="utf-8"><title>example</title></head><body><!-- 页面资源请求 --><a href="https://www.intercept.com/test.html">intercept test!</a></body></html>
● 应用侧代码。
// xxx.etsimport web_webview from '@ohos.web.webview';@Entry@Componentstruct WebComponent {controller: web_webview.WebviewController = new web_webview.WebviewController()responseResource: WebResourceResponse = new WebResourceResponse()// 开发者自定义响应数据@State webData: string = '<!DOCTYPE html>\n' +'<html>\n'+'<head>\n'+'<title>intercept test</title>\n'+'</head>\n'+'<body>\n'+'<h1>intercept ok</h1>\n'+'</body>\n'+'</html>'build() {Column() {Web({ src: $rawfile('example.html'), controller: this.controller }).onInterceptRequest((event) => {console.info('url:' + event.request.getRequestUrl());// 拦截页面请求if (event.request.getRequestUrl() !== 'https://www.intercept.com/test.html') {return null;}// 构造响应数据this.responseResource.setResponseData(this.webData);this.responseResource.setResponseEncoding('utf-8');this.responseResource.setResponseMimeType('text/html');this.responseResource.setResponseCode(200);this.responseResource.setReasonMessage('OK');return this.responseResource;})}}}
二、 使用 Devtools 工具调试前端页面
Web 组件支持使用 DevTools 工具调试前端页面。DevTools 是一个 Web 前端开发调试工具,提供了调试移动设备前端页面的能力。开发者通过setWebDebuggingAccess()接口开启 Web 组件前端页面调试能力,利用 DevTools 工具可以在 PC 端调试移动设备上的前端网页。
使用 DevTools 工具,可以执行以下步骤:
1. 在应用代码中开启 Web 调试开关,具体如下:
// xxx.etsimport web_webview from '@ohos.web.webview';@Entry@Componentstruct WebComponent {controller: web_webview.WebviewController = new web_webview.WebviewController();aboutToAppear() {// 配置web开启调试模式web_webview.WebviewController.setWebDebuggingAccess(true);}build() {Column() {Web({ src: 'www.example.com', controller: this.controller })}}}
2. 将设备连接上电脑,在电脑端配置端口映射,配置方法如下:
// 添加映射hdc fport tcp:9222 tcp:9222// 查看映射hdc fport ls
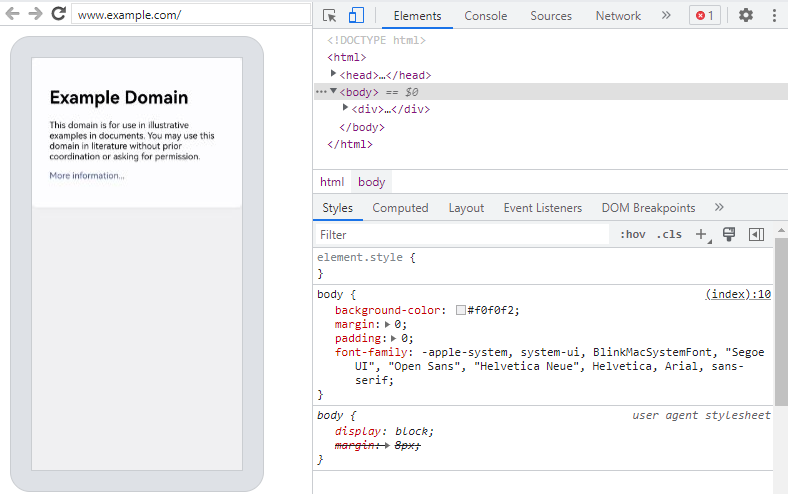
3. 在 PC 端 chrome 浏览器地址栏中输入 chrome://inspect/#devices,页面识别到设备后,就可以开始页面调试。调试效果如下:图 1 页面调试效果图