文章目录
前言
实现FPS枪支不同武器效果,比如手枪,喷子,狙击枪,机枪,其实我最开始的想法是先做一个基类脚本,写一些公共属性和方法,然后再起不同的武器脚本这个基础基类,实现不同的武器效果。
这样的实现思路其实是没什么问题的,直到我看到这个视频:https://www.youtube.com/watch?v=bqNW08Tac0Y,作者只用一个脚本就实现了不同的武器效果更加方便,下面我就参考一下作者的思路实现一下大致的效果。
顺带说一下,在第一人称射击(FPS)游戏中实现子弹射击效果,可以通过不同的技术和方法来完成。以下是几种常见的实现方式:
-
射线投射(Raycasting):
这是最常用的方法之一。射线投射意味着从枪口发出一个虚拟的射线,并检测这个射线与游戏世界中的对象之间的交互。如果射线与某个对象相交,那么就可以认为子弹击中了该对象。实现步骤:
- 从玩家的摄像机或枪口位置发出一条射线。
- 使用物理引擎提供的射线投射功能来检测射线路径上的碰撞。
- 如果射线与对象相交,根据交互结果执行相应的逻辑,比如扣除生命值、播放受击动画等。
- 在射击点显示击中效果,如粒子效果或贴图。
-
抛射物模拟(Projectile Simulation):
对于需要模拟子弹飞行轨迹的情况,比如远距离狙击、火箭筒或者抛射武器,可以使用抛射物模拟。实现步骤:
- 创建一个子弹实体,并赋予它初始速度和方向。
- 通过物理引擎模拟子弹的飞行轨迹,考虑重力、空气阻力等因素。
- 检测子弹与其他对象的碰撞,并在碰撞发生时处理相应的逻辑。
- 在子弹飞行过程中可以添加轨迹效果,如拖尾。
每种方法都有其适用场景和优缺点。射线投射适合快速射击和近距离交火,抛射物模拟适合远距离和弧线射击。在实际开发中,这些方法可以组合使用,以达到最佳的效果。
模型素材
不会配置模型可以看我之前的文章,进行下载和配置:
unity中导入下载的3D模型及albedo/baseColor、normal 、AO/Occlus、metallic、roughness贴图纹理设置
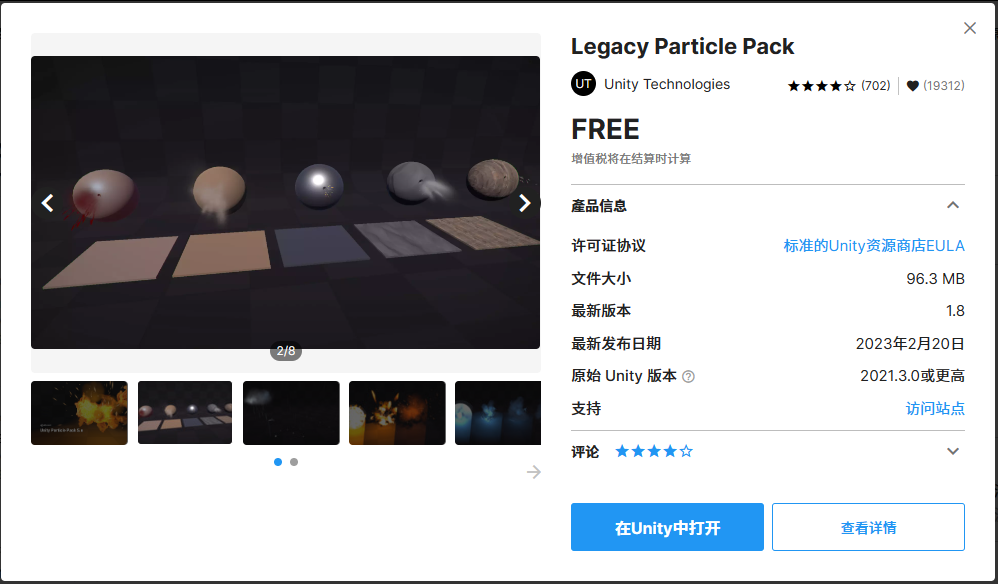
文章用到的粒子火光特效
https://assetstore.unity.com/packages/vfx/particles/legacy-particle-pack-73777
射击效果
[Tooltip("是否正在射击")]
bool shooting;
[Tooltip("是否允许按住射击")]
public bool allowButtonHold;
[Tooltip("是否可以射击")]
bool readyToShoot;
[Tooltip("是否在换弹")]
bool reloading;
[Tooltip("弹夹容量")]
public int magazineSize;
[Tooltip("当前弹夹容量")]
public int bulletsLeft;
[Tooltip("储备弹药容量")]
public int reservedAmmoCapacity = 300;
[Tooltip("当前剩余射击发射的子弹数")]
public int bulletsShot;
[Tooltip("枪口火焰特效")]
public ParticleSystem muzzleFlash;
[Tooltip("子弹击中效果")]
public GameObject bulletHoleGraphic;
[Tooltip("射击间隔时间")]
public float timeBetweenShooting;
[Tooltip("连发射击之间的间隔时间")]
public float timeBetweenShots;
[Tooltip("射击时的散布度")]
public float spread;
[Tooltip("射击的最大距离")]
public float range;
[Tooltip("每次射击发射的子弹数")]
public int bulletsPerTap;
[Tooltip("是否允许按住射击")]
public bool allowButtonHold;
[Tooltip("每次射击造成的伤害")]
public int damage;  // 伤害

public Camera fpsCam;

private void Awake()
{


    bulletsLeft = magazineSize;
    readyToShoot = true;
}

private void Update()
{


    MyInput();
}

private void MyInput()
{


    if (allowButtonHold)
        shooting = Input.GetKey(KeyCode.Mouse0);
    else
        shooting = Input.GetKeyDown(KeyCode.Mouse0);

    // 射击
    if (readyToShoot && shooting && !reloading && bulletsLeft > 0)
    {


        bulletsShot = bulletsPerTap;
        Shoot();
    }
}

private void Shoot()
{


    readyToShoot = false;

    // 散布
    float x = Random.Range(-spread, spread);
    float y = Random.Range(-spread, spread);

    // 计算带有散布的射击方向
    Vector3 direction = fpsCam.transform.forward + fpsCam.transform.TransformDirection(new Vector3(x, y, 0));

    // 射线检测
    if (Physics.Raycast(fpsCam.transform.position, direction, out RaycastHit rayHit, range))
    {


    	//场景显示红线,方便调试查看
    	Debug.DrawLine(fpsCam.transform.position, rayHit.point, Color.red, 10f);
        Debug.Log(rayHit.collider.name);
        muzzleFlash.Play();//枪口火焰/火光
        //TODO:相机震动
        if (rayHit.collider.CompareTag("Enemy"))
        {


            Debug.Log("击中敌人");
            Rigidbody rb = rayHit.transform.GetComponent<Rigidbody>();
            if (rb != null)
            {


                rb.constraints = RigidbodyConstraints.None; // 解除刚体约束
                rb.AddForce(transform.parent.transform.forward * 500); // 给敌人施加一个力
            }
            // 击中敌人特效
            //使用 LookRotation() 方法来让子弹孔特效朝向被击中表面的法线方向。其中 rayHit.normal 是表示被击中表面法线方向的向量
            var res1 = Instantiate(bulletHoleGraphic, rayHit.point, Quaternion.LookRotation(rayHit.normal));
            Destroy(res1, 0.5f);

			//TODO:扣血
        }
    }

    bulletsLeft--;
    bulletsShot--;

    Invoke("ResetShot", timeBetweenShooting);

    if (bulletsShot > 0 && bulletsLeft > 0)
        Invoke("Shoot", timeBetweenShots);
}

private void ResetShot()
{


    readyToShoot = true;
}
换弹
private void MyInput()
{


   //。。。

    if (Input.GetKeyDown(KeyCode.R) && bulletsLeft < magazineSize && !reloading)
        Reload();
}

//换弹
private void Reload()
{


    reloading = true;
    Invoke("ReloadFinished", reloadTime);
}


private void ReloadFinished()
{


    if (reservedAmmoCapacity <= 0) return;

    //计算需要填装的子弹数=1个弹匣子弹数-当前弹匣子弹数
    int bullectToLoad = magazineSize - bulletsLeft;

    //计算备弹需扣除子弹数
    int bullectToReduce = (reservedAmmoCapacity >= bullectToLoad) ? bullectToLoad : reservedAmmoCapacity;

    reservedAmmoCapacity -= bullectToReduce;//减少备弹数

    bulletsLeft += bullectToReduce;//当前子弹数增加
    bulletsLeft = magazineSize;
    reloading = false;
}
瞄准
private void MyInput()
{


    //。。。

    //瞄准
    DetermineAim();
}

void DetermineAim()
{


    Vector3 target = normalLocalPosition; // 默认目标位置为正常瞄准时的本地位置
    if (Input.GetMouseButton(1)){


    	//spread = 0;//瞄准情况下我们通常可能会让射击散步值为0,这个看自己的情况而定
    	target = aimingLocalPosition; // 如果按下鼠标右键,目标位置为瞄准时的本地位置
    }
    Vector3 desiredPosition = Vector3.Lerp(transform.localPosition, target, Time.deltaTime * aimSmoothing); // 使用插值平滑过渡到目标位置

    transform.localPosition = desiredPosition; // 更新枪支的本地位置
}
效果
开枪抖动效果
如果你的枪模型没有开枪动画的话,这个方法就很方便了
private void Shoot()
{


    transform.localPosition -= Vector3.forward * 0.1f; // 后坐力使枪支向后移动

	//。。。
}
设置显示文本
private void Update()
{


    //。。。

    SetUI();
}

// 设置文本
private void SetUI()
{


    text.SetText(bulletsLeft + " / " + reservedAmmoCapacity);
}
生成实体子弹
[Header("子弹")]
public float bulletForce = 100f;//子弹的力
public GameObject bulletPrefab;//子弹预制体
public GameObject BulletShootPoint;//子弹生成点

//实例化一个子弹
GameObject bullet = Instantiate(bulletPrefab, BulletShootPoint.transform.position, BulletShootPoint.transform.rotation);
//给子弹拖尾一个向前的速度力(加上射线打出去的偏移值)
bullet.GetComponent<Rigidbody>().velocity = (BulletShootPoint.transform.forward + direction) * bulletForce;
最终代码
public class GunSystem : MonoBehaviour
{


    public Camera fpsCam;

    [Header("枪械状态")]
    [Tooltip("是否正在射击")]
    bool shooting;
    [Tooltip("是否可以射击")]
    bool readyToShoot;
    [Tooltip("是否在换弹")]
    bool reloading;

    [Header("弹夹")]
    [Tooltip("弹夹容量")]
    public int magazineSize;
    [Tooltip("当前弹夹容量")]
    public int bulletsLeft;
    [Tooltip("储备弹药容量")]
    public int reservedAmmoCapacity = 300;
    [Tooltip("当前剩余射击发射的子弹数")]
    public int bulletsShot;

    [Header("射击")]
    [Tooltip("射击间隔时间")]
    public float timeBetweenShooting;
    [Tooltip("射击时的散布度")]
    public float spread;
    [Tooltip("射击的最大距离")]
    public float range;
    [Tooltip("每次射击发射的子弹数")]
    public int bulletsPerTap;
    [Tooltip("是否允许按住射击")]
    public bool allowButtonHold;
    [Tooltip("每次射击造成的伤害")]
    public int damage;  // 伤害
    [Tooltip("装填弹药的时间")]
    public float reloadTime;
    [Tooltip("连发射击之间的间隔时间")]
    public float timeBetweenShots;

    [Header("瞄准")]
    [Tooltip("正常情况的本地位置")]
    public Vector3 normalLocalPosition;
    [Tooltip("瞄准时的本地位置")]
    public Vector3 aimingLocalPosition;
    [Tooltip("瞄准过程的平滑度")]
    public float aimSmoothing = 10;

    [Header("效果")]
    [Tooltip("枪口火焰特效")]
    public ParticleSystem muzzleFlash;
    [Tooltip("子弹击中效果")]
    public GameObject bulletHoleGraphic;

    [Header("UI")]
    public TextMeshProUGUI text;  // 弹药显示文本

    private void Awake()
    {


        bulletsLeft = magazineSize;
        readyToShoot = true;
    }

    private void Update()
    {


        MyInput();

        SetUI();
    }

    // 设置文本
    private void SetUI()
    {


        text.SetText(bulletsLeft + " / " + reservedAmmoCapacity);
    }

    private void MyInput()
    {


        if (allowButtonHold)
            shooting = Input.GetKey(KeyCode.Mouse0);
        else
            shooting = Input.GetKeyDown(KeyCode.Mouse0);
        // 射击
        if (readyToShoot && shooting && !reloading && bulletsLeft > 0)
        {


            bulletsShot = bulletsPerTap;
            Shoot();
        }

        //换弹
        if (Input.GetKeyDown(KeyCode.R) && bulletsLeft < magazineSize && !reloading)
            Reload();

        //瞄准
        DetermineAim();
    }

    private void Shoot()
    {


        readyToShoot = false;

        transform.localPosition -= Vector3.forward * 0.1f; // 后坐力使枪支向后移动

        // 散布
        float x = Random.Range(-spread, spread);
        float y = Random.Range(-spread, spread);

        // 计算带有散布的射击方向
        Vector3 direction = fpsCam.transform.forward + fpsCam.transform.TransformDirection(new Vector3(x, y, 0));

        // 射线检测
        if (Physics.Raycast(fpsCam.transform.position, direction, out RaycastHit rayHit, range))
        {


            Debug.Log(rayHit.collider.name);
            muzzleFlash.Play();//枪口火焰/火光
                               //相机震动
            if (rayHit.collider.CompareTag("Enemy"))
            {


            	//场景显示红线,方便调试查看
    			Debug.DrawLine(fpsCam.transform.position, rayHit.point, Color.red, 10f);
                Debug.Log("击中敌人");
                // Rigidbody rb = rayHit.transform.GetComponent<Rigidbody>();
                // if (rb != null)
                // {


                //     rb.constraints = RigidbodyConstraints.None; // 解除刚体约束
                //     rb.AddForce(transform.parent.transform.forward * 500); // 给敌人施加一个力
                // }
                // 击中敌人特效
                //使用 LookRotation() 方法来让子弹孔特效朝向被击中表面的法线方向。其中 rayHit.normal 是表示被击中表面法线方向的向量
                var res = Instantiate(bulletHoleGraphic, rayHit.point, Quaternion.LookRotation(rayHit.normal));
                res.transform.parent = rayHit.transform;//设置父类


                //TODO:扣血
            }
        }

		//实例化一个子弹
        GameObject bullet = Instantiate(bulletPrefab, BulletShootPoint.transform.position, BulletShootPoint.transform.rotation);
        //给子弹拖尾一个向前的速度力(加上射线打出去的偏移值)
        bullet.GetComponent<Rigidbody>().velocity = (BulletShootPoint.transform.forward + direction) * bulletForce;

        bulletsLeft--;
        bulletsShot--;

        Invoke("ResetShot", timeBetweenShooting);

        if (bulletsShot > 0 && bulletsLeft > 0)
            Invoke("Shoot", timeBetweenShots);
    }

    void DetermineAim()
    {


        Vector3 target = normalLocalPosition; // 默认目标位置为正常瞄准时的本地位置
        if (Input.GetMouseButton(1)) target = aimingLocalPosition; // 如果按下鼠标右键,目标位置为瞄准时的本地位置
        Vector3 desiredPosition = Vector3.Lerp(transform.localPosition, target, Time.deltaTime * aimSmoothing); // 使用插值平滑过渡到目标位置

        transform.localPosition = desiredPosition; // 更新枪支的本地位置
    }

    private void ResetShot()
    {


        readyToShoot = true;
    }

    //换弹
    private void Reload()
    {


        reloading = true;
        Invoke("ReloadFinished", reloadTime);
    }


    private void ReloadFinished()
    {


        if (reservedAmmoCapacity <= 0) return;

        //计算需要填装的子弹数=1个弹匣子弹数-当前弹匣子弹数
        int bullectToLoad = magazineSize - bulletsLeft;

        //计算备弹需扣除子弹数
        int bullectToReduce = (reservedAmmoCapacity >= bullectToLoad) ? bullectToLoad : reservedAmmoCapacity;

        reservedAmmoCapacity -= bullectToReduce;//减少备弹数

        bulletsLeft += bullectToReduce;//当前子弹数增加
        bulletsLeft = magazineSize;
        reloading = false;
    }
}
不同武器射击效果
注意:这里为了方便,我就用一把枪做演示了
1. 手枪
参数配置
效果

2. 机枪
参数
效果
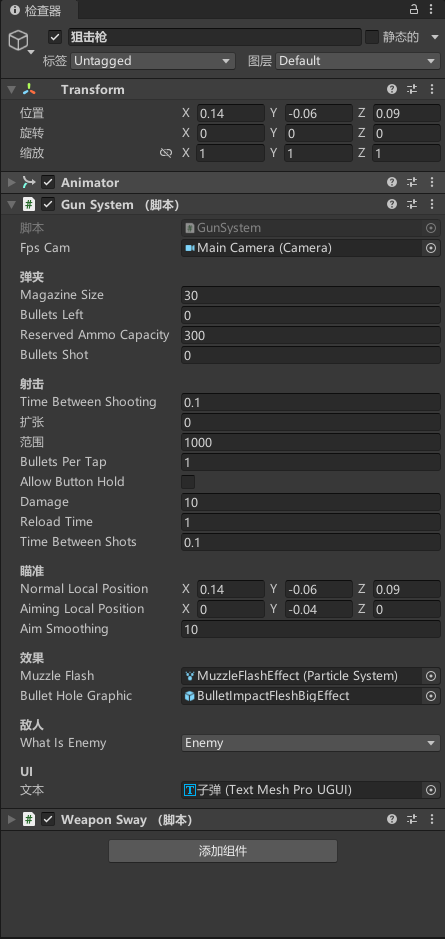
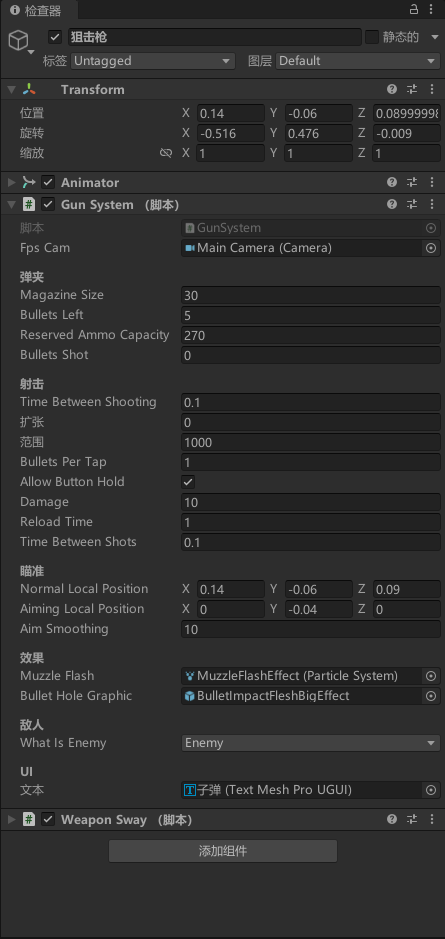
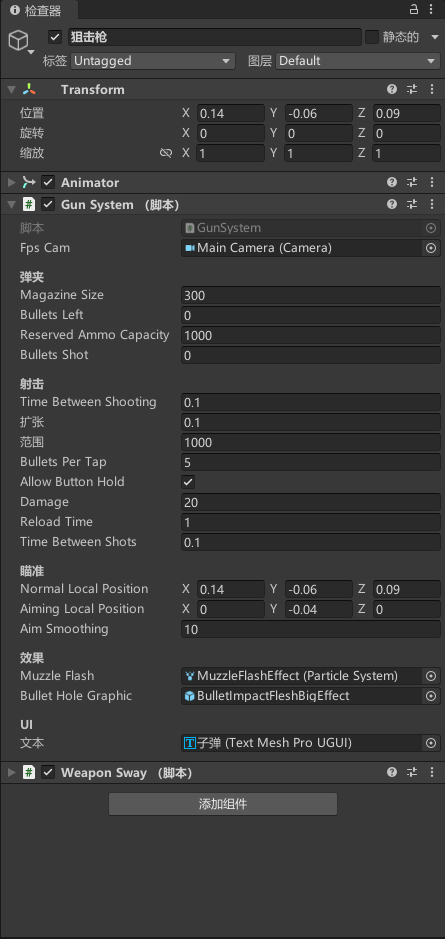
3. 狙击枪
参数,狙击枪其实和手枪参数差不多,可以就需要修改射击间隔时间、换弹时间和伤害
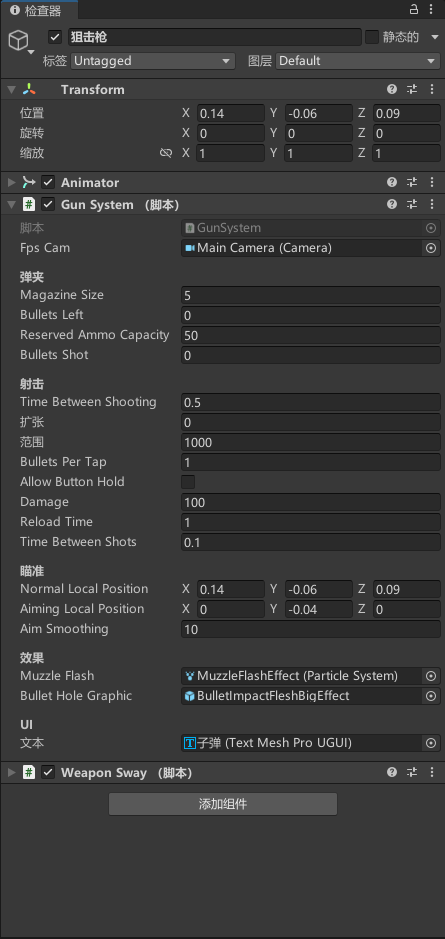
效果
4. 霰弹枪
参数

效果
5. 加特林
参数
效果
其他
可以看到其实还有很多功能没有实现,比如后座力或者放大镜等等效果,这篇文章说的已经够多了,后面我再单独做其他内容的探究吧!
感谢
【视频】https://www.youtube.com/watch?v=bqNW08Tac0Y
完结
赠人玫瑰,手有余香!如果文章内容对你有所帮助,请不要吝啬你的点赞评论和关注,以便我第一时间收到反馈,你的每一次支持都是我不断创作的最大动力。当然如果你发现了文章中存在错误或者有更好的解决方法,也欢迎评论私信告诉我哦!
好了,我是向宇,https://xiangyu.blog.csdn.net
一位在小公司默默奋斗的开发者,出于兴趣爱好,于是最近才开始自习unity。如果你遇到任何问题,也欢迎你评论私信找我, 虽然有些问题我可能也不一定会,但是我会查阅各方资料,争取给出最好的建议,希望可以帮助更多想学编程的人,共勉~