前言:
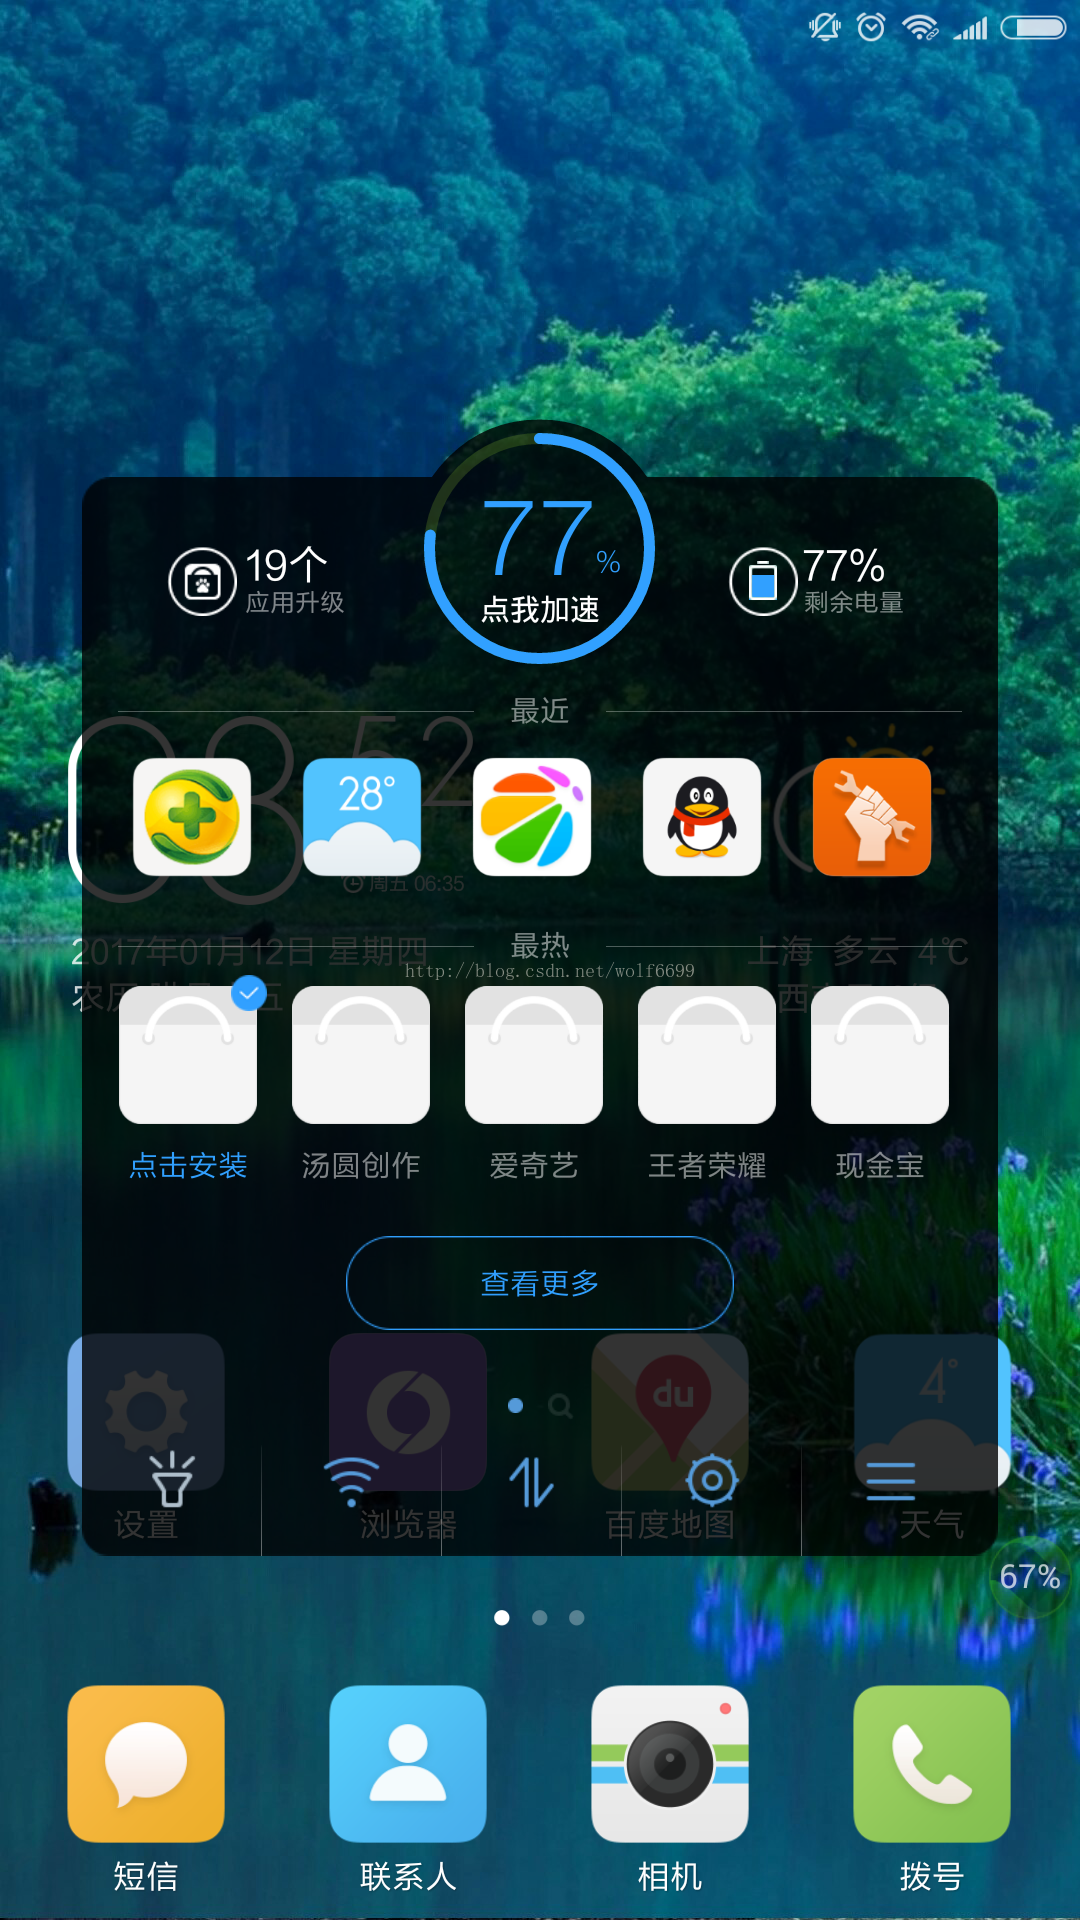
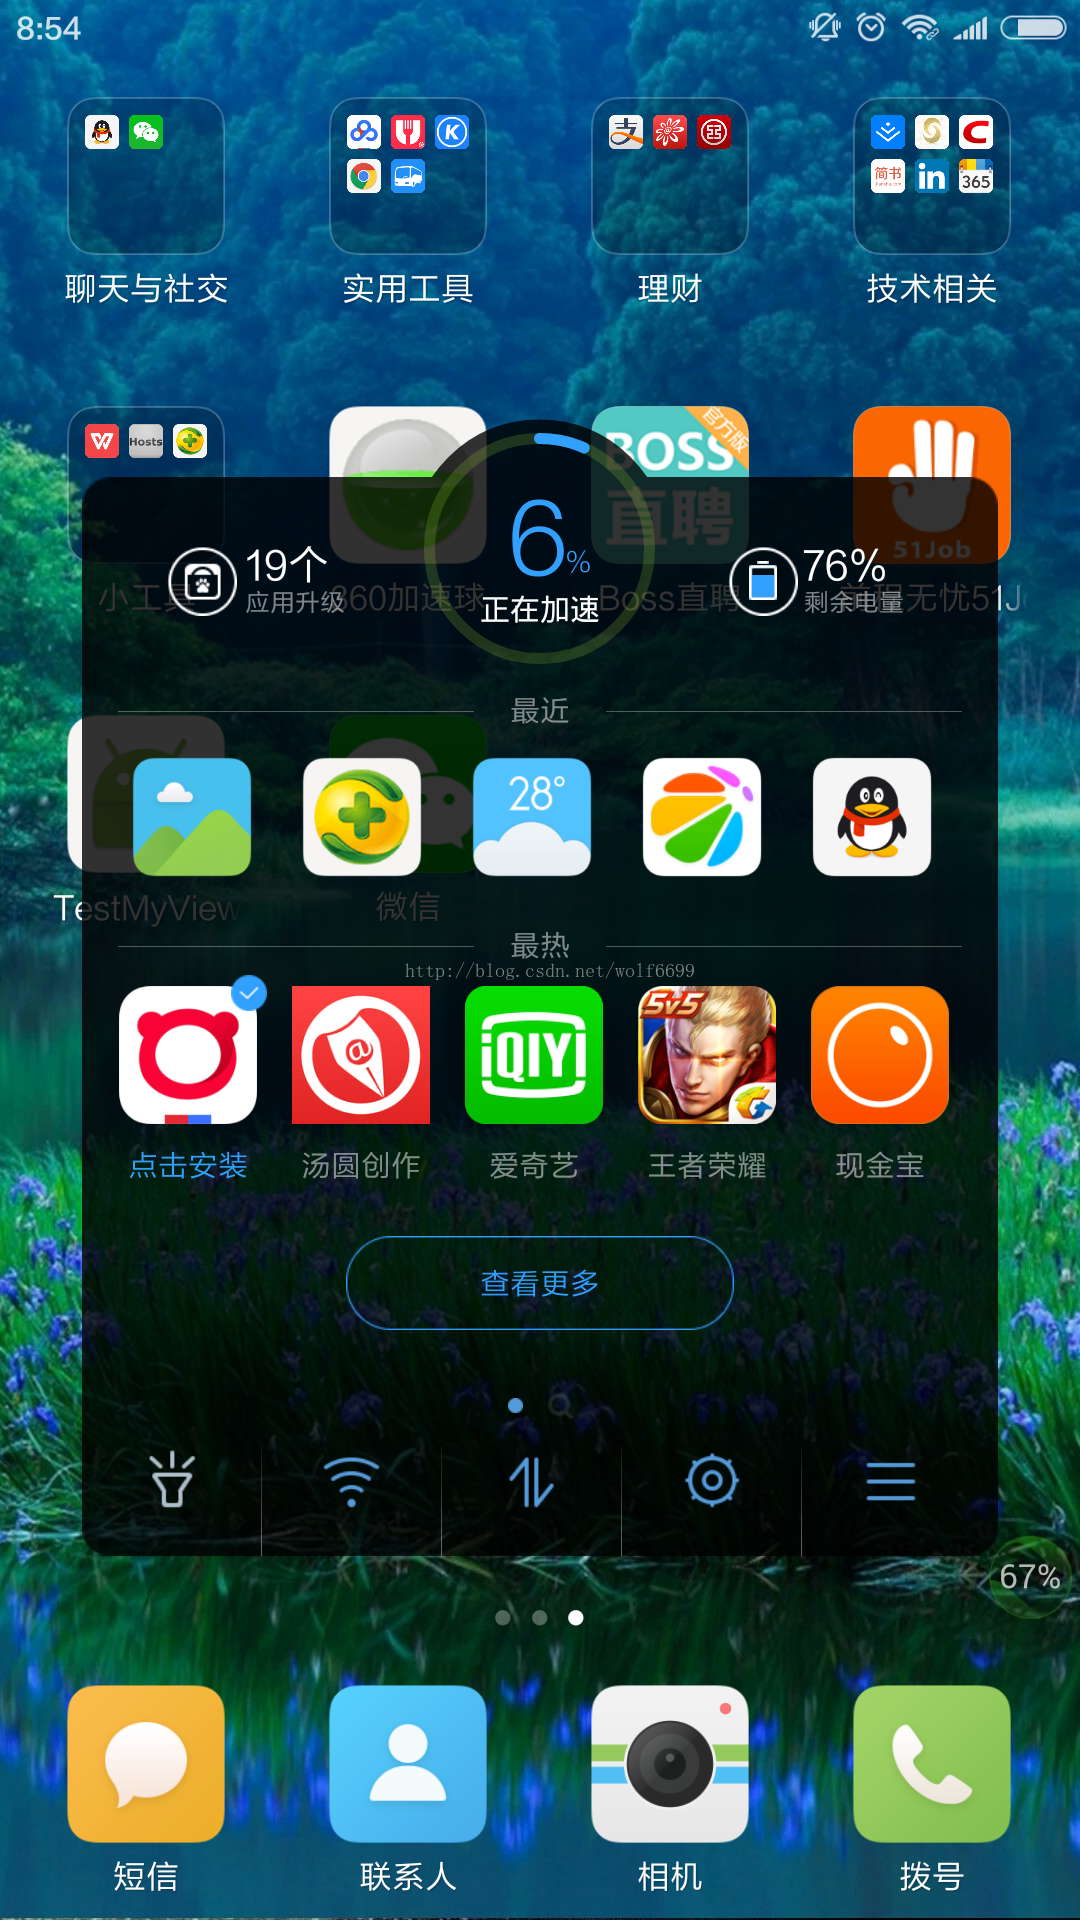
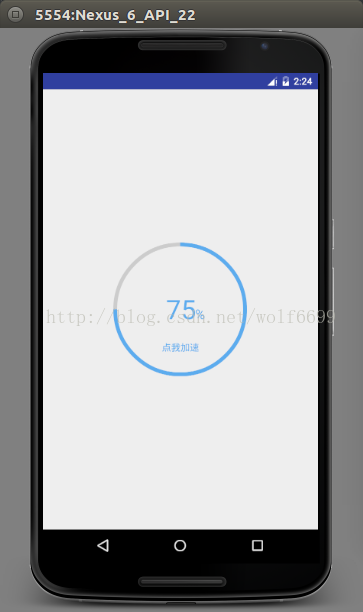
安卓手机用时间长了以后会积累很多的垃圾文件/缓存文件之类的,严重影响手机运行的性能,常备一款手机管理工具是关键,我一直用360手机卫士,觉得那个加速球效果不错,今天就来模仿实现一下简单的效果,先上两张效果图:
概要:
本文主要是实现中间那个圆圈 的动画效果,都是很简单基础的效果,看了不少wing大神和hy大神的博客,我觉得不管多复杂的动画效果,拿到手首先要学会拆分。这里我们可以拆分成主要四块来实现,
1,一个颜色为半透明的圆,不需要动;
2,一个颜色为蓝色的弧,半径以及圆点和第一个圆同样,会根据比例改变弧度的绘制;
3,圆内部展示百分比的文字以及百分号;
4,圆内部提示性的文字。
拆分好了以后,我们实现起来就相对简单多了,先实现静态效果,再实现动态效果。
正文:
1,绘制view的基础准备工作:
创建自定义VIew并添加到布局中、自定义属性、在自定义View中获取属性值,这一部分就不做过多说明了,直接上代码。(这里圆的半径我们按照View的宽度取值,所以就不定义属性了)
属性attrs.xml:
<?xml version="1.0" encoding="utf-8"?>
<resources>
    <declare-styleable name="ClearViewAttrs">
        <!--底部圆的边线颜色-->
        <attr name="circleColor" format="color"></attr>
        <!--圆弧的颜色-->
        <attr name="arcColor" format="color"></attr>
        <!--提示性文字和百分比颜色-->
        <attr name="textColor" format="color"></attr>
        <!--百分比字体大小-->
        <attr name="percentTextSize" format="dimension"></attr>
        <!--%字体大小-->
        <attr name="markTextSize" format="dimension"></attr>
        <!--提示性文字字体大小-->
        <attr name="pointTextSize" format="dimension"></attr>
    </declare-styleable>
</resources>在布局文件中给属性赋值:
<RelativeLayout
    xmlns:android="http://schemas.android.com/apk/res/android"
    xmlns:custom="http://schemas.android.com/apk/res/demo.bys.com.clearviewdemo"
    xmlns:tools="http://schemas.android.com/tools"
    android:layout_width="match_parent"
    android:layout_height="match_parent"
    tools:context="demo.bys.com.clearviewdemo.MainActivity">

    <demo.bys.com.clearviewdemo.ClearView
        android:layout_width="wrap_content"
        android:layout_height="wrap_content"
        android:layout_centerInParent="true"
        custom:circleColor="#cccccc"
        custom:arcColor="#5CACEE"
        custom:textColor="#5CACEE"
        custom:percentTextSize="40sp"
        custom:pointTextSize="14sp"
        custom:markTextSize="20sp"
        />


</RelativeLayout>//圆的半径
private int mRadius;
//底部圆的边线颜色
private int circleColor;
//圆弧的颜色
private int arcColor;
//提示性文字和百分比颜色
private int textColor;
//百分比字体大小
private int percentTextSize;
//字体大小
private int markTextSize;
//提示性文字字体大小
private int pointTextSize;public ClearView(Context context, AttributeSet attrs, int defStyleAttr) {
super(context, attrs, defStyleAttr);
TypedArray ta = context.obtainStyledAttributes(attrs,R.styleable.ClearViewAttrs,defStyleAttr,0);
circleColor = ta.getColor(R.styleable.ClearViewAttrs_circleColor, Color.GRAY);
arcColor = ta.getColor(R.styleable.ClearViewAttrs_arcColor,Color.BLUE);
textColor = ta.getColor(R.styleable.ClearViewAttrs_textColor,Color.BLUE);
percentTextSize = ta.getDimensionPixelSize(R.styleable.ClearViewAttrs_percentTextSize,20);
markTextSize = ta.getDimensionPixelSize(R.styleable.ClearViewAttrs_markTextSize,10);
pointTextSize = ta.getDimensionPixelSize(R.styleable.ClearViewAttrs_pointTextSize,15);
ta.recycle();
}2,测量View的宽高
@Override
    protected void onMeasure(int widthMeasureSpec, int heightMeasureSpec) {
        super.onMeasure(widthMeasureSpec, heightMeasureSpec);

        int widthSize = MeasureSpec.getSize(widthMeasureSpec);
        int widthMode = MeasureSpec.getMode(widthMeasureSpec);
        int heightSize = MeasureSpec.getSize(heightMeasureSpec);
        int heightMode = MeasureSpec.getMode(heightMeasureSpec);

        if(widthMode == MeasureSpec.EXACTLY){
            mWidth = widthSize;
        }else{
            mWidth = (int)TypedValue.applyDimension(TypedValue.COMPLEX_UNIT_DIP,200,getResources().getDisplayMetrics());
        }

        if(heightMode == MeasureSpec.EXACTLY){
            mHeight = heightSize;
        }else{
            mHeight = (int)TypedValue.applyDimension(TypedValue.COMPLEX_UNIT_DIP,200,getResources().getDisplayMetrics());
        }

        //拿到半径的值,因为setStrokeWidth会有个边线的宽度,所以要减去宽度的一半
        mRadius = mWidth/2-10;
        setMeasuredDimension(mWidth,mHeight);

}这里我们分成两大步来实现:静态效果、实现动态效果。
a)静态效果绘制:
首先设置好画笔的颜色等属性,绘制底部的圆:
//绘制底部的圆
        mPaint.setColor(circleColor);
        mPaint.setStyle(Paint.Style.STROKE);
        mPaint.setStrokeWidth(20);
        mPaint.setAntiAlias(true);

        canvas.drawCircle(mWidth/2,mHeight/2,mRadius,mPaint);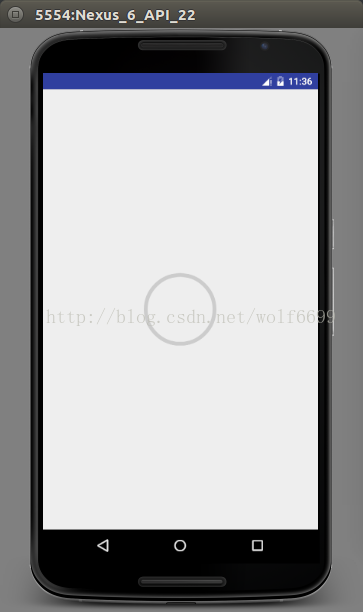
绘制圆弧,圆心和半径和圆相同,首先要对弧度所在区域设置一个矩形:
private RectF mRectF;//设置矩形区域
mRectF.left = mWidth/2 - mRadius;
mRectF.top = mHeight/2 - mRadius;
mRectF.right = mWidth/2 + mRadius;
mRectF.bottom = mHeight/2 + mRadius;3点钟方向是弧的0度,按顺时针方向增大,我们把12点钟方向(也就是-90度)作为起点,这里我们首先绘制一个静态的弧:
//绘制圆弧
mPaint.setColor(arcColor);
mPaint.setStyle(Paint.Style.STROKE);
mPaint.setStrokeWidth(20);
mPaint.setAntiAlias(true);
canvas.drawArc(mRectF,-90,270,false,mPaint);这里我们看到效果:
下面开始绘制百分比、百分号和提示文字,从图中我们可以看出百分比文字是显示在圆的正中间的,百分号在百分数值的右下角,提示文字显示在百分比文字下面空处的中间部分。我们先绘制中间部分的百分比文字:
//百分比
private String percentText = "75";//绘制百分比文字
mPaint.setColor(textColor);
mPaint.setStyle(Paint.Style.FILL);
mPaint.setStrokeWidth(3);
mPaint.setTextSize(percentTextSize);
mPaint.getTextBounds(percentText,0,percentText.length(),mRect);
canvas.drawText(percentText,mWidth/2-mRect.width()/2,mHeight/2+mRect.height()/2,mPaint);百分号所在矩形区域的底侧是和百分数值的底侧齐平的,百分号矩形的左侧是百分数值的右侧偏移一点,我们设置好画笔,开始绘制:
//绘制百分号
mPaint.setColor(textColor);
mPaint.setStyle(Paint.Style.FILL);
mPaint.setStrokeWidth(3);
mPaint.setTextSize(markTextSize);
canvas.drawText("%",mWidth/2+mRect.width()/2+5,mHeight/2+mRect.height()/2,mPaint);最后来绘制提示文字,百分数值下放的空区域为绘制空间,绘制在中间位置,也要使用到上面百分数值所在矩形区域的宽高值。创建一个提示文字的矩形区域Rect对象:
private Rect pointRect;//提示文字
private String pointText = "点我加速";//绘制提示文字
mPaint.setColor(textColor);
mPaint.setStyle(Paint.Style.FILL);
mPaint.setStrokeWidth(3);
mPaint.setTextSize(pointTextSize);
mPaint.getTextBounds(pointText,0,pointText.length(),pointRect);canvas.drawText(pointText,mWidth/2-pointRect.width()/2,((mRadius+mHeight/2)-(mHeight/2+mRect.height()/2))/2+mHeight/2+mRect.height()/2+pointRect.height()/2,mPaint);

到这里,我们静态的效果就已经完成了。
b)实现动画效果:
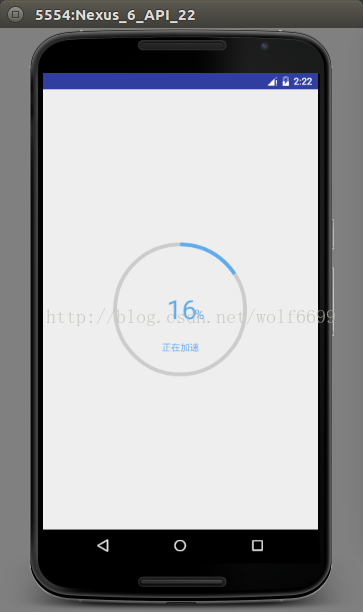
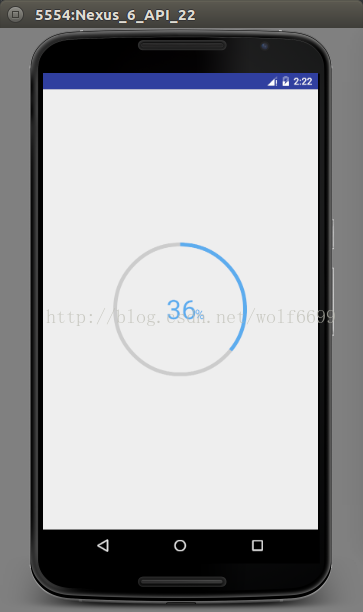
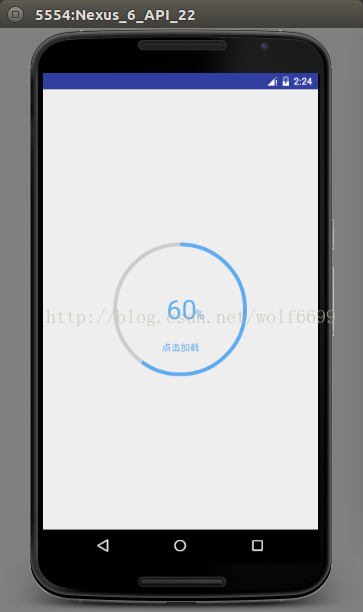
这里我们的动画效果是:1,点击View后,提示文字变成“正在加载”,弧度逐渐减少到-90度,百分值同时逐渐减到0;2,弧度逐渐增加,百分值也同时增加。
定义一个弧度百分比的变量,一个记录上一次弧度百分比的变量,一个记录点击后应该到达的百分比:
//弧度百分比
private int ArcPercent = 0;
//上一次弧度百分比
private int lastPercent = 0;
//当前获取到的百分比
private int currentPercent = 0;百分比数值获取值:
percentText = ArcPercent + "";360*ArcPercent/100一个判断是否执行动画的boolean:
//true是执行动画,false是静态
private boolean isMoving = false;一个判断是加还是减的boolean:
//false是递减到0,true是递增
private boolean direction = false;给View添加点击事件:
implements View.OnClickListenersetOnClickListener(this);@Override
public void onClick(View view) {
isMoving = true;
pointText = "正在加速";
invalidate();
}@Override
protected void onDraw(Canvas canvas) {
super.onDraw(canvas);
if(isMoving){
if(!direction){
if(ArcPercent > 0){
ArcPercent--;
}else{
direction = true;
}
}else{
pointText = "";
currentPercent = random.nextInt(80);
if(ArcPercent < currentPercent){
ArcPercent++;
}else{
direction = false;
isMoving = false;
pointText="点击加载";
}
}
percentText = ArcPercent + "";
moveingView(canvas);
postInvalidateDelayed(10);
}else{
percentText = ArcPercent + "";
//绘制底部的圆
mPaint.setColor(circleColor);
mPaint.setStyle(Paint.Style.STROKE);
mPaint.setStrokeWidth(20);
mPaint.setAntiAlias(true);
canvas.drawCircle(mWidth/2,mHeight/2,mRadius,mPaint);
//绘制圆弧
//计算弧度值
mPaint.setColor(arcColor);
mPaint.setStyle(Paint.Style.STROKE);
mPaint.setStrokeWidth(20);
mPaint.setAntiAlias(true);
//设置矩形区域
        mRectF.left = mWidth/2 - mRadius;
        mRectF.top = mHeight/2 - mRadius;
        mRectF.right = mWidth/2 + mRadius;
        mRectF.bottom = mHeight/2 + mRadius;
canvas.drawArc(mRectF,-90,360*ArcPercent/100,false,mPaint);
//绘制百分比文字
        mPaint.setColor(textColor);
        mPaint.setStyle(Paint.Style.FILL);
        mPaint.setStrokeWidth(3);
        mPaint.setTextSize(percentTextSize);
        mPaint.getTextBounds(percentText,0,percentText.length(),mRect);

        canvas.drawText(percentText,mWidth/2-mRect.width()/2,mHeight/2+mRect.height()/2,mPaint);
//绘制百分号
        mPaint.setColor(textColor);
        mPaint.setStyle(Paint.Style.FILL);
        mPaint.setStrokeWidth(3);
        mPaint.setTextSize(markTextSize);

        canvas.drawText("%",mWidth/2+mRect.width()/2+5,mHeight/2+mRect.height()/2,mPaint);
//绘制提示文字
        mPaint.setColor(textColor);
        mPaint.setStyle(Paint.Style.FILL);
        mPaint.setStrokeWidth(3);
        mPaint.setTextSize(pointTextSize);
        mPaint.getTextBounds(pointText,0,pointText.length(),pointRect);
canvas.drawText(pointText,mWidth/2-pointRect.width()/2,((mRadius+mHeight/2)-(mHeight/2+mRect.height()/2))/2+mHeight/2+mRect.height()/2+pointRect.height()/2,mPaint);
}
}
/**
* 动态效果绘制
* @param canvas
*/
private void moveingView(Canvas canvas){
//绘制底部的圆
mPaint.setColor(circleColor);
mPaint.setStyle(Paint.Style.STROKE);
mPaint.setStrokeWidth(20);
mPaint.setAntiAlias(true);
canvas.drawCircle(mWidth/2,mHeight/2,mRadius,mPaint);
//绘制圆弧
mPaint.setColor(arcColor);
mPaint.setStyle(Paint.Style.STROKE);
mPaint.setStrokeWidth(20);
mPaint.setAntiAlias(true);
//设置矩形区域
mRectF.left = mWidth/2 - mRadius;
mRectF.top = mHeight/2 - mRadius;
mRectF.right = mWidth/2 + mRadius;
mRectF.bottom = mHeight/2 + mRadius;
canvas.drawArc(mRectF,-90,360*ArcPercent/100,false,mPaint);
//绘制百分比文字
mPaint.setColor(textColor);
mPaint.setStyle(Paint.Style.FILL);
mPaint.setStrokeWidth(3);
mPaint.setTextSize(percentTextSize);
mPaint.getTextBounds(percentText,0,percentText.length(),mRect);
canvas.drawText(percentText,mWidth/2-mRect.width()/2,mHeight/2+mRect.height()/2,mPaint);
//绘制百分号
mPaint.setColor(textColor);
mPaint.setStyle(Paint.Style.FILL);
mPaint.setStrokeWidth(3);
mPaint.setTextSize(markTextSize);
canvas.drawText("%",mWidth/2+mRect.width()/2+5,mHeight/2+mRect.height()/2,mPaint);
//绘制提示文字
mPaint.setColor(textColor);
mPaint.setStyle(Paint.Style.FILL);
mPaint.setStrokeWidth(3);
mPaint.setTextSize(pointTextSize);
mPaint.getTextBounds(pointText,0,pointText.length(),pointRect);
canvas.drawText(pointText,mWidth/2-pointRect.width()/2,((mRadius+mHeight/2)-(mHeight/2+mRect.height()/2))/2+mHeight/2+mRect.height()/2+pointRect.height()/2,mPaint);
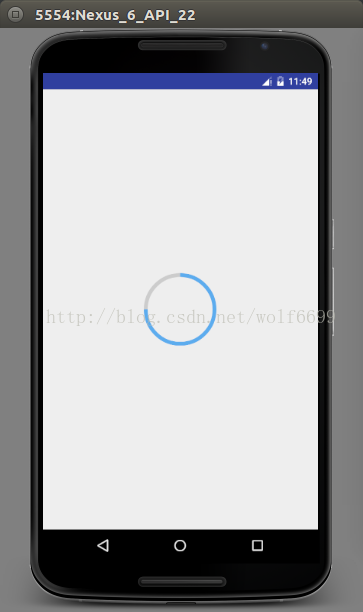
}这里没什么太多东西,就是几个判断的嵌套,以及View绘制的开始,循环绘制,和结束绘制。我这里最后百分比直接取的随机数,自己获取就可以了。没有动态效果图,只能贴几个过程图了:
源码地址:http://download.csdn.net/detail/liujibin1836591303/9735822