目录
前言
“学习能力也好,执行力也罢,核心只有一个:在刚开始的时候,平静地接受自己的笨拙。” 本篇文章是 Vue项目基于 Vite初始化的过程,借此记录一下,巩固基础!
第一章 安装 Vite,本篇基于npm进行(请检测自己的node版本)
具体可看:Vite官方中文文档
npm install -g create-vite-app
全局安装vite,可能会出现:
npm WARN deprecated create-vite-app@1.21.0: create-vite-app has been deprecated.
run `npm init @vitejs/app` or `yarn create @vitejs/app` instead.
继续输入:
npm init @vitejs/app
第二章 创建项目
创建一个空的项目文件夹,用vscode打开,
打开终端,执行命令:
npm init vue@latest
会出现(以下是示例):
√ Project name: ... code1 (项目名字)
√ Add TypeScript? ... No / Yes (是否要添加TypeScript)
√ Add JSX Support? ... No / Yes (是否添加JSX,一般React用的比较多,Vue用的少,选择No)
√ Add Vue Router for Single Page Application development? ... No / Yes(是否添加VueRouter,根据需要选择)
√ Add Pinia for state management? ... No / Yes (是否添加Pinia,状态管理器,根据需要选择)
√ Add Vitest for Unit Testing? ... No / Yes (是否添加单元测试)
√ Add an End-to-End Testing Solution? » No (是否添加 端到端 测试)
√ Add ESLint for code quality? ... No / Yes (是否使用ESLint 进行代码检测 质量问题,一般选Yes)
√ Add Prettier for code formatting? ... No / Yes (是否添加Prettier进行项目代码格式化保存,保持项目代码风格一致,可根据需要进行配置!)
选择完成后会出现以下提示:
cd code1
npm install
npm run lint
npm run dev
按照要求,打开初始化后的项目文件,并且npm install ,安装相关的node_modules依赖, 然后进行启动。
第三章 项目配置
安装对应的插件:
"Vue.volar",
 "Vue.vscode-typescript-vue-plugin"

配置vue文件模块(env.t.ts):
declare module '*.vue' {


  import {

     DefineComponent } from 'vue'
  const component: DefineComponent
  export default component
}
配置项目代码规范:
- 安装 EditorConfig for VS Code 插件;
- 集成 editorconfig配置:
# http://editorconfig.org

root = true

[*] # 表示所有文件适用
charset = utf-8 # 设置文件字符集为 utf-8
indent_style = space # 缩进风格(tab | space)
indent_size = 2 # 缩进大小
end_of_line = lf # 控制换行类型(lf | cr | crlf)
trim_trailing_whitespace = true # 去除行尾的任意空白字符
insert_final_newline = true # 始终在文件末尾插入一个新行

[*.md] # 表示仅 md 文件适用以下规则
max_line_length = off
trim_trailing_whitespace = false
使用prettier工具:npm install prettier -D
第四章 项目目录结构划分

第五章 CSS样式的重置
npm install normalize.css
在main.ts进行引入, import 'normalize.css'
进行样式重置文件:
/* reset.css样式重置文件 */
/* margin/padding重置 */
body, h1, h2, h3, ul, ol, li, p, dl, dt, dd {


  padding: 0;
  margin: 0;
}

/* a元素重置 */
a {


  text-decoration: none;
  color: #333;
}

/* img的vertical-align重置 */
img {


  vertical-align: top;
}

/* ul, ol, li重置 */
ul, ol, li {


  list-style: none;
}

/* 对斜体元素重置 */
i, em {


  font-style: normal;
}
第六章 网络请求封装axios
npm install axios
//request.ts
import axios from 'axios';
const baseURL = '';
const service = axios.create({


  baseURL,
  timeout: 5000, // request timeout
});
// 发起请求之前的拦截器
service.interceptors.request.use(
  (config) => {


    // 如果有token 就携带tokon
    const token = window.localStorage.getItem('accessToken');
    if (token) {


      config.headers.common.Authorization = token;
    }
    return config;
  },
  (error) => Promise.reject(error)
);
// 响应拦截器
service.interceptors.response.use(
  (response) => {


    const res = response.data;

    if (response.status !== 200) {


      return Promise.reject(new Error(res.message || 'Error'));
    } else {


      return res;
    }
  },
  (error) => {


    return Promise.reject(error);
  }
);
export default service;
import request from "../utils/request";

request({

    url: "/profile ",method: "get"})
.then((res)=>{


  console.log(res)
})
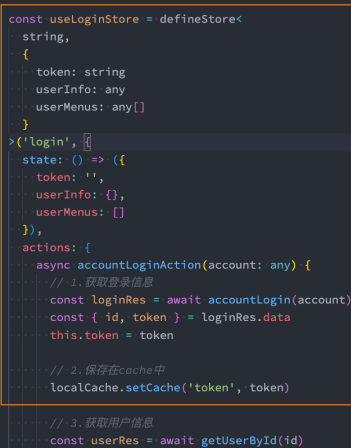
第七章 状态管理(vuex / pinia)
第八章 区分开发环境和生产环境
在 根目录 下创建 .env.development 和 .env.production 文件。
// .env.development
VITE_APP_ENV = 'development'
// .env.production
VITE_APP_ENV = 'production'
修改 package.json,对环境变量进行配置。
//package.json
"scripts": {


  "dev": "cross-env NODE_ENV=development vite",
  "build:dev": "vite build --mode development",
  "build:pro": "vite build --mode production"
},
只有以 VITE_ 为前缀的变量才会暴露给经过 vite 处理的代码。