一、环境版本信息:
操作系统:windows10
Django版本:2.0.5
Python版本:3.6.4
Mysql版本: 5.5.53 安装mysql
二、基础信息
1、App中的模型models.py
from django.db import models

# Create your models here.
class users(models.Model):
    blog_username = models.CharField(max_length=20)
    blog_link = models.CharField(max_length=50)
class account(models.Model):
    blog_account = models.CharField(max_length=20) blog_password = models.CharField(max_length=20) blog_username = models.CharField(max_length=20)
app_users表插入数据:

app_account表插入数据:

2、在模板文件夹中新建landing.html
<!doctype html>
<html lang="zh-CN">
<head>
<meta charset="utf-8">
</head>
<body >
  <form action="/londing/" method="get">
        账号:<input type="text" name="account">
        密码:<input type="text" name="password">
        <input type="submit" value="登陆">
  </form>
</body>
</html>
3、视图views.py
from django.shortcuts import render
from App.models import users,account
from django.http import HttpResponse
# Create your views here.


def index(request):
    user = users.objects.get(id=1)
    context = {'user':user} return render(request, 'index.html', context) def londing_form(request): #添加表单页面 context = {} return render(request,'landing.html',context) def londing(request): #数据接收和处理 if 'account' in request.GET: user_account = request.GET['account'] password = request.GET['password'] username = account.objects.get(blog_account = user_account).blog_username #在数据库account表中获取账号对应的用户名(昵称) user = users.objects.get(blog_username = username) #在users表中获取所有信息 context = {'user':user} return render(request, 'index.html', context) #在index.html中显示信息
4、修改路径urls.py
from django.contrib import admin
from django.urls import path
from App import views
urlpatterns = [
    path('admin/', admin.site.urls),
    path(r'index/',views.index), path(r'londing_form/',views.londing_form), path(r'londing',views.londing), ]
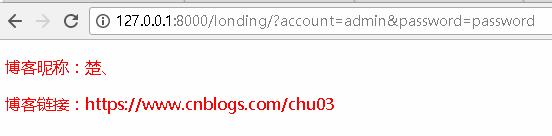
三、GET请求测试
上面的代码都是以get请求写的直接开启服务器: python manage.py runserver

四、POST请求测试
1、修改landing.html 注意:action部分相比get请求结尾多了一个“/”
<!doctype html>
<html lang="zh-CN">
<head>
<meta charset="utf-8">
</head>
<body >
  <form action="/londing/" method="post">
      {% csrf_token %}    csrf 全称是 Cross Site Request Forgery。这是Django提供的防止伪装提交请求的功能。POST 方法提交的表格,必须有此标签。
        账号:<input type="text" name="account">
        密码:<input type="text" name="password">
        <input type="submit" value="登陆">
  </form>
</body>
</html>
2、修改views.py中的londing函数
def londing(request):
    if request.POST:
        user_account = request.POST['account']
        password = request.POST['password']
        username = account.objects.get(blog_account = user_account).blog_username
        user = users.objects.get(blog_username = username) context = {'user':user} return render(request, 'index.html', context)
3、测试

