合并后的Ethereum采用PoS代替原来的PoW,需要加入beacon主链,同步大量的区块数据库,耗时很长。本文用Geth+Prysm创建一个Ethereum私链,即一个Ethereum PoS实验环境,不必挂在beacon主链。
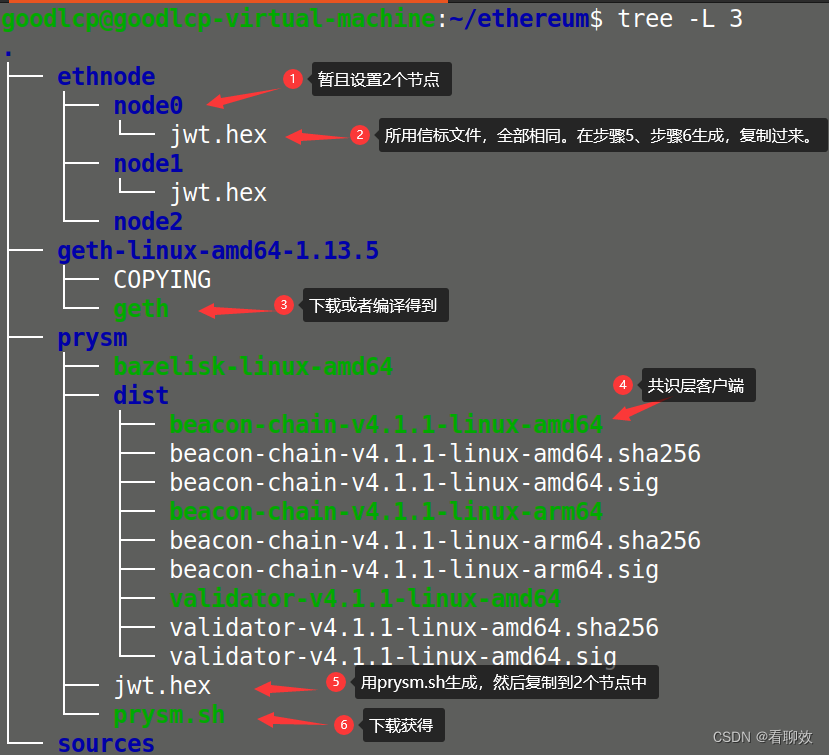
1.目录结构
首先建立所需要文件及目录结构,具体操作可搜索,不再赘述。
2.配置节点node0
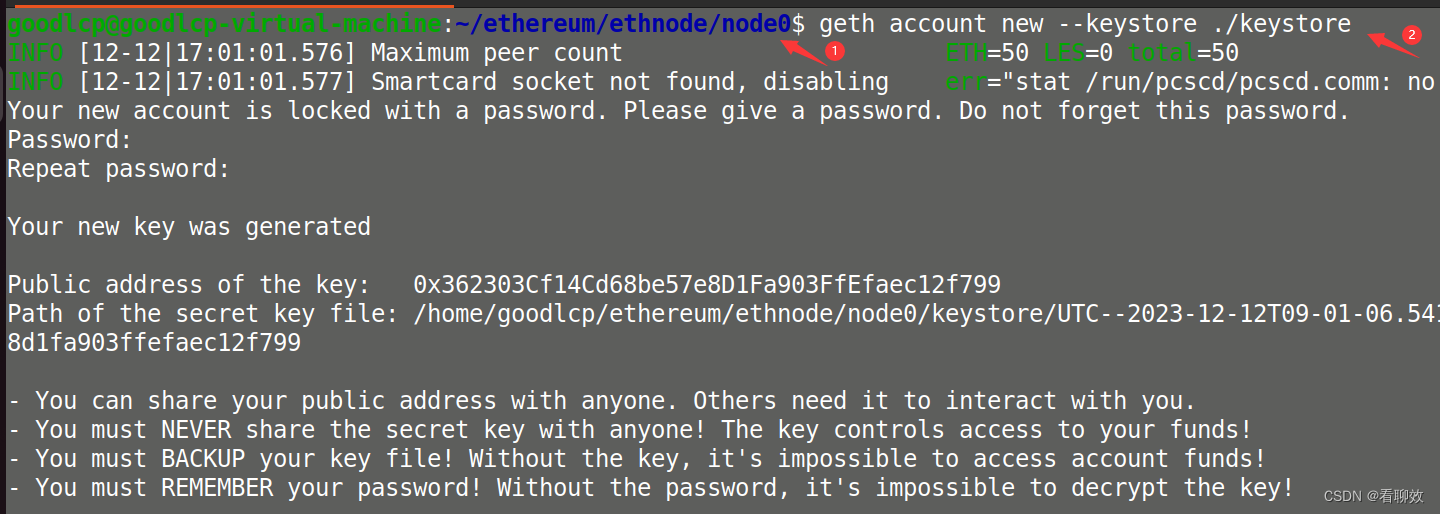
创建账号
geth account new --keystore ./keystore
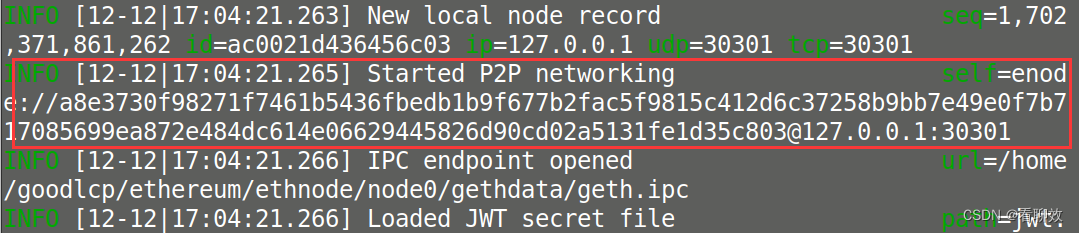
配置并启动node0的执行客户端geth
geth --datadir ./gethdata --networkid 197368 --port 30301 --authrpc.port 8551 --http --http.port 8545 --http.api admin,eth,debug,miner,net,personal,web3 --authrpc.jwtsecret ./jwt.hex console

node0的地址
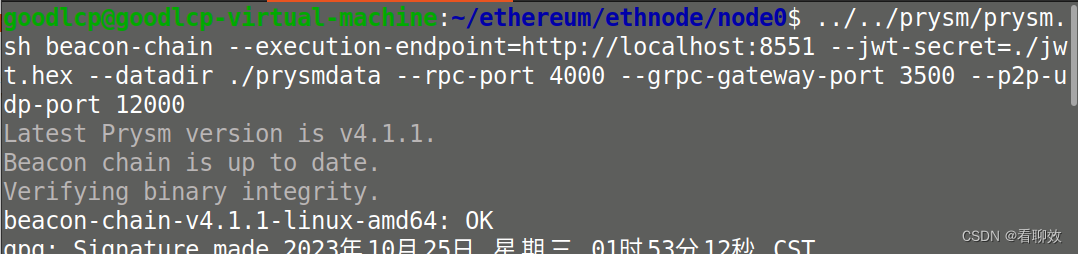
配置并启动node0的共识客户端prysm
../../prysm/prysm.sh beacon-chain --execution-endpoint=http://localhost:8551 --jwt-secret=./jwt.hex --datadir ./prysmdata --rpc-port 4000 --grpc-gateway-port 3500 --p2p-udp-port 12000
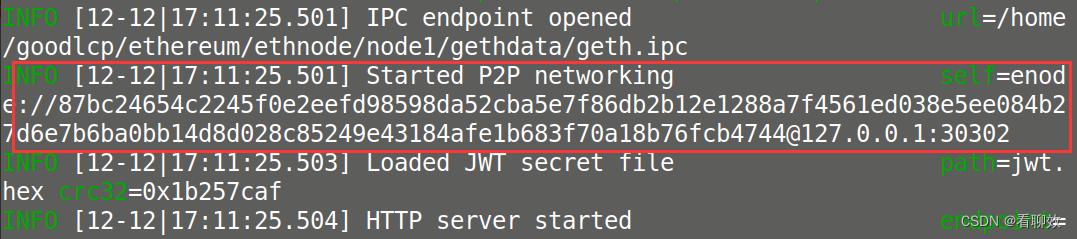
3.配置节点node1
如法炮制节点node1
geth account new --keystore ./keystore
geth --datadir ./gethdata --networkid 197368 --port 30302 --authrpc.port 8552 --http --http.port 8546 --http.api admin,eth,debug,miner,net,personal,web3 --authrpc.jwtsecret ./jwt.hex console
../../prysm/prysm.sh beacon-chain --execution-endpoint=http://localhost:8552 --jwt-secret=./jwt.hex --datadir ./prysmdata --rpc-port 4001 --grpc-gateway-port 3501 --p2p-udp-port 12001
节点node1的地址
4.添加邻居
在节点node0中添加节点node1
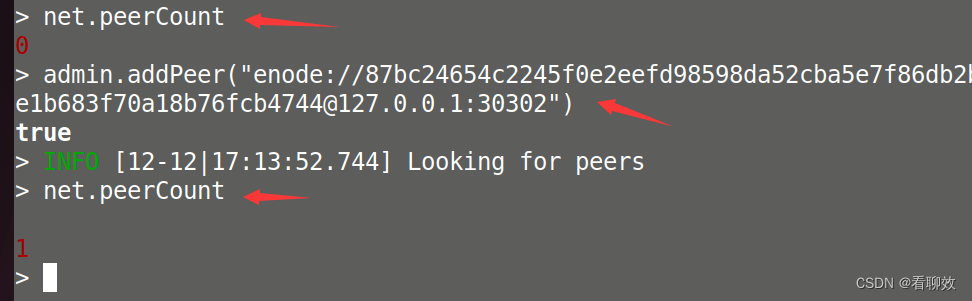
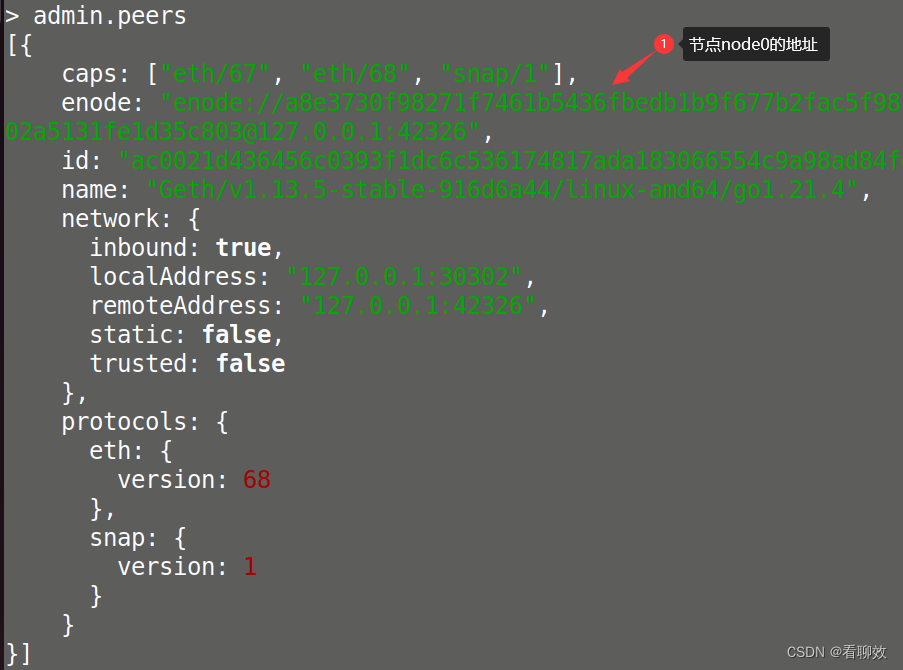
在节点node1中观察新邻居
5.观察区块数
暂时没有交易,区块数为0。在后续实验中发起交易,观察共识与同步。
