机缘巧合,接触了安卓,刚好最近也在写安卓大作业,想必一个系统,登录注册肯定是少不了的,接下来我将把我安卓课设的登陆注册讲解讲解。欢迎小伙伴们提意见,点赞收藏哦。
项目技术栈
使用的是android,Java,Gradle,Servlet,Mysql,IDE使用的是Android Studio 与IDEA。
主要是通过在安卓中写事件,向一个ip地址发送数据,那么在后端进行接受数据并与数据库交互。
废话不多说上界面和代码。
1.登陆界面(可忽略管理员登录按钮)

代码如下:
<?xml version="1.0" encoding="utf-8"?>
<RelativeLayout xmlns:android="http://schemas.android.com/apk/res/android"
    xmlns:app="http://schemas.android.com/apk/res-auto"
    xmlns:tools="http://schemas.android.com/tools"
    android:layout_width="match_parent"
    android:layout_height="match_parent"
    android:background="@drawable/ic_launcher_foreground"
    android:orientation="vertical"
    tools:context=".MainActivity">

    <RelativeLayout
        android:layout_width="match_parent"
        android:layout_height="wrap_content"
        android:layout_marginLeft="20dp"
        android:layout_marginTop="100dp"
        android:layout_marginRight="20dp">

        <ImageView
            android:id="@+id/lg_imageView"
            android:layout_width="100dp"
            android:layout_height="100dp"
            android:layout_marginLeft="120dp"
            android:src="@drawable/ic_launcher_foreground" />


        <EditText
            android:id="@+id/lg_username"
            android:layout_width="match_parent"
            android:layout_height="wrap_content"
            android:layout_below="@+id/lg_imageView"
            android:layout_marginTop="30dp"
            android:drawablePadding="5dp"
            android:hint="用户名"
            android:maxLines="1" />

        <EditText
            android:id="@+id/lg_password"
            android:layout_width="match_parent"
            android:layout_height="wrap_content"
            android:layout_below="@id/lg_username"
            android:layout_marginTop="10dp"
            android:drawablePadding="5dp"
            android:hint="密码"
            android:inputType="textPassword"
            android:maxLines="1" />

        <LinearLayout
            android:id="@+id/ly"
            android:layout_width="match_parent"
            android:layout_height="wrap_content"
            android:layout_below="@id/lg_password"
            android:orientation="horizontal">


            <TextView
                android:id="@+id/lg_register"
                android:layout_width="0dp"
                android:layout_height="wrap_content"
                android:layout_weight="1"
                android:text="还没有账号,去注册"
                android:textColor="#1E90FF" />

        </LinearLayout>

        <Button
            android:id="@+id/lg_user_login"
            android:layout_width="200dp"
            android:layout_height="wrap_content"
            android:layout_below="@id/ly"
            android:layout_marginTop="30dp"
            android:layout_marginRight="200dp"
            android:background="#E91E63"
            android:hint="登录"
            android:textColor="#FFFFFF"
            android:textSize="18sp" />

        <Button
            android:id="@+id/lg_admin_login"
            android:layout_width="200dp"
            android:layout_height="wrap_content"
            android:layout_below="@id/ly"
            android:layout_marginLeft="200dp"
            android:layout_marginTop="30dp"
            android:background="#E91E63"
            android:hint="管理员登录"
            android:textColor="#FFFFFF"
            android:textSize="18sp" />


    </RelativeLayout>

</RelativeLayout>
关于其后台代码:
由于后台代码较为复杂就不沾沾出来了,有需要的后台私信我哦,无偿
2.注册界面
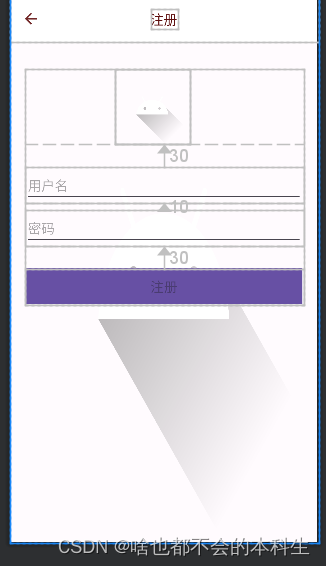
代码如下:
<?xml version="1.0" encoding="utf-8"?>
<RelativeLayout xmlns:android="http://schemas.android.com/apk/res/android"
    xmlns:app="http://schemas.android.com/apk/res-auto"
    xmlns:tools="http://schemas.android.com/tools"
    android:layout_width="match_parent"
    android:layout_height="match_parent"
    android:background="@drawable/ic_launcher_foreground"
    android:orientation="vertical"
    tools:context=".RegisterActivity">

    <!--顶部-->
    <androidx.appcompat.widget.Toolbar
        android:id="@+id/ci_toolBar"
        android:layout_width="match_parent"
        android:layout_height="?attr/actionBarSize"
        android:background="#FFF"
        app:navigationIcon="@drawable/baseline_arrow_back_24">

        <TextView
            android:layout_width="wrap_content"
            android:layout_height="wrap_content"
            android:layout_gravity="center"
            android:text="注册"
            android:textColor="#5E0E0E"
            android:textSize="18sp" />

    </androidx.appcompat.widget.Toolbar>

    <RelativeLayout
        android:layout_width="match_parent"
        android:layout_height="wrap_content"
        android:layout_marginLeft="20dp"
        android:layout_marginTop="100dp"
        android:layout_marginRight="20dp">

        <ImageView
            android:id="@+id/rg_imageView"
            android:layout_width="100dp"
            android:layout_height="100dp"
            android:layout_marginLeft="120dp"
            android:src="@drawable/ic_launcher_foreground" />


        <EditText
            android:id="@+id/rg_username"
            android:layout_width="match_parent"
            android:layout_height="wrap_content"
            android:layout_below="@+id/rg_imageView"
            android:layout_marginTop="30dp"
            android:drawablePadding="5dp"
            android:hint="用户名"
            android:maxLines="1" />

        <EditText
            android:id="@+id/rg_password"
            android:layout_width="match_parent"
            android:layout_height="wrap_content"
            android:layout_below="@id/rg_username"
            android:layout_marginTop="10dp"
            android:drawablePadding="5dp"
            android:hint="密码"
            android:inputType="textPassword"
            android:maxLines="1" />

        <Button
            android:id="@+id/rg_user_register"
            android:layout_width="match_parent"
            android:layout_height="wrap_content"
            android:layout_below="@id/rg_password"
            android:layout_marginTop="30dp"
            android:background="#E91E63"
            android:hint="注册"
            android:textColor="#FFFFFF"
            android:textSize="18sp" />

    </RelativeLayout>

</RelativeLayout>
3.发送请求工具类
public class SendMessage {
    public static String PostUtil(String urlAddress, String data) {
        try {
            URL url = new URL(urlAddress);
            HttpURLConnection conn = (HttpURLConnection) url.openConnection();
            conn.setRequestMethod("POST"); //设置请求方式为post
            conn.setReadTimeout(5000);//设置超时信息
            conn.setConnectTimeout(5000);//设置超时信息
            conn.setDoInput(true);//设置输入流,允许输入
            conn.setDoOutput(true);//设置输出流,允许输出
            conn.setUseCaches(false);//设置POST请求方式不能够使用缓存
            //定义我们要传给servlet的参数,格式好像一定要xxx=xxx,代表键值对,如果有多组,要加一个&,                                                                                         //如“cmd1=version&cmd2=value”
            //获取输出流,其实在这之前还应该有一个操作:conn.connect();意思为建立HttpURLConnection连接,只不过//getOutputStream()方法会隐含进行连接,所以不调用connect()也可以建立连接
            OutputStream out = conn.getOutputStream();
            //把data里的数据以字节的形式写入out流中
            out.write(data.getBytes());
            //刷新,将数据缓冲区中的数据全部输出,并清空缓冲区
            out.flush();
            //关闭输出流并释放与流相关的资源
            out.close();
            //这里是将conn.getInputStream中的数据包装在字符流的缓冲流reader中
            //这里值得一说的是:无论是post还是get,http请求实际上直到HttpURLConnection的getInputStream()这个函数
            //里面才正式发出去,同时getInputStream返回的值就是servlet返回的数据
            BufferedReader reader = new BufferedReader(new InputStreamReader(conn.getInputStream(), "utf-8"));
            String line = null;
            StringBuilder sb = new StringBuilder();
            sb = new StringBuilder();
            while ((line = reader.readLine()) != null) {
                sb.append(line);
            }
            reader.close();
            conn.disconnect();
            System.out.println(sb + "");
            return sb + "";
        } catch (Exception e) {
            e.printStackTrace();
        }
        return "获取数据失败";
    }}
4.登录后台中处理过程
package com.wz.android_work;

import javax.servlet.ServletException;
import javax.servlet.annotation.WebServlet;
import javax.servlet.http.HttpServlet;
import javax.servlet.http.HttpServletRequest;
import javax.servlet.http.HttpServletResponse;
import java.io.IOException;
import java.io.PrintWriter;
import java.sql.Connection;
import java.sql.PreparedStatement;
import java.sql.ResultSet;

/**
 * 返回200 存在 返回四百不存在
 */
@WebServlet("/login")
public class LoginServlet extends HttpServlet {
    @Override
    protected void doGet(HttpServletRequest req, HttpServletResponse resp) throws ServletException, IOException {
        req.setCharacterEncoding("utf-8");
        String username = req.getParameter("username");
        String password = req.getParameter("password");
        System.out.println(username);
        System.out.println(password);
        resp.setContentType("text/html;charset=utf-8");
        PrintWriter writer = resp.getWriter();
        // 验证用户名和密码是否正确
        try {
            Connection connect = DbUtils.getConnect();
            String sql = "select * from db_user where username = ? and password = ?";
            PreparedStatement preparedStatement = connect.prepareStatement(sql);
            preparedStatement.setString(1, username);
            preparedStatement.setString(2, password);
            ResultSet rs = preparedStatement.executeQuery();
            if (!rs.next()) {
                System.out.println("账号不存在或密码错误");
                writer.write("201");
            } else {
                System.out.println("登陆成功");
                writer.write("200");
            }
        } catch (Exception e) {
            e.printStackTrace();
        }
    }

    @Override
    protected void doPost(HttpServletRequest req, HttpServletResponse resp) throws ServletException, IOException {
        doGet(req, resp);
    }

}
总结
关于我们的登陆注册界面效果图以及代码可以查看了,但我认为精髓部分还是在安卓中如何进行发送请求,在java中如何处理请求,并与数据库进行交互。总的收获还是不错的,希望大家多揣摩揣摩。欢迎小伙伴点赞收藏哦。
以上均为个人手敲,自我总结,感谢大家滴阅读,记得点赞和关注哦!!!