参考链接
使用OpenCV和Python拼接图像_W_Tortoise的博客-CSDN博客
OpenCV-Python 图像全景拼接stitch及黑边处理_stitcher_create_Klein-的博客-CSDN博客
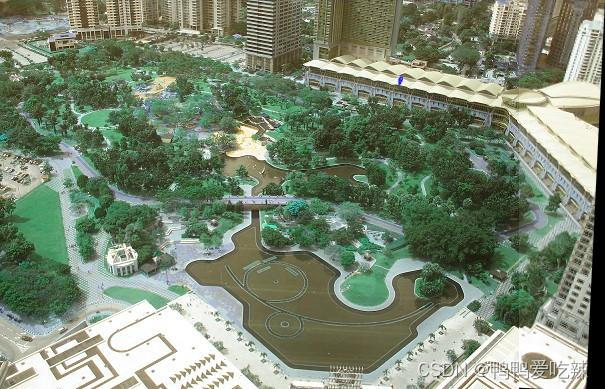
事例图片


算法实现步骤
1、实现stitcher
class Stitcher:

    # 拼接函数
    def stitch(self, images, ratio=0.75, reprojThresh=4.0, showMatches=False):
        # 获取输入图片
        (imageB, imageA) = images
        # 检测A、B图片的SIFT关键特征点,并计算特征描述子
        (kpsA, featuresA) = self.detectAndDescribe(imageA)
        (kpsB, featuresB) = self.detectAndDescribe(imageB)

        # 匹配两张图片的所有特征点,返回匹配结果
        M = self.matchKeypoints(kpsA, kpsB, featuresA, featuresB, ratio, reprojThresh)

        # 如果返回结果为空,没有匹配成功的特征点,退出算法
        if M is None:
            return None

        # 否则,提取匹配结果
        # H是3x3视角变换矩阵
        (matches, H, status) = M
        # 将图片A进行视角变换,result是变换后图片
        result = cv2.warpPerspective(imageA, H, (imageA.shape[1] + imageB.shape[1], imageA.shape[0]))
        self.cv_show('result', result)
        # 将图片B传入result图片最左端
        result[0:imageB.shape[0], 0:imageB.shape[1]] = imageB
        self.cv_show('result', result)
        # 检测是否需要显示图片匹配
        if showMatches:
            # 生成匹配图片
            vis = self.drawMatches(imageA, imageB, kpsA, kpsB, matches, status)
            # 返回结果
            return (result, vis)

        # 返回匹配结果
        return result

    def cv_show(self, name, img):
        cv2.imshow(name, img)
        cv2.waitKey(0)
        cv2.destroyAllWindows()

    def detectAndDescribe(self, image):
        # 将彩色图片转换成灰度图
        gray = cv2.cvtColor(image, cv2.COLOR_BGR2GRAY)

        # 建立SIFT生成器
        descriptor = cv2.SIFT_create()
        # 检测SIFT特征点,并计算描述子
        (kps, features) = descriptor.detectAndCompute(image, None)

        # 将结果转换成NumPy数组
        kps = np.float32([kp.pt for kp in kps])

        # 返回特征点集,及对应的描述特征
        return (kps, features)

    def matchKeypoints(self, kpsA, kpsB, featuresA, featuresB, ratio, reprojThresh):
        # 建立暴力匹配器
        matcher = cv2.BFMatcher()

        # 使用KNN检测来自A、B图的SIFT特征匹配对,K=2
        rawMatches = matcher.knnMatch(featuresA, featuresB, 2)

        matches = []
        for m in rawMatches:
            # 当最近距离跟次近距离的比值小于ratio值时,保留此匹配对
            if len(m) == 2 and m[0].distance < m[1].distance * ratio:
                # 存储两个点在featuresA, featuresB中的索引值
                matches.append((m[0].trainIdx, m[0].queryIdx))

        # 当筛选后的匹配对大于4时,计算视角变换矩阵
        if len(matches) > 4:
            # 获取匹配对的点坐标
            ptsA = np.float32([kpsA[i] for (_, i) in matches])
            ptsB = np.float32([kpsB[i] for (i, _) in matches])

            # 计算视角变换矩阵
            (H, status) = cv2.findHomography(ptsA, ptsB, cv2.RANSAC, reprojThresh)

            # 返回结果
            return (matches, H, status)

        # 如果匹配对小于4时,返回None
        return None

    def drawMatches(self, imageA, imageB, kpsA, kpsB, matches, status):
        # 初始化可视化图片,将A、B图左右连接到一起
        (hA, wA) = imageA.shape[:2]
        (hB, wB) = imageB.shape[:2]
        vis = np.zeros((max(hA, hB), wA + wB, 3), dtype="uint8")
        vis[0:hA, 0:wA] = imageA
        vis[0:hB, wA:] = imageB

        # 联合遍历,画出匹配对
        for ((trainIdx, queryIdx), s) in zip(matches, status):
            # 当点对匹配成功时,画到可视化图上
            if s == 1:
                # 画出匹配对
                ptA = (int(kpsA[queryIdx][0]), int(kpsA[queryIdx][1]))
                ptB = (int(kpsB[trainIdx][0]) + wA, int(kpsB[trainIdx][1]))
                cv2.line(vis, ptA, ptB, (0, 255, 0), 1)

        # 返回可视化结果
        return vis
该代码段是为了实现拟合图片之间的联系
2、读取图片内容,这里采用cv读取
# 读取拼接图片
imageA = cv2.imread("./photo/1.jpg")
imageB = cv2.imread("./photo/2.jpg")
3、利用stitcher开始拼接
#利用stitcher开始拼接
stitcher = Stitcher()
(result, vis) = stitcher.stitch([imageA, imageB], showMatches=True)
4、显示及导出未处理的图片
# 显示所有图片
cv2.imshow("Image A", imageA)
cv2.imshow("Image B", imageB)
cv2.imshow("Keypoint Matches", vis)
# 未处理的结果图片
cv2.imshow("未去黑边的结果", result)
result1 = result #copy一下
result = Image.fromarray(result.astype('uint8')).convert('RGB')
result.save('./photo/result1.jpg')
这里可以发现,在进行拼接时,尺寸大小是两图片之和,一些未有数据的位子会变“黑”,此时就要用到
- 轮廓最小正矩形
- 腐蚀处理
- 裁剪
5、去黑
# 全景图轮廓提取
stitched = cv2.copyMakeBorder(result1, 10, 10, 10, 10, cv2.BORDER_CONSTANT, (0, 0, 0))
gray = cv2.cvtColor(stitched, cv2.COLOR_BGR2GRAY)
thresh = cv2.threshold(gray, 0, 255, cv2.THRESH_BINARY)[1]
cnts = cv2.findContours(thresh, cv2.RETR_EXTERNAL, cv2.CHAIN_APPROX_SIMPLE)[0]

# 轮廓最小正矩形
mask = np.zeros(thresh.shape, dtype="uint8")
(x, y, w, h) = cv2.boundingRect(cnts[0])  # 取出list中的轮廓二值图,类型为numpy.ndarray
cv2.rectangle(mask, (x, y), (x + w, y + h), 255, -1)

# 腐蚀处理,直到minRect的像素值都为0
minRect = mask.copy()
sub = mask.copy()
while cv2.countNonZero(sub) > 0:
    minRect = cv2.erode(minRect, None)
    sub = cv2.subtract(minRect, thresh)
stitched = stitched[y:y + h, x:x + w]
cv2.imshow("去黑边结果", stitched)

stitched = Image.fromarray(stitched.astype('uint8')).convert('RGB')
stitched.save('./photo/result2.jpg')


cv2.waitKey(0)
cv2.destroyAllWindows()
while cv2.countNonZero(sub) > 0:会循环到直到把minrect的像素点都变为0,此时可以使用x,y,h,w了,将我们的图片数据从y切到y+h,x切到x+w,下面看结果
还是会有些需缺陷,可能是拼接时出现的差异或者是需要拼接的图片要倾斜,不好去黑
下面附上源代码及数据
https://download.csdn.net/download/m0_67629315/87600545?spm=1001.2014.3001.5501