一 登录

1 背景
 <div class="box"></div>

.box{
  height: 100%;
  background: url('~@/assets/images/login.jpg') no-repeat center;
  background-size: cover;
}
2
fom 和第一行 都水平居中, 看成一个整体, 进行居中
水平居中,要设置一个宽度
第一行 对里边的图片文字居中,用text-align

代码:
<template>
  <div class="box">
    <div class="login">
      <div class="header">
        <img
          src="http://fes.qyerstatic.com/fe_ssr_passport/41bd0a522fbeb024a41208a408ca73ec.png"
          alt=""
        />

        <span>登录</span>
      </div>
      <div class="login-content">
        <div class="left">
          <el-form ref="form" :model="form" label-width="40px">
            <el-form-item label="账号">
              <el-input v-model="form.username"></el-input>
            </el-form-item>
            <el-form-item label="密码">
              <el-input v-model="form.password" type="password"></el-input>
            </el-form-item>
            <el-form-item>
              <el-button type="primary" @click="onSubmit">提交</el-button>
              <el-button>重置</el-button>
            </el-form-item>
          </el-form>
          <div class="titile">输入任意的账号admin和密码123才可以登录</div>
        </div>
        <div class="right">
          <img src="@/assets/images/login-img.jpg" alt="" />
        </div>
      </div>
    </div>
  </div>
</template>

<script>
export default {
  name: 'lLgoin',
  data () {
    return {
      form: {
        username: 'admin',
        password: '123'
      }
    }
  }
}
</script>

<style scoped lang="less">
.box {
  height: 100%;
  background: url('~@/assets/images/login.jpg') no-repeat center;
  background-size: cover;

  .login {
    width: 650px;
    margin: 0 auto;

    .header {
      text-align: center;
      padding: 60px 0;
      img {
        height: 46px;
      }

      span {
        font-size: 24px;
        color: #fff;
      }
    }

    .login-content {
      width: 650px;
      background-color: #fff;
      display: flex;

      .left {
        flex: 1;
        padding: 60px 20px 0px 20px;

        .titile {
          font-size: 12px;
          color: #999;
          padding-left: 40px;
        }
      }
      .right {
        width: 270px;
        img {
          width: 100%;
          object-fit: contain;
        }
      }
    }
  }
}
</style>
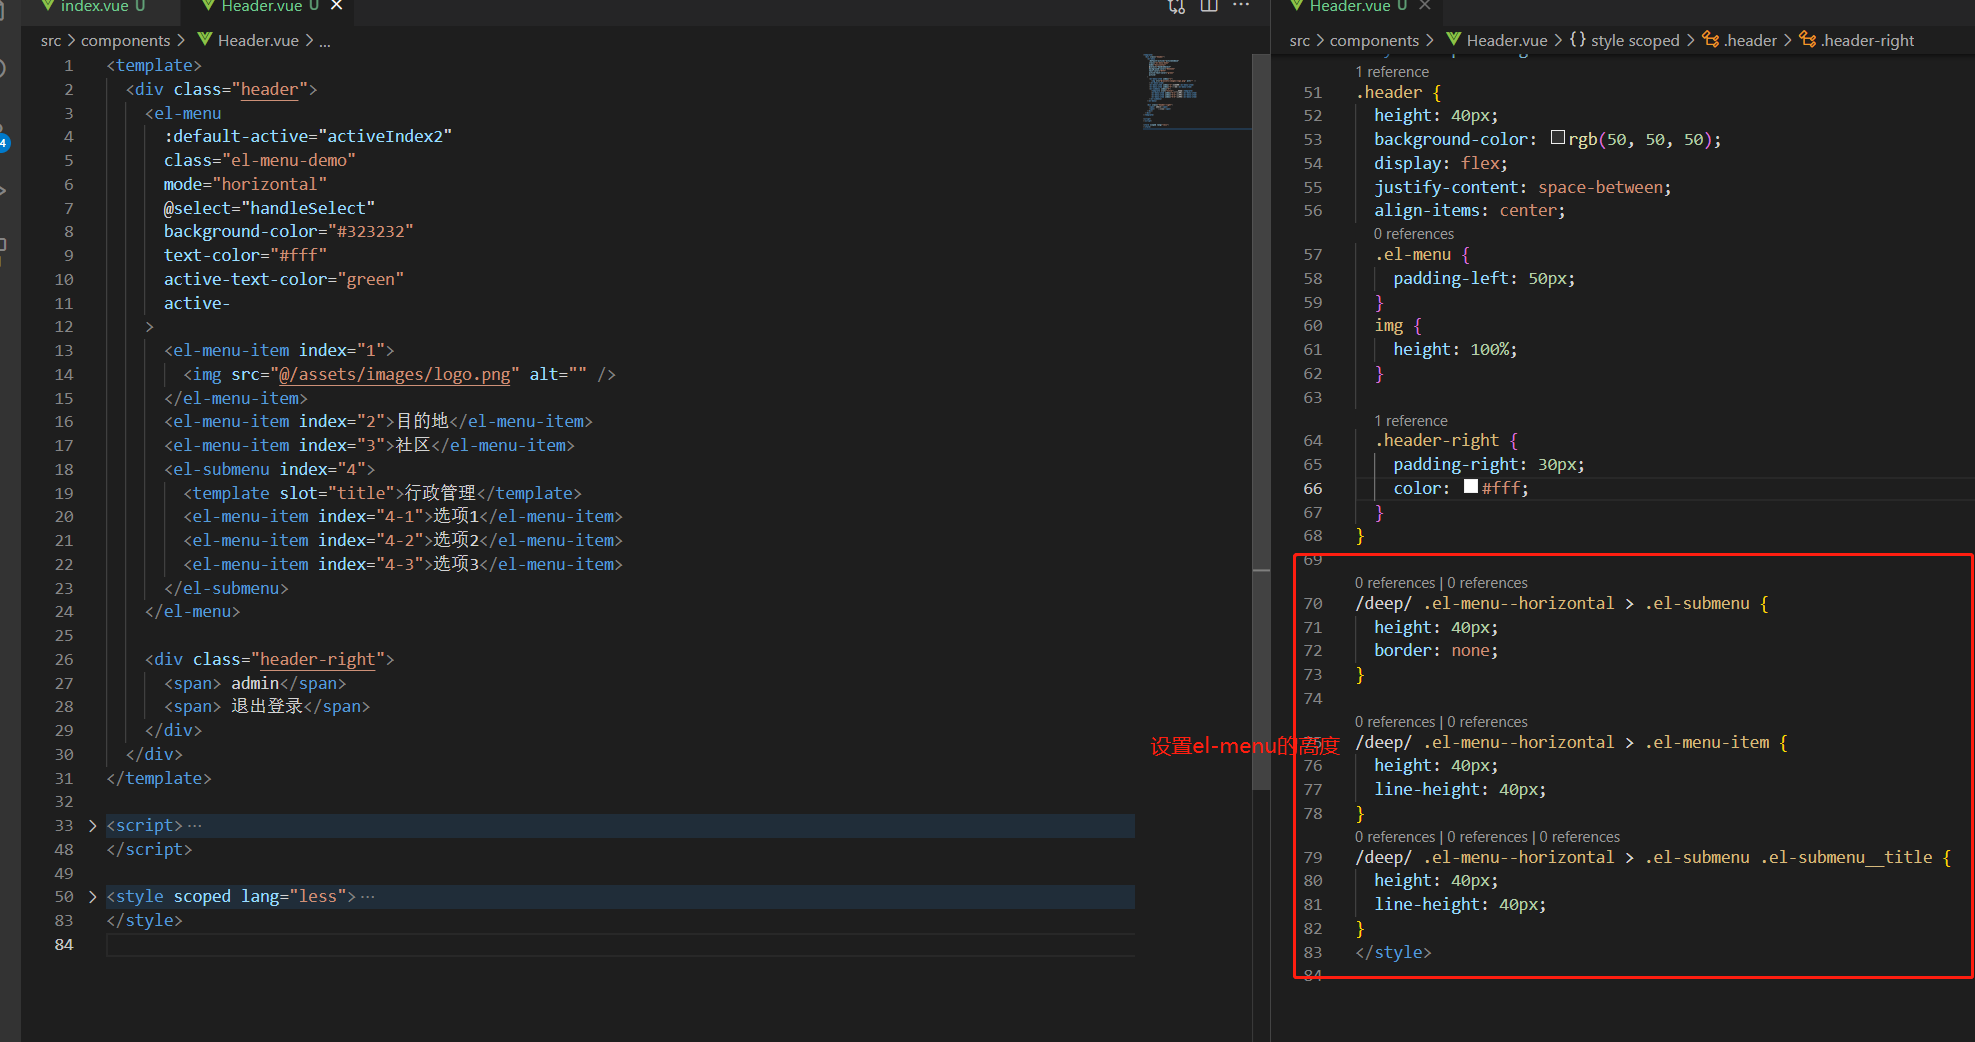
二 设置头部

使用了el-enmu 对他进行样式调整
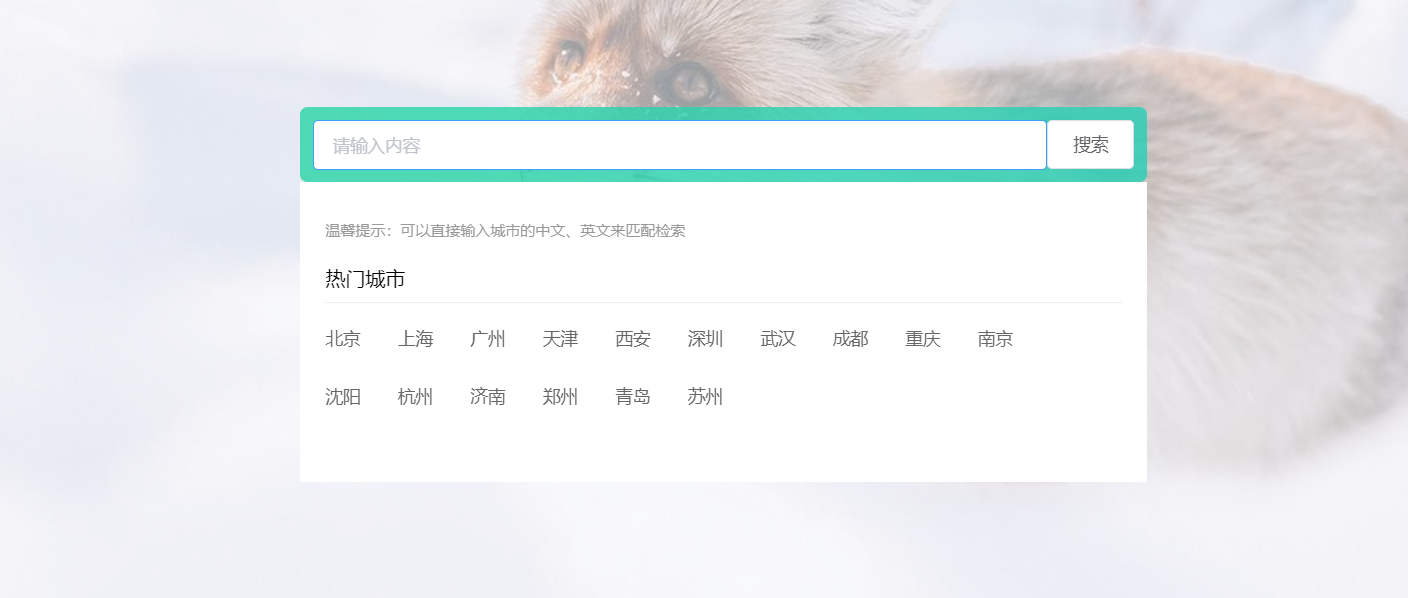
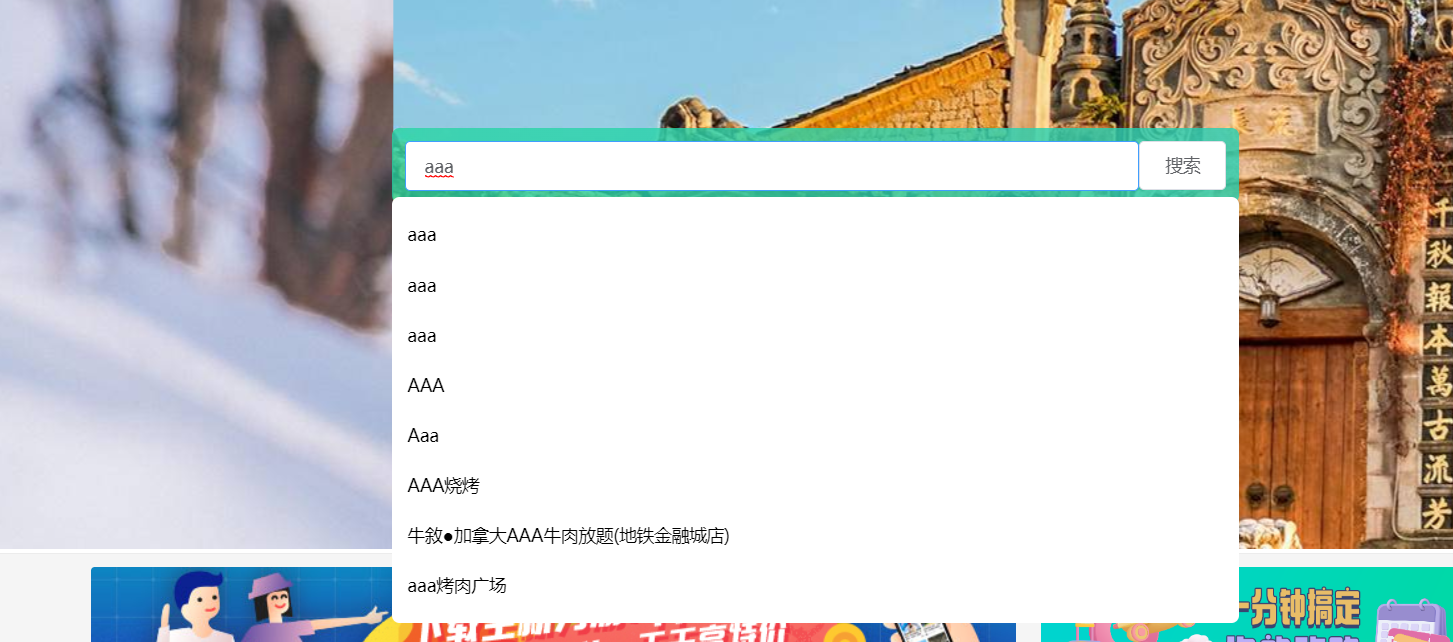
三 编写搜索框

1div里边 input, button
div 设置宽(内容撑开), 背景绿色, 添加padding撑开
input 设置宽 float
button 设置宽 高
2 定位,相对于父盒子, 轮播图肯定不能算是父盒子,所以再套用一个盒子进行定位

3.1
3.2

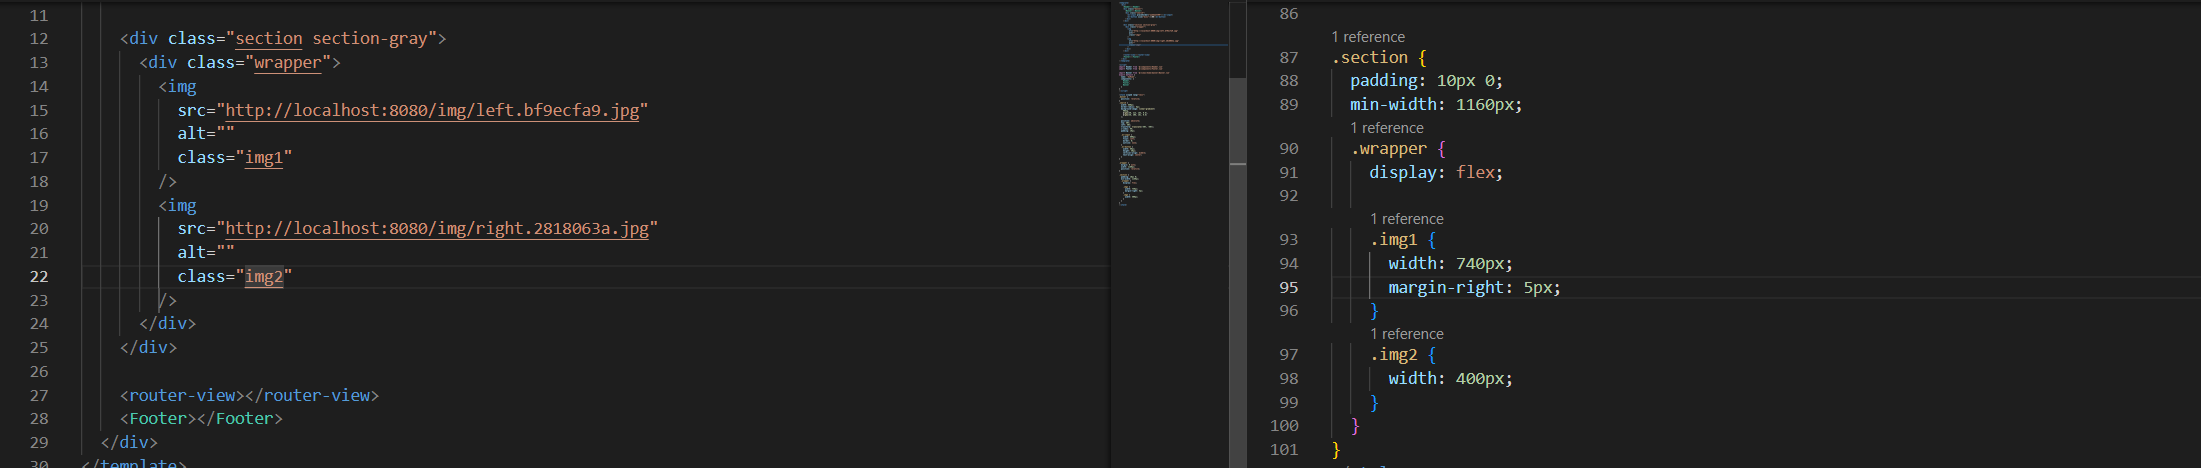
四 两个图片

父盒子 : 添加padding, 设置宽,不设置高(用内容撑开)
图片: 添加一个width (自动缩小成这样)
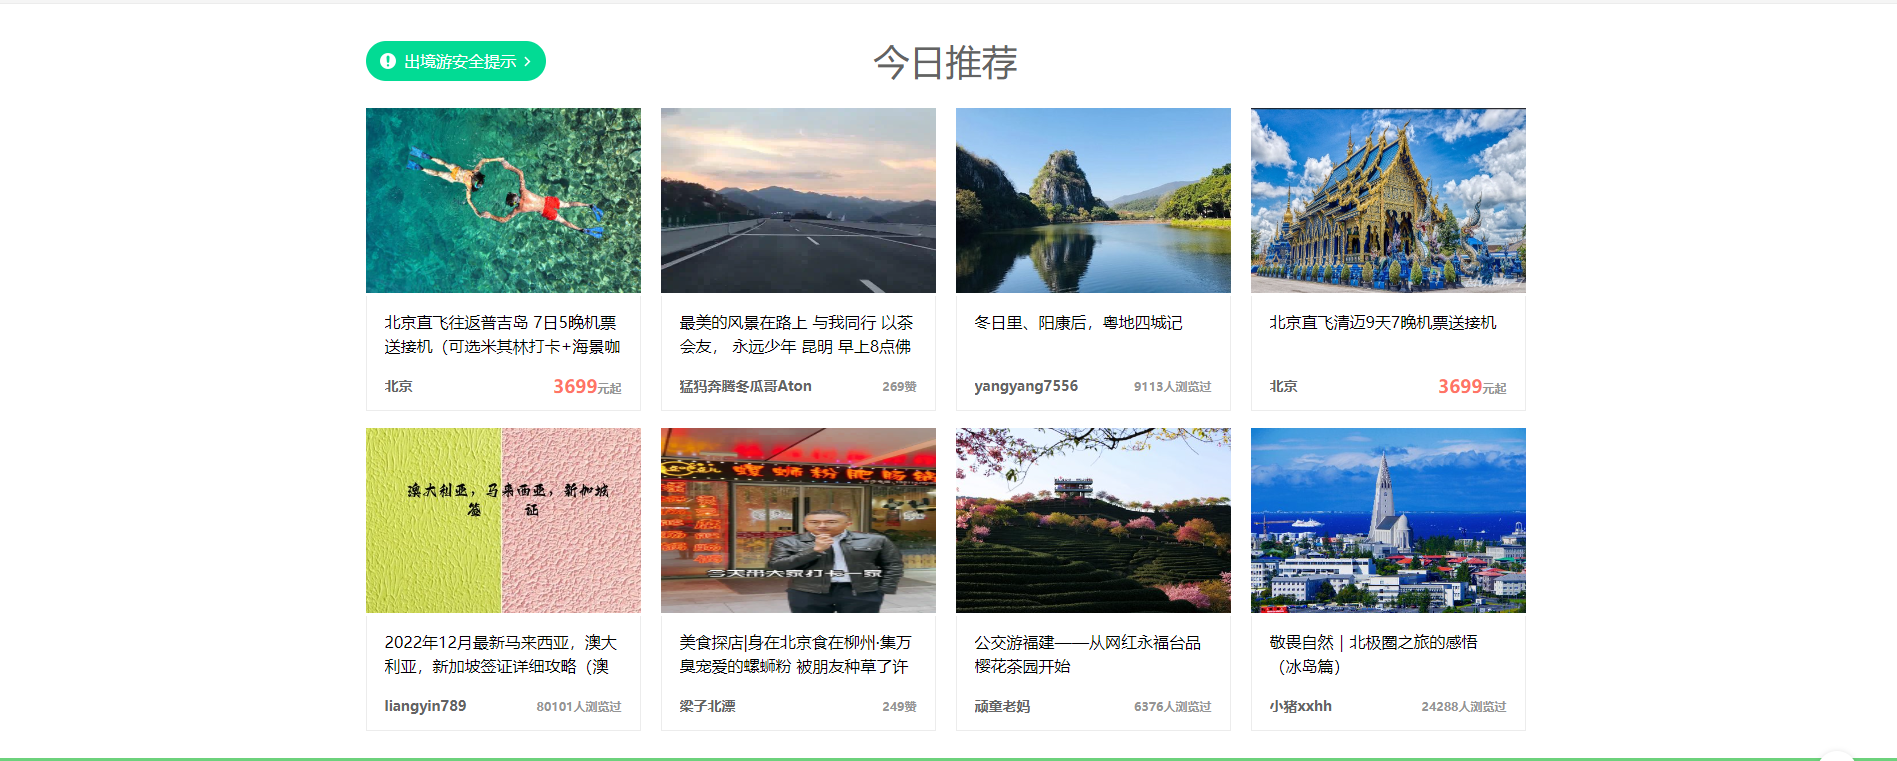
五:今日推荐
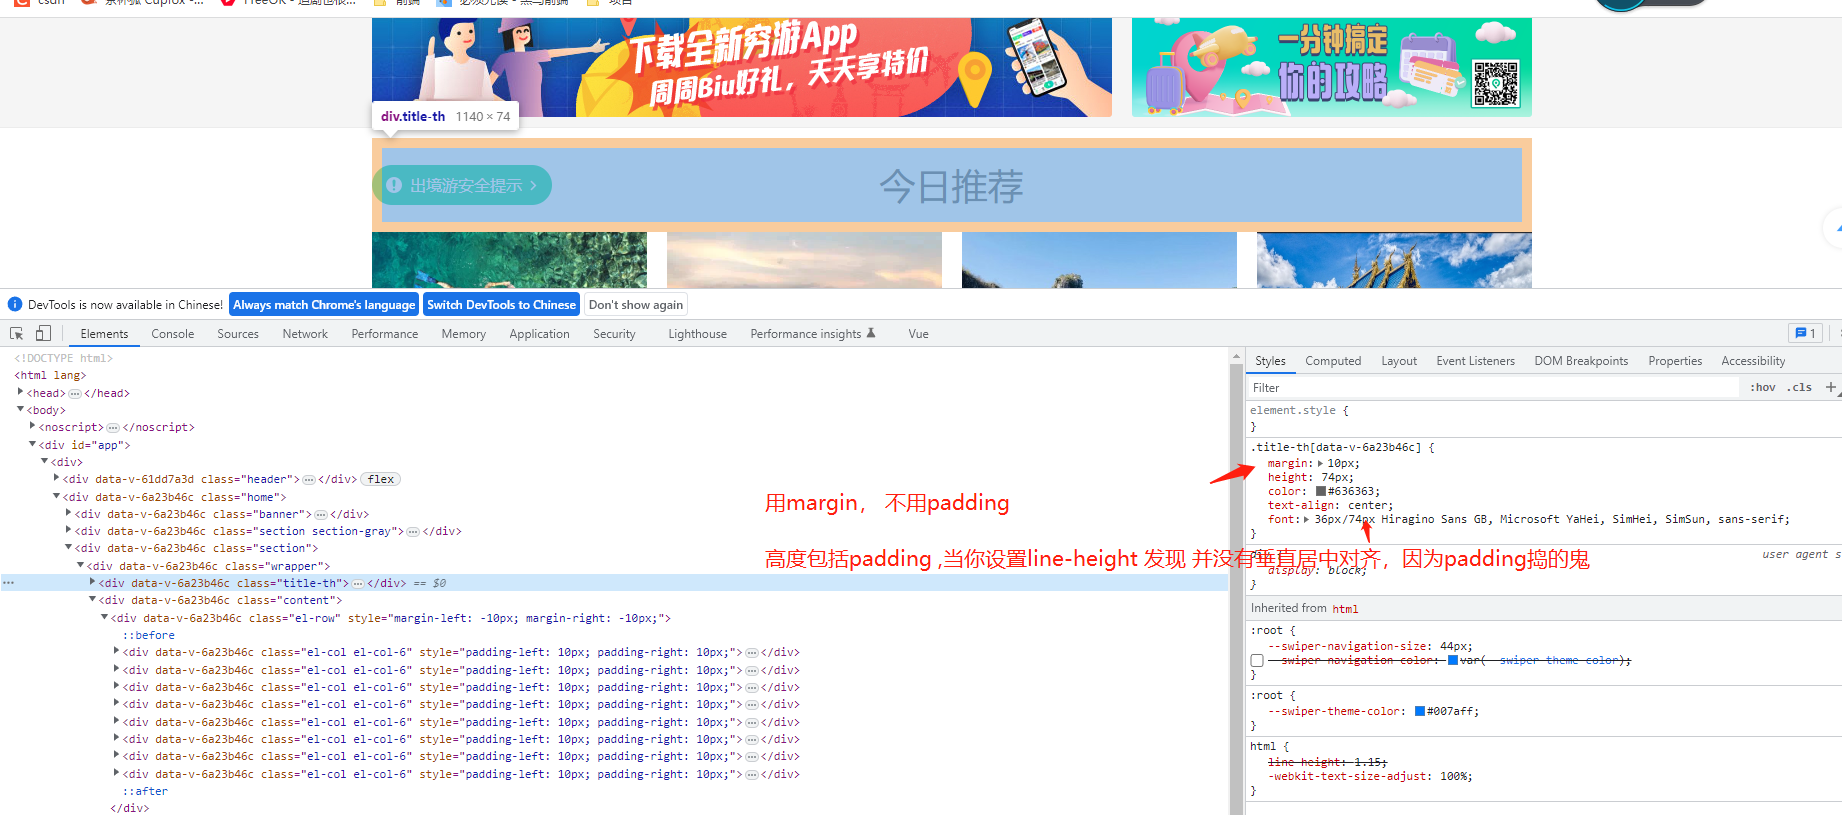
5.1 头部
1文字居中对齐, logo 用绝对定位
2 logo的图片用伪类选择器
3 设置line-height 注意不用padding, 用padding一定要加box-size
代码:

5.2今日推荐列表

1水平方向可以用el-row(:gutter:20), el-col(span:6)来设置
每一个item的下边边距,添加margin-bottom
每一个用div包裹,而不是li
2 文字只显示两行
设置一个高,其他都隐藏
  p {
      height: 43px;
      font-size: 16px;
      overflow: hidden;
      margin-bottom: 10px;
    }
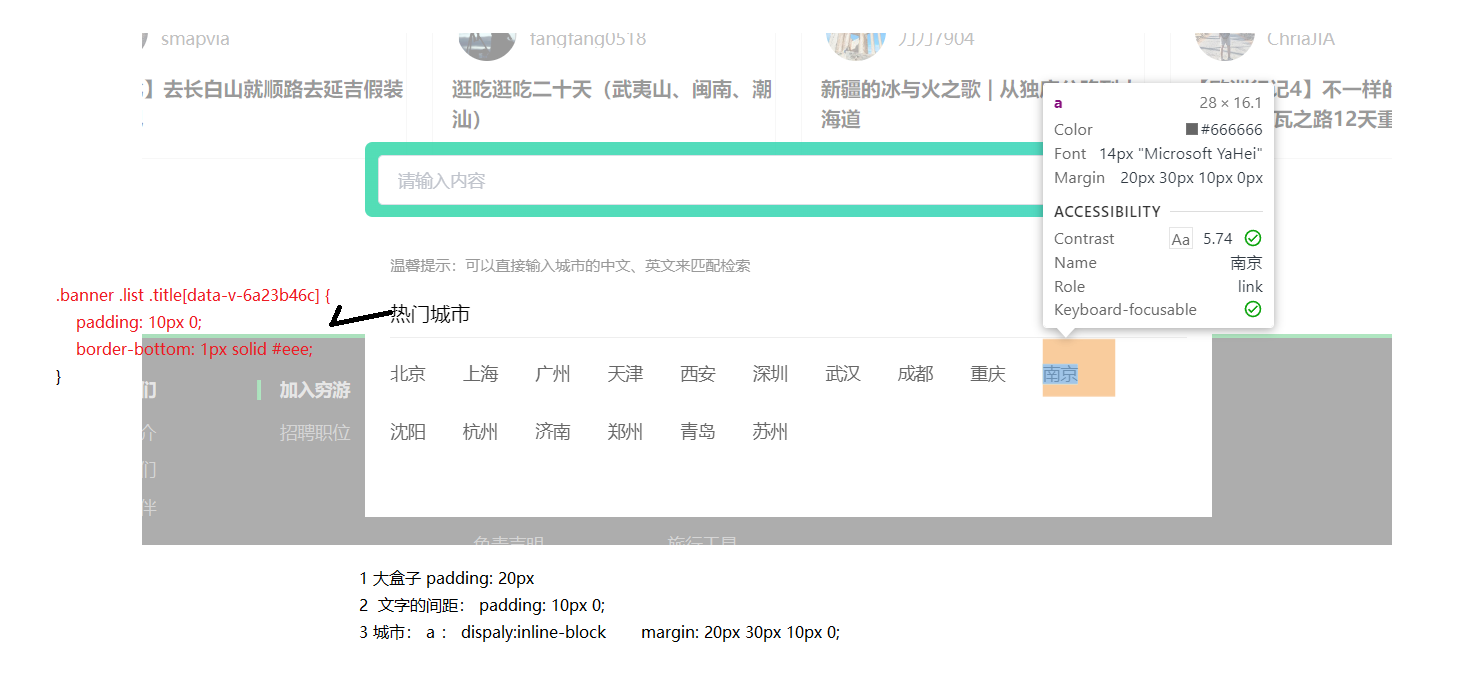
6穷游商城

6.1 头部
1 文字直接水平居中对齐
2 a标签【绝对定位】到右边
3 a里边有图标,可以设置背景
  a {
      position: absolute;
      right: 0px;
      bottom: 20px;
      font-size: 14px;
      background: url(https://fes.qyerstatic.com/Fv2FsRrsqF3KeHTCW1iUvxLxakBC)
        no-repeat;
      padding-left: 20px;
    }
6.2 列表
1 先布局, 对li进行flex布局:space-between , 注意不用设置margin-right
2 标题显示两行, 超出部分省略
        line-height: 26px;
          max-height: 52px;
          display: -webkit-box;
          text-overflow: ellipsis;
          -webkit-line-clamp: 2;
          -webkit-box-orient: vertical;
          overflow: hidden;
2 图片和有部分,在父文本上添加flex:1

6.3 查看更多
使行内元素居中对齐, 给他再套个盒子,text-align:center

7 热门游记


轮播图:
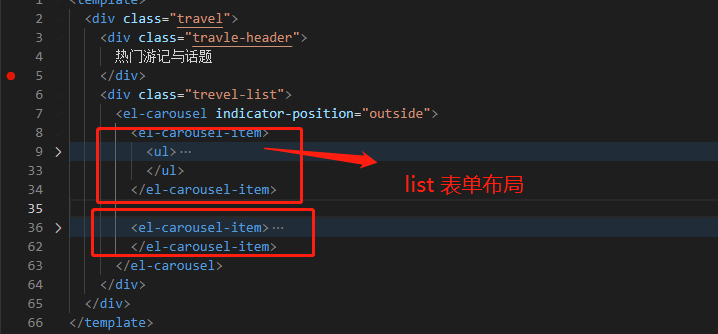
有多少el-carousel-item 就有多少个轮播页面
8 Fotter

8,1

vue项目介绍: