使用vue2.x+ant-design-vue搭建一个后台管理系统的基础架子,直接打开电脑一起敲就行了
node环境
- 官网:https://nodejs.org/zh-cn/download/
- 前端开发框架和环境都需要
Node.js,先安装node.js开发环境,vue的运行是要依赖于node的npm管理工具来实现 - node安装不多说,跟着别人的教程装就行了
编辑器工具(vscode)
- 官网:https://code.visualstudio.com/
- 开发
vue常用vscode插件推荐:
1:Auto Close Tag:自动补全html标签
2:Auto Rename Tag:修改html标签自动帮你完成尾部闭合标签的同步修改
3:Path Intellisense:智能路径提示,可以在你输入文件路径时智能提示
4:Open in Browser:这个插件可以让你从编辑器打开html文件,并且可以自由选择使用哪个浏览器打开
5:Live Server:在编辑器中启动一个服务,监听文件变化自动刷新页面
6:Visual Studio IntelliCode:代码智能提示插件
7:Vetur:vue开发必备,.vue文件支持,语法高亮,智能高亮
8:JavaScript(ES6)code snippets:ES6语法智能提示以及快速输入,除js外还支持.ts,.tsx,.html,.vue,省去了配置其支持各种包含js代码文件的时间
9:Beautify:格式化代码,值得注意的是,beautify插件支持自定义格式化代码规则
10:Eslint:语法纠错
技术框架(vue2.x+and-design-vue)
安装全局vue-cli脚手架:npm i --global vue-cli
vue init webpack:
安装vue-init:npm i -g @vue/cli-init
使用命令创建脚手架:vue init webpack xxxx(文件名/项目名称)
vue create:
直接使用命令:vue create xxxx(文件名/项目名称)
目前有vue3.0和vue2.0可供选择,也可以选择自己配置,看个人项目需求:
-
TypeScript:支持TypeScript书写源码
-
Progressive Web App(PWA)Support:PWA支持
-
Vuex:vuex支持
-
CSS Pre-processors:支持CSS预处理器
-
Linter / Formatter:支持代码风格检查和格式化
-
Unit Testing:支持单元测试
-
E2E Testing:支持E2E测试
-
安装完成后npm i 命令安装依赖,npm run serve 命令启动项目
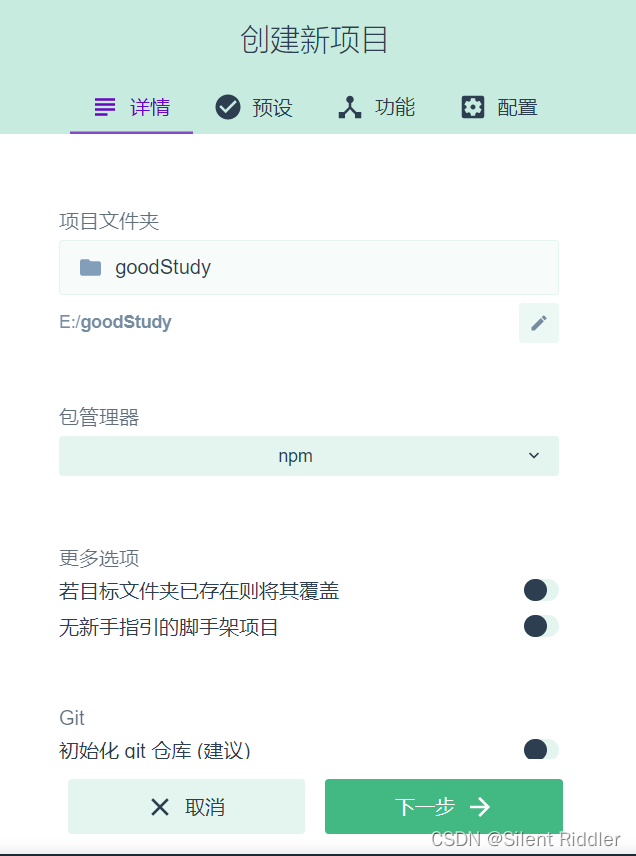
vue ui:
使用命令vue ui打开vue项目管理器
先找个放项目的地方
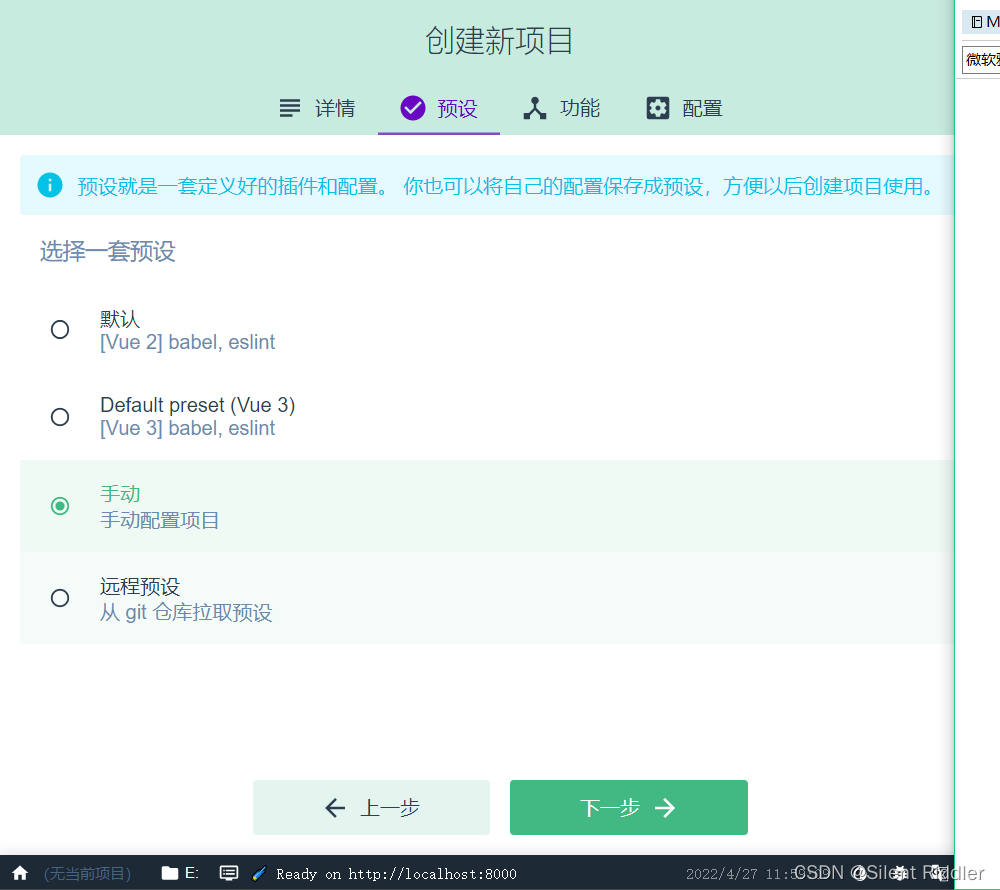
预设(我选择手动配置)
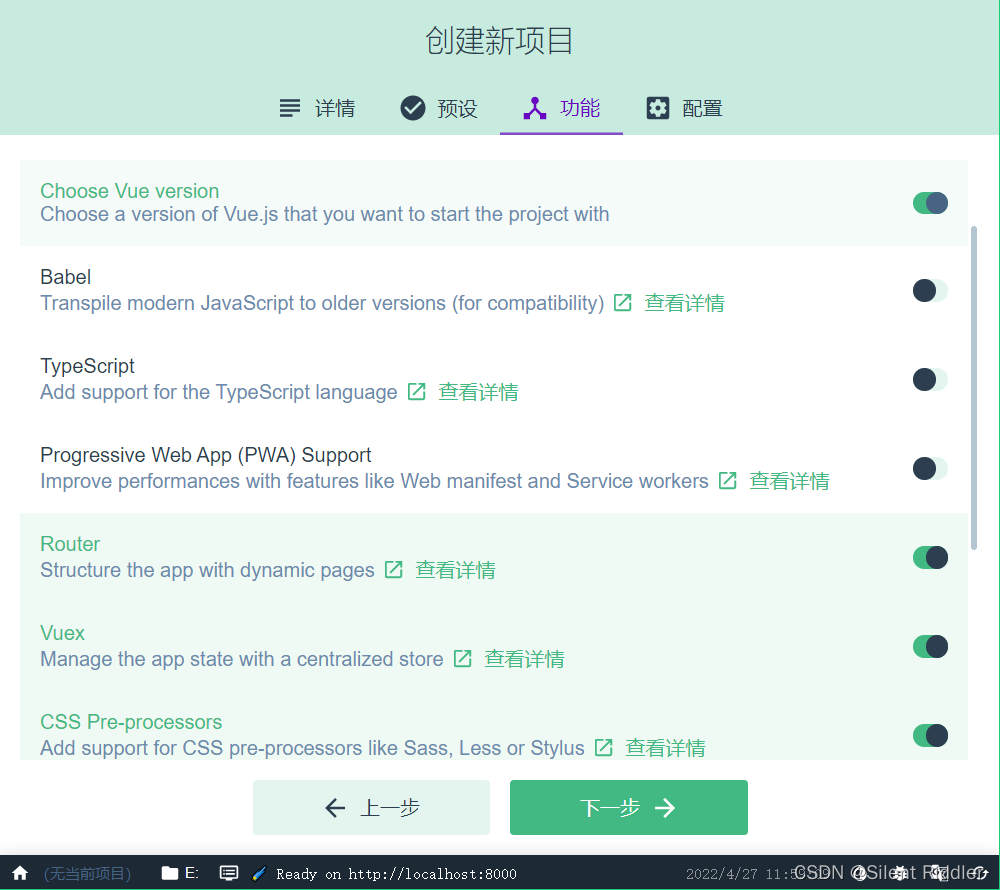
功能(选择预安装的依赖,对于不太了解规范的建议在自己玩demo时Linter / Formatter 代码风格检查和校验 就不要开启了)
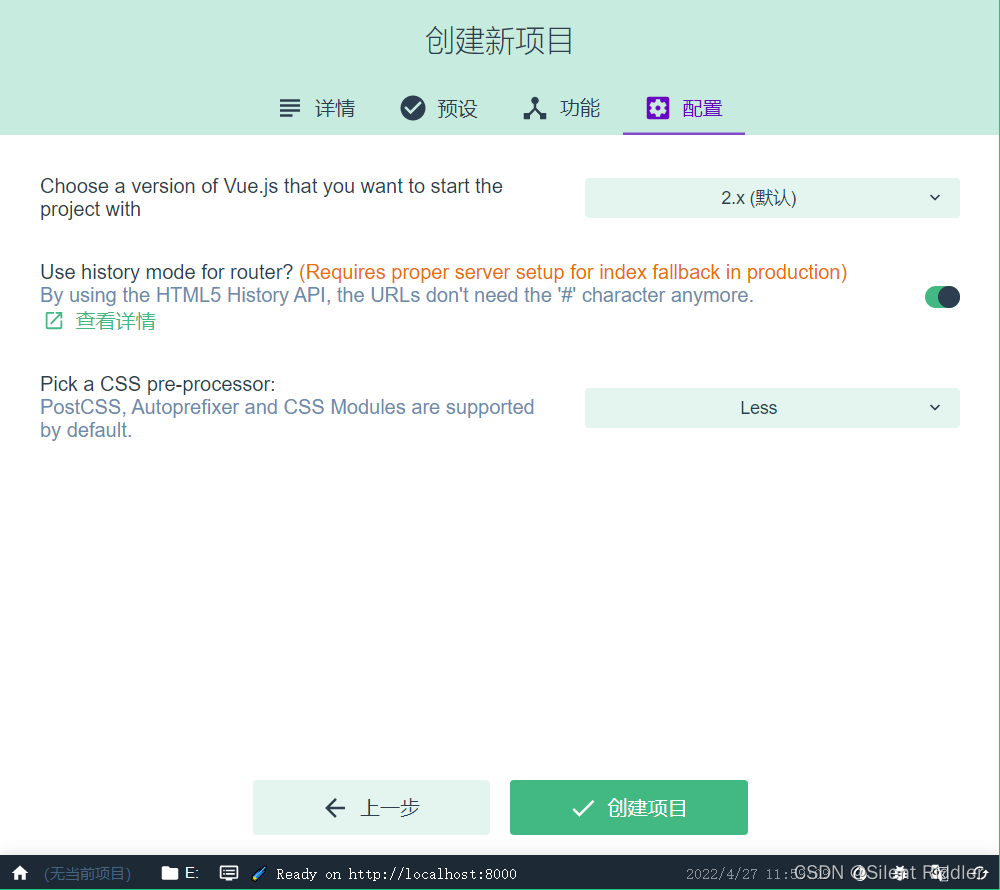
配置(项目的代码配置)
安装成功
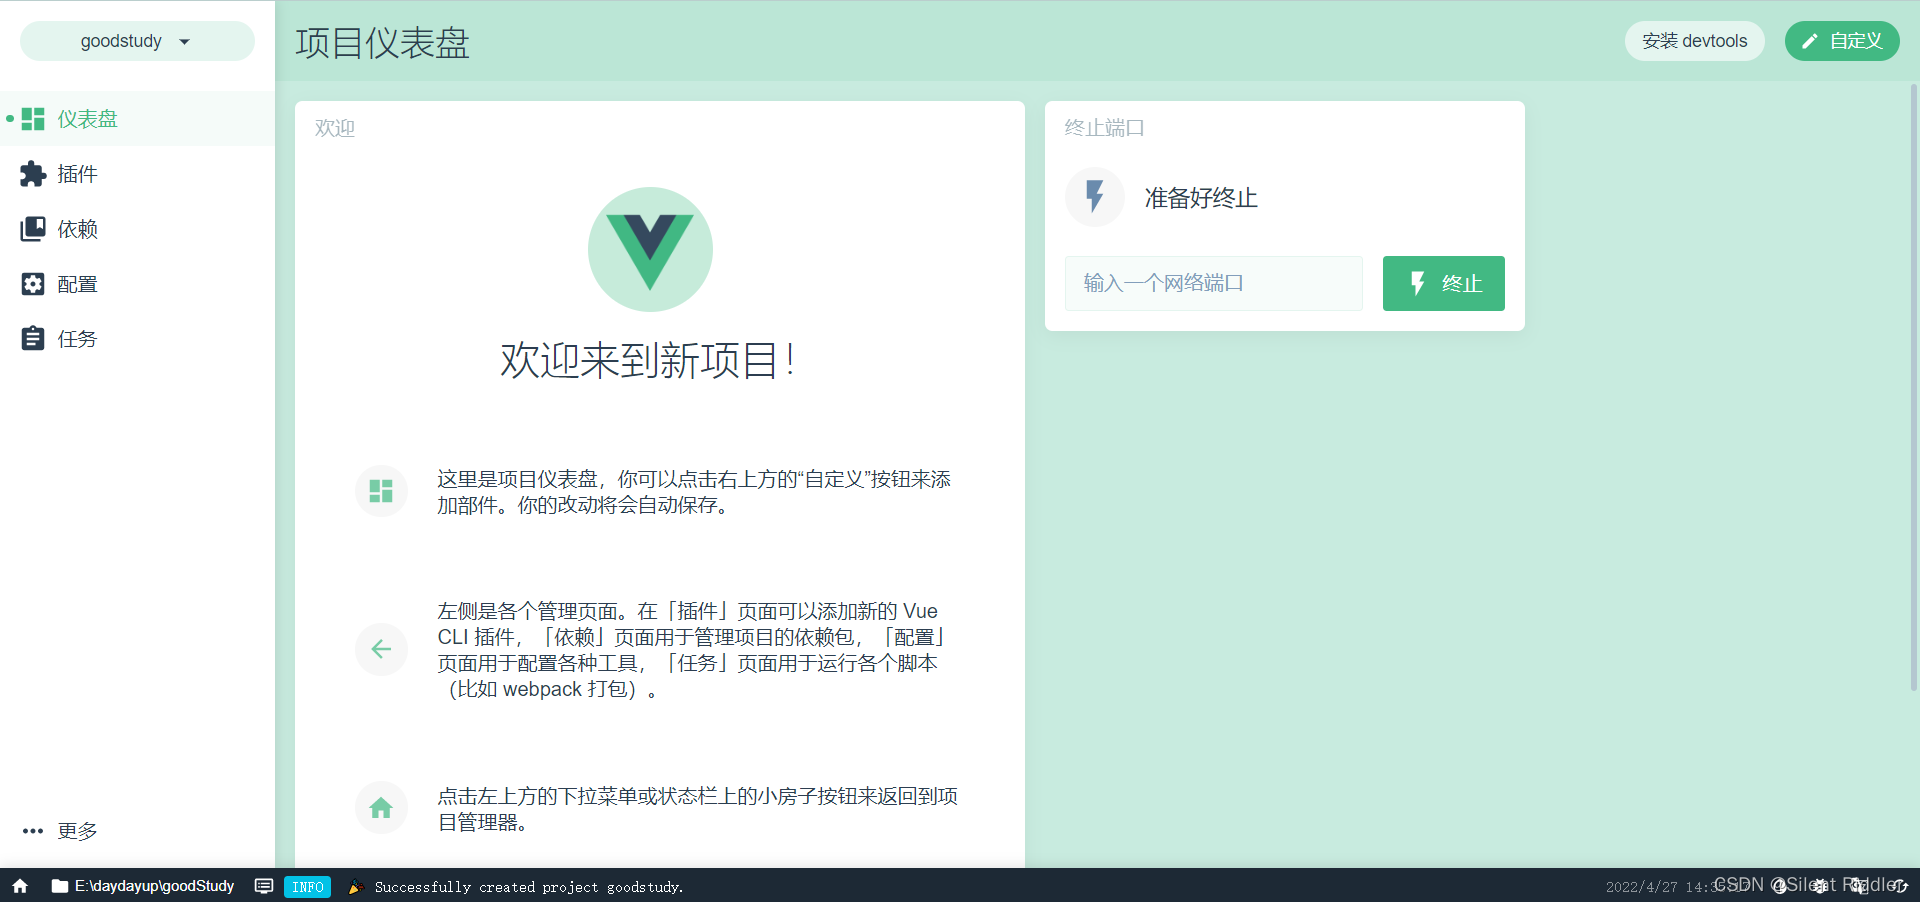
运行一下看看
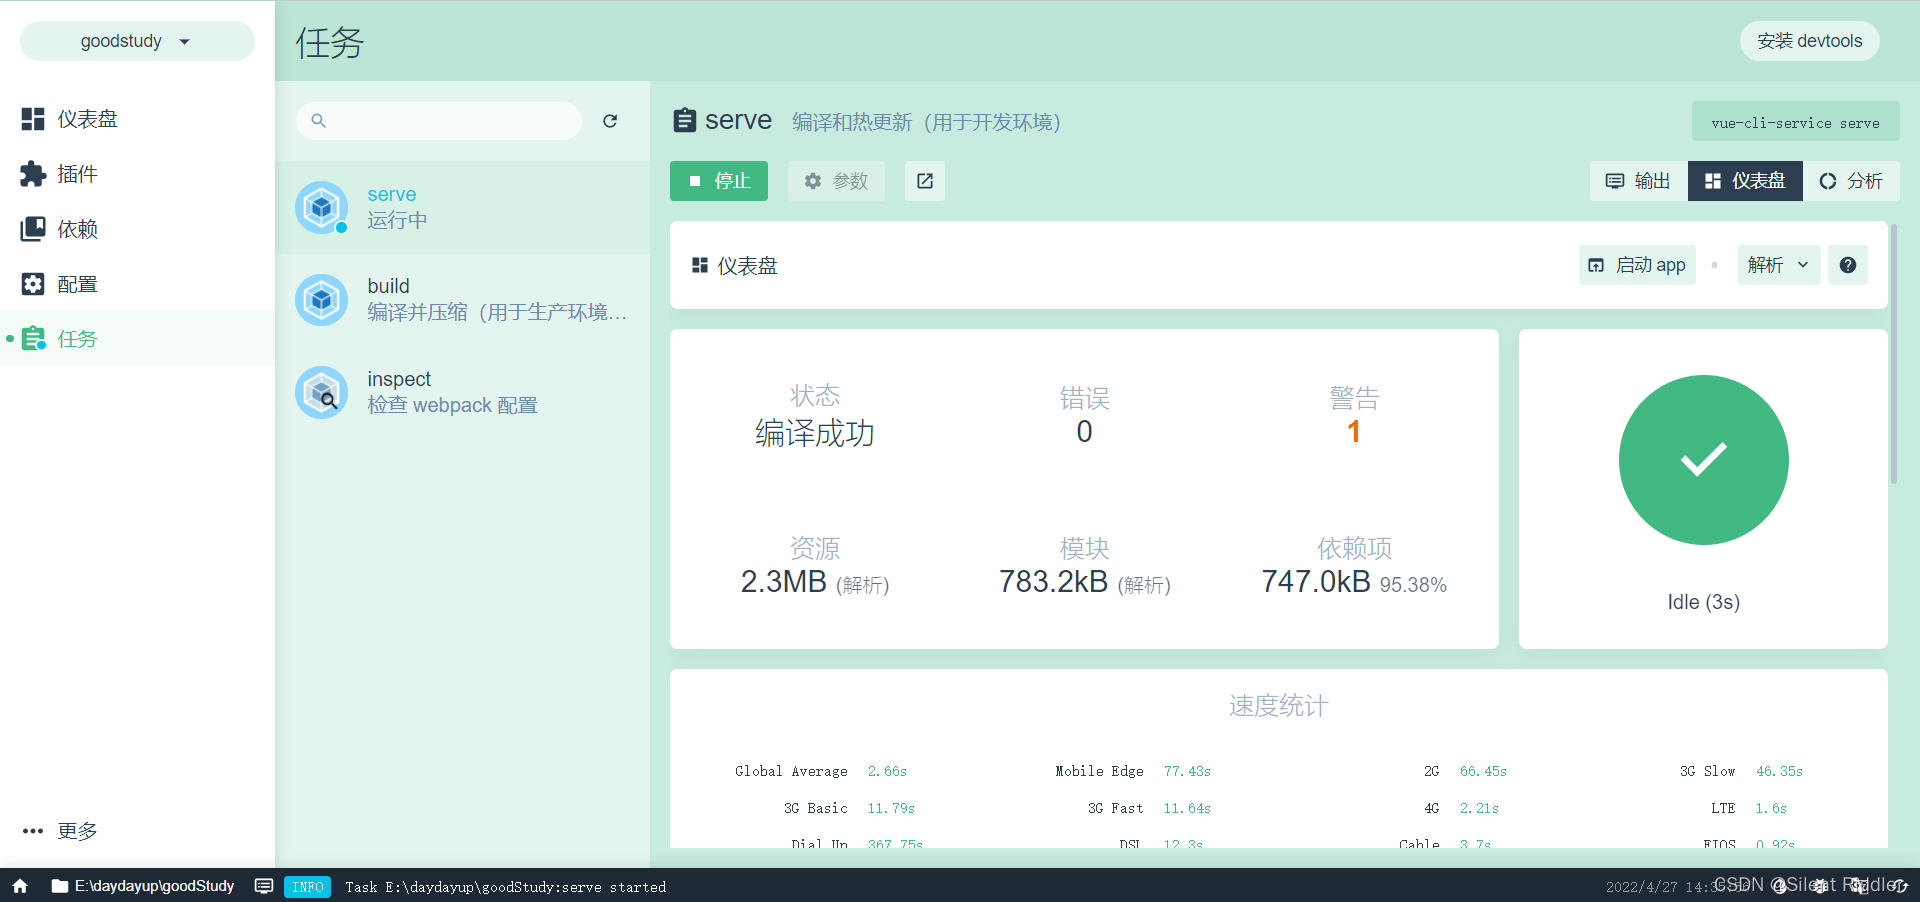
到这里已经安装好了,接下来就是配置项目了
配置项目
1、首先安装依赖(根据需要安装对应依赖)(通过@指定安装的版本)
- 安装ant-design-vue依赖注意一下版本
- 先看一下版本支持情况

2、配置按需引入(先安装babel-plugin-babel)在配置文件中加入上图配置
 plugins: [
    [
      'import',
      { libraryName: 'ant-design-vue', libraryDirectory: 'es', style: true }
    ]
 ]
然后我们页面上引入的button组件就生效了
<template>
  <div class="hello">
    <h1>{

   { msg }}</h1>
    <p>
      Welcome to your first project.
    </p>
    <a-button type="primary">按钮</a-button>
  </div>
</template>

<script>
export default {
  name: 'HelloWorld',
  props: {
    msg: String
  }
}
</script>

<!-- Add "scoped" attribute to limit CSS to this component only -->
<style scoped lang="less">
h3 {
  margin: 40px 0 0;
}
ul {
  list-style-type: none;
  padding: 0;
}
li {
  display: inline-block;
  margin: 0 10px;
}
a {
  color: #42b983;
}
</style>
多人协作项目开发时,入口最好保持简洁,我们将注册组件抽离出去,在main.js中引入(import'./config/components_use')
// main.js
import Vue from 'vue'
import App from './App.vue'
import router from './router'
import store from './store'
import './config/components_use'

Vue.config.productionTip = false

new Vue({
  router,
  store,
  render: h => h(App)
}).$mount('#app')
// components_use.js
// 根据需求引入项目中要使用的组件
import Vue from 'vue'
import {
  LocaleProvider,
  Layout,
  Input,
  InputNumber,
  Button,
  Switch,
  Radio,
  Checkbox,
  Select,
  AutoComplete,
  Cascader,
  Card,
  Form,
  Row,
  Col,
  Comment,
  Modal,
  Table,
  Tabs,
  Icon,
  Badge,
  Popover,
  Dropdown,
  List,
  Avatar,
  Breadcrumb,
  Steps,
  Spin,
  Menu,
  Drawer,
  Tooltip,
  Alert,
  Tag,
  Divider,
  DatePicker,
  TimePicker,
  Upload,
  Progress,
  Skeleton,
  Popconfirm,
  message,
  notification,
  Pagination,
  comment,
  FormModel
} from 'ant-design-vue'

Vue.use(LocaleProvider)
Vue.use(Layout)
Vue.use(Input)
Vue.use(InputNumber)
Vue.use(Button)
Vue.use(Switch)
Vue.use(Radio)
Vue.use(Checkbox)
Vue.use(Select)
Vue.use(AutoComplete)
Vue.use(Cascader)
Vue.use(Card)
Vue.use(Form)
Vue.use(Row)
Vue.use(Col)
Vue.use(Comment)
Vue.use(Modal)
Vue.use(Table)
Vue.use(Tabs)
Vue.use(Icon)
Vue.use(Badge)
Vue.use(Popover)
Vue.use(Dropdown)
Vue.use(List)
Vue.use(Avatar)
Vue.use(Breadcrumb)
Vue.use(Steps)
Vue.use(Spin)
Vue.use(Menu)
Vue.use(Drawer)
Vue.use(Tooltip)
Vue.use(Alert)
Vue.use(Tag)
Vue.use(Divider)
Vue.use(DatePicker)
Vue.use(TimePicker)
Vue.use(Upload)
Vue.use(Progress)
Vue.use(Skeleton)
Vue.use(Popconfirm)
Vue.use(notification)
Vue.use(Pagination)
Vue.use(comment)
Vue.use(FormModel)

Vue.prototype.$confirm = Modal.confirm
Vue.prototype.$message = message
Vue.prototype.$notification = notification
Vue.prototype.$info = Modal.info
Vue.prototype.$success = Modal.success
Vue.prototype.$error = Modal.error
Vue.prototype.$warning = Modal.warning
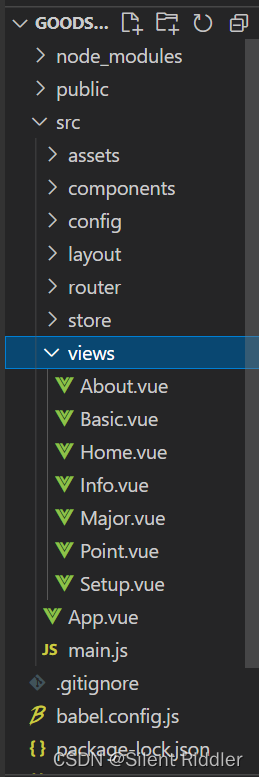
项目结构:
|-- daydayup
    |-- .gitignore
    |-- package-lock.json
    |-- babel.config.js
    |-- vue.config.js
    |-- package.json
    |-- README.md
    |-- public
    |   |-- favicon.ico
    |   |-- index.html
    |-- src
        |-- api // 接口放在这里
        |-- assets // 静态资源,图片之类
        |-- components // 项目中封装的组件
        |-- config // 项目配置文件
        |-- layout // 布局组件
        |-- router // 路由
            |-- router.js
        |-- store // vuex状态管理器
            |-- store.js
        |-- utils // 公共方法和工具这类放这里
        |-- views // 主页面放这里
            |-- Home.vue
        |-- App.vue
        |-- main.js
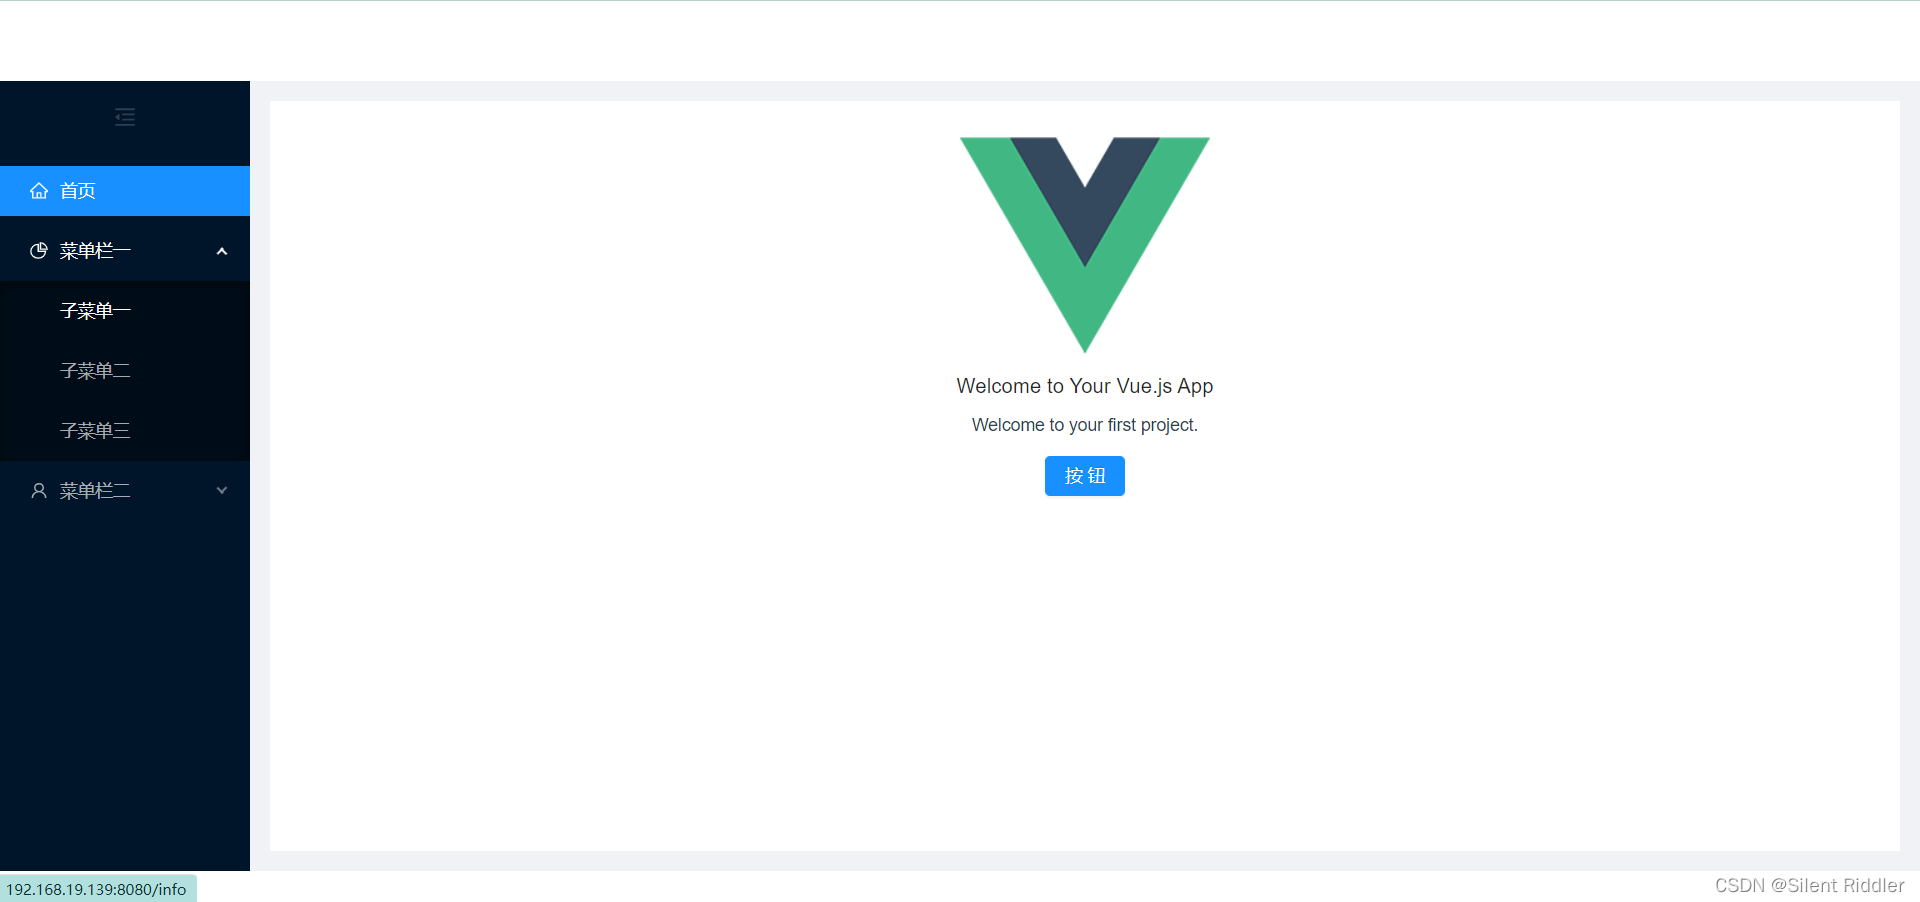
构建基础页面
1、修改APP.vue文件,<router-view />是路由渲染组件
<template>
  <div id="app">
    <router-view/>
  </div>
</template>
2、创建基础布局容器
新建layout文件夹、BasicLayout.vue文件
<template>
  <a-layout class="basic-layout">
    <a-layout-header style="background: #fff; padding: 0">
      <div class="logo" />
    </a-layout-header>
    <a-layout>
      <a-layout-sider
        theme="dark"
        :trigger="null"
        collapsible
        v-model="collapsed"
      >
        <a-icon
          class="trigger"
          :type="collapsed ? 'menu-unfold' : 'menu-fold'"
          @click="() => (collapsed = !collapsed)"
        />
        <a-menu
          mode="inline"
          :defaultSelectedKeys="['1']"
          :inline-collapsed="collapsed"
          theme="dark"
        >
          <a-menu-item key="1">
            <router-link to="/">
              <a-icon type="home" />
              <span>首页</span>
            </router-link>
          </a-menu-item>
          <a-sub-menu key="2">
            <span slot="title"><a-icon type="pie-chart" />菜单栏一</span>
            <a-menu-item key="2-1">
              <router-link to="/info">
                <span>子菜单一</span>
              </router-link>
            </a-menu-item>
            <a-menu-item key="2-2">
              <router-link to="/major">
                <span>子菜单二</span>
              </router-link>
            </a-menu-item>
            <a-menu-item key="2-3">
              <router-link to="/point">
                <span>子菜单三</span>
              </router-link>
            </a-menu-item>
          </a-sub-menu>
          <a-sub-menu key="3">
            <span slot="title"><a-icon type="user" />菜单栏二</span>
            <a-menu-item key="3-1">
              <span>子菜单一</span>
            </a-menu-item>
            <a-menu-item key="3-2">
              <span>子菜单二</span>
            </a-menu-item>
          </a-sub-menu>
        </a-menu>
      </a-layout-sider>
      <a-layout-content
        :style="{
          margin: '16px',
          padding: '16px',
          background: '#fff',
          minHeight: '600px',
        }"
      >
        <router-view />
      </a-layout-content>
    </a-layout>
  </a-layout>
</template>

<script>
export default {
  data () {
    return {
      collapsed: false
    }
  }
}
</script>

<style lang="less">
.basic-layout {
  height: 100%;
  .trigger {
    font-size: 18px;
    line-height: 64px;
    padding: 0 24px;
    cursor: pointer;
    transition: color 0.3s;
    &:hover {
      color: #018ae8;
    }
  }
  .ant-menu-item {
    text-align: left;
  }
  .ant-menu-submenu {
    text-align: left;
  }
  .logo {
    height: 32px;
    background: rgba(255, 255, 255, 0.2);
    margin: 16px;
  }
}
</style>
创建对应页面
<template>
  <div class="info">
      this is info page.
  </div>
</template>

<script>
export default {
  components: {},
  data() {
    return {};
  },
};
</script>
<style lang="less" scoped>
.info {
    color: #333;
    font: 16px/2 "";
    text-align: center;
}
</style>
3、修改路由配置文件
import Vue from 'vue'
import VueRouter from 'vue-router'
import Home from '../views/Home.vue'
import BasicLayout from '../layout/BasicLayout.vue'

Vue.use(VueRouter)

const routes = [
  {
    path: '/',
    component: BasicLayout,
    redirect: '/index',
    children: [
      {
        path: '/',
        name: 'index',
        hideInMenu: true,
        component: Home
      }, {
        path: '/info',
        name: 'info',
        component: () => import('./../views/Info.vue')
      }, {
        path: '/major',
        name: 'major',
        component: () => import('./../views/Major.vue')
      }, {
        path: '/point',
        name: 'point',
        component: () => import('./../views/Point.vue')
      }, {
        path: '/basic',
        name: 'basic',
        component: () => import('./../views/Basic.vue')
      }, {
        path: '/setup',
        name: 'setup',
        component: () => import('./../views/Setup.vue')
      }
    ]
  }
]

const router = new VueRouter({
  mode: 'history',
  base: process.env.BASE_URL,
  routes
})

export default router
4、运行项目,查看效果