兰伯特漫反射公式:Diffuse = 直射光颜色 *物体颜色* max(0,cos夹角(光和法线的夹角) )
下面给出顶点漫反射代码:
Shader "Unlit/005"
{
	Properties
	{
		_Diffuse("Diffuse", Color) = (1,1,1,1)

	}
	SubShader
	{
		Tags { "RenderType"="Opaque" }
		LOD 100

		Pass
		{
			CGPROGRAM
			#pragma vertex vert
			#pragma fragment frag
			#include "UnityCG.cginc"
			#include "Lighting.cginc"

			fixed4 _Diffuse;

			struct v2f
			{
				float4 vertex : SV_POSITION;
				fixed3 color: Color;
			};

			v2f vert (appdata_base v)
			{
				v2f o;
				o.vertex = UnityObjectToClipPos(v.vertex);//模型空间转换为裁剪空间

				fixed3 ambient = UNITY_LIGHTMODEL_AMBIENT.xyz; //获得环境光
				fixed3 worldNormal = UnityObjectToWorldNormal( v.normal); //把法线方向从模型空间转换为世界空间,得到单位化向量
				fixed3 worldLight = normalize(_WorldSpaceLightPos0.xyz); //把光源方向单位化
				fixed3 diffuse = _LightColor0.rgb * _Diffuse.rgb * max(0, dot(worldNormal,worldLight));//计算漫反射
				//_LightColor0.rgb 取得光源颜色
				//_Diffuse.rgb 取得物体颜色

				o.color = diffuse + ambient;//漫反射颜色+环境光
				return o;
			}

			fixed4 frag (v2f i) : SV_Target
			{
				return fixed4(i.color,1);
			}
			ENDCG
		}
	}
	FallBack "Diffuse"
}
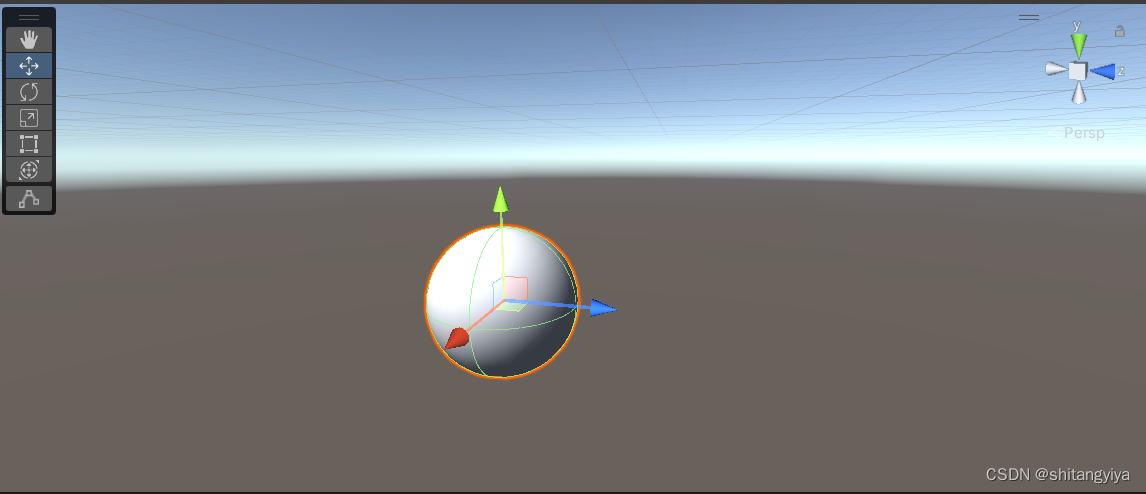
效果图:
下面给出片元漫反射代码:
Shader "Unlit/006"
{
	Properties
	{
		_Diffuse("Diffuse", Color) = (1,1,1,1)

	}

	SubShader
	{
		Tags { "RenderType"="Opaque" }
		LOD 100

		Pass
		{
			CGPROGRAM
			#pragma vertex vert
			#pragma fragment frag
			#include "UnityCG.cginc"
			#include "Lighting.cginc"

			fixed4 _Diffuse;

			struct v2f
			{
				float4 vertex : SV_POSITION;
				fixed3 worldNormal: TEXCOORD0;
			};

			v2f vert (appdata_base v)
			{
				v2f o;
				o.vertex = UnityObjectToClipPos(v.vertex);  //模型空间转换为裁剪空间
				fixed3 worldNormal = UnityObjectToWorldNormal( v.normal);//把法线方向从模型空间转换为世界空间,得到单位化向量
				o.worldNormal = worldNormal;
				return o;
			}

			fixed4 frag (v2f i) : SV_Target
			{
				fixed3 ambient = UNITY_LIGHTMODEL_AMBIENT.xyz; //获得环境光

				fixed3 worldLightDir = normalize(_WorldSpaceLightPos0.xyz);//把光源方向单位化
				fixed3 diffuse = _LightColor0.rgb * _Diffuse.rgb * max(0,dot(worldLightDir,i.worldNormal));
				//计算漫反射
				//_LightColor0.rgb 取得光源颜色
				//_Diffuse.rgb 取得物体颜色
				fixed3 color = ambient + diffuse;//环境光颜色 + 漫反射颜色

				return fixed4(color,1);
			}
			ENDCG
		}
	}
	FallBack "Diffuse"
}
效果图:
一般来说片元会比顶点效果更平滑更精细,但是性能消耗也就更大一些
半兰伯特光照模型,Diffuse = 直射光颜色 *( cos夹角(光和法线的夹角) *0.5 +0.5 )
下面给出片元半兰伯特光照模型的写法:
Shader "Unlit/007"
{
	Properties
	{
		_Diffuse("Diffuse", Color) = (1,1,1,1)

	}

	SubShader
	{
		Tags { "RenderType"="Opaque" }
		LOD 100

		Pass
		{
			CGPROGRAM
			#pragma vertex vert
			#pragma fragment frag
			#include "UnityCG.cginc"
			#include "Lighting.cginc"

			fixed4 _Diffuse;

			struct v2f
			{
				float4 vertex : SV_POSITION;
				fixed3 worldNormal: TEXCOORD0;
			};

			v2f vert (appdata_base v)
			{
				v2f o;
				o.vertex = UnityObjectToClipPos(v.vertex);
				fixed3 worldNormal = UnityObjectToWorldNormal( v.normal);
				o.worldNormal = worldNormal;
				return o;
			}

			fixed4 frag (v2f i) : SV_Target
			{
				fixed3 ambient = UNITY_LIGHTMODEL_AMBIENT.xyz;

				fixed3 worldLightDir = normalize(_WorldSpaceLightPos0.xyz);
				fixed3 diffuse = _LightColor0.rgb * _Diffuse.rgb * (dot(worldLightDir,i.worldNormal) * 0.5 + 0.5);//在此处公式做了更改其余同兰伯特光照模型的代码一致
				fixed3 color = ambient + diffuse;
				return fixed4(color,1);
			}
			ENDCG
		}
	}

	FallBack "Diffuse"
}
效果图:

可以看出黑的地方没有那么黑了。半兰伯特光照模型其实就是防止无光情况下背部阴影完全处于黑色的情况,这样在无光的背部也可以看清物体的纹理细节