现在开发的一个项目要求使用Mule ESB为一个已有的系统的Web Service接口做代理接口,客户端调用原来Web Service接口的代码要求不做大的改动,只修改调用Web Service的url地址为Mule ESB代理接口的url地址。
这个要求看起来很简单,但是实现起来发现有两个问题:
1)如何通过Mule ESB的Http控件暴露已有Web Service接口的描述文件?
也就是说原来描述文件的地址是http://[target ip]:[target port]/service?wsdl,经过http控件后将变成
http://[new ip]:[new port]/newservice?wsdl,而且wsdl文件的内容不能改变。
2)如何将Mule ESB接口接收的Soap报文发送到实际的Web Service地址,得到实际结果。
第一个问题我使用CXF Component组件的Proxy Service类型进行配置。
我创建了两个Web Service服务,一个是使用Apache CXF搭建的Web Service,一个是使用Asp.net搭建的Web Service
1.1 Apache CXF Web Service wsdl代理
使用Apache CXF搭建的Web Service只有一个HelloService,主要的类文件和配置文件如下:
package com.rick.service;

import javax.jws.WebParam;

public interface HelloService {

	String sayHello(@WebParam(name="name") String name);
}
package com.rick.service.impl;
import javax.jws.WebMethod;
import javax.jws.WebParam;
import javax.jws.WebService;
import org.springframework.stereotype.Component;
import com.rick.service.HelloService;
@Component("helloService")
@WebService
public class HelloServiceImpl implements HelloService {
@Override
@WebMethod(action="sayHello")
public String sayHello(@WebParam(name="name") String name) {
return "Hello world," +name;
}
}applicationContext.xml
<?xml version="1.0" encoding="UTF-8"?>
<beans xmlns="http://www.springframework.org/schema/beans"
    xmlns:xsi="http://www.w3.org/2001/XMLSchema-instance"
    xmlns:p="http://www.springframework.org/schema/p"
    xmlns:aop="http://www.springframework.org/schema/aop"
    xmlns:context="http://www.springframework.org/schema/context"
    xmlns:jee="http://www.springframework.org/schema/jee"
    xmlns:tx="http://www.springframework.org/schema/tx"
    xmlns:jaxws="http://cxf.apache.org/jaxws"
    xsi:schemaLocation="
        http://www.springframework.org/schema/aop http://www.springframework.org/schema/aop/spring-aop-4.0.xsd
        http://www.springframework.org/schema/beans http://www.springframework.org/schema/beans/spring-beans-4.0.xsd
        http://www.springframework.org/schema/context http://www.springframework.org/schema/context/spring-context-4.0.xsd
        http://www.springframework.org/schema/jee http://www.springframework.org/schema/jee/spring-jee-4.0.xsd
        http://www.springframework.org/schema/tx http://www.springframework.org/schema/tx/spring-tx-4.0.xsd
        http://cxf.apache.org/jaxws http://cxf.apache.org/schemas/jaxws.xsd">

    <!-- import CXF configuration files -->
    <import resource="classpath:META-INF/cxf/cxf.xml"/>
    <import resource="classpath:META-INF/cxf/cxf-servlet.xml"/>

    <context:component-scan base-package="com.rick.service" />

    <jaxws:endpoint implementor="#helloService" address="hello"/>

</beans>
web.xml
<?xml version="1.0" encoding="UTF-8"?>
<web-app xmlns:xsi="http://www.w3.org/2001/XMLSchema-instance" xmlns="http://java.sun.com/xml/ns/javaee" xsi:schemaLocation="http://java.sun.com/xml/ns/javaee http://java.sun.com/xml/ns/javaee/web-app_3_0.xsd" id="WebApp_ID" version="3.0">
<display-name>WsDemo</display-name>
<welcome-file-list>
<welcome-file>index.html</welcome-file>
<welcome-file>index.htm</welcome-file>
<welcome-file>index.jsp</welcome-file>
<welcome-file>default.html</welcome-file>
<welcome-file>default.htm</welcome-file>
<welcome-file>default.jsp</welcome-file>
</welcome-file-list>
<context-param>
<param-name>contextConfigLocation</param-name>
<param-value>classpath:applicationContext.xml</param-value>
</context-param>
<!-- Spring listener -->
<listener>
<listener-class>org.springframework.web.context.ContextLoaderListener</listener-class>
</listener>
<servlet>
<servlet-name>CXFServlet</servlet-name>
<servlet-class>org.apache.cxf.transport.servlet.CXFServlet</servlet-class>
</servlet>
<servlet-mapping>
<servlet-name>CXFServlet</servlet-name>
<url-pattern>/webservice/*</url-pattern>
</servlet-mapping>
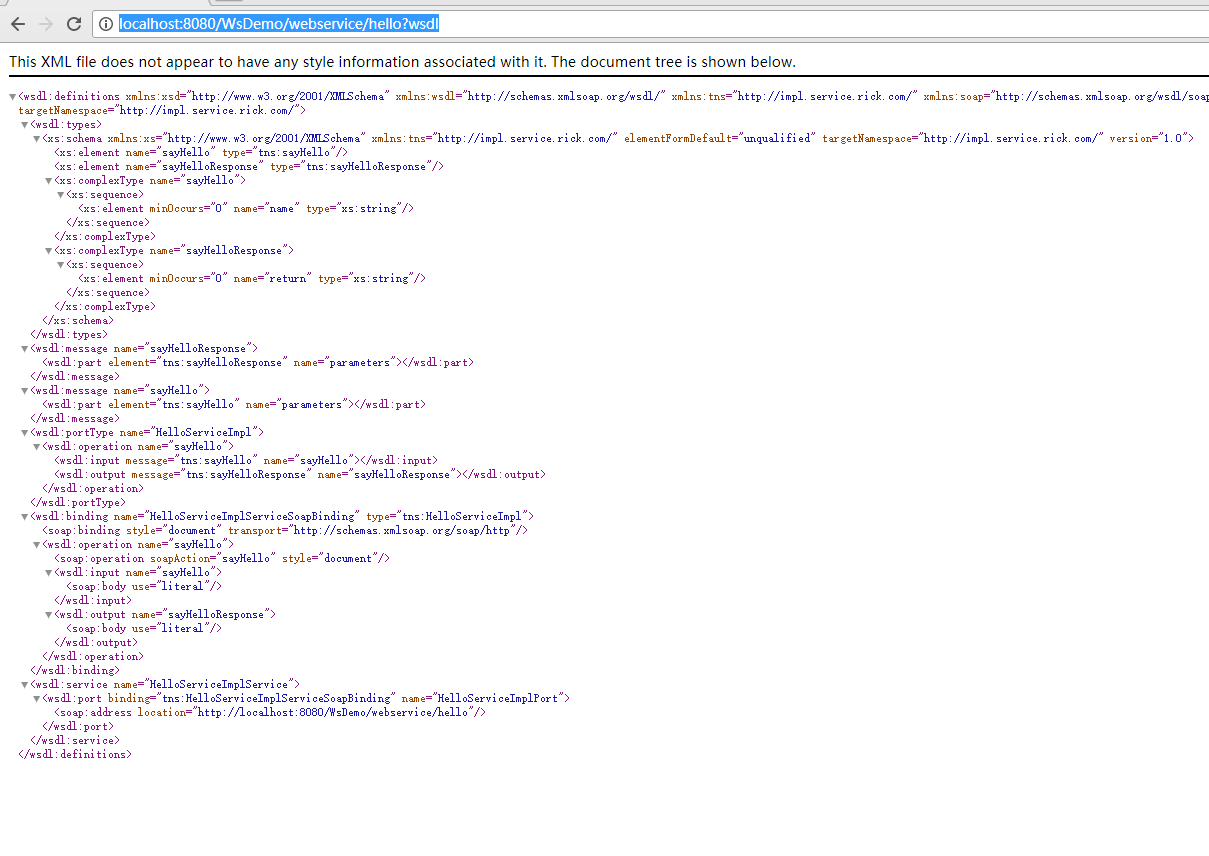
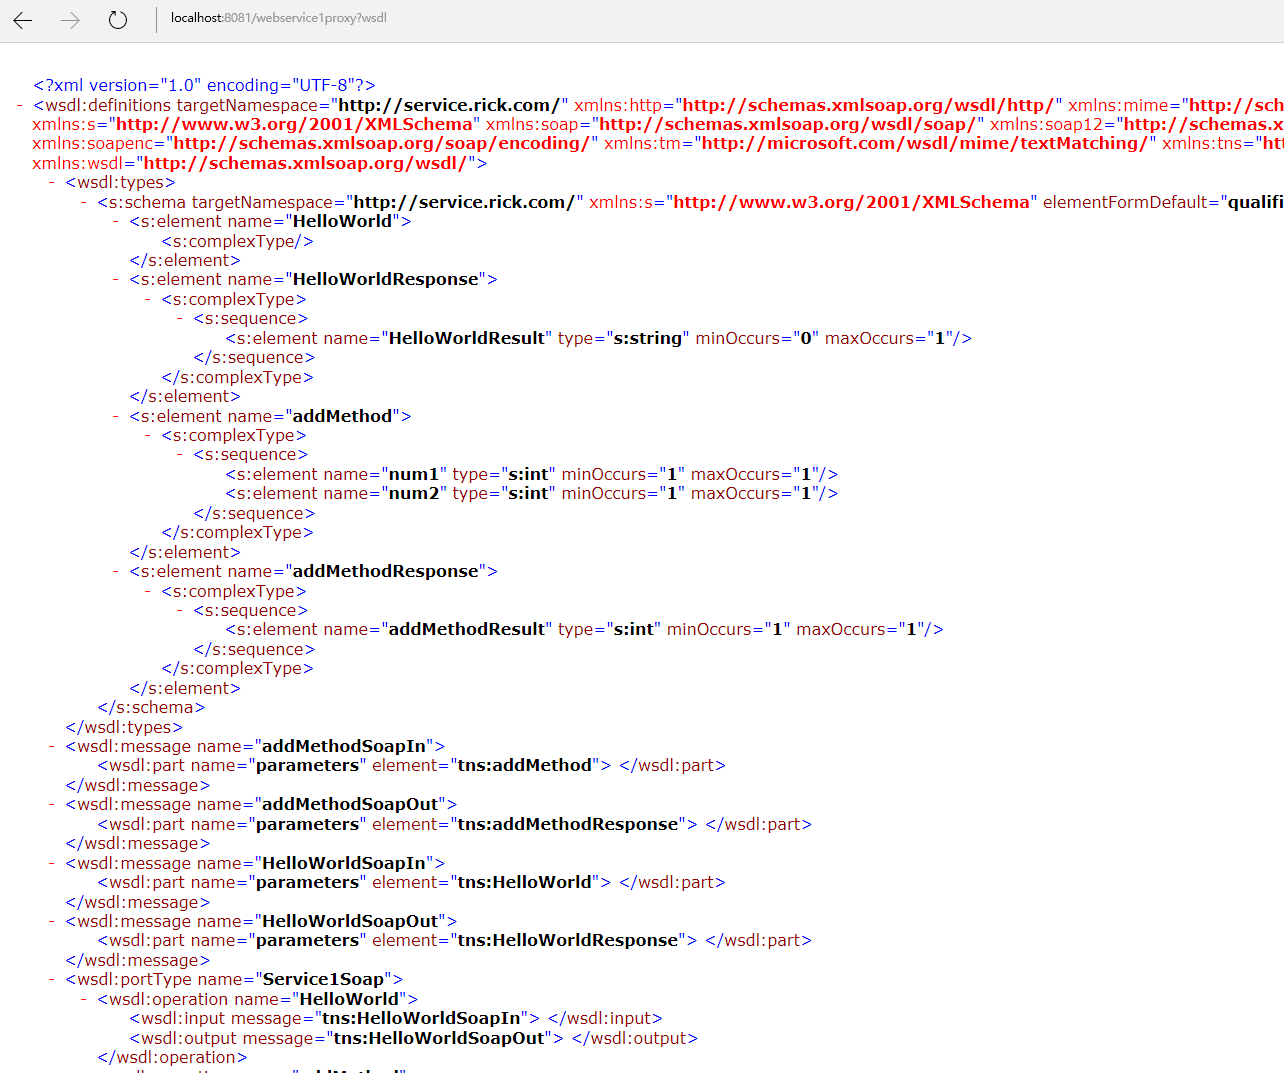
</web-app>Web Service配置在一个Web Application中,在Eclipse EE的Tomcat Server启动后的Web Service wsdl文件访问地址是:
http://localhost:8080/WsDemo/webservice/hello?wsdl
具体内容如下图所示
我们新建一个Mule Project项目WsDemoProxy
在WsDemoProxy项目中,拖拽一个Http Listener和CXF Component组件
Http Listener组件是入口,配置如下图所示
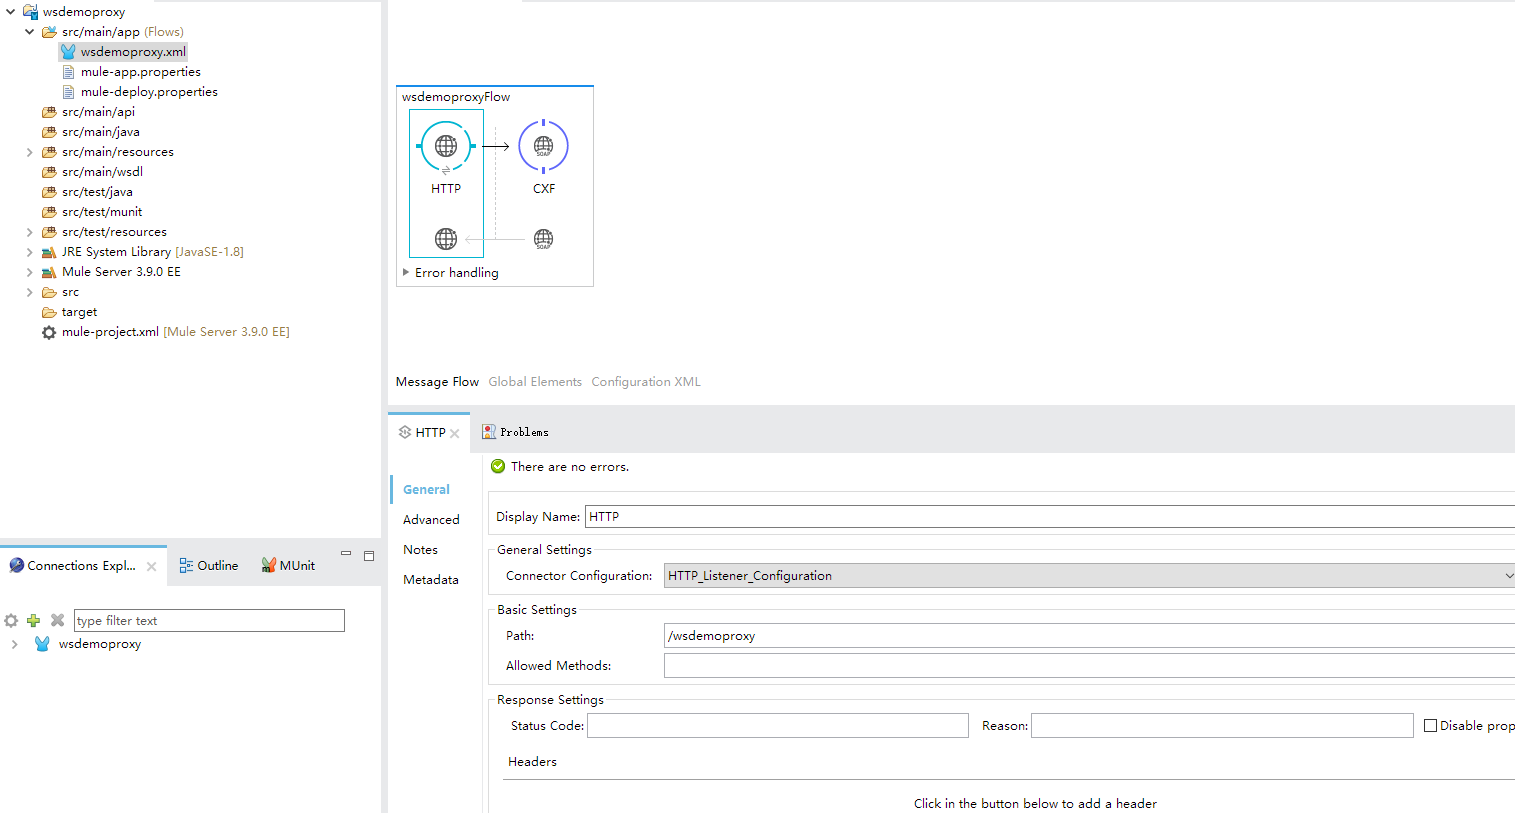
Http访问端口为8081,访问Path为/wsdemoproxy
CXF Component配置为Proxy Service,配置如下图所示
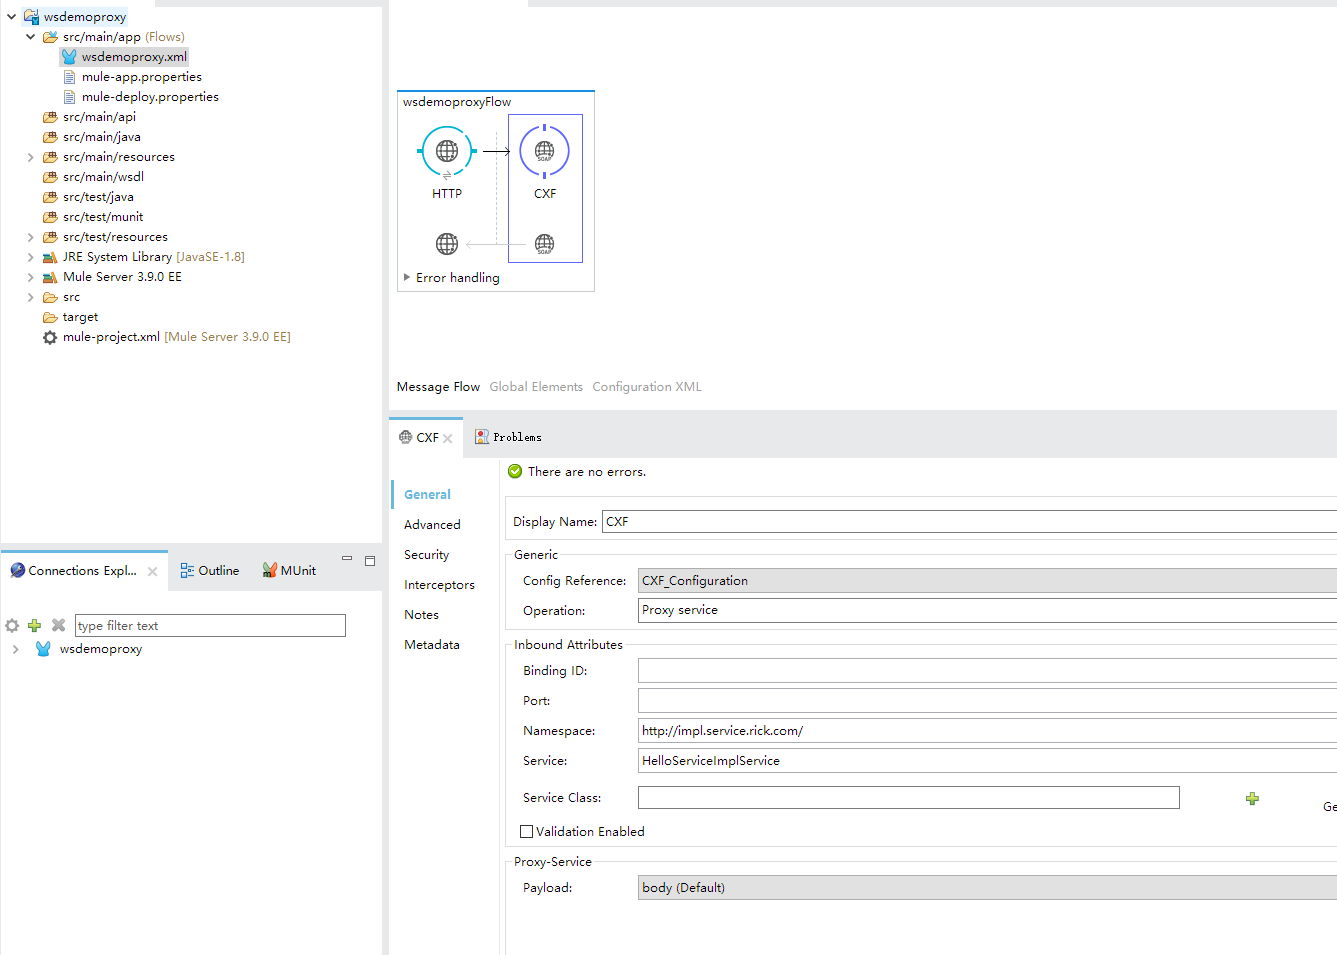
其中Namespace使用wsdl文件的targetNamespace值,Service使用wsdl:service节点的name属性值。

在[Advanced] Tab中设置实际的WSDL地址,这里可以使用在线的wsdl地址,也可以使用本地的wsdl文件地址,本项目使用前者。
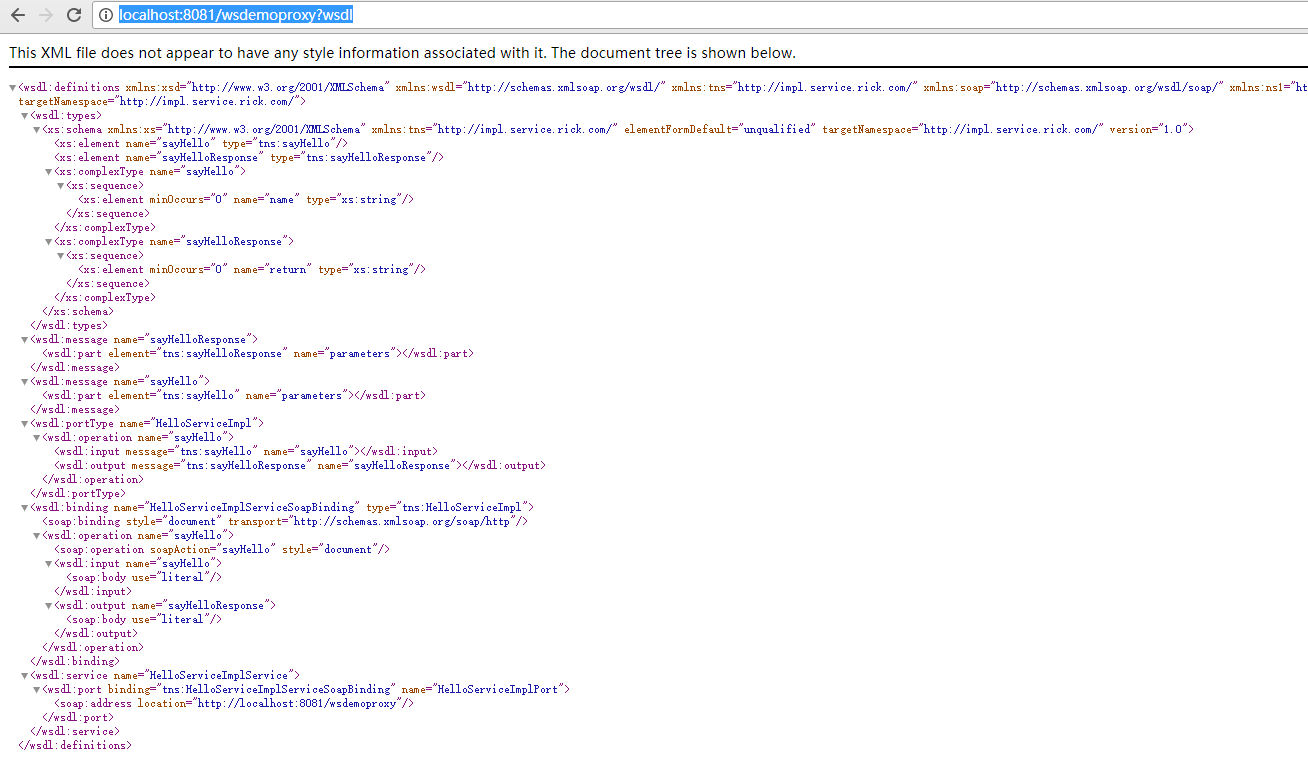
启动WsDemoProxy项目,访问http://localhost:8081/wsdemoproxy?wsdl,我们可以看到显示WsDemo项目的wsdl描述文件,表明使用CXF Component 代理CXF搭建的Web Service wsdl成功。
1.2 Asp.net Web Service wsdl代理
我使用Visual Studio 2008创建一个Asp.net Web Service
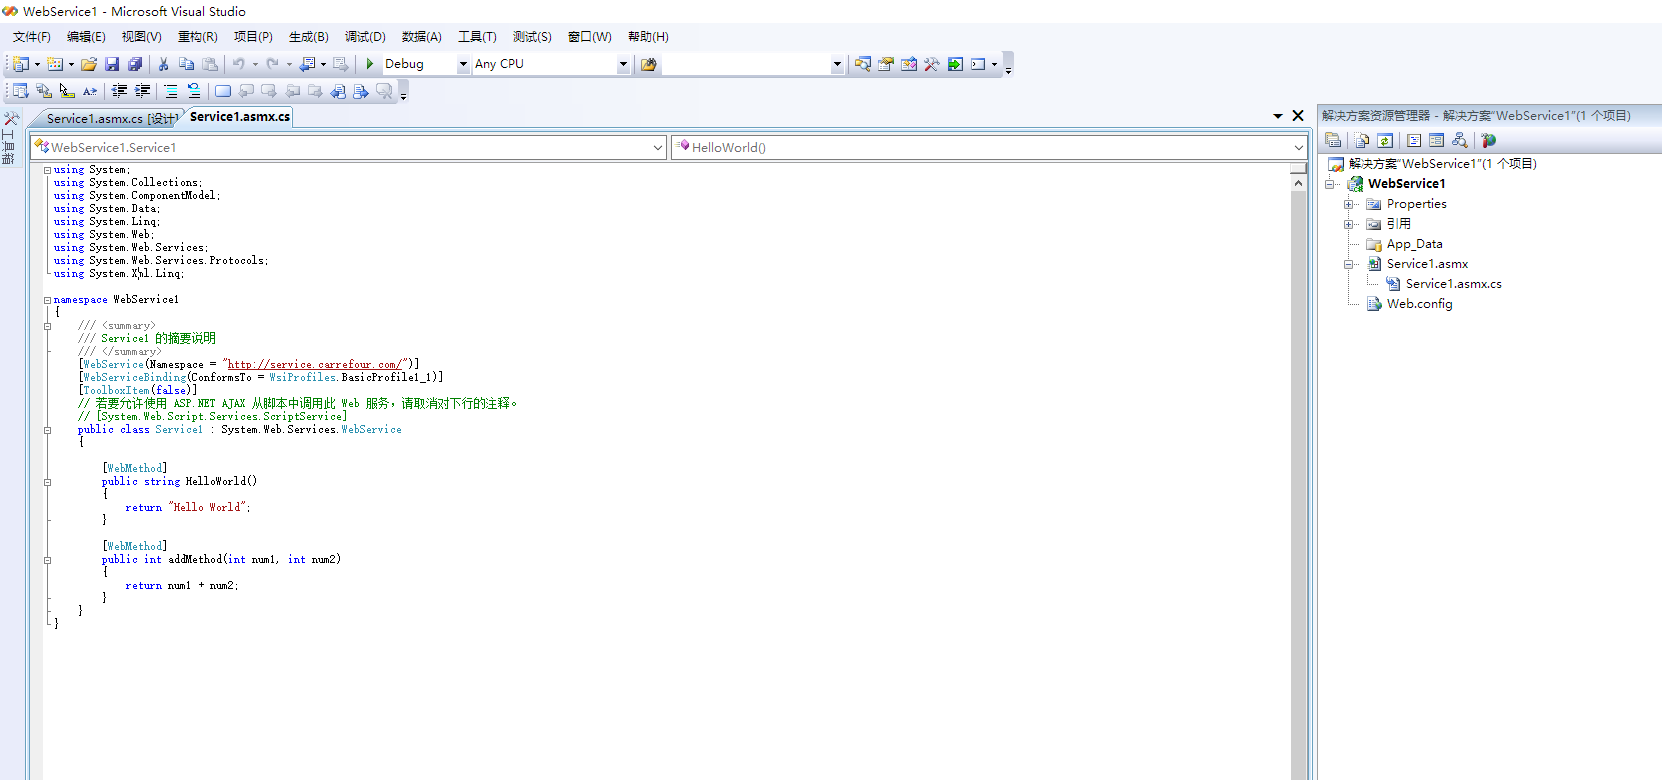
这个Web Service服务有两个方法,HelloWorld()和addMethod(int, int),我们设置它的启动端口为8888,启动后界面如下:

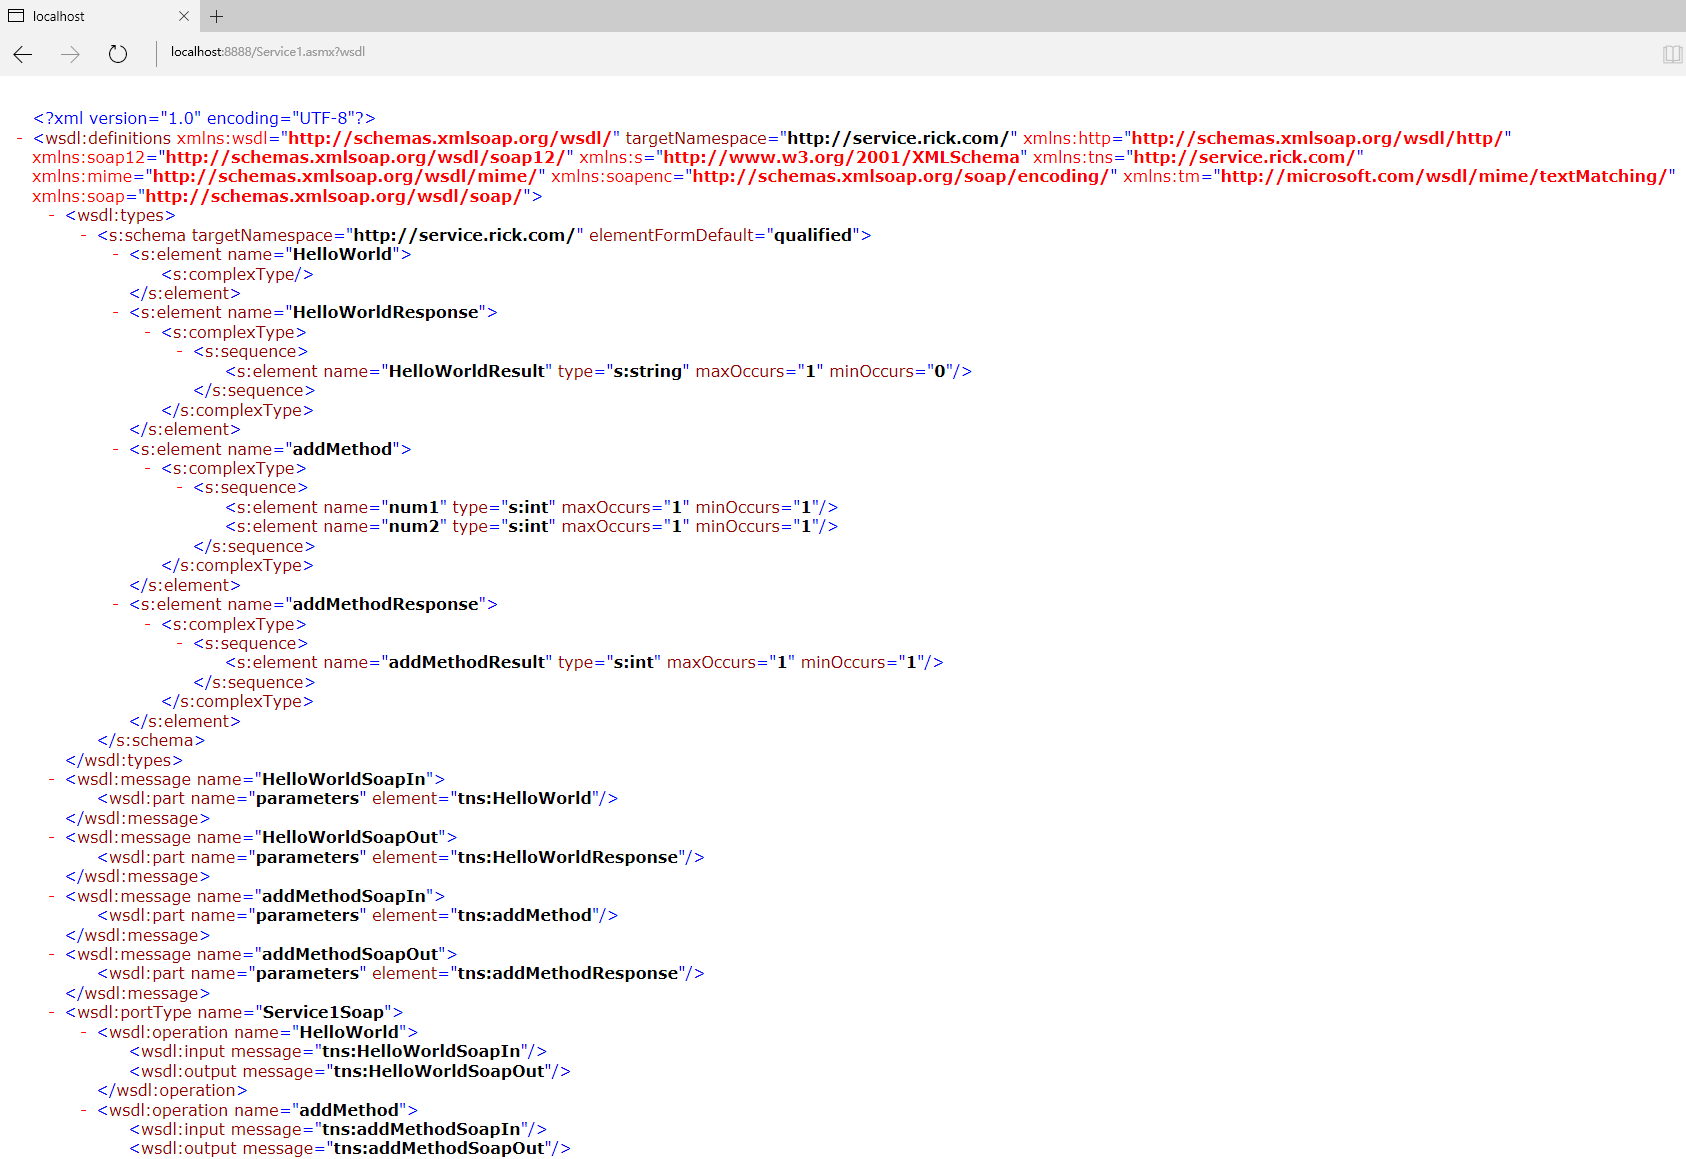
对应的wsdl界面如下:
新建一个Mule ESB项目webservice1proxy,与wsdemoproxy一样,同样拖拽一个Http Listener和CXF Component控件。两个控件配置如下图所示
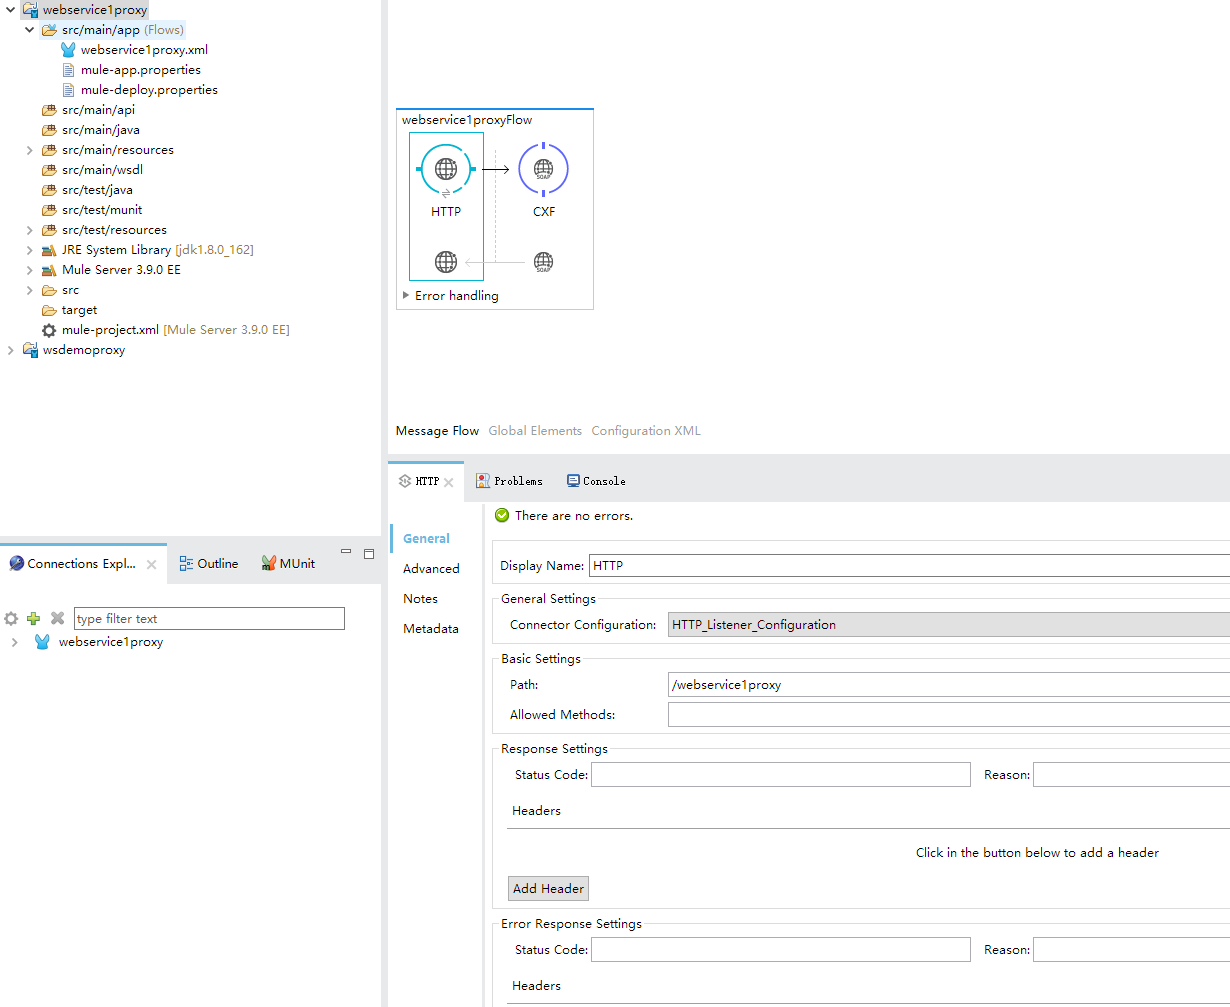
Http Listener使用的端口号还是8081

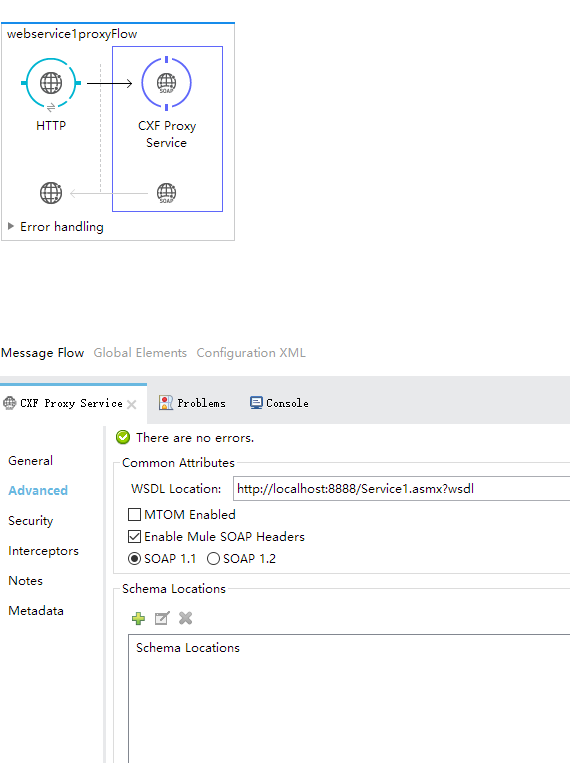
需要指出的是,由于Asp.net搭建的web service服务器有Soap1.1和Soap1.2两种协议形式,因此在CXF Proxy Service中必须指定Binding id,即wsdl中的wsdl:binding节点的name属性,由于我们使用Soap1.1协议,因此Binding Id使用1.1协议对应的ServiceSoap1.
启动webservice1proxy项目,访问http://localhost:8081/webservice1proxy?wsdl,显示webservice1的wsdl描述文件。
在代理Web Service的wsdl文件成功后,接下来解决第二个问题,即通过Mule ESB转发Web Service请求到真实的Web Service请求,获得结果返回调用客户端,我们通过在Mule ESB项目中使用Web Service Consumer来实现,下文我们将详细说明。
2.1 调用CXF 代理Web Service
启动WsDemo项目,我们在SoapUI中调用这个Web Service,如下图所示

在WsDemoProxy项目中拖一个Web Service Consumer组件,配置它指向WsDemo的wsdl文件
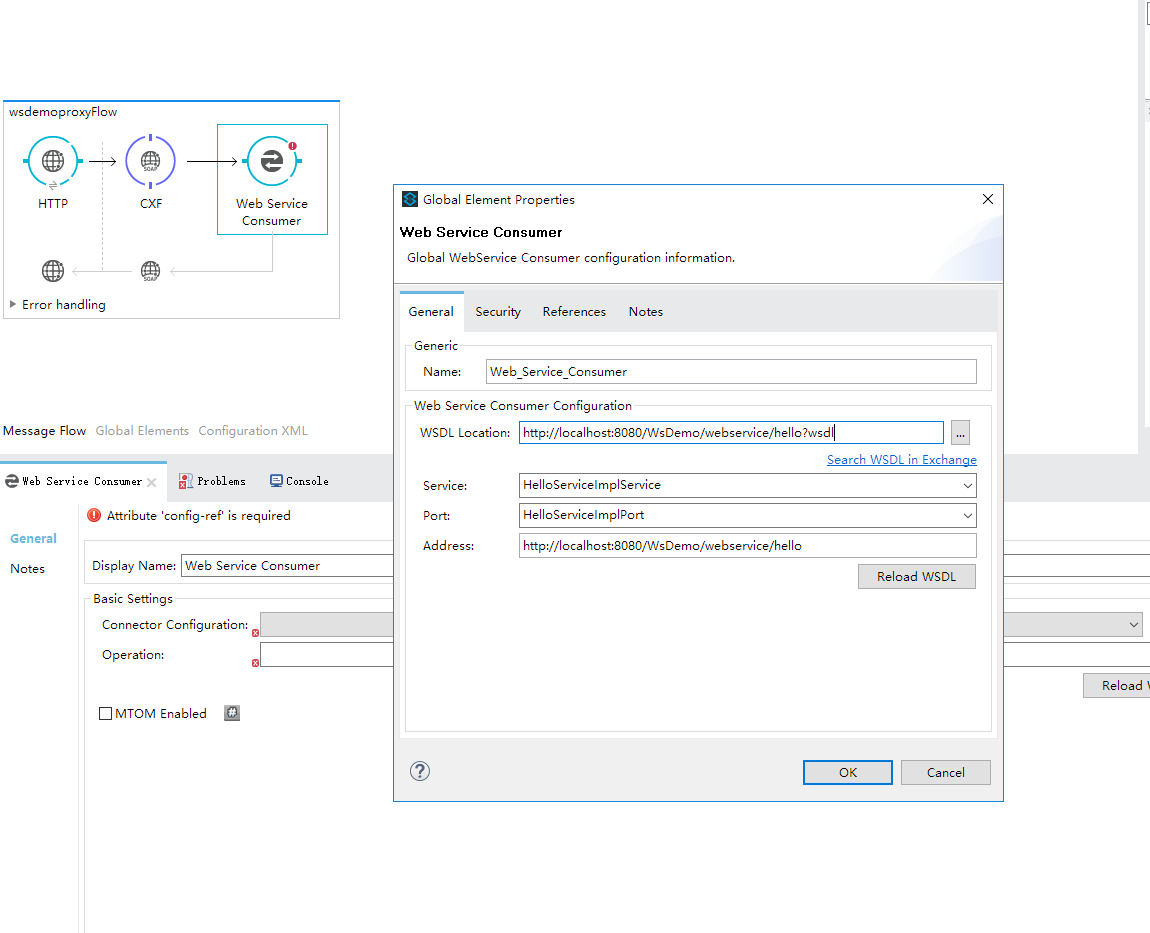
加载wsdl文件后,Service,Port和Address将自动扫描wsdl文件获取。
在Operation行的下拉列表中选择要调用的Web Service方法(这里只有sayHello方法)
保存后启动WsDemoProxy项目,再使用SoapUI调用WsDemoProxy代理的Web Service,如下图所示
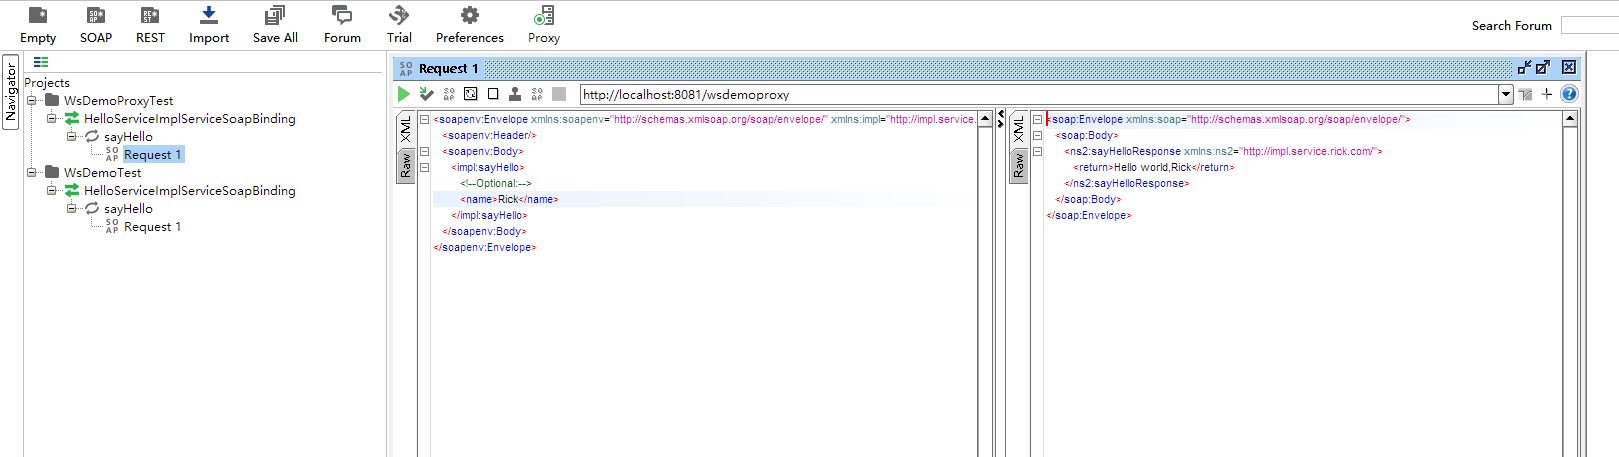
和直接调用WsDemo的结果完全一样。
使用CXF Client客户端调用
import org.apache.cxf.endpoint.Client;
import org.apache.cxf.jaxws.endpoint.dynamic.JaxWsDynamicClientFactory;

public class WebServiceClientDemo {

	public static void main(String[] args) throws Exception {
		 JaxWsDynamicClientFactory clientFactory = JaxWsDynamicClientFactory.newInstance();

		 Client client =
				 (Client) clientFactory.createClient("http://localhost:8081/wsdemoproxy?wsdl");

	     Object[] result = client.invoke("sayHello","Rick");
	     if(result != null && result.length > 0)
	     {
	    	 System.out.println(result[0].toString());
	     }
	}

}
返回结果如下图所示

使用.net客户端进行调用
首先建立一个ServiceReference指向WsDemo Web Service

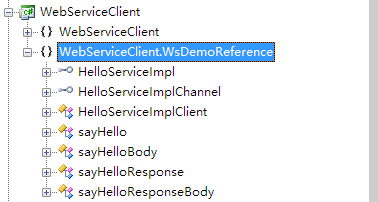
然后在代码里引用生成的代理类HelloServiceImplClient
namespace WebServiceClient
{
    public class Program
    {
        public static void Main(string[] args)
        {
            WsDemoReference.HelloServiceImplClient client = new WsDemoReference.HelloServiceImplClient();
            Console.WriteLine(client.sayHello("Rick"));
        }
    }
}
执行结果如下图所示(按Ctrl + F5启动程序,否则Console窗口会一闪而过)

2.2 调用Asp.net 代理Web Service
同2.1,我们修改webservice1proxy项目,由于WebService1暴露了两个方法,我们需要加入两个Web Service Consumer控件