接上次博客:JavaEE进阶(12)Spring事务和事务传播机制:事务回顾、Spring中事务的实现、@Transactional详解(用法、rollbackFor、事务隔离级别、事务传播机制)-CSDN博客
目录

项目介绍
使用SSM框架(Spring + Spring MVC + MyBatis)实现一个简单的博客系统,共包括以下5个页面:
- 用户登录页面
- 博客发表页面
- 博客编辑页面
- 博客列表页面
- 博客详情页面
在这个系统中,
功能描述: 用户成功登录后,将能够浏览所有人的博客内容。通过点击“查看全文”,用户可以深入了解所选博客的全部内容。如果当前登录用户即为该博客的作者,则享有特权,可以随时对博客进行修改、删除,甚至发布全新的博客内容。这一功能不仅提供了便捷的博客浏览体验,同时也赋予了作者更多的控制权,以便更好地管理和分享个人创作
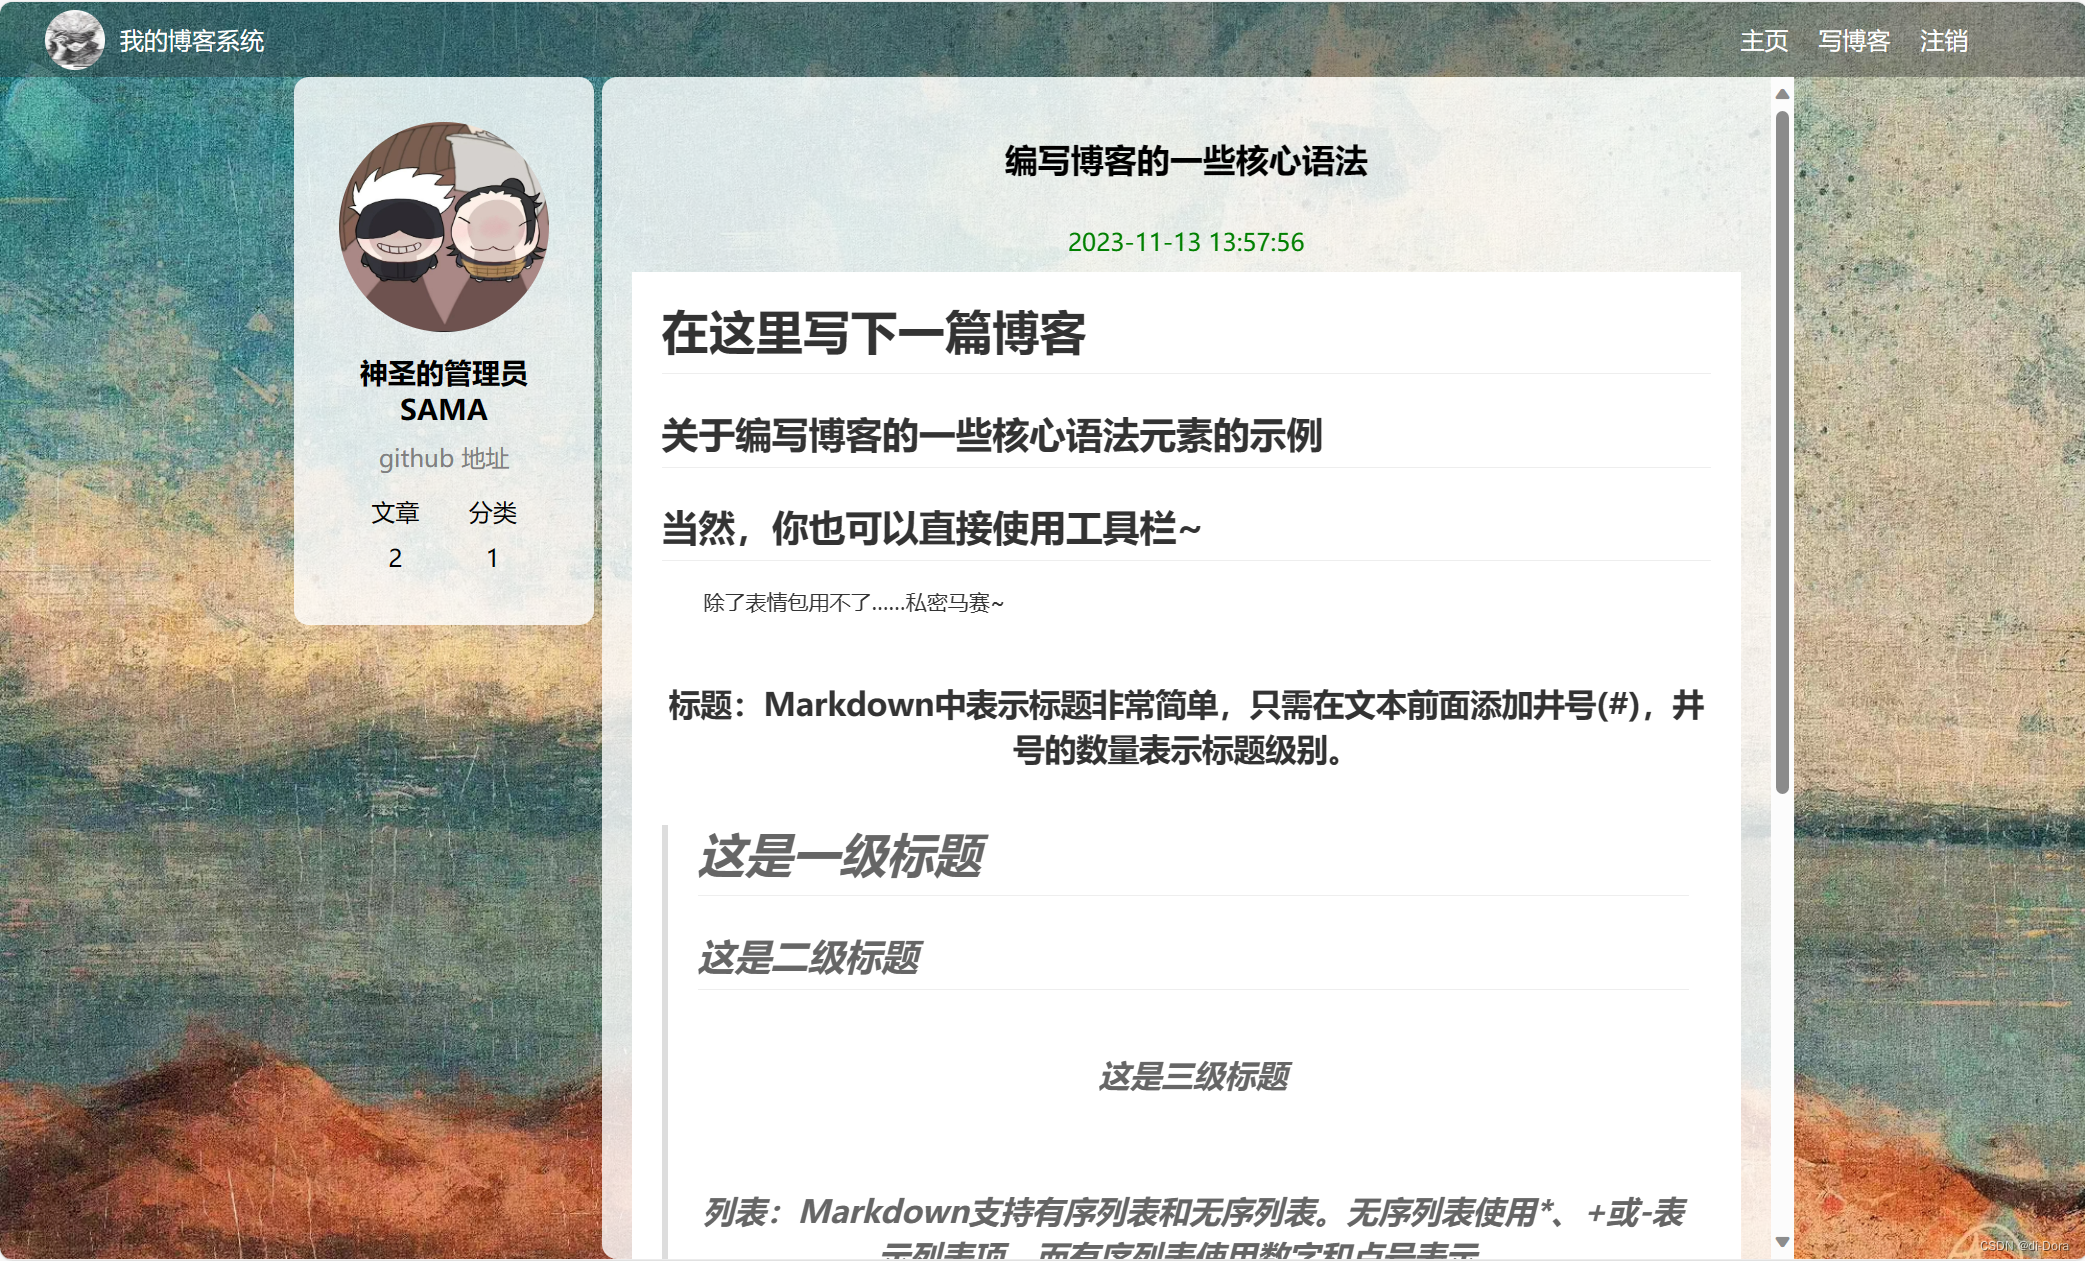
页面预览
用户登录页面:

博客列表页面:
博客发表、编辑页面

博客详情页面:
准备工作
数据准备
建表SQL
-- 建表SQL
CREATE DATABASE IF NOT EXISTS java_blog_spring CHARSET utf8mb4;
USE java_blog_spring;
-- 用户表
DROP TABLE IF EXISTS java_blog_spring.user;
CREATE TABLE java_blog_spring.user (
                                       `id` INT NOT NULL AUTO_INCREMENT,
                                       `user_name` VARCHAR(128) NOT NULL,
                                       `password` VARCHAR(128) NOT NULL,
                                       `github_url` VARCHAR(128) NULL,
                                       `delete_flag` TINYINT(4) NULL DEFAULT 0,
                                       `create_time` DATETIME DEFAULT NOW(),
                                       `update_time` DATETIME DEFAULT NOW(),
                                       PRIMARY KEY (`id`),
                                       UNIQUE INDEX `user_name_UNIQUE` (`user_name` ASC)
) ENGINE=InnoDB DEFAULT CHARSET=utf8mb4 COMMENT='用户表';

-- 博客表
DROP TABLE IF EXISTS java_blog_spring.blog;
CREATE TABLE java_blog_spring.blog (
                                       `id` INT NOT NULL AUTO_INCREMENT,
                                       `title` VARCHAR(200) NULL,
                                       `content` TEXT NULL,
                                       `user_id` INT(11) NULL,
                                       `delete_flag` TINYINT(4) NULL DEFAULT 0,
                                       `create_time` DATETIME DEFAULT NOW(),
                                       `update_time` DATETIME DEFAULT NOW(),
                                       PRIMARY KEY (`id`)
) ENGINE=InnoDB DEFAULT CHARSET=utf8mb4 COMMENT='博客表';

-- 新增用户信息
INSERT INTO java_blog_spring.user (user_name, password, github_url) VALUES ('zhangsan', '123456', 'https://gitee.com/bubblefish666/class-java45');
INSERT INTO java_blog_spring.user (user_name, password, github_url) VALUES ('lisi', '123456', 'https://gitee.com/bubblefish666/class-java45');
INSERT INTO java_blog_spring.blog (title, content, user_id) VALUES ('第一篇博客', '111我是博客正文我是博客正文我是博客正文', 1);
INSERT INTO java_blog_spring.blog (title, content, user_id) VALUES ('第二篇博客', '222我是博客正文我是博客正文我是博客正文', 2);


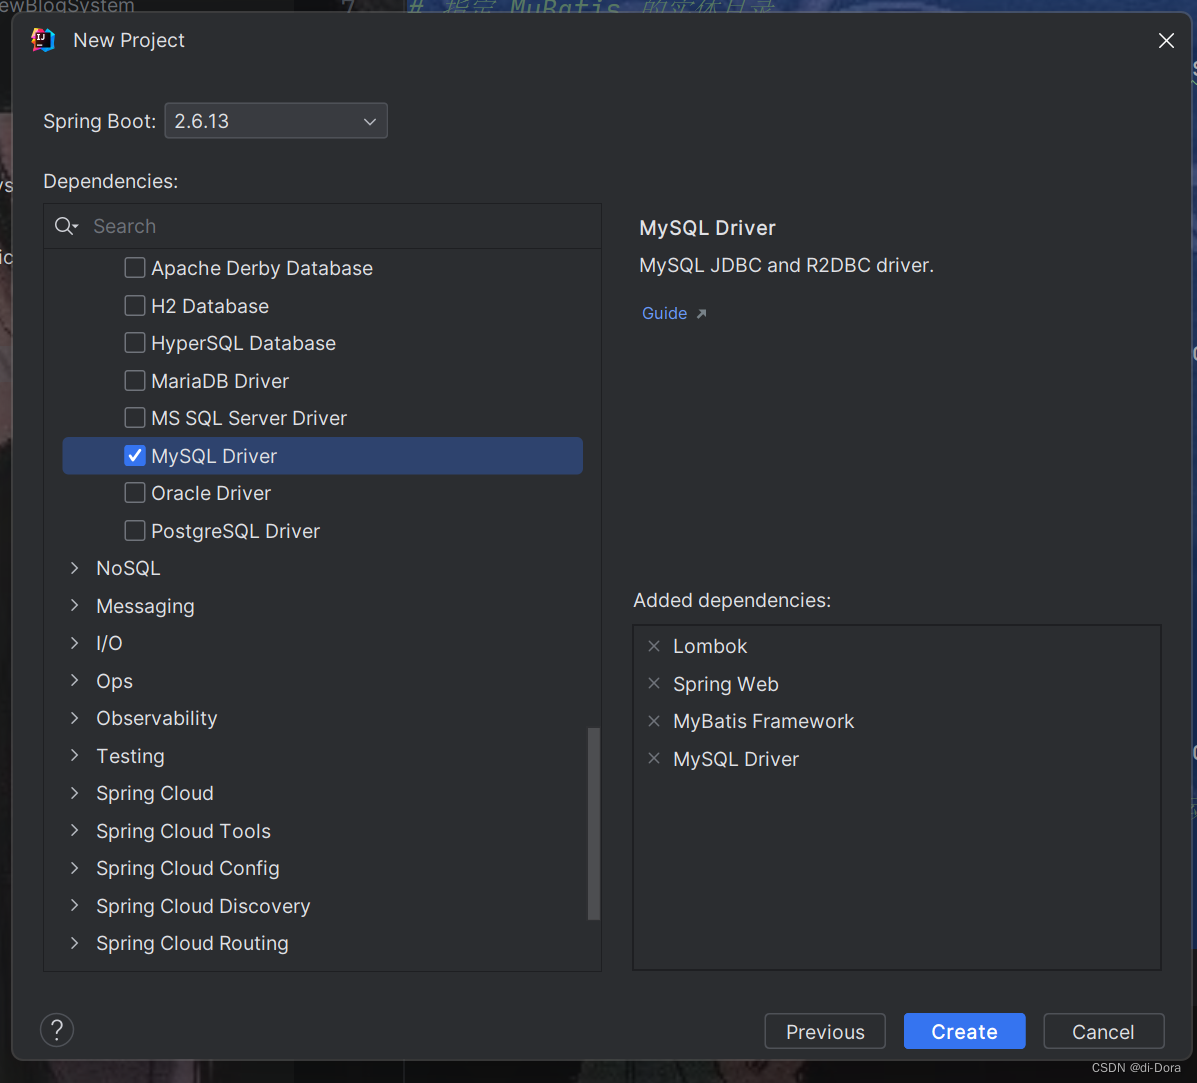
创建项目
创建SpringBoot项目,添加Spring MVC 和MyBatis对应依赖:
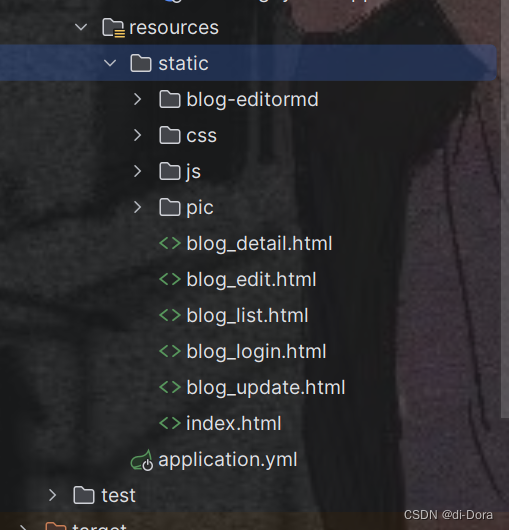
准备前端页面
blog_detail.html:
<!DOCTYPE html>
<html lang="en">

<head>
    <meta charset="UTF-8">
    <meta http-equiv="X-UA-Compatible" content="IE=edge">
    <meta name="viewport" content="width=device-width, initial-scale=1.0">
    <title>博客详情页</title>

    <link rel="stylesheet" href="css/common.css">
    <link rel="stylesheet" href="css/detail.css">

</head>

<body>
    <div class="nav">
        <img src="pic/酷狗.jpg" alt="">
        <span class="blog-title">我的博客系统</span>
        <div class="space"></div>
        <a class="nav-span" href="blog_list.html">主页</a>
        <a class="nav-span" href="blog_edit.html">写博客</a>
        <a class="nav-span" href="#" onclick="logout()">注销</a>
    </div>

    <div class="container">
        <div class="left">
            <div class="card">
                <img src="pic/五条悟.jpg" alt="">
                <h3>神圣的管理员SAMA</h3>
                <a href="#">GitHub 地址</a>
                <div class="row">
                    <span>文章</span>
                    <span>分类</span>
                </div>
                <div class="row">
                    <span>2</span>
                    <span>1</span>
                </div>
            </div>
        </div>
        <div class="right">
            <div class="content">
                <div class="title">我的第一篇博客</div>
                <div class="date">2021-06-02</div>
                <div class="detail">
                    <p>从今天开始, 好好学习~Lorem, ipsum dolor sit amet consectetur adipisicing elit. Obcaecati cumque alias
                        laborum numquam aliquam? Ipsam aliquam dolorem officiis! Magni pariatur officiis iusto? Et unde
                        quo fuga, minus deserunt architecto eligendi.</p>
                </div>
                <div class="operating">
                    <button onclick="window.location.href='blog_update.html'">编辑</button>
                    <button onclick="deleteBlog()">删除</button>
                </div>
            </div>

        </div>
    </div>

    <!-- 引入 editor.md 的依赖 -->
    <link rel="stylesheet" href="blog-editormd/css/editormd.css" />
    <script src="js/jquery.min.js"></script>
    <script src="blog-editormd/lib/marked.min.js"></script>
    <script src="blog-editormd/lib/prettify.min.js"></script>
    <script src="blog-editormd/editormd.js"></script>
    <script src="js/common.js"></script>
    <script>

        //显示博客作者信息
        var userUrl = "/user/getAuthorInfo" + location.search;
        getUserInfo(userUrl);

        function deleteBlog() {
            alert("删除博客");
        }
    </script>
</body>

</html>
blog_list.html:
<!DOCTYPE html>
<html lang="en">
<head>
<meta charset="UTF-8">
<meta http-equiv="X-UA-Compatible" content="IE=edge">
<meta name="viewport" content="width=device-width, initial-scale=1.0">
<title>博客列表页</title>
<link rel="stylesheet" href="css/common.css">
<link rel="stylesheet" href="css/list.css">
</head>
<body>
<div class="nav">
<img src="pic/酷狗.jpg" alt="">
<span class="blog-title">我的博客系统</span>
<div class="space"></div>
<a class="nav-span" href="blog_list.html">主页</a>
<a class="nav-span" href="blog_edit.html">写博客</a>
<a class="nav-span" href="#" onclick="logout()">注销</a>
</div>
<div class="container">
<div class="left">
<div class="card">
<img src="pic/五条悟.jpg" alt="">
<h3>神圣的管理员SAMA</h3>
<a href="#">GitHub 地址</a>
<div class="row">
<span>文章</span>
<span>分类</span>
</div>
<div class="row">
<span>2</span>
<span>1</span>
</div>
</div>
</div>
<div class="right">
<div class="blog">
<div class="title">我的第一篇博客</div>
<div class="date">2021-06-02</div>
<div class="desc">今天开始, 好好学习Lorem ipsum dolor sit, amet consectetur adipisicing elit. Quas nesciunt, hic voluptatum, dolorem quisquam modi accusantium, commodi dolores architecto ratione vel exercitationem optio. Facere repellendus autem, obcaecati dolore sequi incidunt?</div>
<a class="detail" href="blog_detail.html">查看全文>></a>
</div>
</div>
</div>
<script src="js/jquery.min.js"></script>
<script src="js/common.js"></script>
</body>
</html>blog_ edit.html:
<!DOCTYPE html>
<html lang="en">

<head>
    <meta charset="UTF-8">
    <meta http-equiv="X-UA-Compatible" content="IE=edge">
    <meta name="viewport" content="width=device-width, initial-scale=1.0">
    <title>博客编辑页</title>

    <link rel="stylesheet" href="css/common.css">
    <link rel="stylesheet" href="css/edit.css">
    <link rel="stylesheet" href="blog-editormd/css/editormd.css" />

</head>

<body>
    <div class="nav">
        <img src="pic/酷狗.jpg" alt="">
        <span class="blog-title">我的博客系统</span>
        <div class="space"></div>
        <a class="nav-span" href="blog_list.html">主页</a>
        <a class="nav-span" href="blog_edit.html">写博客</a>
        <a class="nav-span" href="#" onclick="logout()">注销</a>
    </div>
    <div class="content-edit">
        <div class="push">
            <input type="text" name="" id="title">
            <input type="button" value="发布文章" id="submit" onclick="submit()">
        </div>
        <!-- markdown 插件 html代码 -->
        <div id="editor">
            <textarea style="display:none;" id="content" name="content">##在这里写下一篇博客</textarea>
        </div>
    </div>

    <script src="js/jquery.min.js"></script>
    <script src="blog-editormd/editormd.min.js"></script>
    <script src="js/common.js"></script>
    <script type="text/javascript">

        $(function () {
            var editor = editormd("editor", {
                width: "100%",
                height: "550px",
                path: "blog-editormd/lib/"
            });
        });

        function submit() {
            alert("发表博客");
        }
    </script>
</body>

</html>
blog_login.html:
<!DOCTYPE html>
<html lang="en">

<head>
    <meta charset="UTF-8">
    <meta http-equiv="X-UA-Compatible" content="IE=edge">
    <meta name="viewport" content="width=device-width, initial-scale=1.0">
    <title>博客登陆页</title>

    <link rel="stylesheet" href="css/common.css">
    <link rel="stylesheet" href="css/login.css">

    <style>
        /* 添加按钮样式 */
        .login-dialog button {
            padding: 10px 20px;
            background-color: #4CAF50;
            color: white;
            border: none;
            border-radius: 5px;
            cursor: pointer;
            font-size: 16px;
            margin-top: 10px;
            transition: background-color 0.3s;
        }

        /* 鼠标悬停时改变按钮颜色 */
        .login-dialog button:hover {
            background-color: #45a049;
        }
    </style>
</head>

<body>
    <div class="nav">
        <img src="pic/酷狗.jpg" alt="">
        <span class="blog-title">我的博客系统</span>
        <div class="space"></div>
        <a class="nav-span" href="blog_list.html">主页</a>
        <a class="nav-span" href="blog_edit.html">写博客</a>
    </div>

    <div class="container-login">
        <div class="login-dialog">
            <h3>登陆</h3>
            <div class="row">
                <span>用户名</span>
                <input type="text" name="username" id="username">
            </div>
            <div class="row">
                <span>密码</span>
                <input type="password" name="password" id="password">
            </div>
            <div class="row">
                <!-- 为按钮添加类名 -->
                <button class="login-btn" id="submit" onclick="login()">提交</button>
            </div>

        </div>
    </div>
    <script src="js/jquery.min.js"></script>
    <script>
        function login() {
            location.assign("blog_list.html");
        }
    </script>
</body>

</html>
blog_update.html:
<!DOCTYPE html>
<html lang="en">

<head>
    <meta charset="UTF-8">
    <meta http-equiv="X-UA-Compatible" content="IE=edge">
    <meta name="viewport" content="width=device-width, initial-scale=1.0">
    <title>博客编辑页</title>

    <link rel="stylesheet" href="css/common.css">
    <link rel="stylesheet" href="css/edit.css">
    <link rel="stylesheet" href="blog-editormd/css/editormd.css" />

</head>

<body>
    <div class="nav">
        <img src="pic/酷狗.jpg" alt="">
        <span class="blog-title">我的博客系统</span>
        <div class="space"></div>
        <a class="nav-span" href="blog_list.html">主页</a>
        <a class="nav-span" href="blog_edit.html">写博客</a>
        <a class="nav-span" href="#" onclick="logout()">注销</a>
    </div>
    <div class="content-edit">
        <div class="push">
            <input type="hidden" id="blogId">
            <input type="text" name="" id="title">
            <input type="button" value="更新文章" id="submit" onclick="submit()">
        </div>
        <!-- markdown 插件 html代码 -->
        <div id="editor">
            <textarea style="display:none;" id="content">##在这里写下一篇博客</textarea>
        </div>
    </div>

    <script src="js/jquery.min.js"></script>
    <script src="blog-editormd/editormd.min.js"></script>
    <script src="js/common.js"></script>
    <script type="text/javascript">

        $(function () {
            var editor = editormd("editor", {
                width  : "100%",
                height : "550px",
                path: "blog-editormd/lib/"
            });
        });

        function submit() {
            $.ajax({
                type: "post",
                url: "/blog/update",
                contentType: "application/json",
                data: JSON.stringify({
                    "title": $("#title").val(),
                    "content": $("#content").val(),
                    "id": $("#blogId").val()
                }),
                success: function (result) {
                    if (result != null && result.code == 200 && result.data == true) {
                        location.href = "blog_list.html";
                    } else {
                        alert(result.msg);
                        return;
                    }

                },
                error: function (error) {
                    if (error != null && error.status == 401) {
                        alert("用户未登录, 登录后再进行对应操作");
                    }
                }

            });
        }
        function getBlogInfo() {

        }
        getBlogInfo();
    </script>
</body>

</html>
配置配置文件
# 应用服务 WEB 访问端口
server.port: 8080

# 下面这些内容是为了让 MyBatis 映射
# 指定 MyBatis 的 Mapper 文件
mybatis.mapper-locations: classpath:mappers/*xml
# 指定 MyBatis 的实体目录
mybatis.type-aliases-package: com.example.mybatisstudy.mybatis.entity

# 数据库连接配置
spring:
  datasource:
    url: jdbc:mysql://127.0.0.1:3306/java_blog_spring?characterEncoding=utf8&useSSL=false
    username: root
    password: root
    driver-class-name: com.mysql.cj.jdbc.Driver

mybatis:
  configuration: # 配置打印 MyBatis⽇志
    log-impl: org.apache.ibatis.logging.stdout.StdOutImpl
    map-underscore-to-camel-case: true #配置驼峰⾃动转换
  mapper-locations: classpath:mapper/**Mapper.xml
测试
前端:127.0.0.1:8080/blog_login.html

前端页面可以正确显示,说明项目初始化成功。
项目公共模块
项⽬分为控制层(Controller)、服务层(Service)、持久层(Mapper),各层之间的调⽤关系如下:

我们先根据需求完成实体类和公共层代码的编写。
实体类
package com.example.newblogsystem.model;

import lombok.Data;

import java.util.Date;

@Data
public class UserInfo {
    private Integer id;
    private String userName;
    private String password;
    private String githubUrl;
    private Integer deleteFlag;
    private Date createTime;
    private Date updateTime;

}
package com.example.newblogsystem.model;
import lombok.Data;
import java.util.Date;
@Data
public class BlogInfo {
private Integer id;
private String title;
private String content;
private Integer userId;
private Integer deleteFlag;
private Date createTime;
private Date updateTime;
}
公共层
统一返回结果实体类包含以下三个主要属性:
a. code(状态码):表示业务处理的结果状态。具体定义如下:
- 200:业务处理成功。
- -1:业务处理失败。
- -2:用户未登录。
还可以根据需要添加其他异常信息。
b. msg(错误信息):当业务处理失败时,返回的错误信息。
c. data(返回数据):业务处理成功后返回的数据。
这个实体类的设计旨在提供一种标准的方式来表示业务处理结果,使得客户端能够轻松地解析返回结果并做出相应的处理。
定义业务状态码
package com.example.newblogsystem.constants;

public class Constant {
    public final static Integer SUCCESS_CODE = 200;
    public final static Integer FAIL_CODE = -1;
    public final static Integer UNLOGIN_CODE = -2;
}
统一结果返回
package com.example.newblogsystem.model;

import com.example.newblogsystem.constants.Constant;
import lombok.Data;

@Data
public class Result {
    private int code;//200-成功   -1-失败    -2 未登录.....
    private String errMsg;
    private Object data;

    public static Result success(Object data){
        Result result = new Result();
        result.setCode(Constant.SUCCESS_CODE);
        result.setErrMsg("");
        result.setData(data);
        return  result;
    }

    public static Result fail(String errMsg){
        Result result = new Result();
        result.setCode(Constant.FAIL_CODE);
        result.setErrMsg(errMsg);
        result.setData(null);
        return  result;
    }

    public static Result fail(String errMsg,Object data){
        Result result = new Result();
        result.setCode(Constant.FAIL_CODE);
        result.setErrMsg(errMsg);
        result.setData(data);
        return  result;
    }

    public static Result unlogin(String errMsg){
        Result result = new Result();
        result.setCode(Constant.UNLOGIN_CODE);
        result.setErrMsg("用户未登录");
        result.setData(null);
        return  result;
    }


}
package com.example.newblogsystem.config;

import com.example.newblogsystem.model.Result;
import com.fasterxml.jackson.databind.ObjectMapper;
import lombok.SneakyThrows;
import org.springframework.beans.factory.annotation.Autowired;
import org.springframework.core.MethodParameter;
import org.springframework.http.MediaType;
import org.springframework.http.server.ServerHttpRequest;
import org.springframework.http.server.ServerHttpResponse;
import org.springframework.web.bind.annotation.ControllerAdvice;
import org.springframework.web.servlet.mvc.method.annotation.ResponseBodyAdvice;

@ControllerAdvice
public class ResponsAdvice implements ResponseBodyAdvice {
    @Autowired
    private ObjectMapper objectMapper;

    @Override
    public boolean supports(MethodParameter returnType, Class converterType) {
        //哪个接口执行统一结果返回
        return true;
    }

    @SneakyThrows
    @Override
    public Object beforeBodyWrite(Object body, MethodParameter returnType, MediaType selectedContentType, Class selectedConverterType, ServerHttpRequest request, ServerHttpResponse response) {
        //统一结果返回的具体逻辑
        if (body instanceof Result){
            return body;
        }
        //对String 类型单独处理
        if (body instanceof String){
            return objectMapper.writeValueAsString(Result.success(body));
        }
        return Result.success(body);
    }
}
统一异常处理
package com.example.newblogsystem.constants;


import com.example.newblogsystem.model.Result;
import org.springframework.web.bind.annotation.ControllerAdvice;
import org.springframework.web.bind.annotation.ExceptionHandler;
import org.springframework.web.bind.annotation.ResponseBody;

@ResponseBody
@ControllerAdvice
public class ErrorHandler {
    @ExceptionHandler
    public Result handler(Exception e){
        return Result.fail(e.getMessage());
    }

//    捕获异常的两种写法
//    @ExceptionHandler(NullPointerException.class)
//    public Result handler(Exception e){
//        return Result.fail(e.getMessage());
//    }
//
//        @ExceptionHandler
//        public Result handler(NullPointerException e){
//            return Result.fail(e.getMessage());
//        }
}
业务代码
持久层
根据需求,先大致计算有哪些DB(数据库)相关操作,完成持久层初步代码,,后续再根据业务需求进行完善。
-
用户登录页:根据用户名查询用户信息。判断用户名和密码是否正确。
-
博客列表页:根据用户ID查询用户信息。获取所有博客列表。
-
博客详情页:根据博客ID查询博客信息。根据博客ID删除博客(逻辑删除:修改 delete_flag=1)。
-
博客修改页:根据博客ID修改博客信息。
-
发表博客:插入新的博客数据。
根据以上分析,在持久层(DAO 层)中来实现持久层的代码 :
package com.example.newblogsystem.mapper;

import com.example.newblogsystem.model.UserInfo;
import org.apache.ibatis.annotations.Mapper;
import org.apache.ibatis.annotations.Select;

@Mapper
public interface UserInfoMapper {
    //根据用户名, 查询用户信息
    // * 替换成具体字段
    @Select("select * from user where user_name = #{userName} and delete_flag = 0")
    UserInfo selectByName(String userName);

    //根据用户ID, 查询用户信息
    @Select("select * from user where id = #{userId} and delete_flag=0")
    UserInfo selectById(Integer userId);
}
package com.example.newblogsystem.mapper;
import com.example.newblogsystem.model.BlogInfo;
import org.apache.ibatis.annotations.Insert;
import org.apache.ibatis.annotations.Mapper;
import org.apache.ibatis.annotations.Select;
import java.util.List;
@Mapper
public interface BlogMapper {
//查询博客列表
@Select("select * from blog where delete_flag=0 order by create_time desc")
List<BlogInfo> selectAllBlog();
//根据博客ID, 查询博客信息
@Select("select * from blog where delete_flag =0 and id= #{blogId}")
BlogInfo selectById(Integer blogId);
//根据博客ID, 修改博客信息
//此修改包含修改和删除, 根据参数决定修改什么
//代码较多,使用xml
Integer updateBlog(BlogInfo blogInfo);
//插入博客
@Insert("insert into blog(title, content, user_id) values (#{title}, #{content}, #{userId})")
Integer insertBlog(BlogInfo blogInfo);
}
<?xml version="1.0" encoding="UTF-8"?>
<!DOCTYPE mapper PUBLIC "-//mybatis.org//DTD Mapper 3.0//EN"
        "http://mybatis.org/dtd/mybatis-3-mapper.dtd">
<mapper namespace="com.example.newblogsystem.mapper.BlogMapper">
    <update id="updateBlog">
        update blog
        <set>
            <if test="title != null">
                title = #{title},
            </if>
            <if test="content != null">
                content = #{content},
            </if>
            <if test="deleteFlag != null">
                delete_flag = #{deleteFlag}
            </if>
        </set>
        where id = #{id}
    </update>
</mapper>
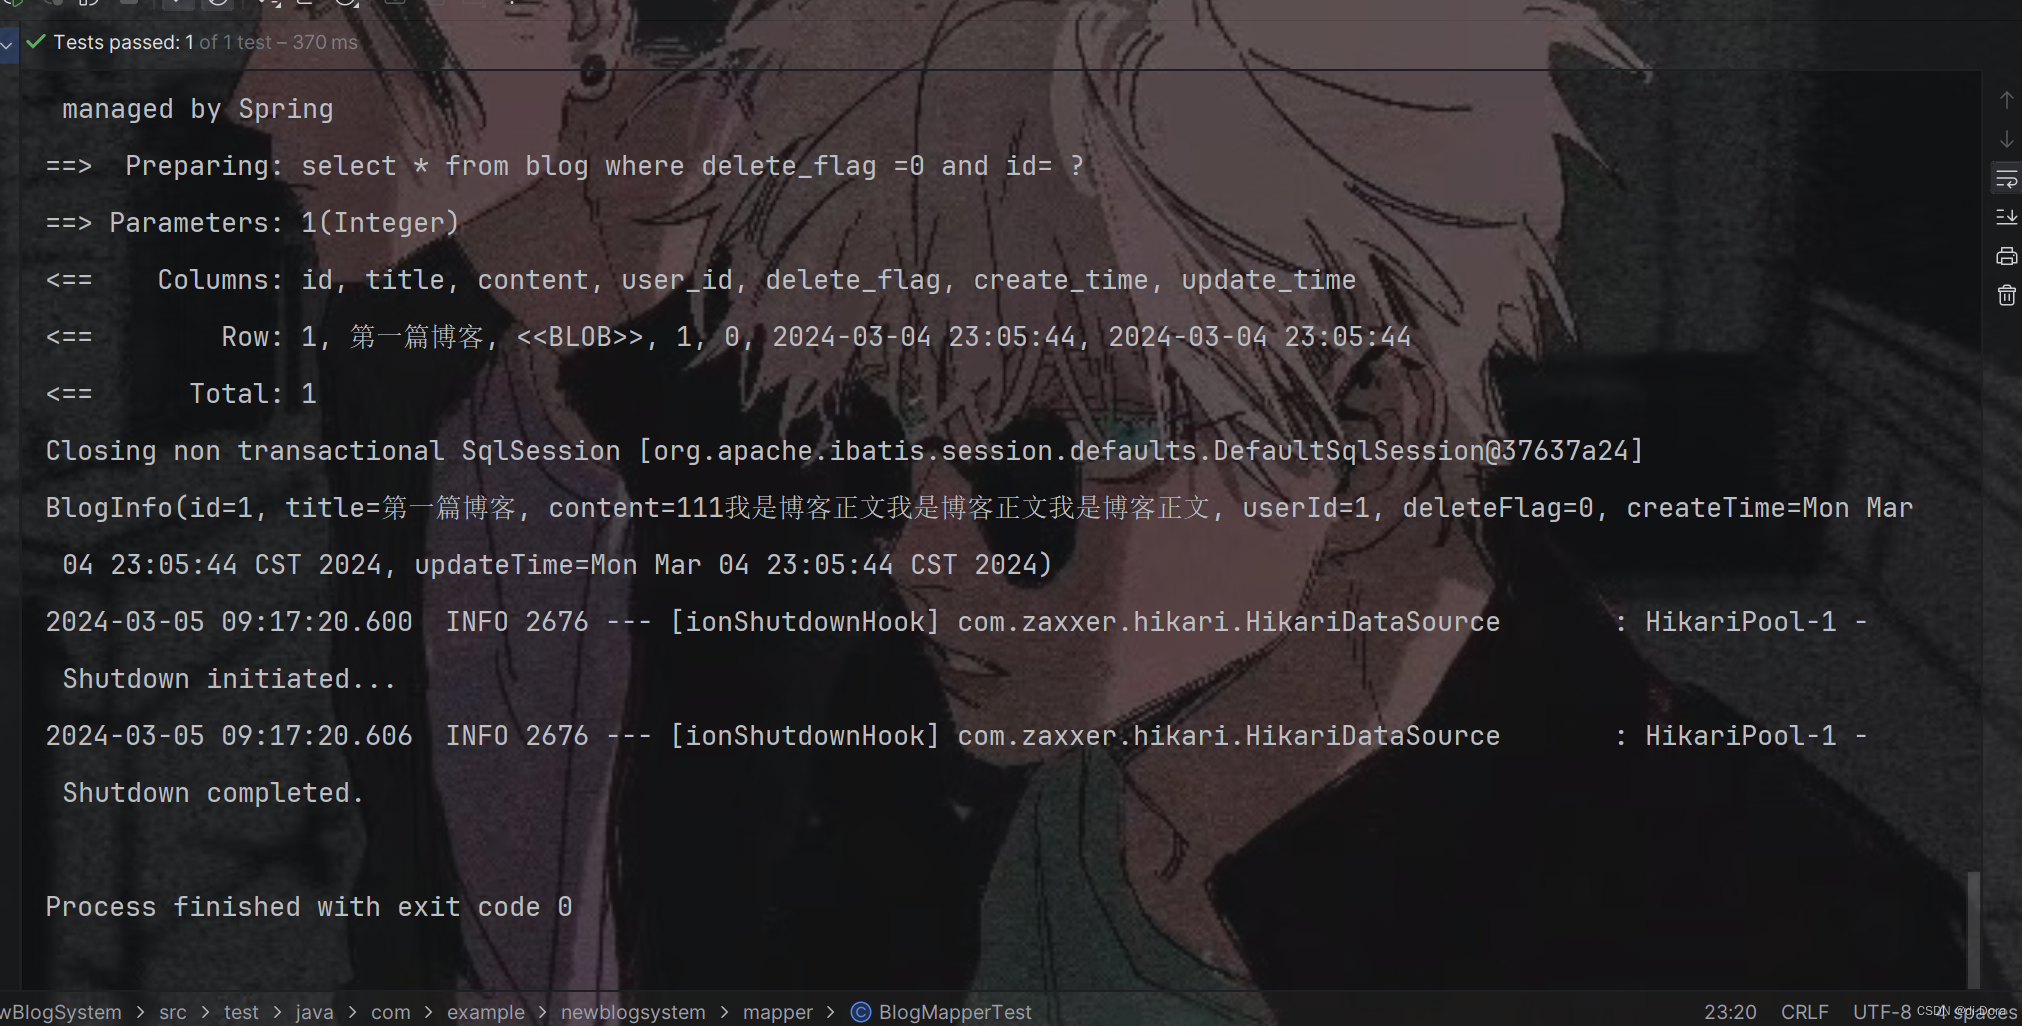
编写单元测试代码
package com.example.newblogsystem.mapper;

import org.junit.jupiter.api.Test;

import static org.junit.jupiter.api.Assertions.*;

import org.junit.jupiter.api.Test;
import org.springframework.beans.factory.annotation.Autowired;
import org.springframework.boot.test.context.SpringBootTest;

import static org.junit.jupiter.api.Assertions.*;

@SpringBootTest
class UserMapperTest {

    @Autowired
    private UserInfoMapper userMapper;

    @Test
    void selectByName() {
        System.out.println(userMapper.selectByName("zhangsan"));
    }

    @Test
    void selectById() {
        System.out.println(userMapper.selectById(2));
    }
}
package com.example.newblogsystem.mapper;
import com.example.newblogsystem.model.BlogInfo;
import org.junit.jupiter.api.Test;
import static org.junit.jupiter.api.Assertions.*;
import org.junit.jupiter.api.Test;
import org.springframework.beans.factory.annotation.Autowired;
import org.springframework.boot.test.context.SpringBootTest;
import static org.junit.jupiter.api.Assertions.*;
@SpringBootTest
class BlogMapperTest {
@Autowired
private BlogMapper blogMapper;
@Test
void selectAllBlog() {
System.out.println(blogMapper.selectAllBlog());
}
@Test
void selectById() {
System.out.println(blogMapper.selectById(1));
}
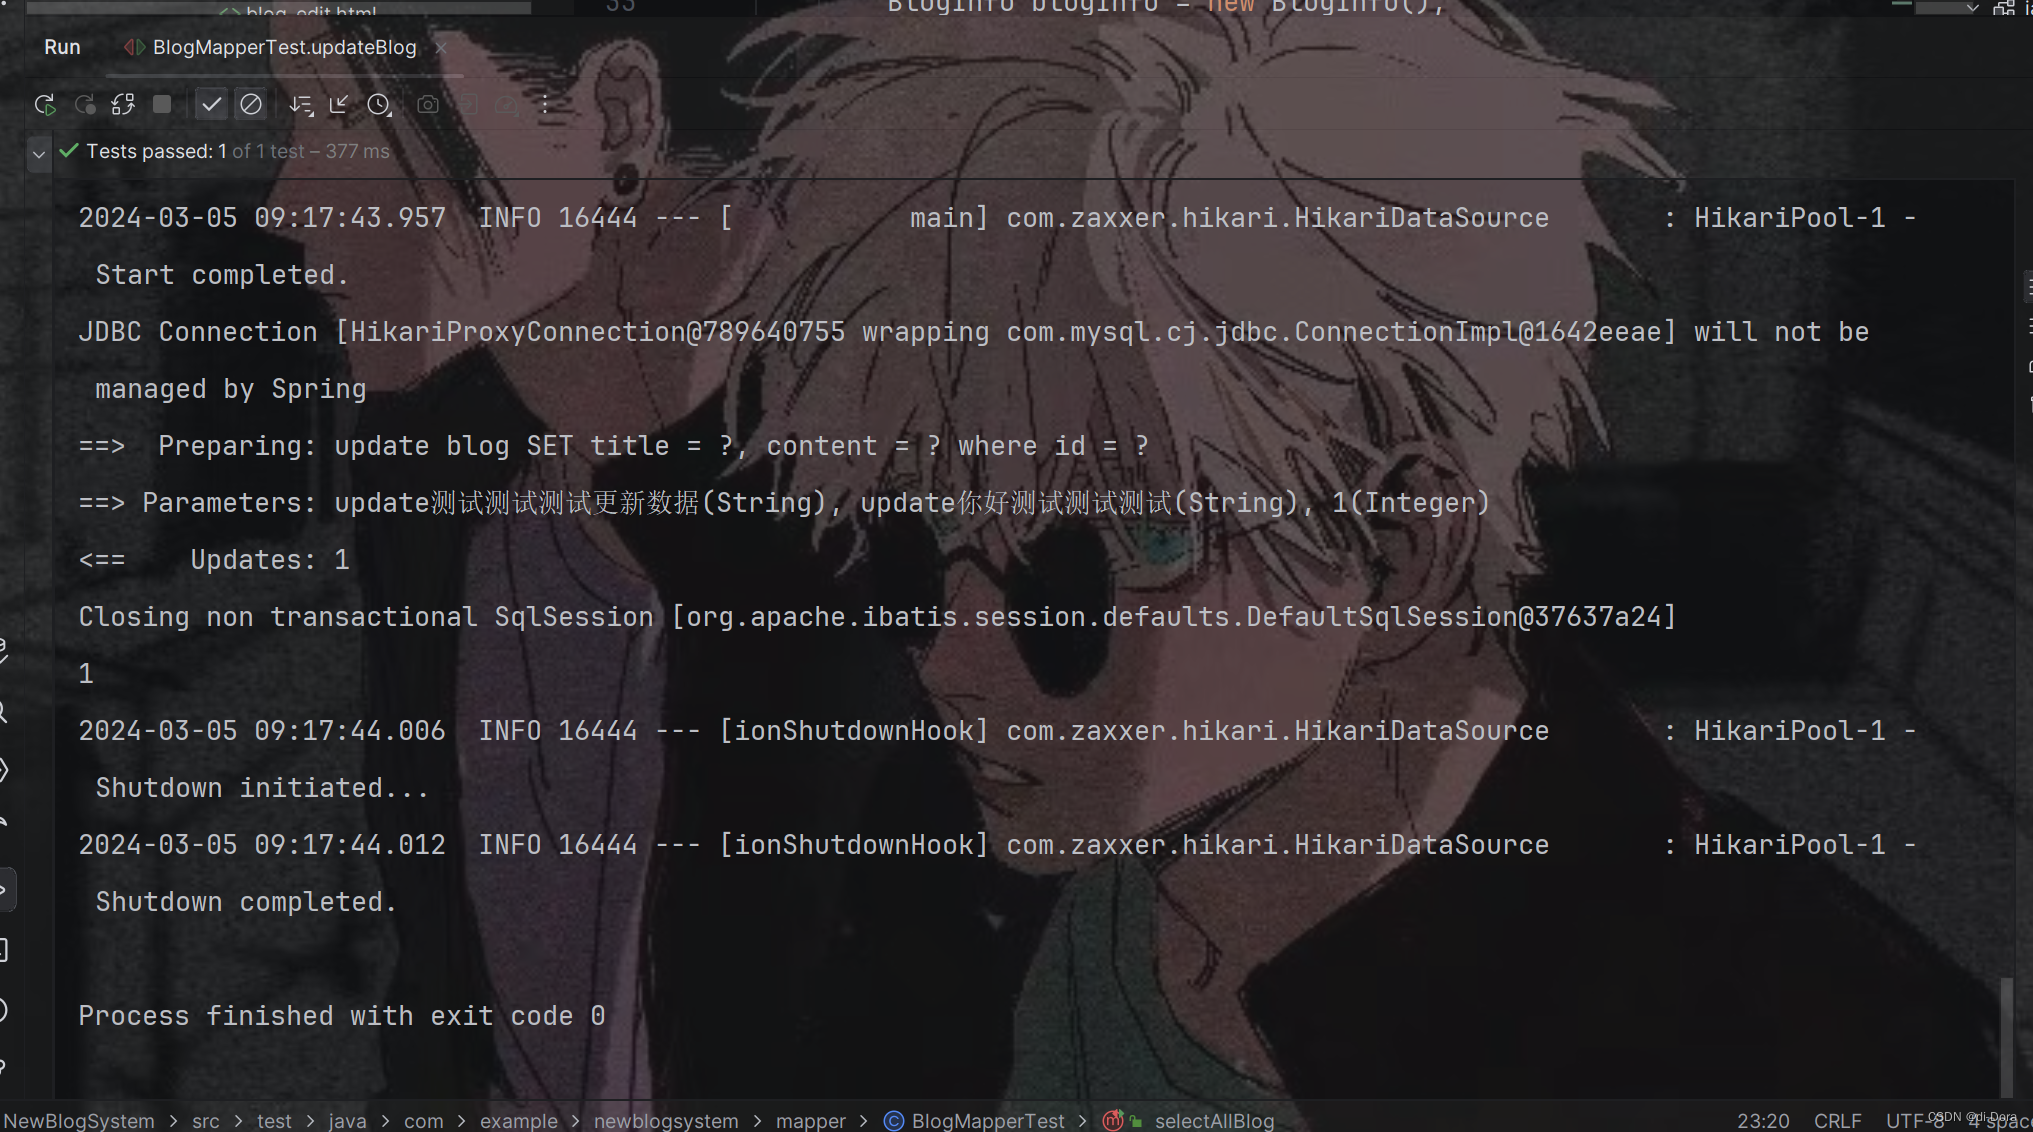
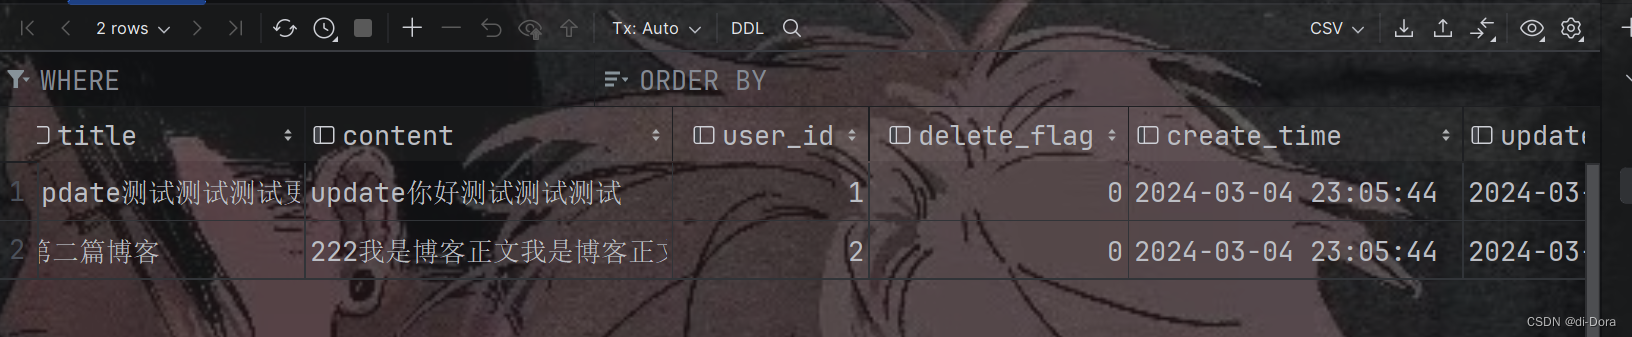
@Test
void updateBlog() {
BlogInfo blogInfo = new BlogInfo();
blogInfo.setTitle("update测试测试测试更新数据");
blogInfo.setContent("update你好测试测试测试");
blogInfo.setId(1);
System.out.println(blogMapper.updateBlog(blogInfo));
}
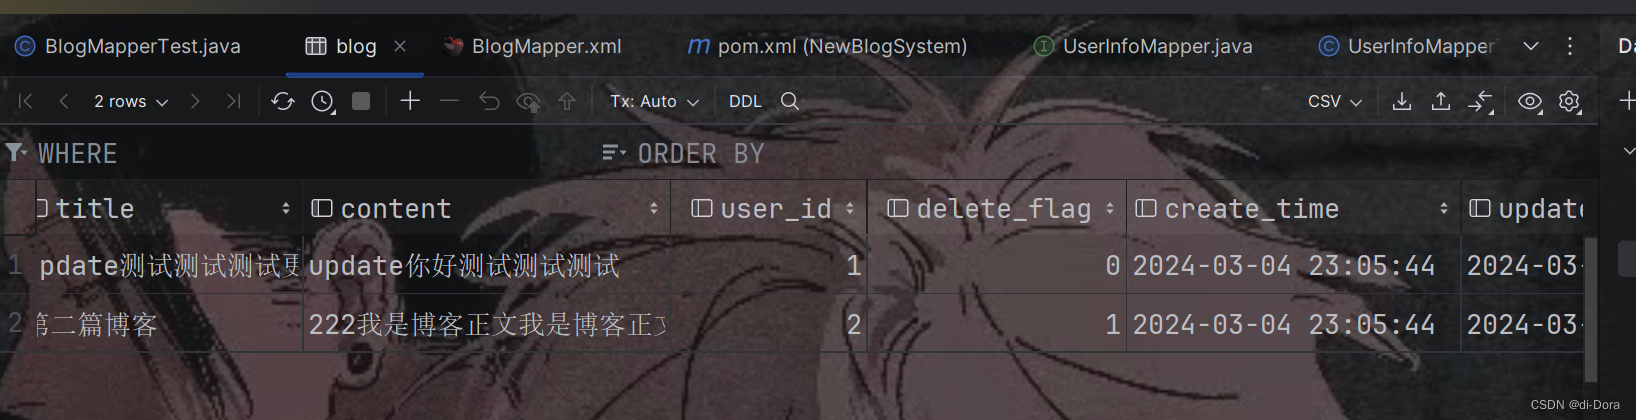
@Test
void deleteBlog() {
BlogInfo blogInfo = new BlogInfo();
blogInfo.setId(2);
blogInfo.setDeleteFlag(1);
System.out.println(blogMapper.updateBlog(blogInfo));
}
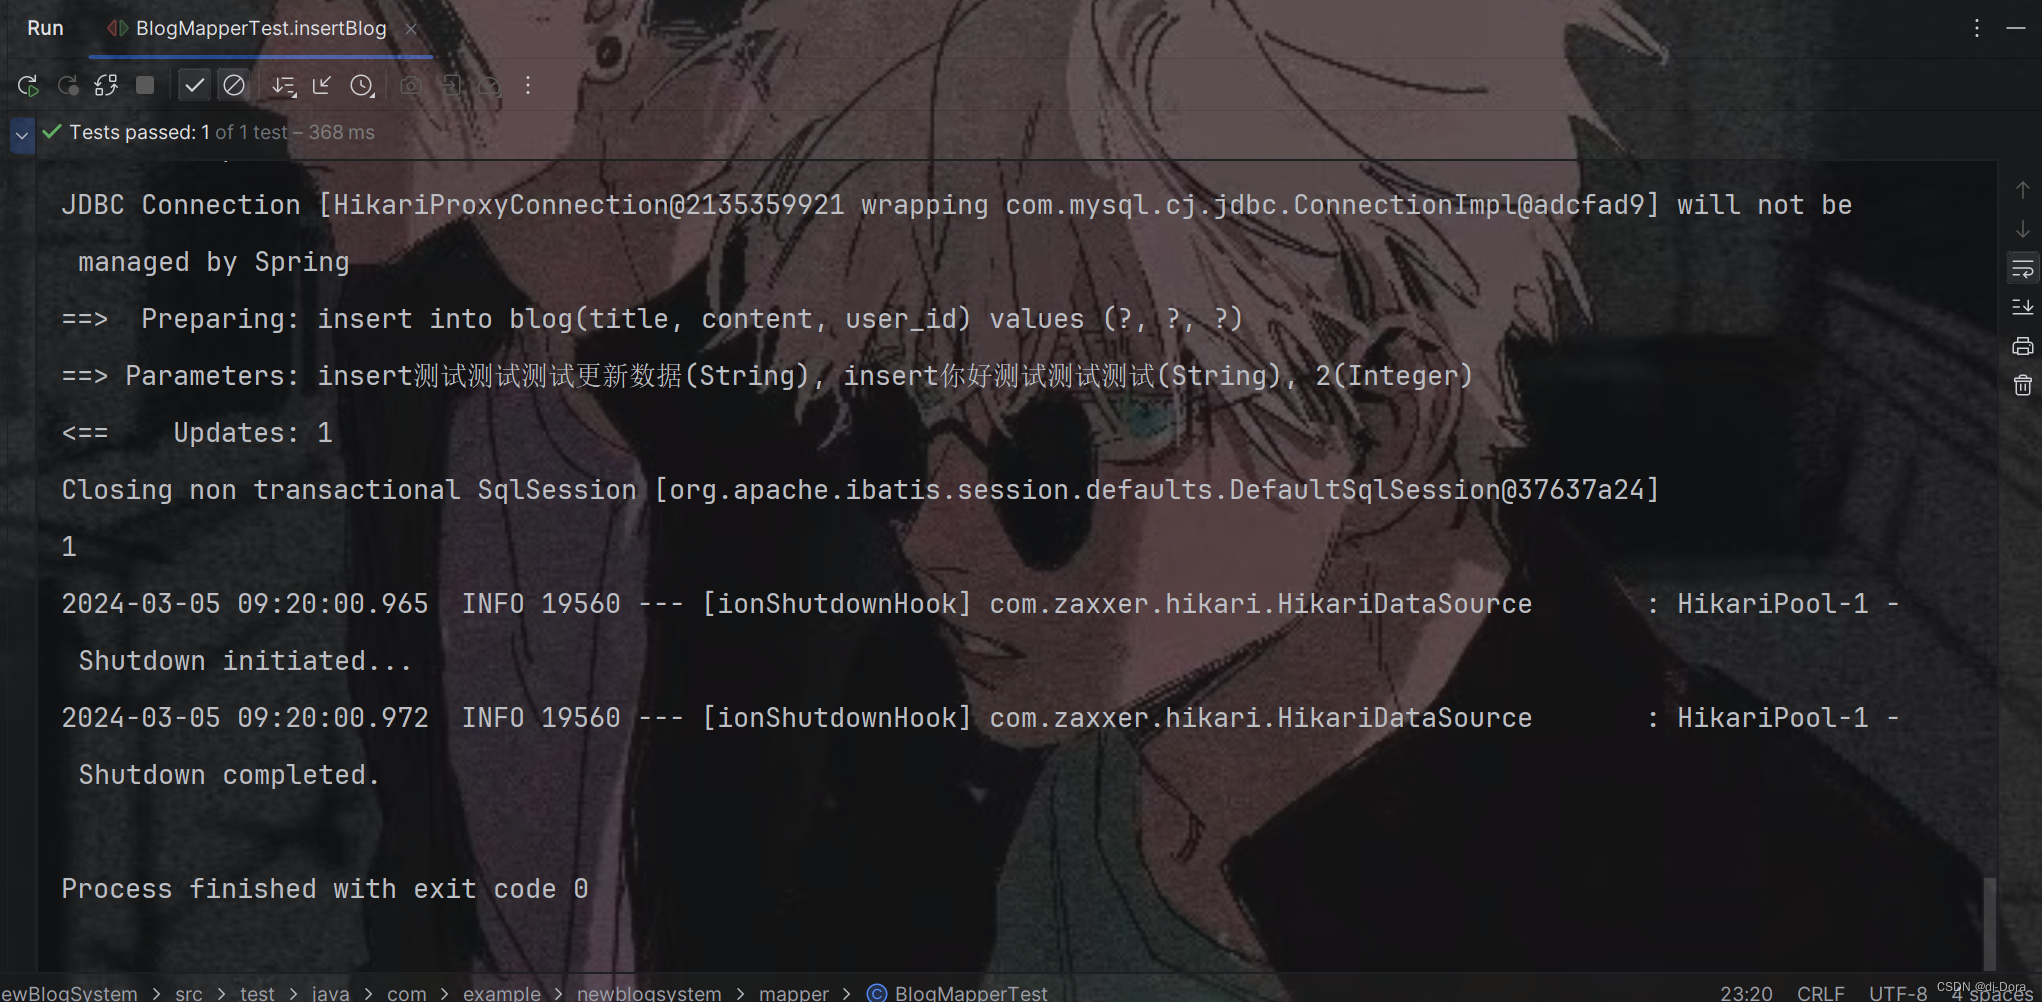
@Test
void insertBlog() {
BlogInfo blogInfo = new BlogInfo();
blogInfo.setTitle("insert测试测试测试更新数据");
blogInfo.setContent("insert你好测试测试测试");
blogInfo.setUserId(2);
System.out.println(blogMapper.insertBlog(blogInfo));
}
}


实现博客列表
约定前后端交互接
请求:
- 请求路径:/blog/getlist
响应:
- 状态码:200
- 错误消息:空字符串
- 数据:
- 数据类型:数组,包含多个博客对象
- 每个博客对象包含以下字段:
- id:博客ID
- title:博客标题
- content:博客内容
- userId:用户ID,表示博客作者
- deleteFlag:删除标志,
0表示未删除,1表示已删除 - createTime:博客创建时间
- updateTime:博客更新时间,格式为 ISO 8601
实现服务器代码
package com.example.newblogsystem.controller;

import com.example.newblogsystem.model.BlogInfo;
import com.example.newblogsystem.service.BlogService;
import org.springframework.beans.factory.annotation.Autowired;
import org.springframework.web.bind.annotation.RequestMapping;
import org.springframework.web.bind.annotation.RestController;

import java.util.List;

@RequestMapping("/blog")
@RestController
public class BlogController {
    @Autowired
    private BlogService blogService;

    @RequestMapping("/getList")
    public List<BlogInfo> queryBlogList(){
        return blogService.queryBlogList();
    }
}
package com.example.newblogsystem.service;

import com.example.newblogsystem.mapper.BlogMapper;
import com.example.newblogsystem.model.BlogInfo;
import org.springframework.beans.factory.annotation.Autowired;
import org.springframework.stereotype.Service;

import java.util.List;

@Service
public class BlogService {
    @Autowired
    private BlogMapper blogMapper;

    public List<BlogInfo> queryBlogList() {
        return blogMapper.selectAllBlog();
    }
}
部署程序,验证服务器是否能正确返回数据:

实现客户端代码
首先,需要修改 blog_list.html 文件,删除之前写死的博客内容,然后新增 JavaScript 代码来处理 AJAX 请求。以下是大致的步骤:
- 在 blog_list.html 文件中,删除之前写死的博客内容(例如 <div class="blog">)。
- 新增 JavaScript 代码来处理 AJAX 请求:
使用 AJAX 向服务器发送 HTTP 请求。
处理服务器返回的 JSON 格式数据,并利用 DOM API 构建页面内容。
将响应中的 postTime 字段从毫秒级时间戳转换为格式化日期。
构建跳转到博客详情页的 URL,形如 blog_detail.html?blogId=1,以便让博客详情页知道要访问的是哪篇博客。
<!DOCTYPE html>
<html lang="en">
<head>
<meta charset="UTF-8">
<meta http-equiv="X-UA-Compatible" content="IE=edge">
<meta name="viewport" content="width=device-width, initial-scale=1.0">
<title>博客列表页</title>
<link rel="stylesheet" href="css/common.css">
<link rel="stylesheet" href="css/list.css">
</head>
<body>
<div class="nav">
<img src="pic/酷狗.jpg" alt="">
<span class="blog-title">我的博客系统</span>
<div class="space"></div>
<a class="nav-span" href="blog_list.html">主页</a>
<a class="nav-span" href="blog_edit.html">写博客</a>
<a class="nav-span" href="#" onclick="logout()">注销</a>
</div>
<div class="container">
<div class="left">
<div class="card">
<img src="pic/五条悟.jpg" alt="">
<h3>神圣的管理员SAMA</h3>
<a href="#">GitHub 地址</a>
<div class="row">
<span>文章</span>
<span>分类</span>
</div>
<div class="row">
<span>2</span>
<span>1</span>
</div>
</div>
</div>
<div class="right">
<!-- <div class="blog">
<div class="title">我的第一篇博客</div>
<div class="date">2021-06-02</div>
<div class="desc">今天开始, 好好学习Lorem ipsum dolor sit, amet consectetur adipisicing elit. Quas nesciunt, hic voluptatum, dolorem quisquam modi accusantium, commodi dolores architecto ratione vel exercitationem optio. Facere repellendus autem, obcaecati dolore sequi incidunt?</div>
<a class="detail" href="blog_detail.html">查看全文>></a>
</div>
<div class="blog">
<div class="title">我的第一篇博客</div>
<div class="date">2021-06-02</div>
<div class="desc">今天开始, 好好学习Lorem ipsum dolor sit, amet consectetur adipisicing elit. Quas nesciunt, hic voluptatum, dolorem quisquam modi accusantium, commodi dolores architecto ratione vel exercitationem optio. Facere repellendus autem, obcaecati dolore sequi incidunt?</div>
<a class="detail" href="blog_detail.html">查看全文>></a>
</div> -->
</div>
</div>
<script src="js/jquery.min.js"></script>
<script src="js/common.js"></script>
<script>
$.ajax({
type: "get",
url: "/blog/getList",
success:function(result){
if(result.code == 200 && result.data != null && result.data.length > 0){
var finalHtml = "";
// 页面展示
for(var blog of result.data){
finalHtml += '<div class="blog">';
finalHtml += '<div class="title">'+blog.title+'</div>';
finalHtml += '<div class="date">'+blog.createTime+'</div>';
finalHtml += '<div class="desc">'+blog.content+'</div>';
finalHtml += '<a class="detail" href="blog_detail.html?blogId='+blog.id+'">查看全文>></a>';
finalHtml += '</div>';
}
$(".right").html(finalHtml);
} else if (result.code == 200 && (result.data == null || result.data.length == 0)) {
// 数据为空时,显示提示信息
$(".right").html('<div class="no-blog">当前还没有任何博客,快去写博客吧...</div>');
} else {
// 其他状态码或者请求失败时,显示错误信息
$(".right").html('<div class="error-msg">加载博客列表失败,请稍后重试...</div>');
}
},
error: function() {
// 请求失败时,显示错误信息
$(".right").html('<div class="error-msg">加载博客列表失败,请稍后重试...</div>');
}
});
</script>
</body>
</html>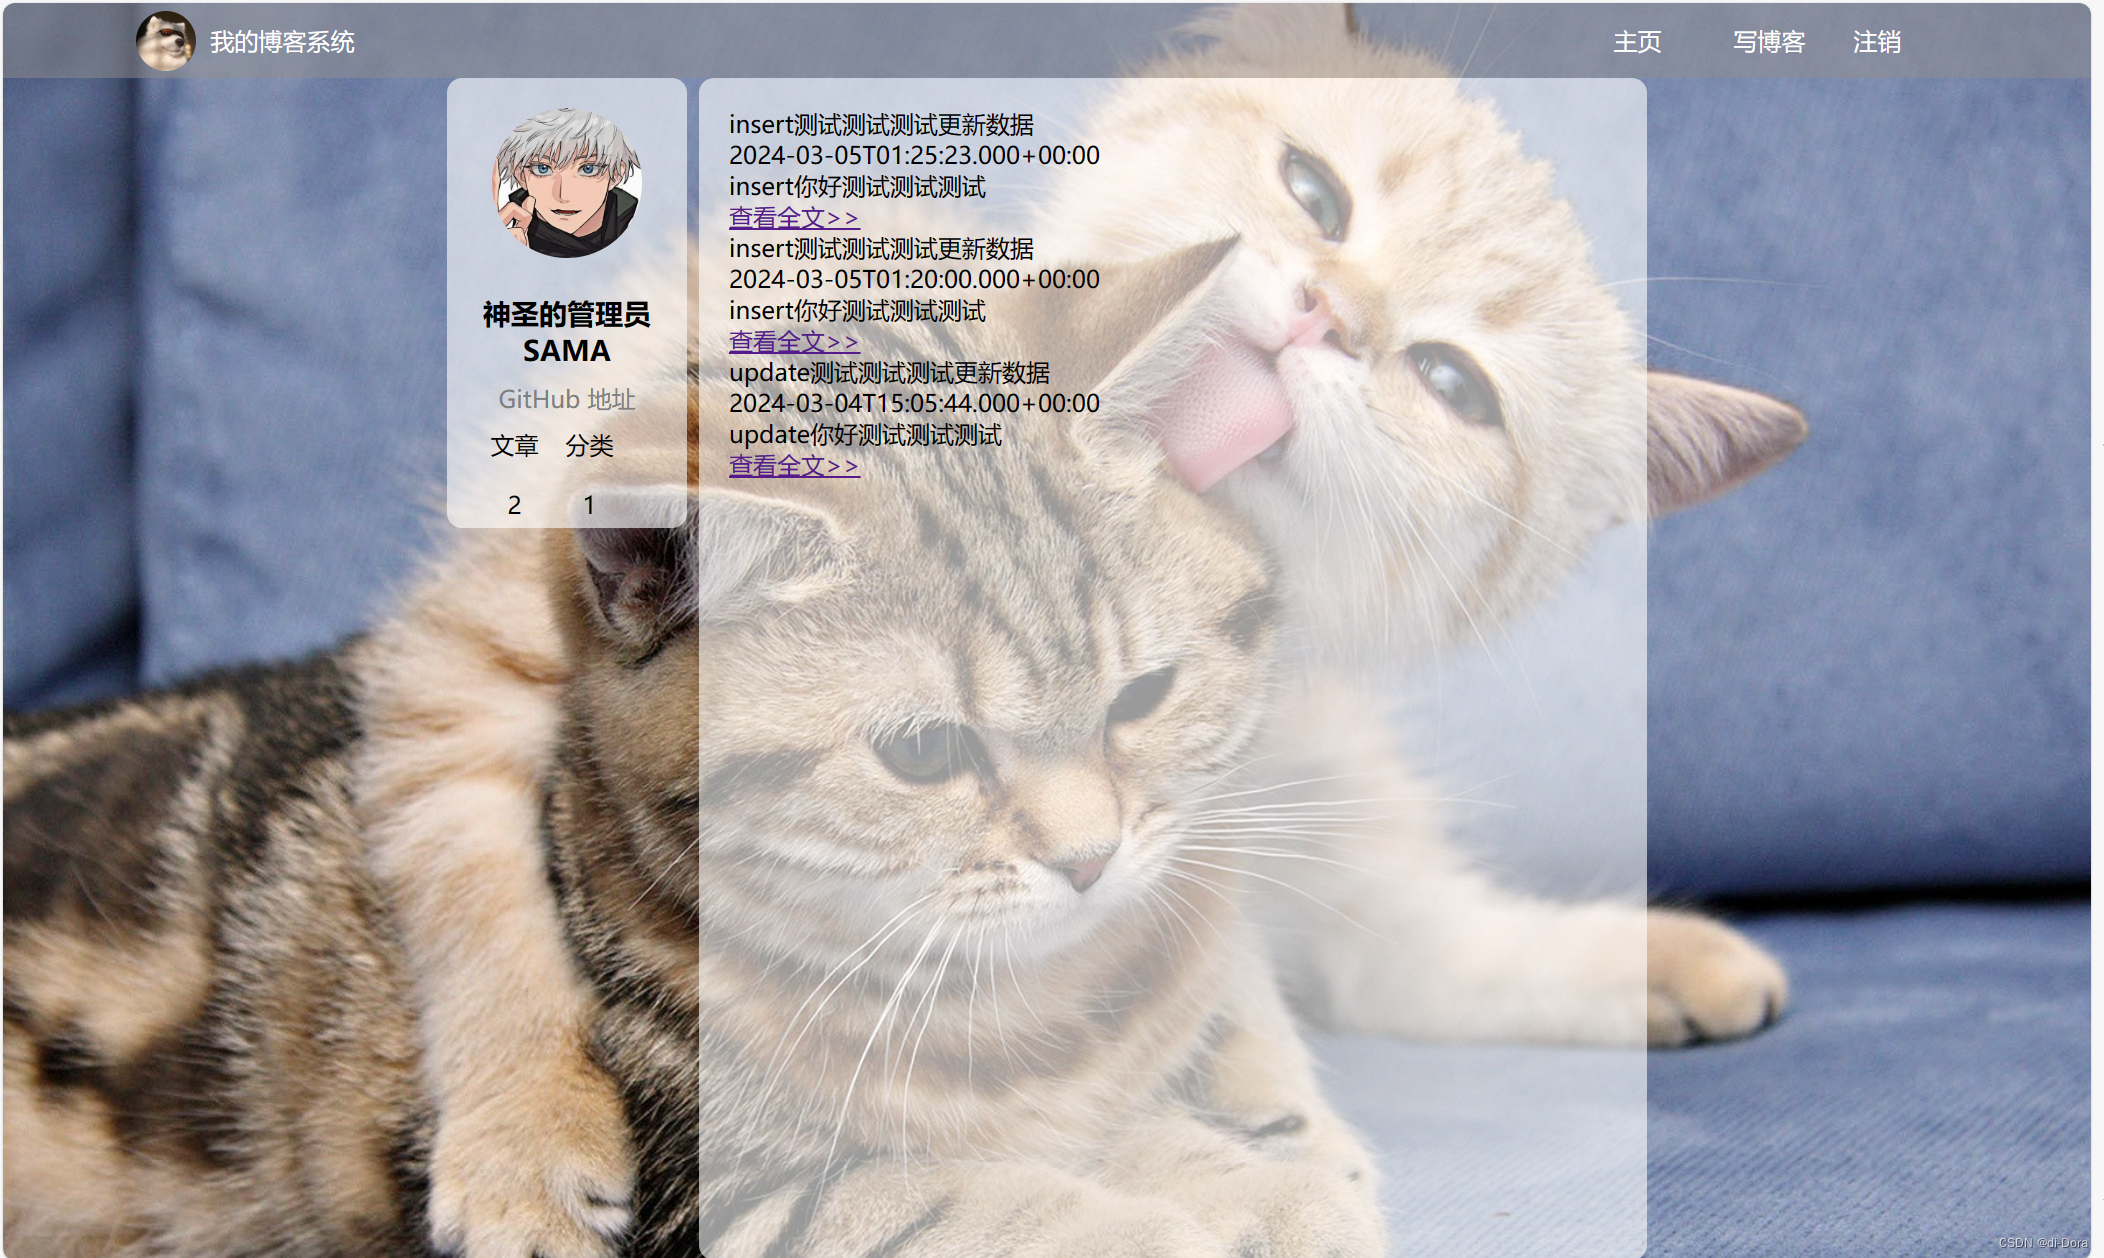
感觉页面不太美观,所有文字都挤在一起无法区分标题正文,而且背景图片我想换一个。
现在修改一下前端代码中的css文件,并且引入新的css文件:
<!DOCTYPE html>
<html lang="en">
<head>
<meta charset="UTF-8">
<meta http-equiv="X-UA-Compatible" content="IE=edge">
<meta name="viewport" content="width=device-width, initial-scale=1.0">
<title>博客列表页</title>
<link rel="stylesheet" href="css/common.css">
<link rel="stylesheet" href="css/list.css">
<link rel="stylesheet" href="css/blog_style.css">
</head>
<body>
<div class="nav">
<img src="pic/酷狗.jpg" alt="">
<span class="blog-title">我的博客系统</span>
<div class="space"></div>
<a class="nav-span" href="blog_list.html">主页</a>
<a class="nav-span" href="blog_edit.html">写博客</a>
<a class="nav-span" href="#" onclick="logout()">注销</a>
</div>
<div class="container">
<div class="left">
<div class="card">
<img src="pic/五条悟.jpg" alt="">
<h3>神圣的管理员SAMA</h3>
<a href="#">GitHub 地址</a>
<div class="row">
<span>文章</span>
<span>分类</span>
</div>
<div class="row">
<span>2</span>
<span>1</span>
</div>
</div>
</div>
<div class="right">
<!-- <div class="blog">
<div class="title">我的第一篇博客</div>
<div class="date">2021-06-02</div>
<div class="desc">今天开始, 好好学习Lorem ipsum dolor sit, amet consectetur adipisicing elit. Quas nesciunt, hic voluptatum, dolorem quisquam modi accusantium, commodi dolores architecto ratione vel exercitationem optio. Facere repellendus autem, obcaecati dolore sequi incidunt?</div>
<a class="detail" href="blog_detail.html">查看全文>></a>
</div>
<div class="blog">
<div class="title">我的第一篇博客</div>
<div class="date">2021-06-02</div>
<div class="desc">今天开始, 好好学习Lorem ipsum dolor sit, amet consectetur adipisicing elit. Quas nesciunt, hic voluptatum, dolorem quisquam modi accusantium, commodi dolores architecto ratione vel exercitationem optio. Facere repellendus autem, obcaecati dolore sequi incidunt?</div>
<a class="detail" href="blog_detail.html">查看全文>></a>
</div> -->
</div>
</div>
<script src="js/jquery.min.js"></script>
<script src="js/common.js"></script>
<script>
$.ajax({
type: "get",
url: "/blog/getList",
success:function(result){
if(result.code == 200 && result.data != null && result.data.length > 0){
var finalHtml = "";
// 页面展示
for(var blog of result.data){
finalHtml += '<div class="blog">';
finalHtml += '<div class="title">'+blog.title+'</div>';
finalHtml += '<div class="date">'+blog.createTime+'</div>';
finalHtml += '<div class="desc">'+blog.content+'</div>';
finalHtml += '<a class="detail" href="blog_detail.html?blogId='+blog.id+'">查看全文>></a>';
finalHtml += '</div>';
}
$(".right").html(finalHtml);
} else if (result.code == 200 && (result.data == null || result.data.length == 0)) {
// 数据为空时,显示提示信息
$(".right").html('<div class="no-blog">当前还没有任何博客,快去写博客吧...</div>');
} else {
// 其他状态码或者请求失败时,显示错误信息
$(".right").html('<div class="error-msg">加载博客列表失败,请稍后重试...</div>');
}
},
error: function() {
// 请求失败时,显示错误信息
$(".right").html('<div class="error-msg">加载博客列表失败,请稍后重试...</div>');
}
});
</script>
</body>
</html>.blog {
margin-bottom: 30px; /* 增加间距 */
padding: 20px; /* 增加内边距 */
border: 1px solid #ccc;
border-radius: 10px; /* 增加圆角 */
background-color: #f9f9f9;
text-align: center;
position: relative; /* 用于定位装饰性元素 */
}
.blog-content {
margin-bottom: 20px; /* 调整间距 */
}
.title {
font-size: 22px; /* 增大标题字体大小 */
color: #333;
font-weight: bold;
font-family: Arial, sans-serif;
margin-bottom: 10px; /* 调整标题与日期的间距 */
}
.date {
font-size: 14px;
color: #0066ff; /* 设置时间颜色为绿色 */
font-style: italic;
font-family: Arial, sans-serif;
margin-bottom: 10px; /* 调整日期与描述的间距 */
}
.desc {
font-size: 16px;
color: #444;
font-family: Arial, sans-serif;
line-height: 1.6; /* 设置行高 */
}
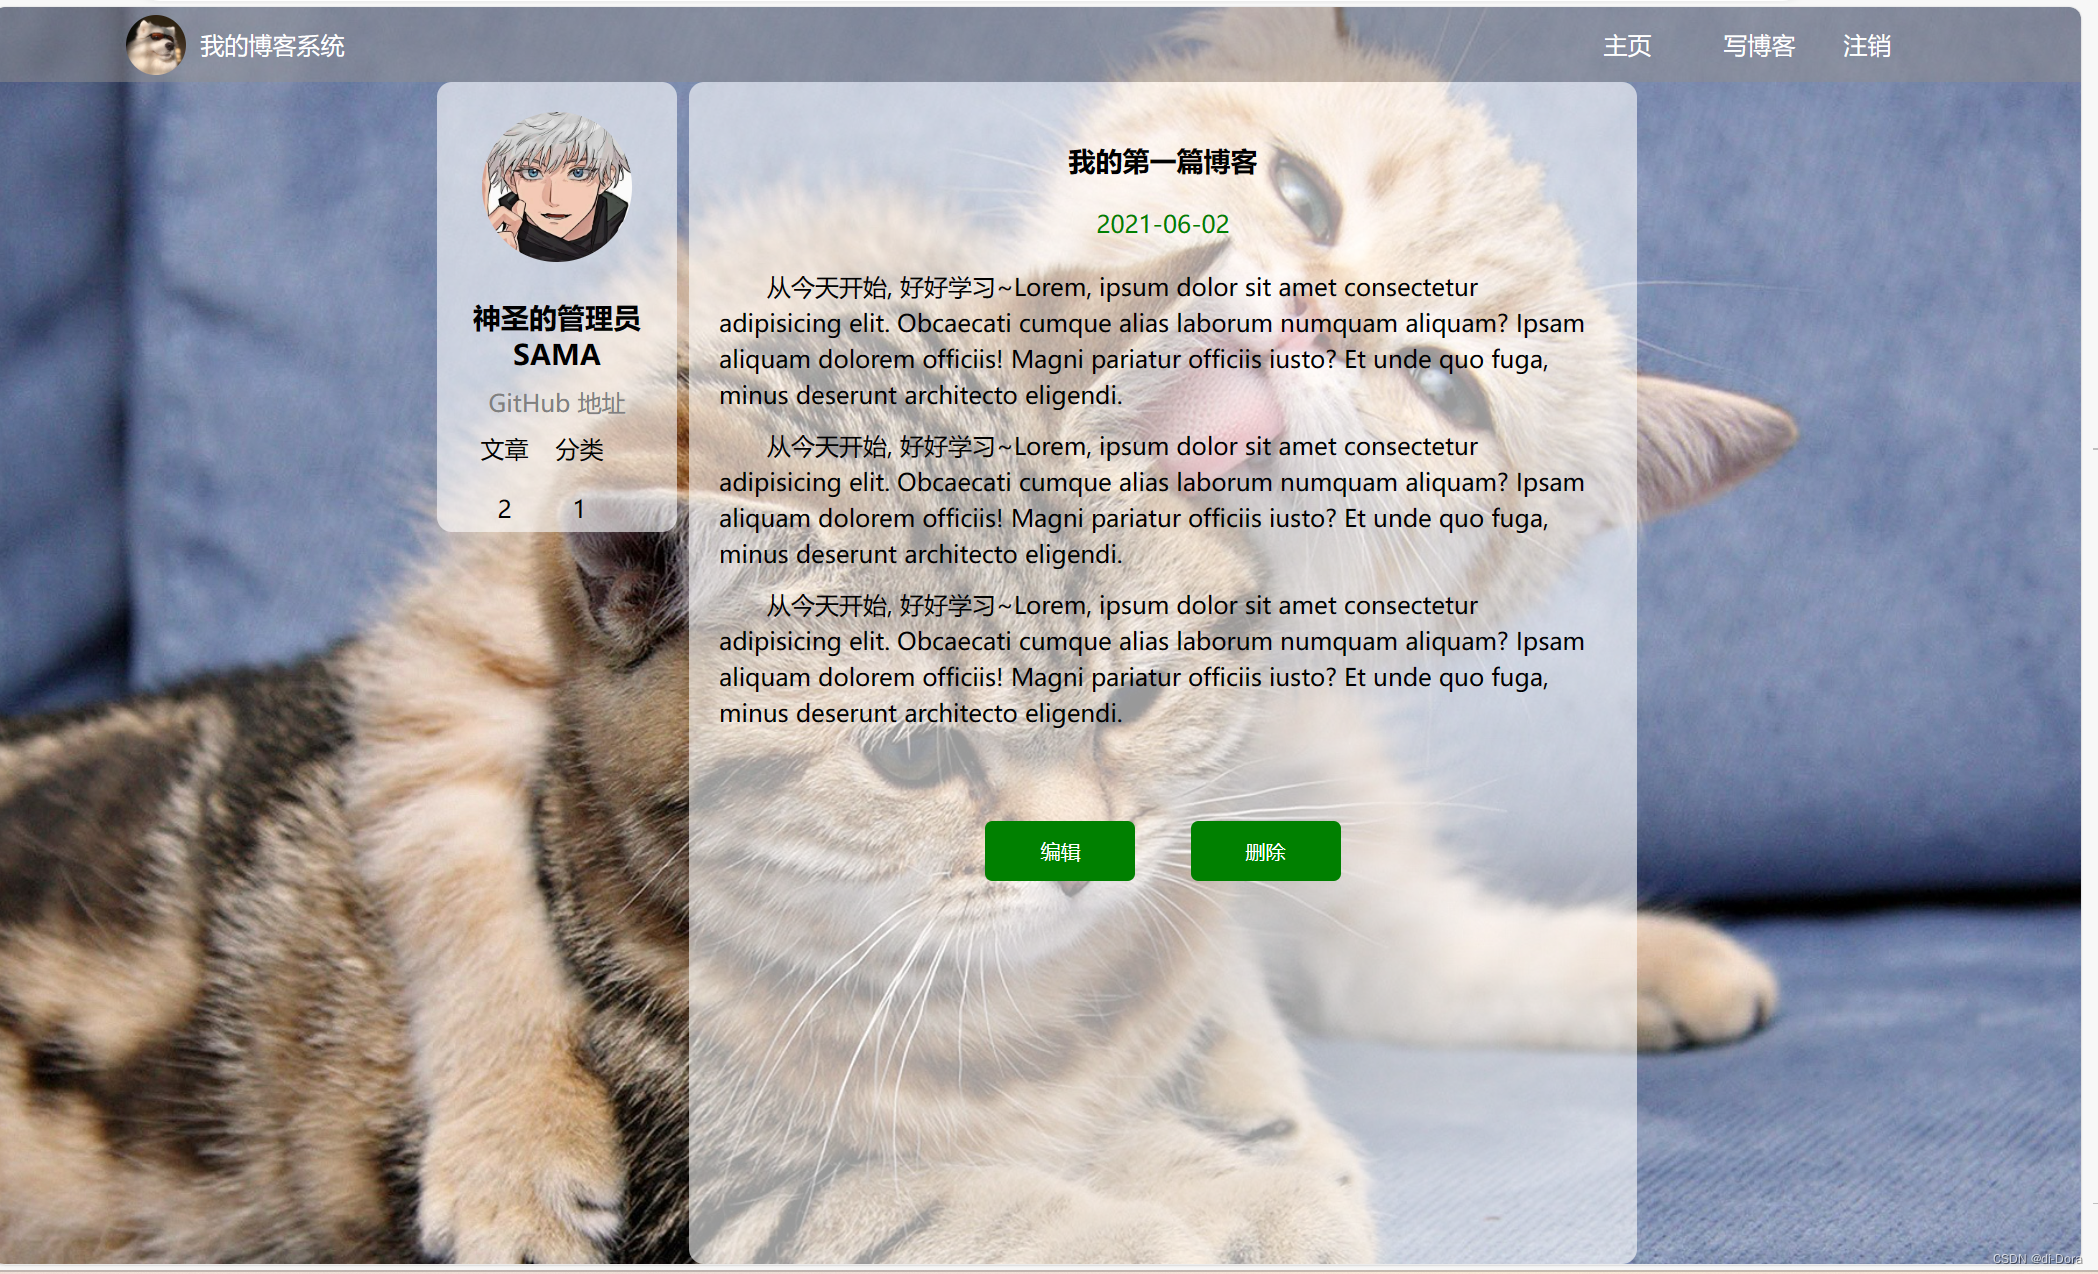
同时我们发现点进去博客详情页,文字很容易被背景图片混淆,所以我们再引入一个新的css文件:
.content {
    background-color: rgba(255, 255, 255, 0.8); /* 设置白色背景,通过透明度来控制背景的透明度 */
    padding: 20px; /* 添加内边距 */
    border-radius: 10px; /* 添加圆角 */
}

.content .title {
    font-size: 24px; /* 设置标题字体大小 */
    font-weight: bold; /* 设置标题粗体 */
    margin-bottom: 10px; /* 调整标题与日期的间距 */
}

.content .date {
    font-size: 16px; /* 设置日期字体大小 */
    color: #666; /* 设置日期颜色 */
    margin-bottom: 20px; /* 调整日期与内容的间距 */
}

.content .detail p {
    margin-bottom: 15px; /* 调整段落间距 */
    line-height: 1.6; /* 设置行高 */
}

.operating {
    margin-top: 20px; /* 添加操作按钮与内容的间距 */
}


我们还可以给详情页的的css换一个背景图片:
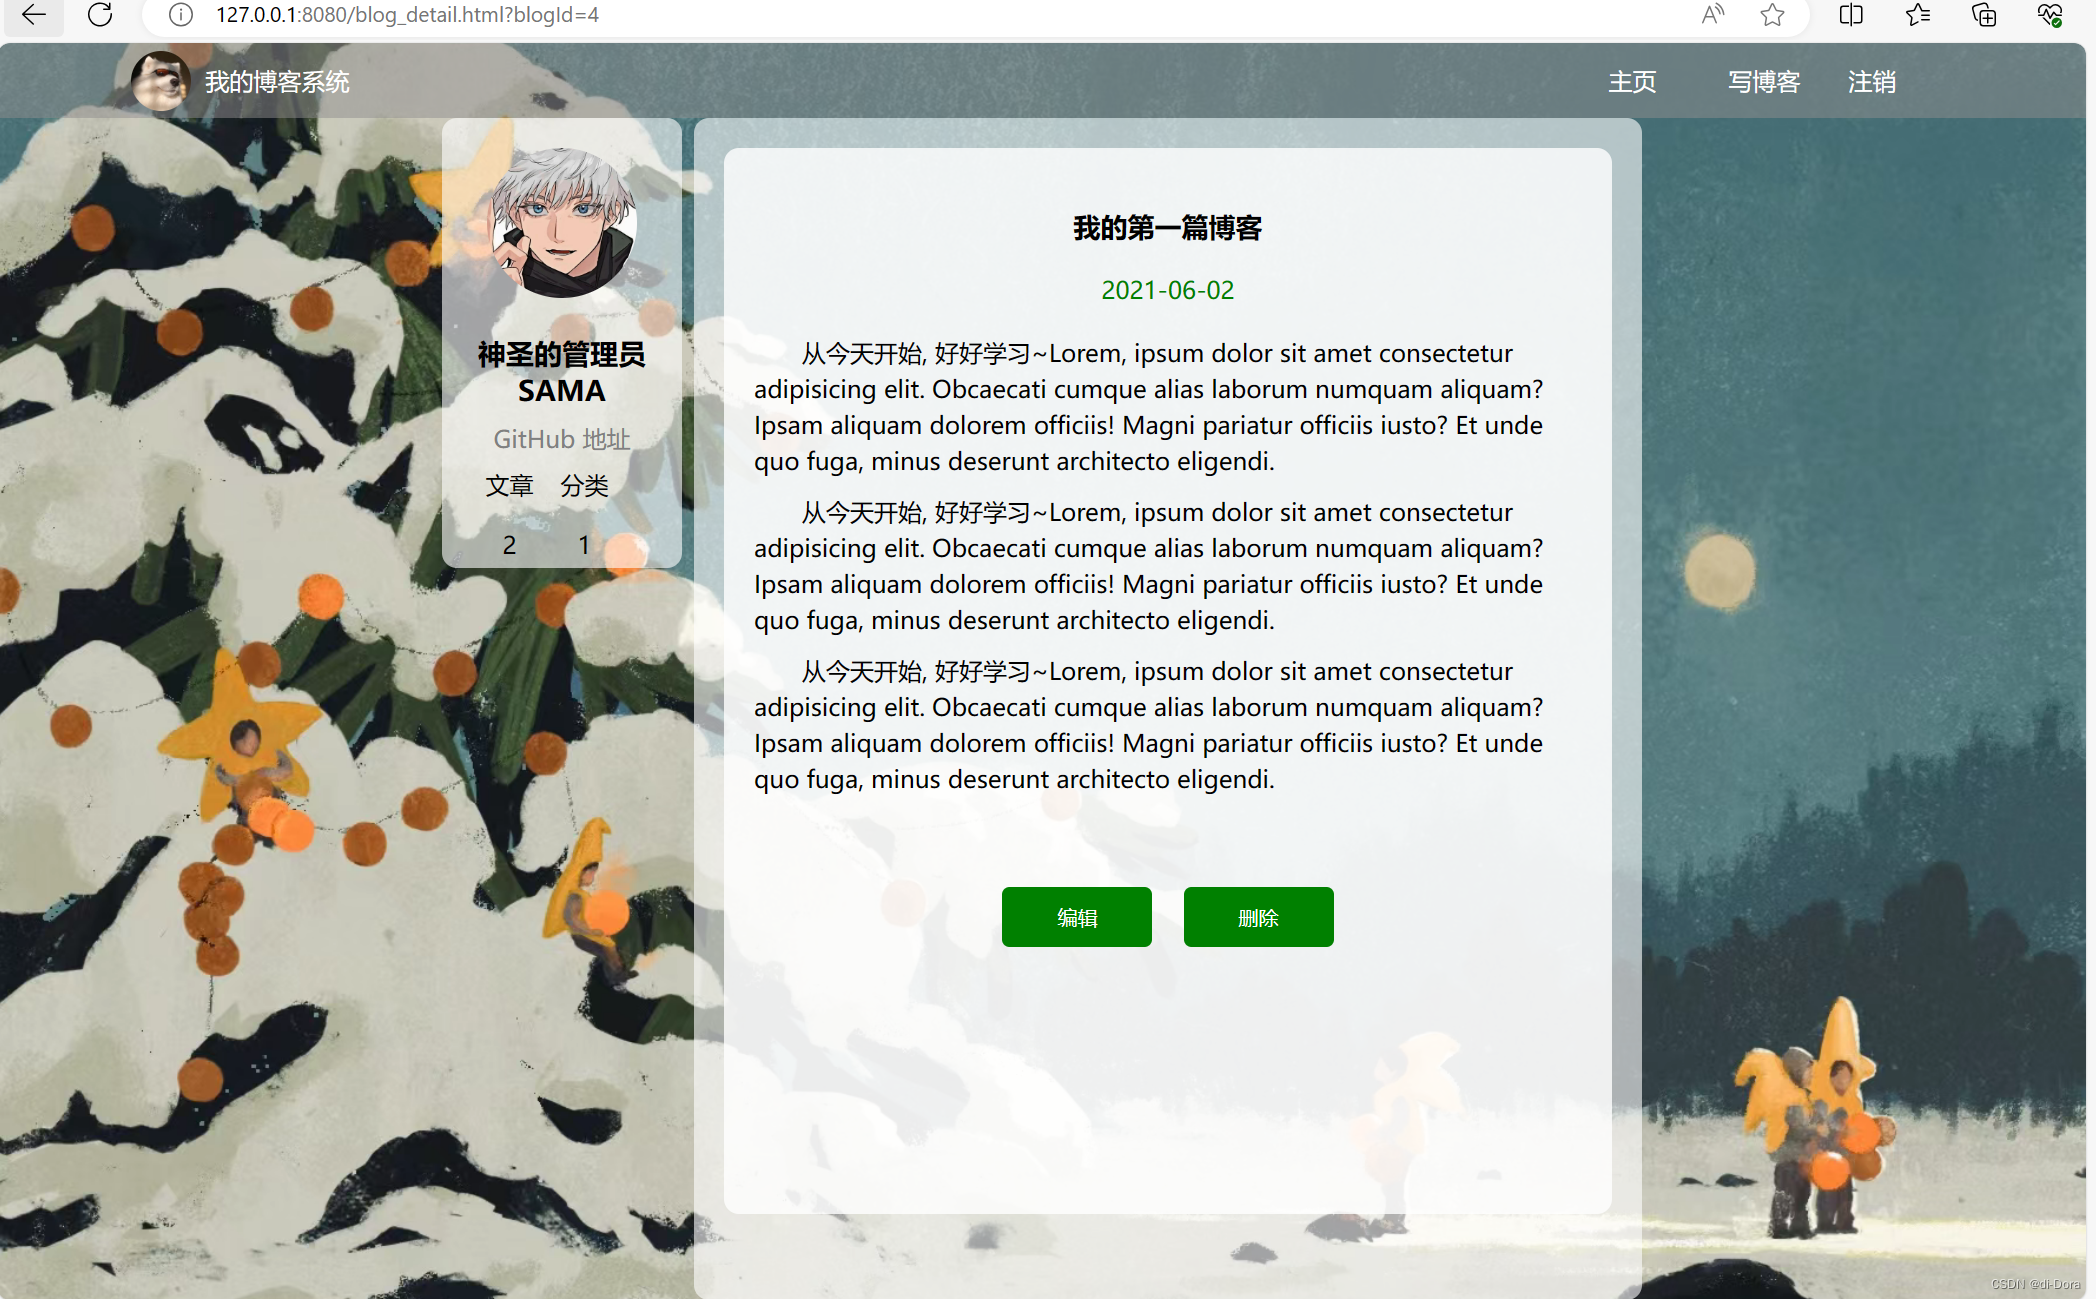
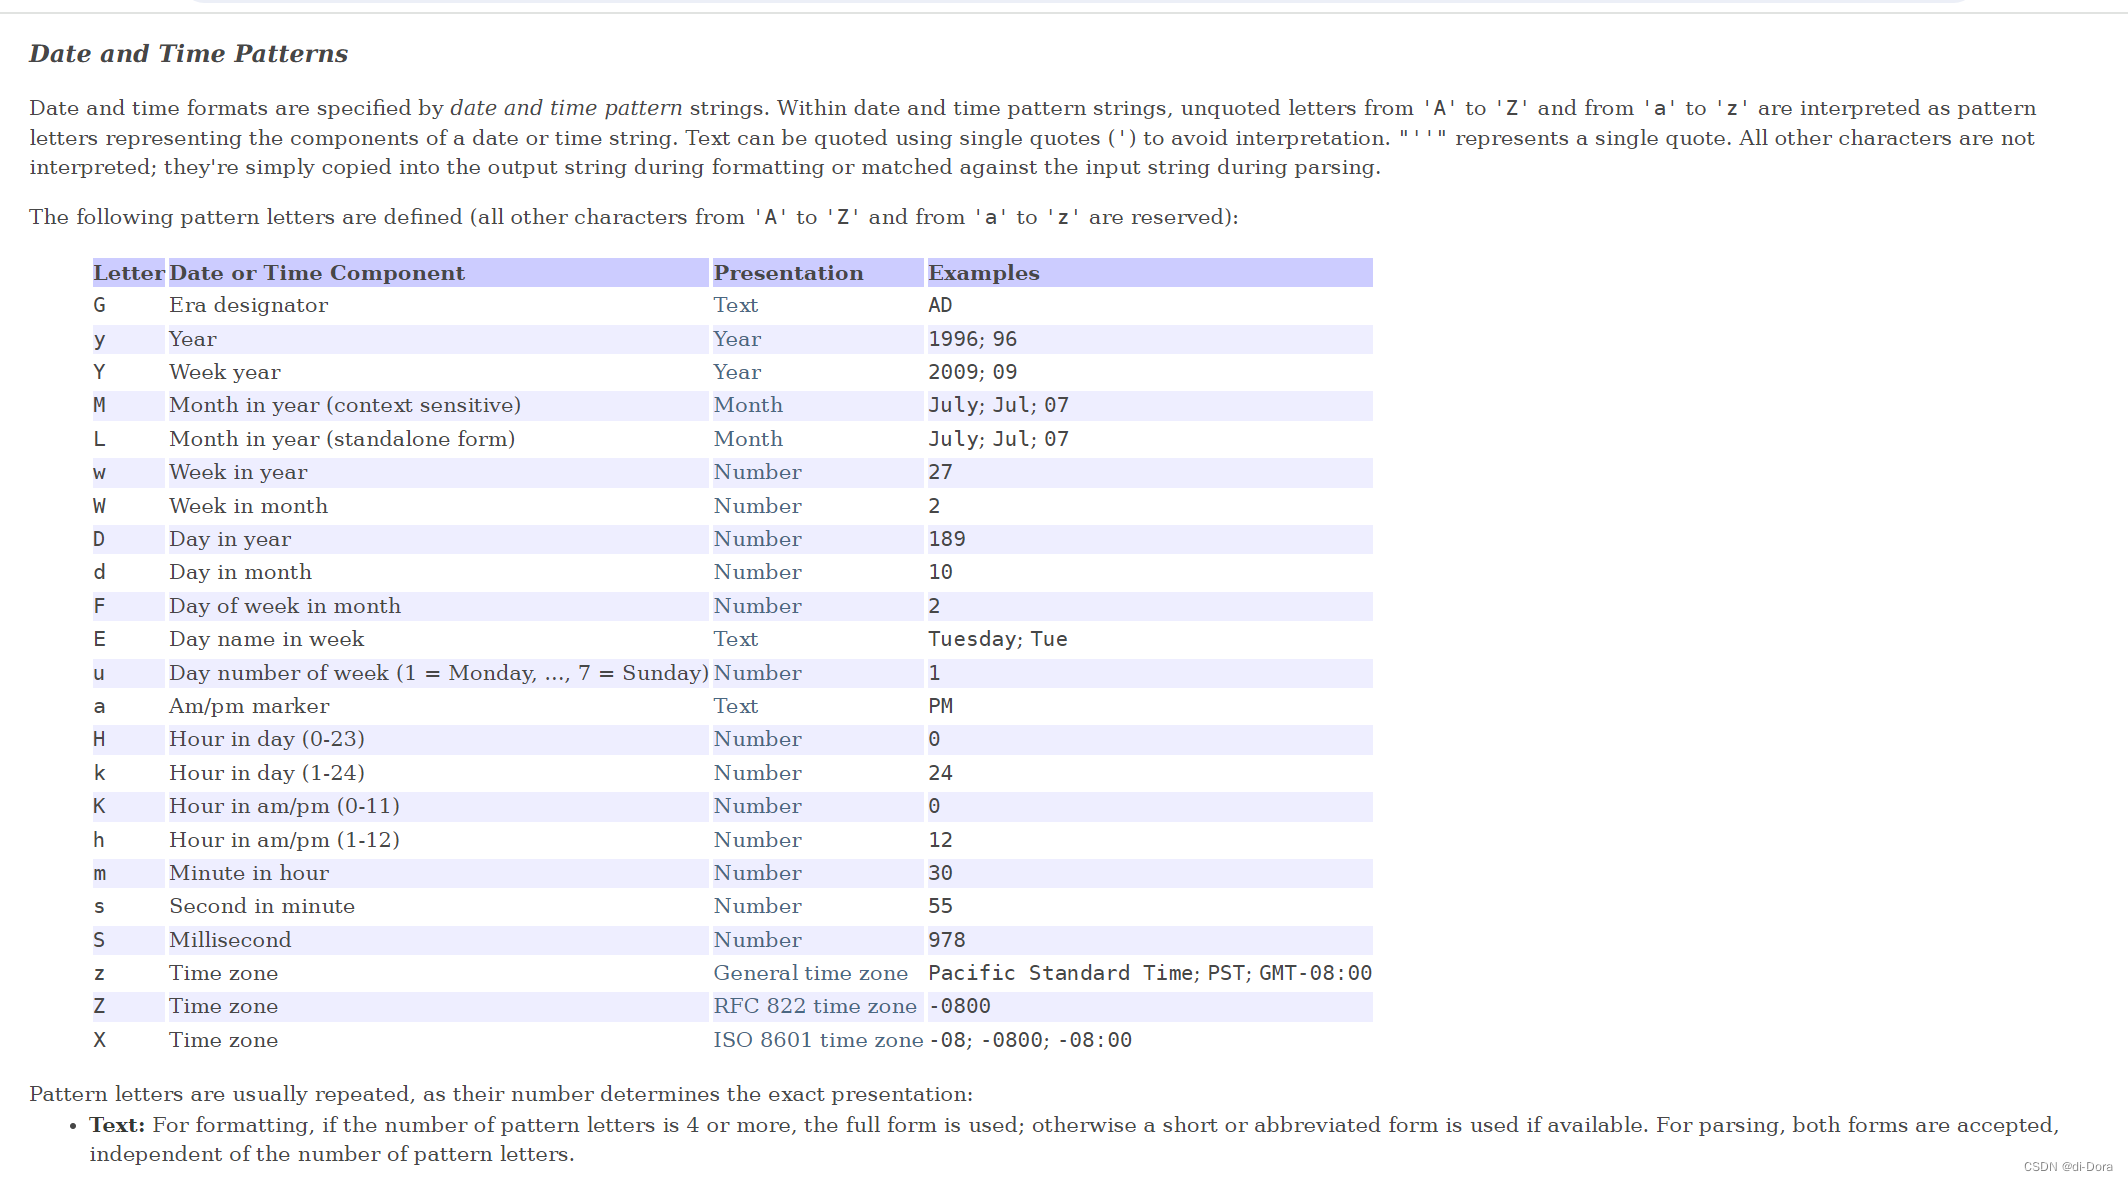
另外,我们会感觉列表页的时间不太对,太冗长了。这个部分在后端修改比较方便,我们可以使用到一个类——public class SimpleDateFormat extends DateFormat:
参考:SimpleDateFormat (Java Platform SE 8 )
可以在这里修改时间的格式:
package com.example.newblogsystem.model;

import com.example.newblogsystem.utils.DateUtils;
import lombok.Data;

import java.util.Date;

@Data
public class BlogInfo {

    private Integer id;
    private String title;
    private String content;
    private Integer userId;
    private Integer deleteFlag;
    private Date createTime;
    private Date updateTime;

    public String getCreateTime() {
        return DateUtils.formatDate(createTime);
    }
}
package com.example.newblogsystem.utils;

import java.text.SimpleDateFormat;
import java.util.Date;

/**
 * 日期工具类
 */
public class DateUtils {

    public static String formatDate(Date date){
        SimpleDateFormat simpleDateFormat = new SimpleDateFormat("yyyy-MM-dd HH:mm");
        return simpleDateFormat.format(date);
    }
}
实现博客详情
目前,点击博客列表页中的“查看全文”按钮会跳转到博客详情页,但是博客详情页显示的是静态的固定内容。我们希望能够根据当前博客的ID从服务器动态获取博客内容,以便用户能够查看最新的、与该博客相关联的内容。
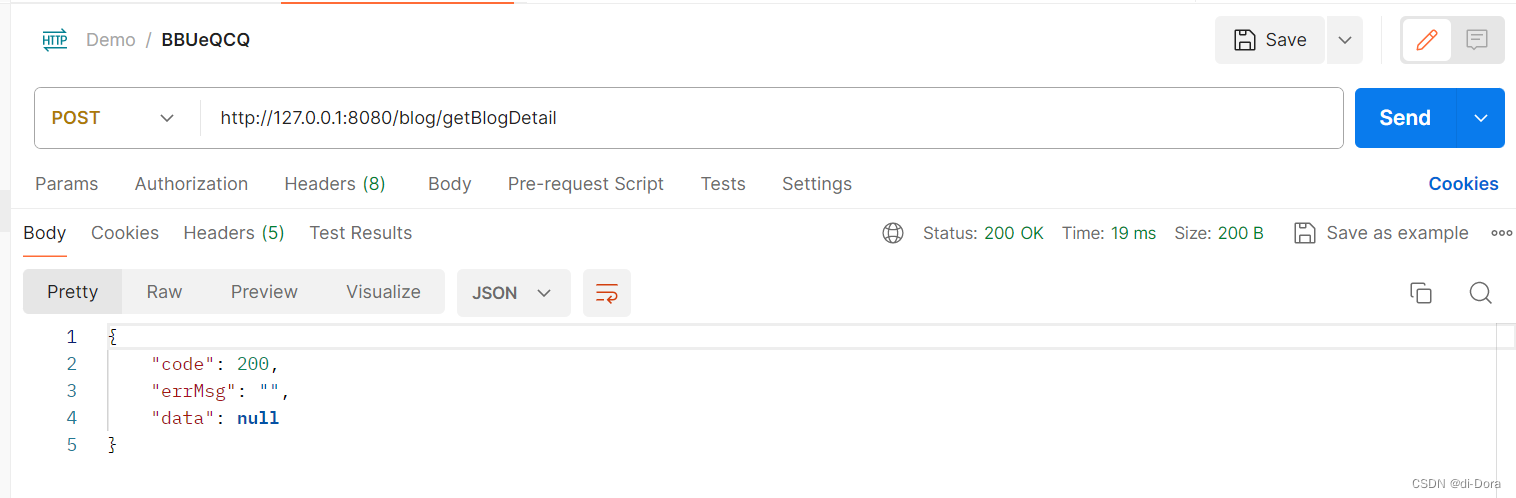
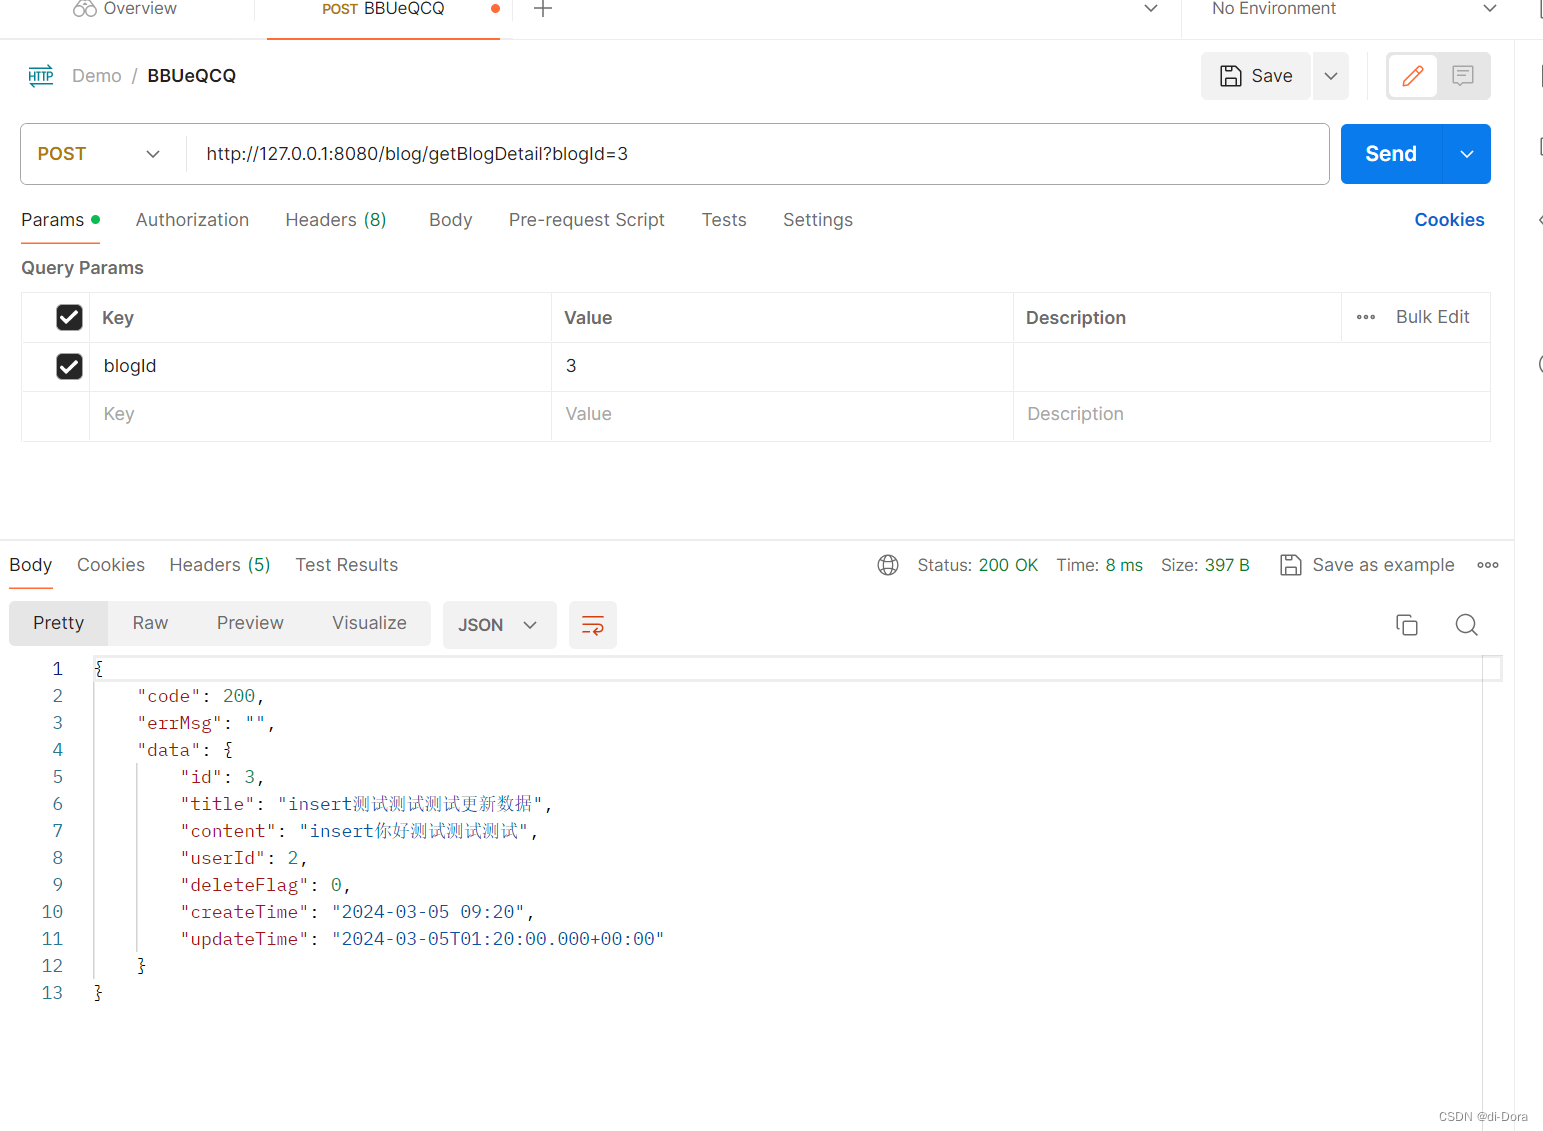
约定前后端交互接口
请求:
/blog/getBlogDetail?blogId=1
响应:
{
"code": 200,
"msg": "",
"data": {
"id": 1,
"title": "第⼀篇博客",
"content": "111我是博客正⽂我是博客正⽂我是博客正⽂",
"userId": 1,
"deleteFlag": 0,
"createTime": "2023-10-21 16:56:57",
"updateTime": "2023-10-21T08:56:57.000+00:00"
}
}
实现服务器代码
在 BlogController 中添加getBlogDeatail方法:
package com.example.newblogsystem.controller;

import com.example.newblogsystem.model.BlogInfo;
import com.example.newblogsystem.service.BlogService;
import org.springframework.beans.factory.annotation.Autowired;
import org.springframework.web.bind.annotation.RequestMapping;
import org.springframework.web.bind.annotation.RestController;

import java.util.List;

@RequestMapping("/blog")
@RestController
public class BlogController {
    @Autowired
    private BlogService blogService;

    @RequestMapping("/getList")
    public List<BlogInfo> queryBlogList(){
        return blogService.queryBlogList();
    }
    @RequestMapping("/getBlogDetail")
    public BlogInfo queryBlogDetail(Integer blogId){
        return blogService.queryBlogDetail(blogId);
    }
}
在BlogService 中添加getBlogDeatil方法:
package com.example.newblogsystem.service;

import com.example.newblogsystem.mapper.BlogMapper;
import com.example.newblogsystem.model.BlogInfo;
import org.springframework.beans.factory.annotation.Autowired;
import org.springframework.stereotype.Service;

import java.util.List;

@Service
public class BlogService {
    @Autowired
    private BlogMapper blogMapper;

    public List<BlogInfo> queryBlogList() {
        return blogMapper.selectAllBlog();
    }

    public BlogInfo queryBlogDetail(Integer blogId) {
        return blogMapper.selectById(blogId);
    }
}
实现客户端代码
在修改 blog_content.html 文件时,首先需要获取当前页面 URL 中的 blogId 参数,这可以通过使用 location.search 来获取,该参数的形式通常为类似 ?blogId=1 的数据。接下来,需要向服务器发送一个 GET 请求,路径为 /blog/getBlogDetail?blogId=1,其中 blogId 的值为页面 URL 中提取的参数。一旦收到服务器的响应数据,需要将其显示在页面上,通常会包括博客的标题、内容、发布时间和作者信息。
我们需要修改html页面,去掉原来写死的博客标题,日期和正文部分,然后完善 js 代码,从服务器获取博客详情数据:
<!DOCTYPE html>
<html lang="en">

<head>
    <meta charset="UTF-8">
    <meta http-equiv="X-UA-Compatible" content="IE=edge">
    <meta name="viewport" content="width=device-width, initial-scale=1.0">
    <title>博客详情页</title>

    <link rel="stylesheet" href="css/common2.css">
    <link rel="stylesheet" href="css/detail.css">
    <link rel="stylesheet" href="css/mydetail.css">

</head>

<body>
    <div class="nav">
        <img src="pic/酷狗.jpg" alt="">
        <span class="blog-title">我的博客系统</span>
        <div class="space"></div>
        <a class="nav-span" href="blog_list.html">主页</a>
        <a class="nav-span" href="blog_edit.html">写博客</a>
        <a class="nav-span" href="#" onclick="logout()">注销</a>
    </div>

    <div class="container">
        <div class="left">
            <div class="card">
                <img src="pic/五条悟.jpg" alt="">
                <h3>神圣的管理员SAMA</h3>
                <a href="#">GitHub 地址</a>
                <div class="row">
                    <span>文章</span>
                    <span>分类</span>
                </div>
                <div class="row">
                    <span>2</span>
                    <span>1</span>
                </div>
            </div>
        </div>
        <div class="right">
            <div class="content">
                <div class="title"></div>
                <div class="date"></div>
                <div class="detail"></div>
                <div class="operating">
                    <button onclick="window.location.href='blog_update.html'">编辑</button>
                    <button onclick="deleteBlog()">删除</button>
                </div>
            </div>

        </div>
    </div>

    <!-- 引入 editor.md 的依赖 -->
    <link rel="stylesheet" href="blog-editormd/css/editormd.css" />
    <script src="js/jquery.min.js"></script>
    <script src="blog-editormd/lib/marked.min.js"></script>
    <script src="blog-editormd/lib/prettify.min.js"></script>
    <script src="blog-editormd/editormd.js"></script>
    <script src="js/common.js"></script>
    <script>
                //获取博客详情
    $.ajax({
        type: "get",
        url: "/blog/getBlogDetail"+location.search,
        success:function(result){
            if(result.code==200 && result.data!=null){
                var blog = result.data;
                $(".right .content .title").text(blog.title);
                $(".right .content .date").text(blog.createTime);
                $(".right .content .detail").text(blog.content);
            }
        }
    });
        //显示博客作者信息
        var userUrl = "/user/getAuthorInfo" + location.search;
        getUserInfo(userUrl);

        function deleteBlog() {
            alert("删除博客");
        }
    </script>
</body>

</html>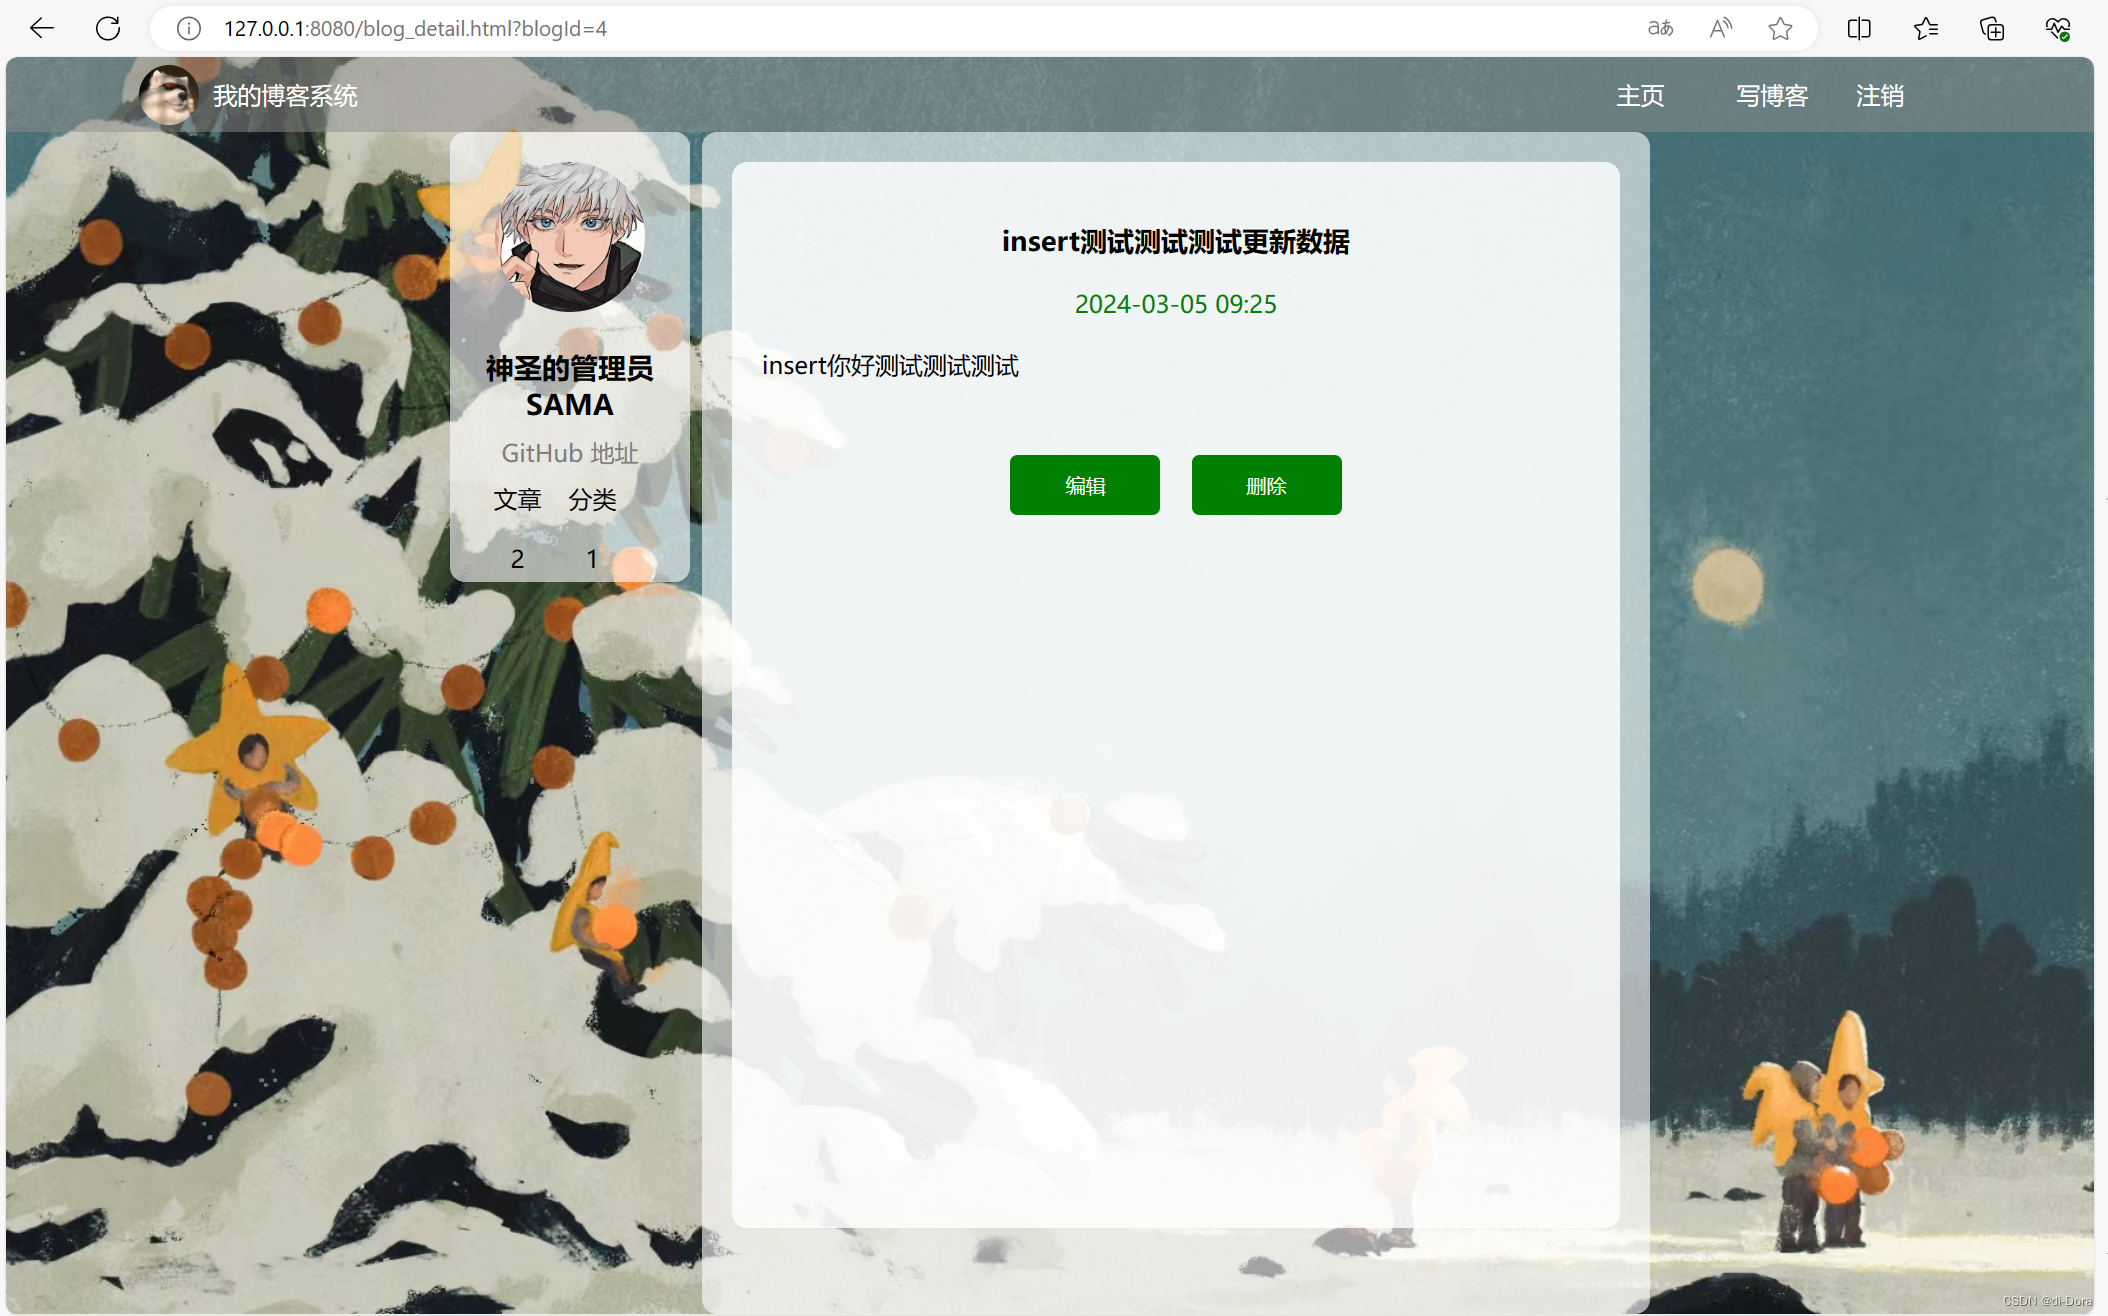
用户登录
我们之前实现过的用户登录过程一般分为以下步骤:
-
用户提供用户名和密码,前端将这些信息提交给后端进行验证。
-
后端接收到用户名和密码后,进行验证,验证通过后,将用户信息存储在服务器端的Session中,并生成一个SessionID。
-
后端将SessionID发送给前端,并存储在Cookie中,以便后续的用户访问时进行身份识别。
-
当用户再次访问网站时,浏览器会自动携带Cookie中的SessionID信息,后端根据SessionID获取对应的Session信息。
-
后端通过SessionID获取到用户的会话信息,并进行相关处理,如验证用户身份、授权等。
所以传统的登录方式通常包括以下几个步骤:
-
用户在登录页面输入用户名和密码,点击登录按钮。
-
后端接收到用户提交的用户名和密码后,进行校验,验证用户名和密码是否正确。
-
如果验证通过,后端会创建一个Session,并将用户的相关信息存储在Session中,同时生成一个SessionID。
-
后端将SessionID返回给浏览器,浏览器会将SessionID保存在Cookie中。
-
用户登录成功后,后续的请求都会携带这个Cookie信息,后端通过SessionID可以获取到对应的Session,从而识别用户的身份信息。
但这种方式存在较大的问题:
在集群环境下,无法直接使用Session。
原因主要是:
- 服务重启问题:Session存储在服务端的内存中,如果服务器重启,那么Session就丢失了。
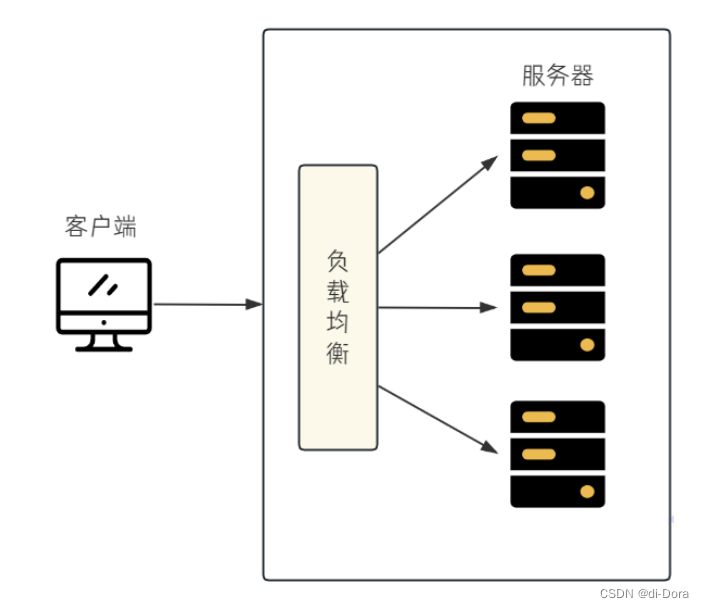
极端的例子:用户刚登录成功,服务器就进行重启,此时Session丢失,客户端需要重新登录, 用户体验不好。 - 单点故障问题:由于我们开发的项目很少会部署在单台机器上,容易发生单点故障。一旦某台服务器挂了,整个应用都无法访问,这是不可接受的。因此,通常情况下,一个Web应用会部署在多个服务器上,并通过Nginx等负载均衡工具进行流量分发,这就意味着来自同一个用户的请求可能会被分发到不同的服务器上。
即在集群环境下,使用Session进行会话跟踪时可能出现的Session共享问题。
-
用户登录:当用户进行登录操作时,其请求会经过负载均衡,然后被分发到集群中的某一台服务器上。这台服务器会对用户提供的账号密码进行验证,并在验证成功后,将用户的会话信息存储在该服务器的Session中。
-
查询操作:用户在登录成功后,可能会进行一系列的操作,比如查询博客列表等。当用户执行查询操作时,请求可能会被负载均衡转发到集群中的另一台服务器上。在这个新的服务器上,会先进行权限验证,其中包括对用户的登录状态进行验证,通常是通过SessionID进行。然而,由于该服务器上并没有存储该用户的Session信息,因此会导致权限验证失败,进而引发问题,可能会提示用户需要重新登录。
这种情况下,用户被迫重新登录是用户无法接受的,因为用户已经在第一台服务器上成功登录过了。这种不一致性会给用户带来困扰,并严重影响用户体验。

因此,在集群环境下,我们需要寻找一种可靠的解决方案来管理用户的会话状态,考虑在集群环境下如何实现Session的共享或跨服务器访问,以确保用户的登录状态和体验不会受到单点故障的影响。
常见的解决方案包括:
-
Session共享:使用一种可共享的Session存储方式,如使用数据库或缓存服务(如Redis)来存储Session数据,以实现跨服务器的会话共享。
-
Session复制:将每个服务器上的Session数据进行复制,以确保每台服务器都能够访问到完整的Session信息,从而实现在任何一台服务器上都能够正确验证用户登录状态。
-
Token认证:使用基于Token的身份认证方式,如JWT(JSON Web Token),将用户的身份信息存储在Token中,并在每次请求中携带Token进行身份验证,从而避免了对Session的依赖,也解决了跨服务器共享Session的问题。
这就引入了我们要讲解的“令牌技术”,也是我们提到的第三种方式。
令牌技术
令牌本质上就是用户身份的标识,通常是一个字符串。
虽然名字听起来很高大上,但实际上就相当于我们日常生活中携带的身份证。当需要验证身份时,我们会出示身份证,身份证上的信息能够帮助他人确认我们的身份真实性。
如同我们携带身份证一样,令牌在网络通信中扮演着类似的角色。它是一个具有特定信息的字符串,可以帮助服务器验证用户的身份。与身份证类似,令牌也有一定的安全性,一般来说,合法的令牌不容易被伪造,因此可以用来确保通信的安全性。
在网络通信中,验证令牌的过程通常由服务器完成,就像警察在验证身份证一样。服务器会检查令牌的有效性,并根据令牌中的信息来确认用户的身份。这种基于令牌的身份验证方式相对于传统的基于会话的验证方式具有更好的灵活性和可扩展性,因此在很多应用中得到了广泛的应用。

服务器在使用令牌技术时通常具备生成令牌和验证令牌的能力。这意味着服务器能够执行以下两个主要任务:
-
生成令牌:当用户进行登录或者其他需要验证身份的操作时,服务器可以根据一定的算法生成一个令牌。这个令牌可以包含用户的身份信息、访问权限、过期时间等信息。生成令牌的过程通常是在用户验证成功后进行的,以确保生成的令牌是合法且与特定用户相关联的。
-
验证令牌:当用户携带令牌进行后续的请求时,服务器可以对该令牌进行验证,以确认用户的身份和权限。验证令牌的过程包括解析令牌并检查其内容的完整性和有效性,比如检查令牌的签名是否有效、令牌是否已过期等。如果令牌验证成功,服务器可以相应地处理用户请求;如果令牌验证失败,则服务器可能会拒绝用户的请求或者要求用户重新进行身份验证。
因此,使用令牌技术就可以有效地解决在集群环境下使用Session会话跟踪时可能出现的问题。
以下是利用令牌技术进行会话跟踪的过程:
-
用户登录:用户发起登录请求后,请求经过负载均衡后被转发至集群中的某一台服务器。该服务器验证用户提供的账号密码,验证成功后,生成一个令牌,并将其返回给客户端。
-
令牌存储:客户端收到令牌后,将其存储起来。通常情况下,可以将令牌存储在Cookie中,也可以选择存储在其他地方,比如localStorage等。
-
查询操作:用户在登录成功后,可以继续执行其他操作,比如查询博客列表。当用户执行查询操作时,请求可能被负载均衡转发至集群中的另一台服务器。在这个新的服务器上,会先进行权限验证。服务器会验证请求中携带的令牌是否有效。如果令牌有效,说明用户已经进行过登录操作,服务器会允许查询操作继续执行。如果令牌无效,则说明用户之前未进行登录操作,服务器会拒绝查询操作,并可能提示用户需要进行登录。
令牌技术作为一种会话管理和身份验证机制,具有以下优点和缺点:
优点:
-
解决了集群环境下的认证问题:使用令牌技术可以有效地解决在集群环境下会话共享和状态管理的问题。由于令牌本身包含了用户的身份信息和授权信息,因此可以在不同的服务器之间进行传递和验证,从而实现在集群环境下的认证和授权操作。
-
减轻服务器的存储压力:相比于传统的基于会话的认证方式,令牌技术不需要在服务器端存储用户的会话状态信息。令牌通常是由客户端保存的,因此可以减轻服务器的存储压力,特别是在需要处理大量并发请求的场景下,这种优势尤为明显。
缺点:
-
需要自行实现:使用令牌技术需要自行实现相关的逻辑,包括令牌的生成、传递和验证等环节。这需要额外的开发工作,并且需要确保实现的安全性和正确性。如果实现不当,可能会导致令牌被篡改或者伪造,从而引发安全漏洞。
-
安全性依赖于实现:令牌技术的安全性主要依赖于实现的质量和细节。如果实现不够严谨或者存在漏洞,可能会导致令牌被攻击者利用,造成用户身份泄露或者未经授权的访问。因此,在使用令牌技术时需要特别注意安全性方面的考虑,采取适当的措施保护令牌的安全性。
目前在企业开发中,解决会话跟踪最常见的方案之一就是令牌技术。令牌技术已经被广泛地应用于Web应用程序、移动应用程序和API服务等各种场景中,以实现用户身份认证、会话管理和访问控制等功能。
JWT令牌
介绍
JSON Web Token (JWT) 是一种开放的行业标准,用于在客户端和服务器之间传递安全可靠的信息。JWT的全称是JSON Web Token,在技术上被定义为RFC 7519,是一种用于表示声明的令牌,通常用于认证和信息交换。
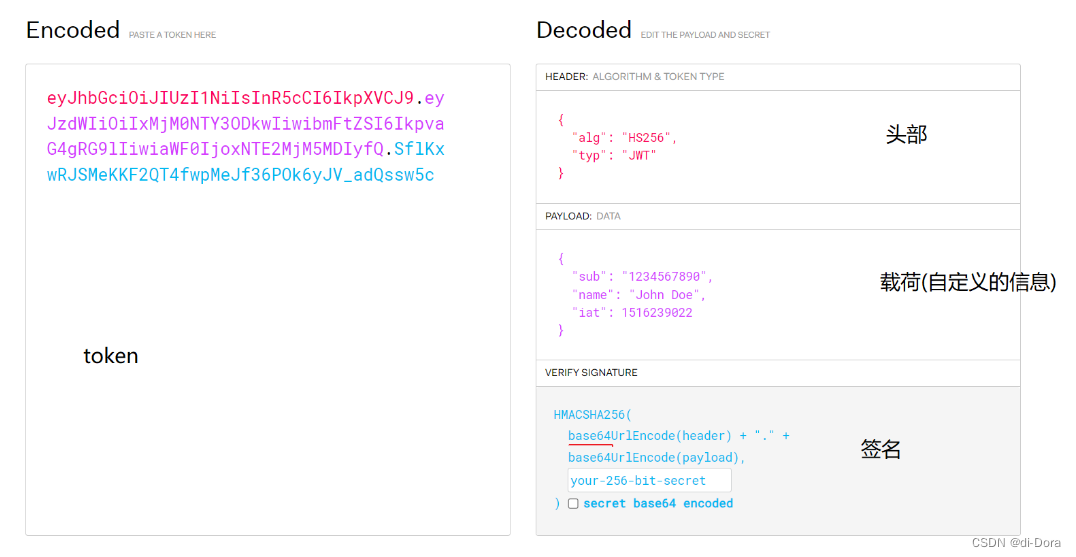
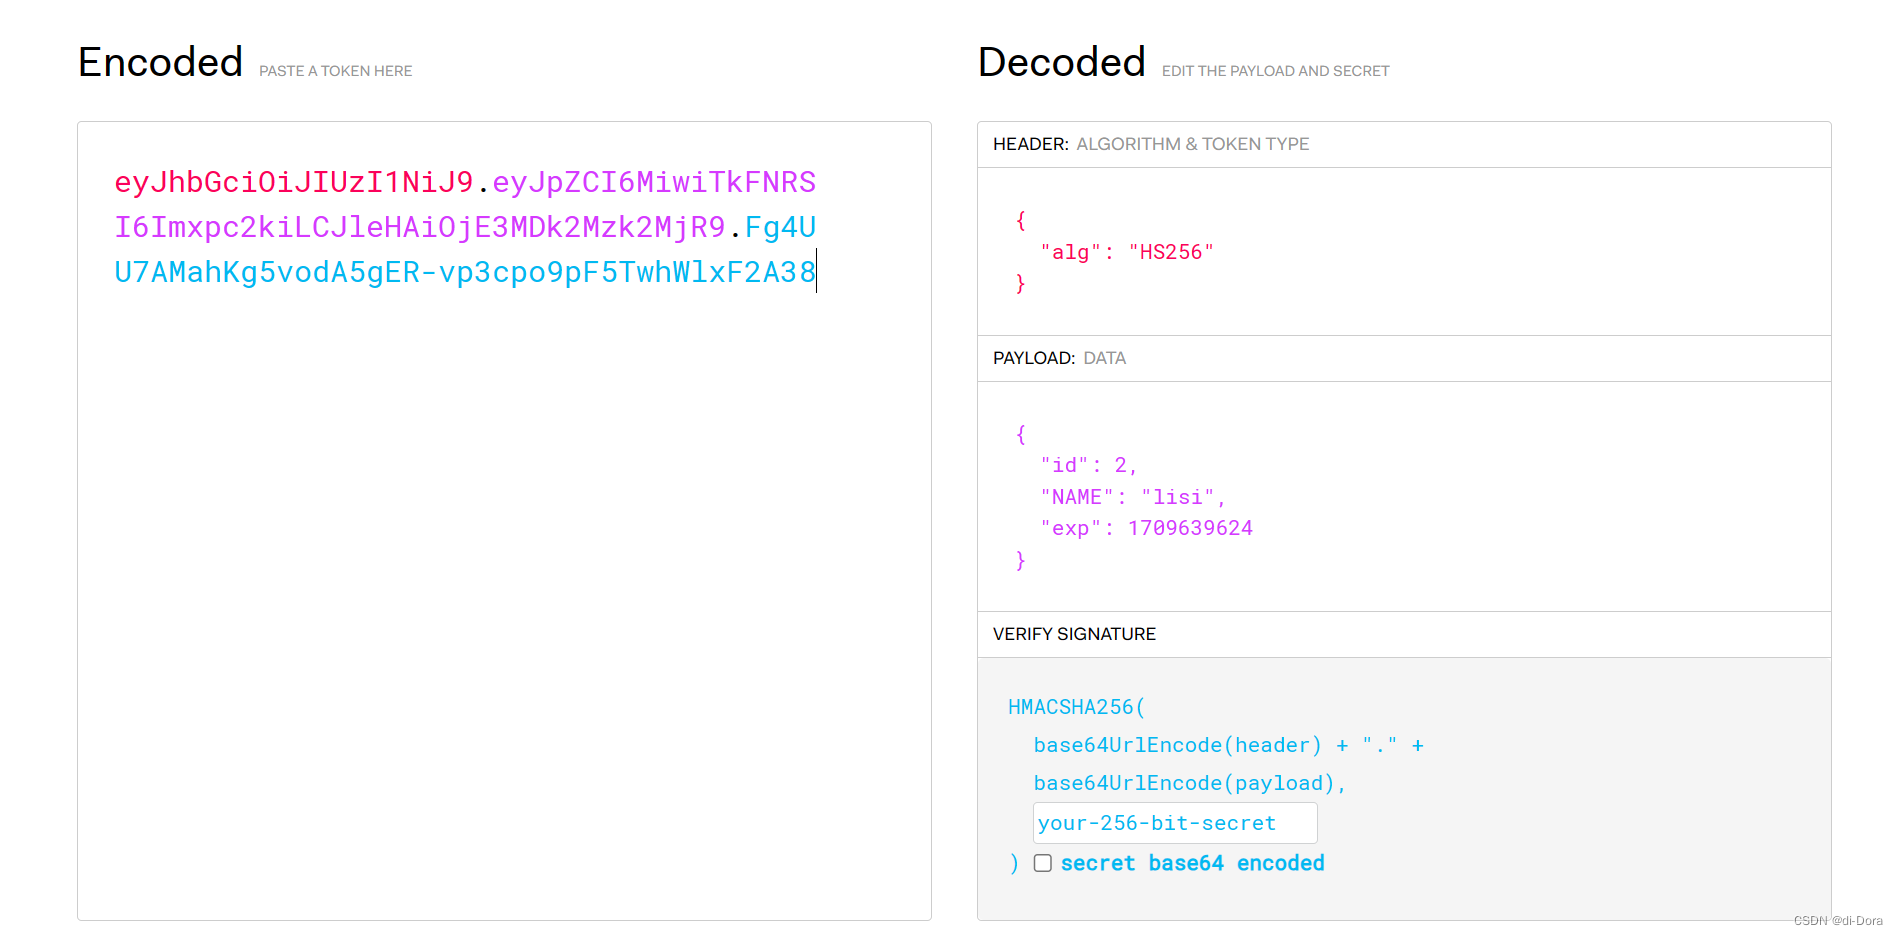
JWT本质上是一个 token,它采用了一种紧凑的 URL 安全方法,可以在客户端和服务器之间进行传递。JWT通常由三部分组成,这三部分之间通过点号(.)连接,包括头部(Header)、载荷(Payload)和签名(Signature)。
JWT组成
JWT(JSON Web Token)由三部分组成,每部分之间使用点号 (.) 分隔,例如:aaaaa.bbbbb.cccc。
-
Header(头部):头部包括了令牌的类型(即JWT)以及所采用的哈希算法(例如HMAC SHA256或RSA)。头部通常是一个JSON对象,用于描述JWT的元数据信息。
-
Payload(负载):负载部分用于存放有效信息,其中包含了一些自定义的内容,例如用户ID、用户名等。Payload也可以包含JWT提供的标准字段,如过期时间戳(exp)等。值得注意的是,负载部分不建议存放敏感信息,因为这部分内容可以被解码还原为原始信息。
-
Signature(签名):签名部分用于防止JWT内容被篡改,从而确保令牌的安全性。签名通过对头部和负载的组合进行签名生成,使用了头部中声明的哈希算法。JWT的安全性主要依赖于签名部分,因为任何一个部分的内容被篡改都会导致整个令牌的校验失败,从而确保了令牌的完整性和真实性。
JWT之所以安全,就是因为最后的签名部分。JWT中任何一个字符的篡改都会导致整个令牌的校验失败,确保了令牌的完整性和真实性。这种安全性机制类似于我们的身份证,身份证之所以能够标识一个人的身份,是因为它的信息无法被篡改,而不是因为信息被加密保护(任何人都可以看到身份证的信息,JWT也是类似的)。
对上述信息使用Base64Url进行编码后,合并在一起就是jwt令牌。Base64是一种编码方式,而不是加密方式。
JWT具有以下特点和优势:
-
轻量级和紧凑:JWT使用JSON格式表示令牌信息,并且采用了紧凑的编码方式,使得令牌相对较小,便于在网络上传输。
-
无状态性:JWT令牌中包含了所有必要的信息,因此服务器不需要保存任何会话状态信息,使得系统更易于水平扩展和维护。
-
安全性:JWT通过签名保护令牌的完整性,有效防止了令牌被篡改或伪造,同时可以设置过期时间等限制,增强了令牌的安全性。
-
可扩展性:JWT可以在不同的系统和平台之间进行传递和验证,因此非常适合构建分布式和微服务架构的应用程序。
JWT令牌生成和校验
1. 引入JWT令牌的依赖:
      <!-- https://mvnrepository.com/artifact/io.jsonwebtoken/jjwt-api -->
        <dependency>
            <groupId>io.jsonwebtoken</groupId>
            <artifactId>jjwt-api</artifactId>
            <version>0.11.5</version>
        </dependency>
        <!-- https://mvnrepository.com/artifact/io.jsonwebtoken/jjwt-impl -->
        <dependency>
            <groupId>io.jsonwebtoken</groupId>
            <artifactId>jjwt-impl</artifactId>
            <version>0.11.5</version>
            <scope>runtime</scope>
        </dependency>
        <dependency>
            <groupId>io.jsonwebtoken</groupId>
            <artifactId>jjwt-jackson</artifactId> <!-- or jjwt-gson if Gson is
preferred -->
            <version>0.11.5</version>
            <scope>runtime</scope>
        </dependency>
我们先来写个测试用例看看令牌怎么生成和使用的:
package com.example.newblogsystem;

import io.jsonwebtoken.*;

import org.junit.jupiter.api.Test;

import java.util.HashMap;
import java.util.Map;


public class JwtUtisTest {
    //生成令牌
    @Test
    public void genToken(){
        Map<String ,Object> claim = new HashMap<>();
        claim.put("id",5);
        claim.put("name","milan");
        String token = Jwts.builder().setClaims(claim).compact();
        System.out.println(token);
    }

    /**
     * 解析令牌
     * @param token
     * @return
     */


}
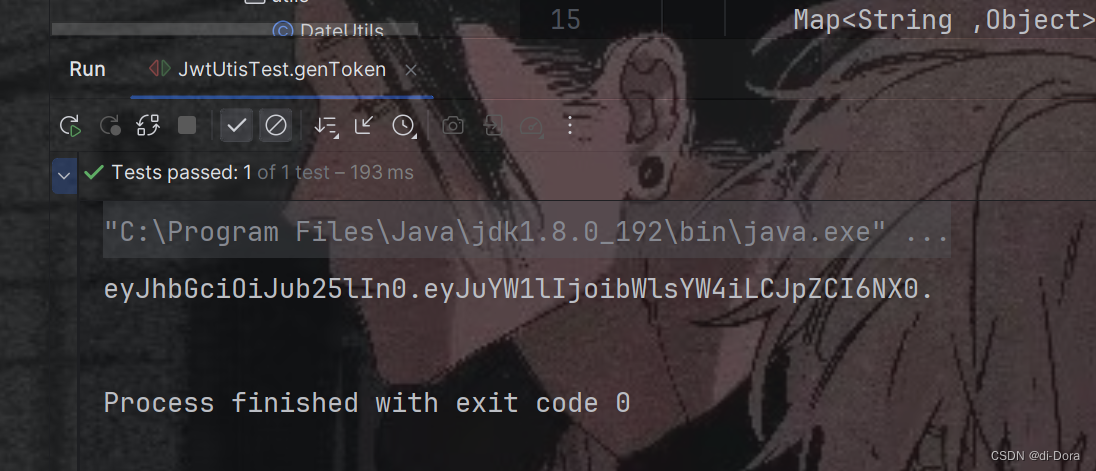
我们把这个令牌放到官网上解码:

写代码的时候经常会发现有些东西被删除线标记了。
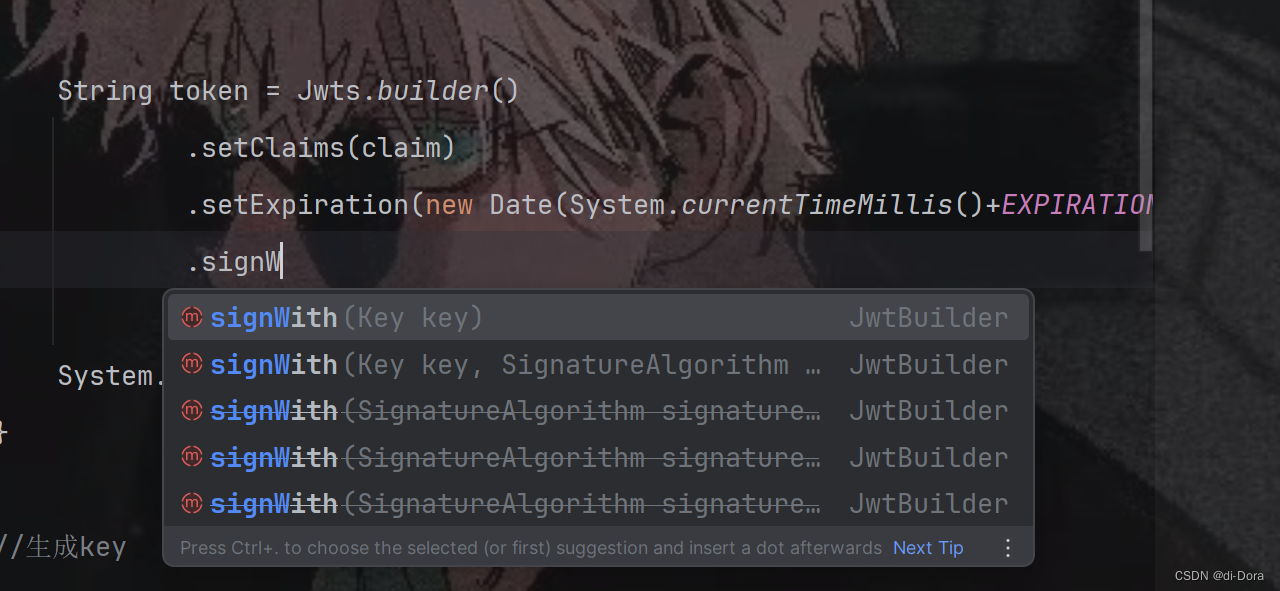
这并不代表已经不可以使用了,而是方法的提供方不推荐使用。这样的方法通常会加一个注解:

2.使用Jar包中提供的API来完成JWT令牌的生成和校验:
生成令牌:
在令牌生成过程中,需要注意密钥的长度和内容的要求。建议使用io.jsonwebtoken.security.Keys#secretKeyFor(signatureAlgorithm)方法来创建一个符合要求的密钥。生成的令牌将由三个部分组成,并通过点(.)进行分割。这个生成的令牌将会是JWT令牌的输出内容。通过官方网站提供的解析工具,我们可以将生成的令牌进行解析,从而查看其中存储的信息。
校验令牌:
在完成了令牌的生成后,需要根据令牌来校验其合法性,以防止客户端伪造令牌。解析令牌后,我们可以查看其中存储的信息。如果在解析过程中没有报错,就说明解析成功了。在令牌解析时,还会进行时间有效性的校验,如果令牌已过期,则解析也会失败。需要特别注意的是,修改令牌中的任何一个字符都会导致校验失败,因此令牌是无法篡改的。


package com.example.newblogsystem;
import io.jsonwebtoken.*;
import io.jsonwebtoken.io.Decoders;
import io.jsonwebtoken.io.Encoders;
import io.jsonwebtoken.security.Keys;
import io.jsonwebtoken.security.SignatureException;
import org.junit.jupiter.api.Test;
import javax.crypto.SecretKey;
import javax.swing.*;
import java.nio.charset.StandardCharsets;
import java.security.Key;
import java.util.Date;
import java.util.HashMap;
import java.util.Map;
public class JWTUtisTest {
//过期时间: 1小时的毫秒数
private final static long EXPIRATION_DATE = 60 * 60 * 1000;
private final static String secretString = "0KaOWooBSgztZvS0bn8+FBNF9MA2kfg7WbrBNfis+LM=";
private final static Key key = Keys.hmacShaKeyFor(Decoders.BASE64.decode(secretString));
//生成令牌
@Test
public void genToken(){
// 创建存储声明的Map对象
Map<String, Object> claim = new HashMap<>();
claim.put("id", 7);
claim.put("name", "milan");
// 使用JWT Builder创建JWT令牌
String token = Jwts.builder()
.setClaims(claim) // 设置声明
.setExpiration(new Date(System.currentTimeMillis()+EXPIRATION_DATE)) // 设置过期时间
.signWith(key) // 使用指定的密钥进行签名
.compact(); // 生成JWT字符串
System.out.println(token); // 输出生成的JWT令牌
}
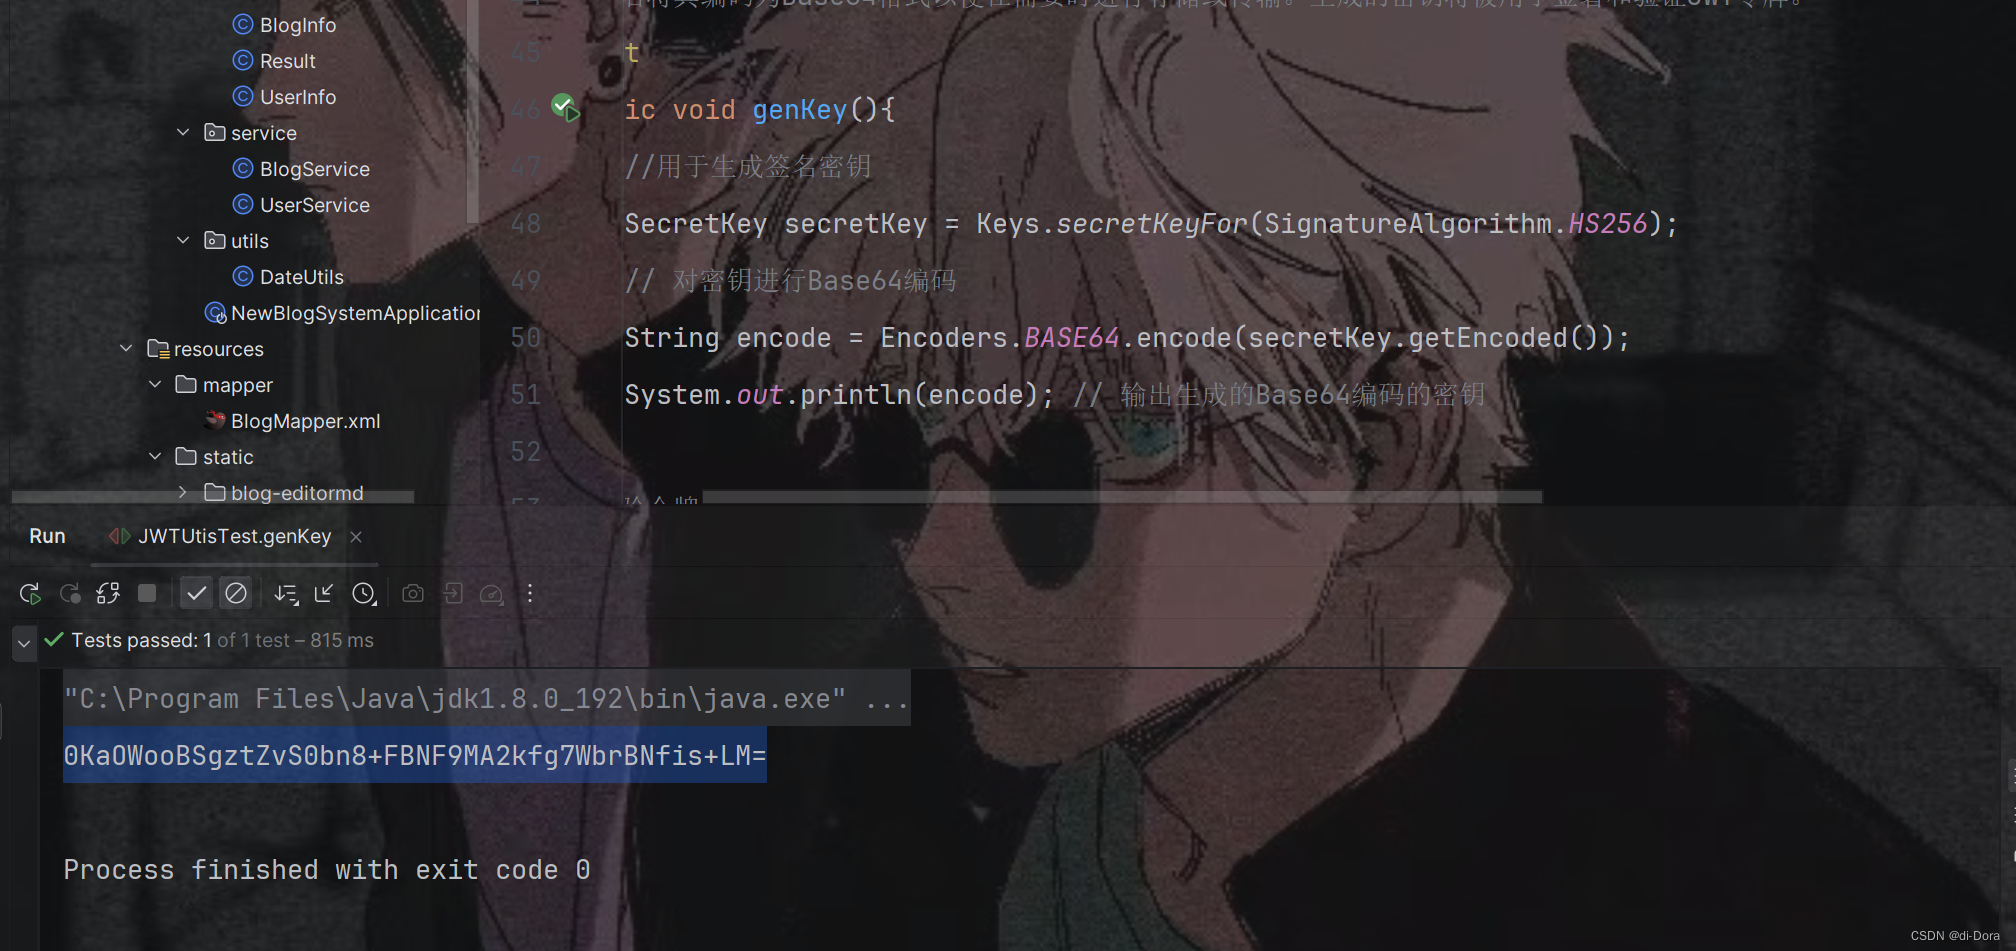
//生成key
// 在这个方法中,使用Keys.secretKeyFor(SignatureAlgorithm.HS256)
// 生成一个用于HMAC-SHA256签名算法的密钥(SecretKey),
// 然后将其编码为Base64格式以便在需要时进行存储或传输。生成的密钥将被用于签署和验证JWT令牌。
@Test
public void genKey(){
//用于生成签名密钥
SecretKey secretKey = Keys.secretKeyFor(SignatureAlgorithm.HS256);
// 对密钥进行Base64编码
String encode = Encoders.BASE64.encode(secretKey.getEncoded());
System.out.println(encode); // 输出生成的Base64编码的密钥
}
//校验令牌
@Test
public void parseToken(){
String token = "eyJhbGciOiJIUzI1NiJ9.eyJuYW1lIjoibWlsYW4iLCJpZCI6NywiZXhwIjoxNzA5NjM3Mjc5fQ.Dsf5mUHoPQnmo1nQp2LGlKH5ZcQvx_ZXG-bfkkg3YUE";
// 使用指定的密钥构建JWT解析器
JwtParser build = Jwts.parserBuilder().setSigningKey(key).build();
Claims body = null;
try {
// 解析JWT令牌并获取声明主体
body = build.parseClaimsJws(token).getBody();
} catch (Exception e) {
System.out.println("令牌校验失败"); // 输出令牌校验失败消息
}
System.out.println(body); // 输出JWT声明主体
}
}
总结整个流程:
-
设置过期时间和密钥:
- 首先,在代码中定义了JWT令牌的过期时间和密钥。过期时间规定了令牌的有效期限,密钥用于对令牌进行签名和验证。
-
生成令牌:
- 在生成令牌之前,需要设置令牌的声明,即令牌中存储的信息。这些信息可能包括用户ID、用户名等。
- 使用JWT的Builder模式,将声明、过期时间和密钥等信息传入,并调用signWith(key)方法对令牌进行签名。
- 最后调用compact()方法生成JWT令牌,并将其输出到控制台。
-
生成密钥:
- 如果没有提供密钥,需要先生成一个用于JWT令牌的密钥。
- 使用Keys.secretKeyFor(SignatureAlgorithm.HS256)方法生成一个密钥,该密钥适用于HMAC SHA-256签名算法。
- 将生成的密钥编码为Base64格式,以便在需要时进行存储或传输。
-
校验令牌:
- 对于接收到的JWT令牌,需要进行校验以确保其合法性。
- 首先,构建一个JWT解析器,并设置相应的密钥。
- 然后,尝试解析JWT令牌并获取其声明主体。如果解析失败,则输出相应的错误消息。
- 解析时,还会进行时间有效性的校验,如果令牌已过期,则解析也会失败。
- 任何对令牌的修改都会导致校验失败,因此JWT令牌无法篡改。
学习了令牌的使用之后,下面我们将通过令牌来实现用户的登录过程:
-
用户提交登录信息:
- 用户在登录页面输入用户名和密码,并将其提交给服务器。
-
服务器验证用户信息:
- 服务器端接收到用户提交的用户名和密码后,会进行验证,确保其正确性。如果验证通过,服务器将生成一个令牌,并将其下发给客户端。
-
客户端存储令牌:
- 客户端接收到服务器下发的令牌后,会将其存储起来,可以选择存储在Cookie、本地存储等地方。在后续的请求中,客户端会携带这个令牌发送给服务器。
-
服务器校验令牌:
- 当客户端发送请求时,会将令牌随请求一起发送给服务器。
- 服务器收到请求后,会对令牌进行校验,确保其正确性和有效性。如果令牌通过了校验,服务器会继续执行相应的操作。

约定前后端交互接口
请求:
POST /user/login
Body: username=test&password=123
响应:
{
"code": 200,
"msg": "",
"data": "eyJhbGciOiJIUzI1NiJ9.eyJpZCI6MSwidXNlcm5hbWUiOiJ6aGFuZ3NhbiIsImlhdCI6MTY5ODM5Nzg2MCwiZXhwIjoxNjk4Mzk5NjYwfQ.oxup5LfpuPixJrE3uLB9u3q0rHxxTC8_AhX1QlYV--E"
}
说明:
- 当用户名和密码验证成功时,服务器返回包含用户认证令牌的 JSON 响应。
- 如果验证失败,服务器返回空字符串作为数据字段的值。
- 响应中的令牌是 JWT 格式,包含用户信息和有效期等声明。
实现服务器代码
创建JWT工具类
这个工具类是用来处理JWT(JSON Web Token)的生成、解析和校验的,其中的密钥(key)一般是在类加载时初始化的,一旦初始化完成,就可以在整个应用程序的生命周期内使用相同的密钥来签署和验证JWT令牌。
我们说过,secretString 是一个字符串,它代表了用于生成和验证 JWT 令牌的密钥。在 JWT 中,密钥用于对令牌进行签名和验证签名的一部分。因此密钥的选择非常重要,它需要足够长、随机,并且只有授权的实体(也就是我们程序猿)才能知道。
在这里,secretString 可以是一个静态的字符串常量,存储了一个预先定义好的密钥。通常情况下,应该将密钥存储在安全的地方,比如配置文件中,或者通过环境变量传递,而不是硬编码在代码中。因为一旦密钥暴露,就会导致令牌被篡改或者伪造,从而危及系统的安全性。
但在一些情况下,如果开发人员对密钥的安全性有足够的信心,或者为了简化代码,可以将密钥硬编码在代码中。但这种做法需要格外小心,确保密钥不会被泄露到不信任的人员手中。
所以此处我们可以在代码中定义一个固定的密钥(即secretString),然后在需要生成或验证 JWT 令牌时使用它。只有我们知道这个密钥,这样确实能够方便地进行开发和测试。
后续的令牌生成、解析和校验过程中这个密匙会被重复使用。这样做的好处是在应用程序中集中管理密钥,提高了安全性和代码的可维护性。
综上,只要应用程序的密钥没有变化,就可以在任何需要生成、解析或校验JWT令牌的地方使用 JwtUtils 类提供的方法,而不必每次都重新生成密钥。
package com.example.newblogsystem.utils;

import com.example.newblogsystem.constants.Constant;
import io.jsonwebtoken.*;
import io.jsonwebtoken.io.Decoders;
import io.jsonwebtoken.io.Encoders;
import io.jsonwebtoken.security.Keys;
import io.jsonwebtoken.security.SignatureException;
import lombok.extern.slf4j.Slf4j;

import javax.crypto.SecretKey;
import java.security.Key;
import java.util.Date;
import java.util.HashMap;
import java.util.Map;

@Slf4j
public class JwtUtis {
    //过期时间: 1小时的毫秒数
    private final static long EXPIRATION_DATE = 60 * 60 * 1000;
    private final static String secretString = "ND/G/LsRFDTC88R/ua9ZqGn3ueqHC5Els255MdPMiF4=";
    private final static Key key = Keys.hmacShaKeyFor(Decoders.BASE64.decode(secretString));

    //生成令牌
    public static String genToken(Map<String, Object> claim){
        return Jwts.builder()
                .setClaims(claim)
                .setExpiration(new Date(System.currentTimeMillis()+EXPIRATION_DATE))
                .signWith(key)
                .compact();
    }
    /**
     * 解析令牌
     * @param token
     * @return
     */
    public static Claims parseToken(String token){
        JwtParser build = Jwts.parserBuilder().setSigningKey(key).build();
        Claims body = null;
        try {
            body = build.parseClaimsJws(token).getBody();
        } catch (ExpiredJwtException e) {
            log.error("token过期, 校验失败, token:",token);

        } catch (Exception e) {
            log.error("token校验失败, token:",token);
        }
        return body;
    }
    //校验令牌
    public static boolean checkToken(String token){
        Claims body = parseToken(token);
        if (body==null){
            return false;
        }
        return true;
    }
    public static Integer getUserIdFromToken(String token){
        Claims body = parseToken(token);
        if (body!=null){
            return (Integer) body.get(Constant.USER_CLAIM_ID);
        }
        return null;
    }
}
创建 UserController
package com.example.newblogsystem.constants;

public class Constant {
    public final static Integer SUCCESS_CODE = 200;
    public final static Integer FAIL_CODE = -1;
    public final static Integer UNLOGIN_CODE = -2;
    public final static String USER_TOKEN_HEADER = "user_token_header";

    public final static String USER_CLAIM_ID = "id";
    public final static String USER_CLAIM_NAME = "NAME";
}
package com.example.newblogsystem.service;

import com.example.newblogsystem.mapper.BlogMapper;
import com.example.newblogsystem.mapper.UserInfoMapper;
import com.example.newblogsystem.model.BlogInfo;
import com.example.newblogsystem.model.UserInfo;
import org.springframework.beans.factory.annotation.Autowired;
import org.springframework.stereotype.Service;

@Service
public class UserService {
    @Autowired
    private UserInfoMapper userMapper;
    @Autowired
    private BlogMapper blogMapper;
    public UserInfo queryUserByName(String userName) {
        return userMapper.selectByName(userName);
    }
}
package com.example.newblogsystem.controller;
import com.example.newblogsystem.constants.Constant;
import com.example.newblogsystem.model.Result;
import com.example.newblogsystem.model.UserInfo;
import com.example.newblogsystem.service.UserService;
import com.example.newblogsystem.utils.JwtUtis;
import org.springframework.beans.factory.annotation.Autowired;
import org.springframework.util.StringUtils;
import org.springframework.web.bind.annotation.RequestMapping;
import org.springframework.web.bind.annotation.RestController;
import javax.servlet.http.HttpServletRequest;
import java.util.HashMap;
import java.util.Map;
@RequestMapping("/user")
@RestController
public class UserController {
@Autowired
private UserService userService;
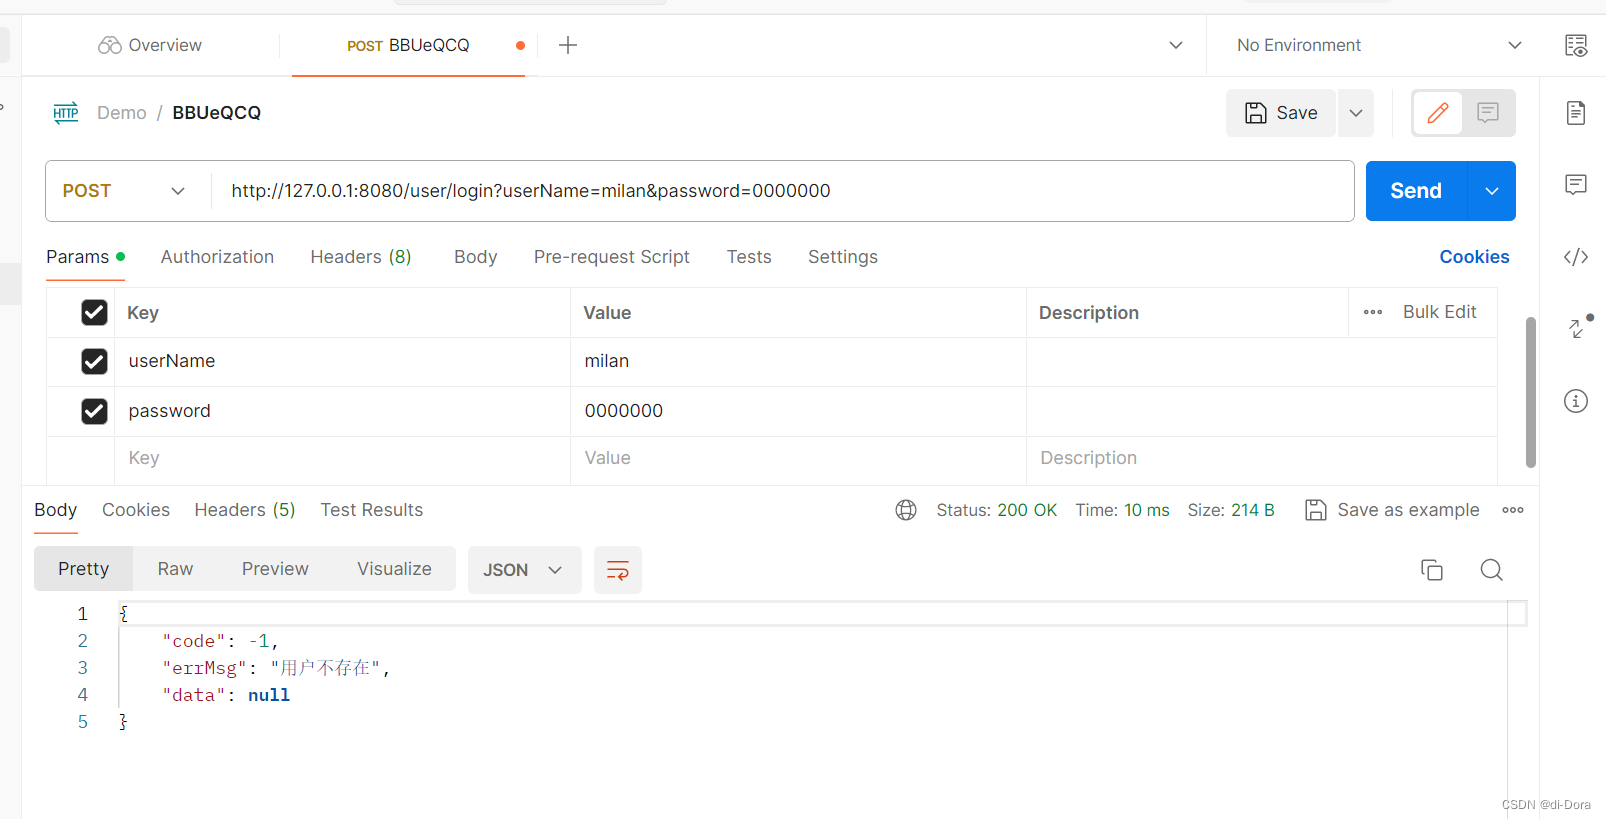
//登录接口
@RequestMapping("/login")
public Result login(String userName, String password){
//1. 对参数进行校验
//2. 对密码进行校验
//3. 如果校验成功, 生成token
if (!StringUtils.hasLength(userName) || !StringUtils.hasLength(password)){
return Result.fail("用户名或密码不能为空");
}
UserInfo userInfo = userService.queryUserByName(userName);
if (userInfo==null || userInfo.getId()<=0){
return Result.fail("用户不存在");
}
if (!password.equals(userInfo.getPassword())){
return Result.fail("密码错误");
}
//密码正确了, 生成token
Map<String,Object> claim = new HashMap<>();
claim.put(Constant.USER_CLAIM_ID, userInfo.getId());
claim.put(Constant.USER_CLAIM_NAME, userInfo.getUserName());
return Result.success(JwtUtis.genToken(claim));
}
}

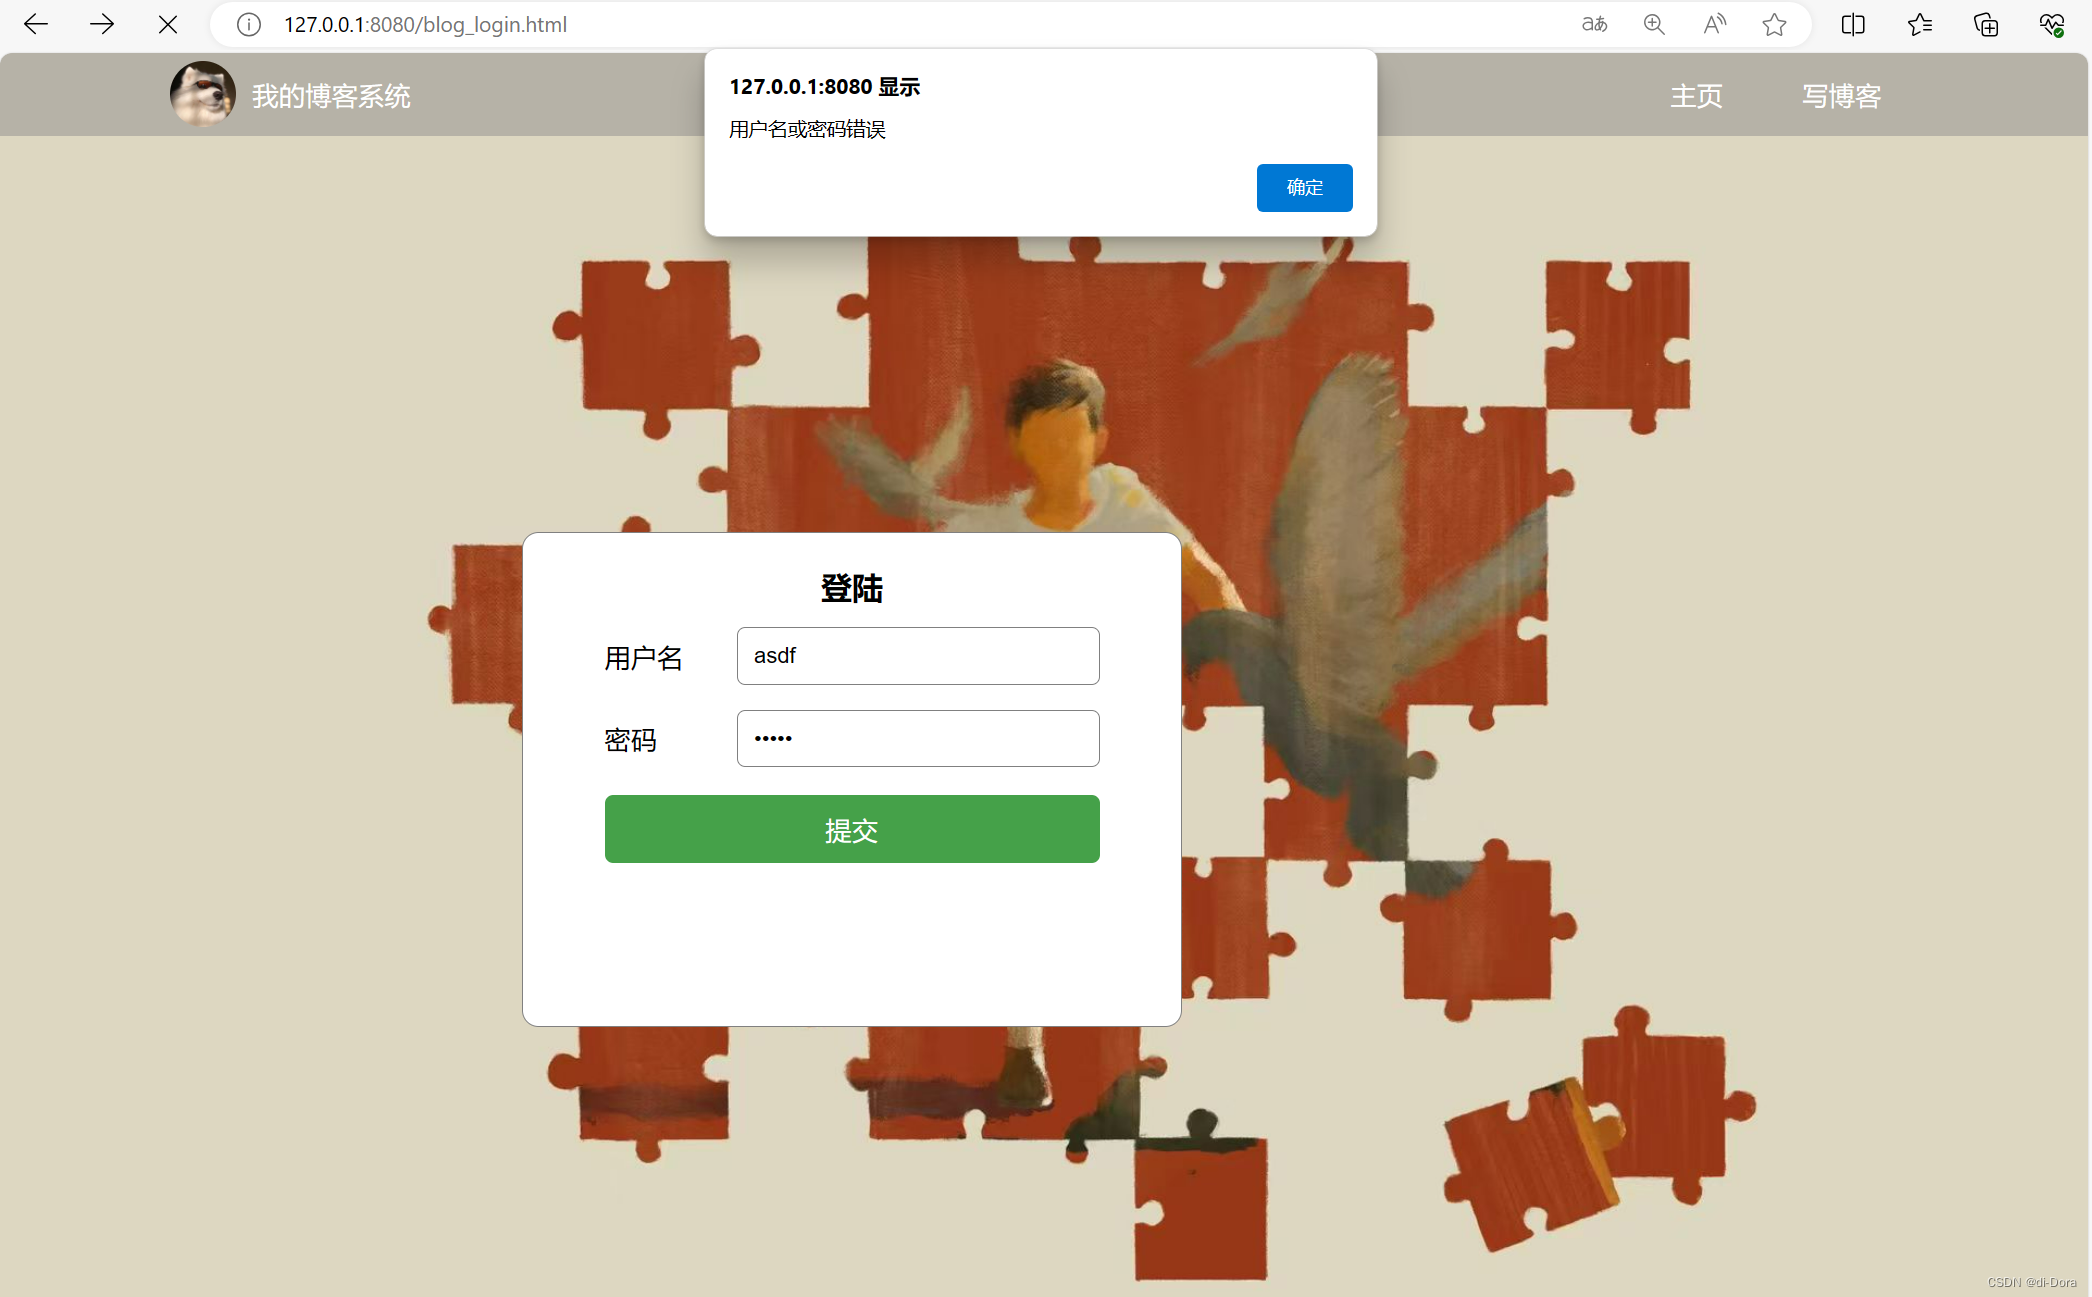
实现客户端代码
修改 login.html,完善登录方法。
前端收到token之后,保存在localstorage本地存储中。当然,你也可以选择放在Cookie里面。但是我们不建议存放在URL中。
<script>
    function login() {
        // 发送ajax请求, 获得token
        $.ajax({
            type:"post",
            url: "/user/login",
            data:{
                "userName": $("#username").val(),
                "password": $("#password").val()
            },
            success:function(result){
                if(result != null && result.code != null) {
                    if(result.code == 200 && result.data != null){
                        // 存储token
                        localStorage.setItem("user_token", result.data);
                        location.href = "blog_list.html";
                    } else if (result.code == -1) {
                        alert("用户名或密码错误");
                    } else if (result.code == -2) {
                        alert("用户未注册,请先注册");
                    } else {
                        // 处理其他状态码
                        alert("登录失败,请稍后再试");
                    }
                } else {
                    alert("服务器返回数据异常");
                }
            },
            error:function(){
                alert("请求失败,请稍后再试");
            }
        });
    }
</script>

成功:

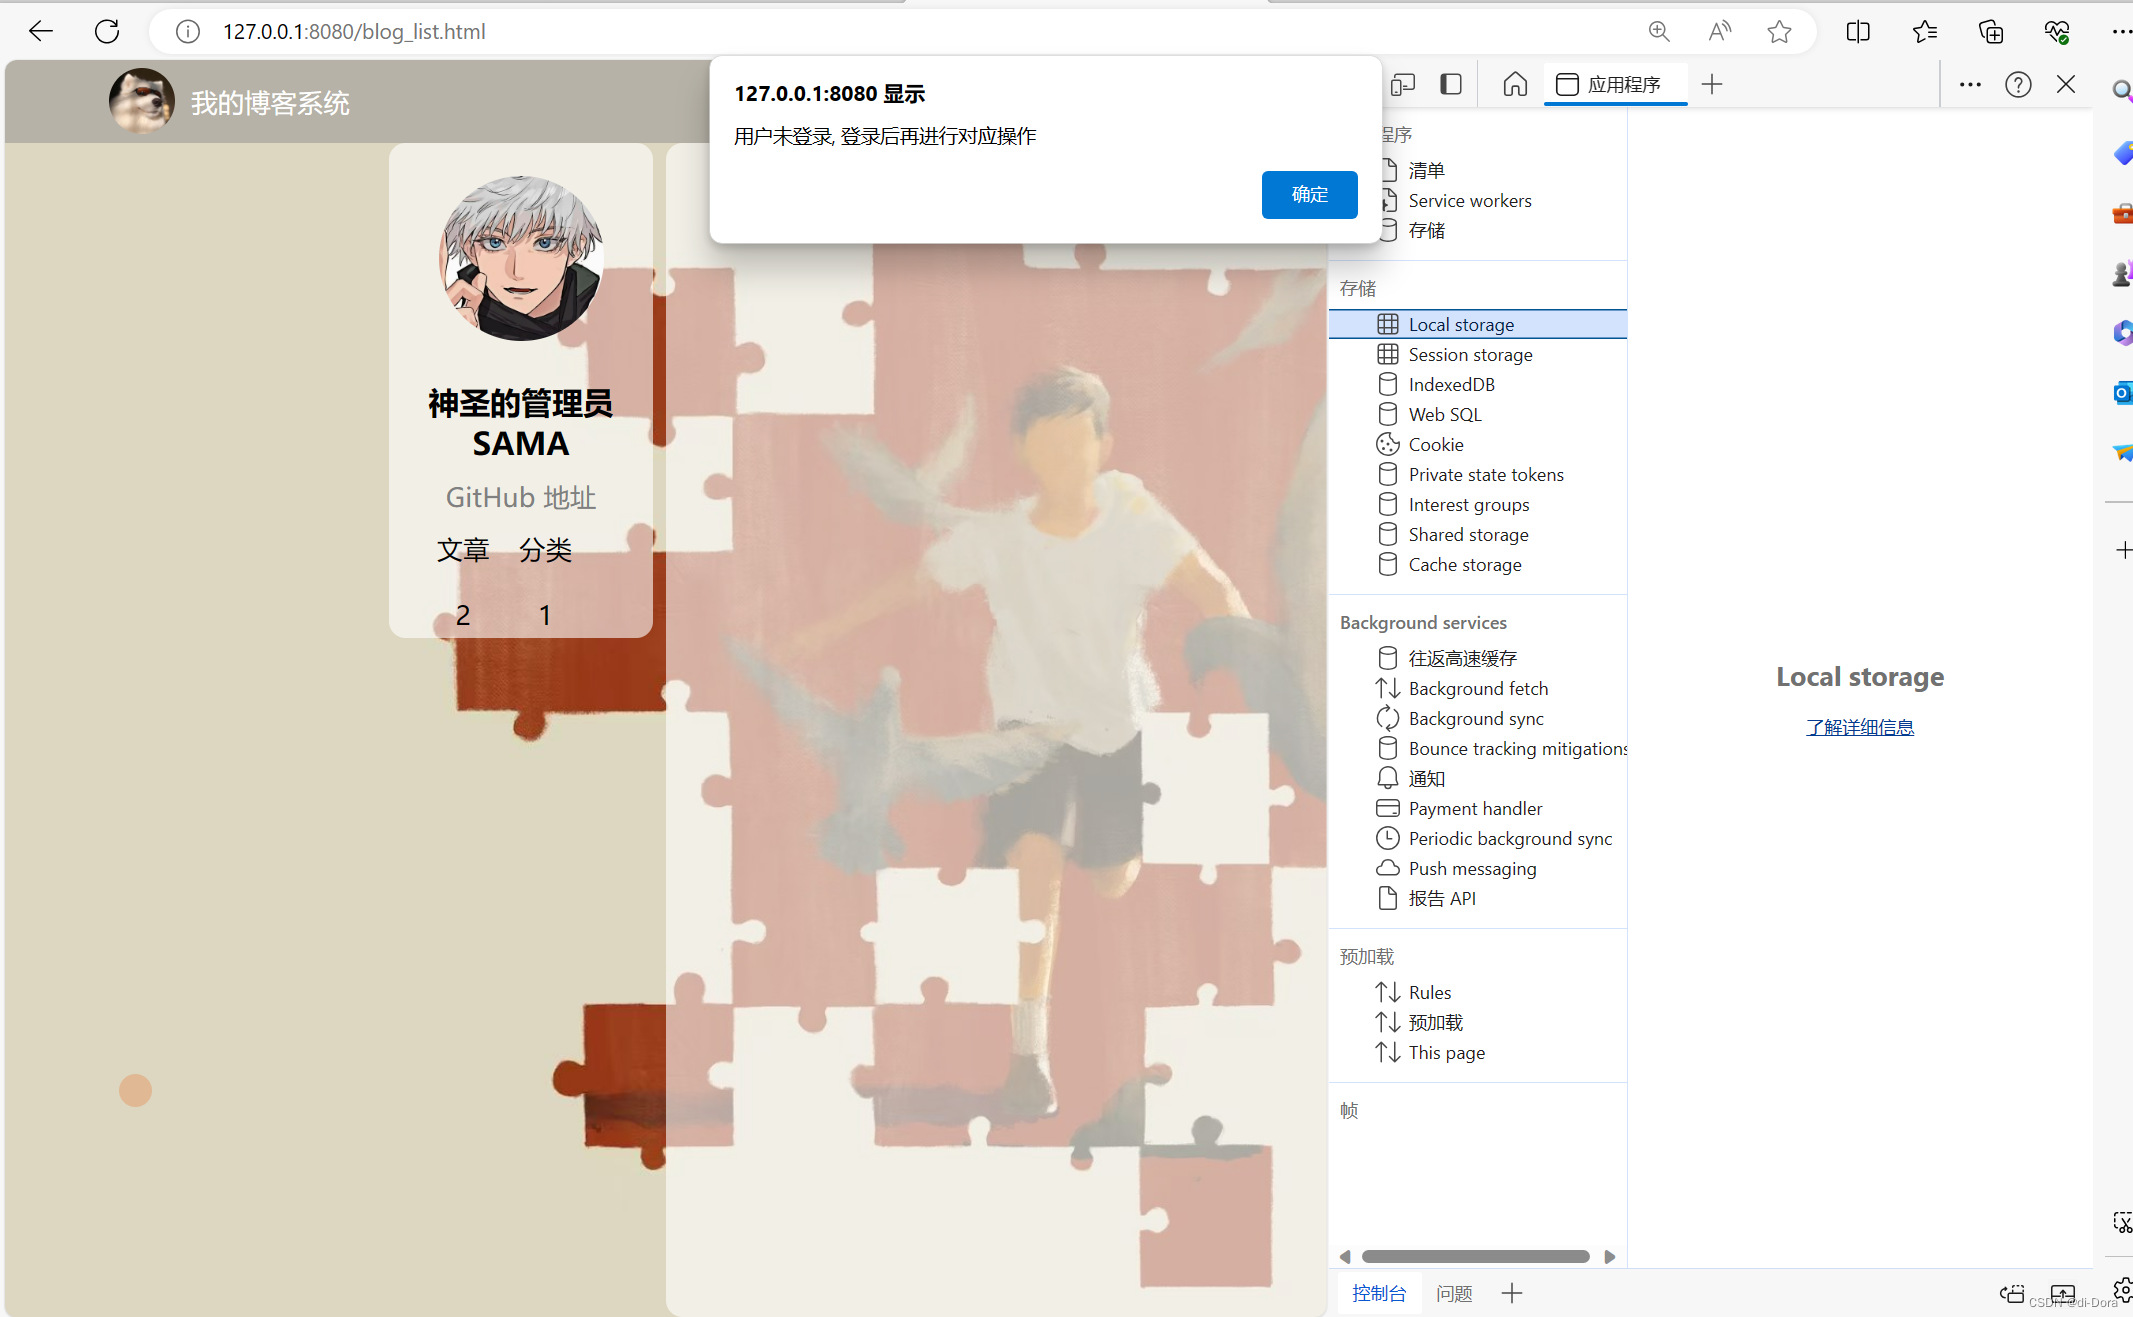
F12点开,可以看到我们存储的令牌:

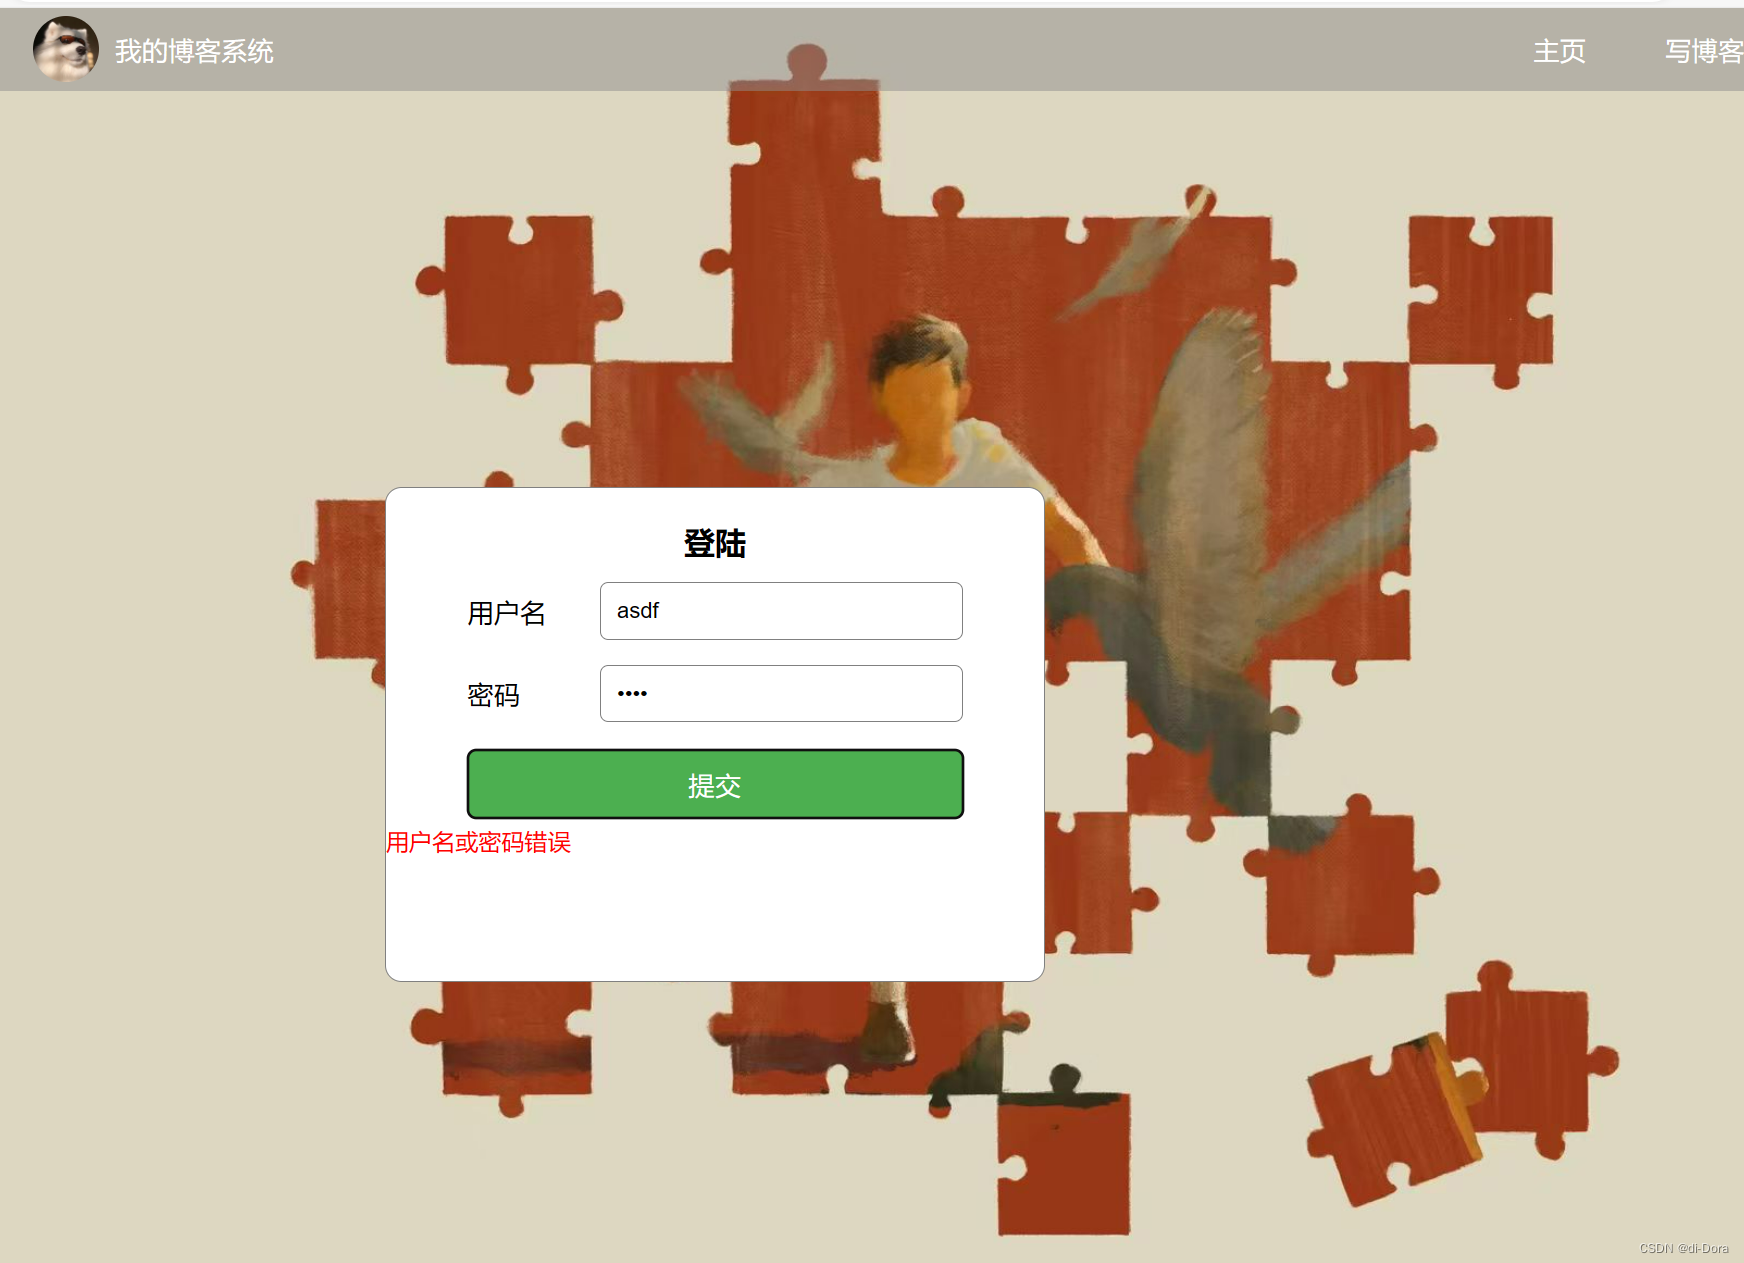
也可以更美观一点:
<!DOCTYPE html>
<html lang="en">

<head>
    <meta charset="UTF-8">
    <meta http-equiv="X-UA-Compatible" content="IE=edge">
    <meta name="viewport" content="width=device-width, initial-scale=1.0">
    <title>博客登陆页</title>

    <link rel="stylesheet" href="css/common.css">
    <link rel="stylesheet" href="css/login.css">

    <style>
        /* 添加按钮样式 */
        .login-dialog button {
            padding: 10px 20px;
            background-color: #4CAF50;
            color: white;
            border: none;
            border-radius: 5px;
            cursor: pointer;
            font-size: 16px;
            margin-top: 10px;
            transition: background-color 0.3s;
        }

        /* 鼠标悬停时改变按钮颜色 */
        .login-dialog button:hover {
            background-color: #45a049;
        }

        /* 错误信息样式 */
        .error-message {
            color: red;
            font-size: 14px;
            margin-top: 5px;
        }
    </style>
</head>

<body>
    <div class="nav">
        <img src="pic/酷狗.jpg" alt="">
        <span class="blog-title">我的博客系统</span>
        <div class="space"></div>
        <a class="nav-span" href="blog_list.html">主页</a>
        <a class="nav-span" href="blog_edit.html">写博客</a>
    </div>

    <div class="container-login">
        <div class="login-dialog">
            <h3>登陆</h3>
            <div class="row">
                <span>用户名</span>
                <input type="text" name="username" id="username">
            </div>
            <div class="row">
                <span>密码</span>
                <input type="password" name="password" id="password">
            </div>
            <div class="row">
                <!-- 为按钮添加类名 -->
                <button class="login-btn" id="submit" onclick="login()">提交</button>
            </div>
            <!-- 错误信息提示框 -->
            <div class="error-message" id="error-message"></div>
        </div>
    </div>
    <script src="js/jquery.min.js"></script>
    <script>
        function login() {
            // 发送ajax请求, 获得token
            $.ajax({
                type:"post",
                url: "/user/login",
                data:{
                    "userName": $("#username").val(),
                    "password": $("#password").val()
                },
                success:function(result){
                    if(result != null && result.code != null) {
                        if(result.code == 200 && result.data != null){
                            // 存储token
                            localStorage.setItem("user_token", result.data);
                            location.href = "blog_list.html";
                        } else if (result.code == -1) {
                            showError("用户名或密码错误");
                        } else if (result.code == -2) {
                            showError("用户未注册,请先注册");
                        } else {
                            // 处理其他状态码
                            showError("登录失败,请稍后再试");
                        }
                    } else {
                        showError("服务器返回数据异常");
                    }
                },
                error:function(){
                    showError("请求失败,请稍后再试");
                }
            });
        }

        // 显示错误信息
        function showError(message) {
            $("#error-message").text(message);
        }
    </script>

</body>

</html>
实现强制要求登陆
当用户访问博客列表页面或博客详情页面时,如果用户当前尚未登录,系统会自动将其重定向到登录页面。为了实现这一功能,我们可以使用拦截器(interceptor)。通常,用户的身份验证令牌(token)会被前端放置在HTTP请求的header中。我们可以从header中提取token,并对其进行合法性验证。
1、客户端访问时携带token;
2、服务器获取token,验证token,如果token校验成功,放行。
添加拦截器
package com.example.newblogsystem.config;

import com.example.newblogsystem.constants.Constant;
import com.example.newblogsystem.utils.JwtUtis;
import lombok.extern.slf4j.Slf4j;
import org.springframework.stereotype.Component;
import org.springframework.web.servlet.HandlerInterceptor;

import javax.servlet.http.HttpServletRequest;
import javax.servlet.http.HttpServletResponse;

/**
 * 用户登录拦截器
 */
@Slf4j
@Component
public class LoginInterceptor implements HandlerInterceptor {
    @Override
    public boolean preHandle(HttpServletRequest request, HttpServletResponse response, Object handler) throws Exception {
        //1. 从header中获取token
        //2. 校验token
        //3. 成功, 放行
        String userToken = request.getHeader(Constant.USER_TOKEN_HEADER);
        log.info("获得token, token:"+userToken);
        boolean result = JwtUtis.checkToken(userToken);
        if (result){
            return true;
        }
        response.setStatus(401);
        return false;
    }
}
package com.example.newblogsystem.config;
import org.springframework.beans.factory.annotation.Autowired;
import org.springframework.context.annotation.Configuration;
import org.springframework.web.servlet.config.annotation.InterceptorRegistry;
import org.springframework.web.servlet.config.annotation.WebMvcConfigurer;

@Configuration
public class WebConfig implements WebMvcConfigurer {
    @Autowired
    private LoginInterceptor loginInterceptor;
    @Override
    public void addInterceptors(InterceptorRegistry registry) {
        registry.addInterceptor(loginInterceptor).addPathPatterns("/**")
                .excludePathPatterns("/**/*.html",
                        "/pic/**",
                        "/js/**",
                        "/css/**",
                        "/blog-editormd/**",
                        "/user/login");

    }
}
实现客户端代码
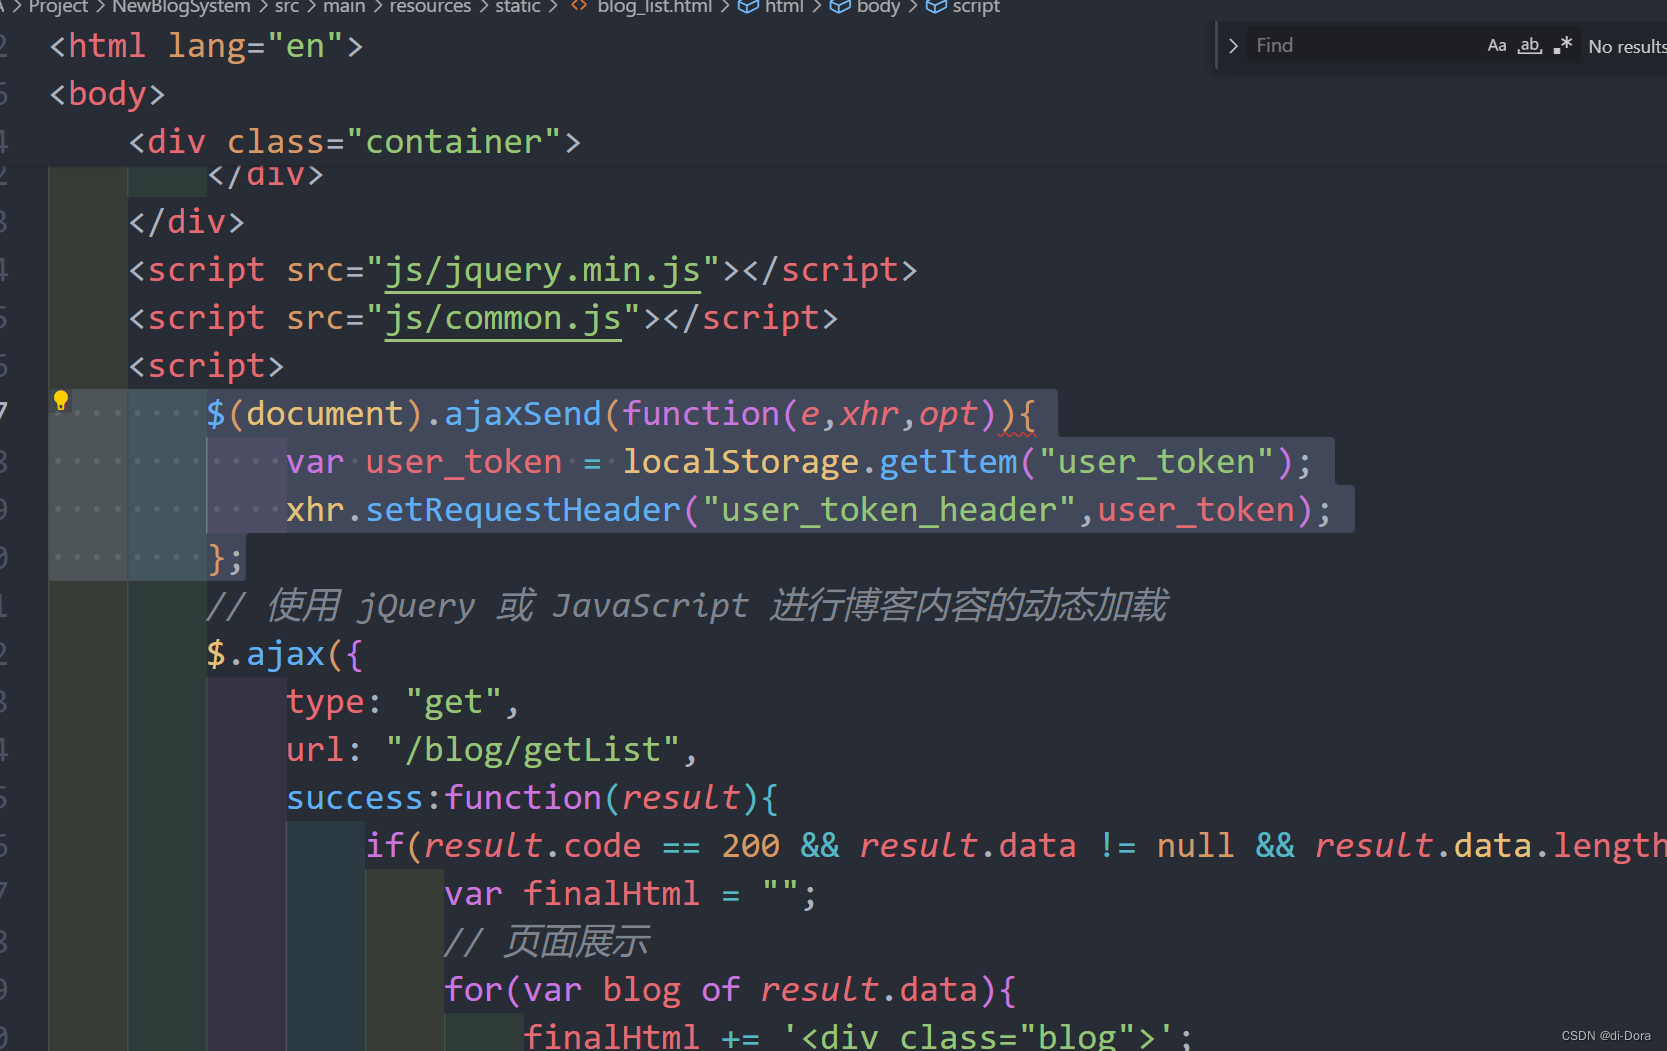
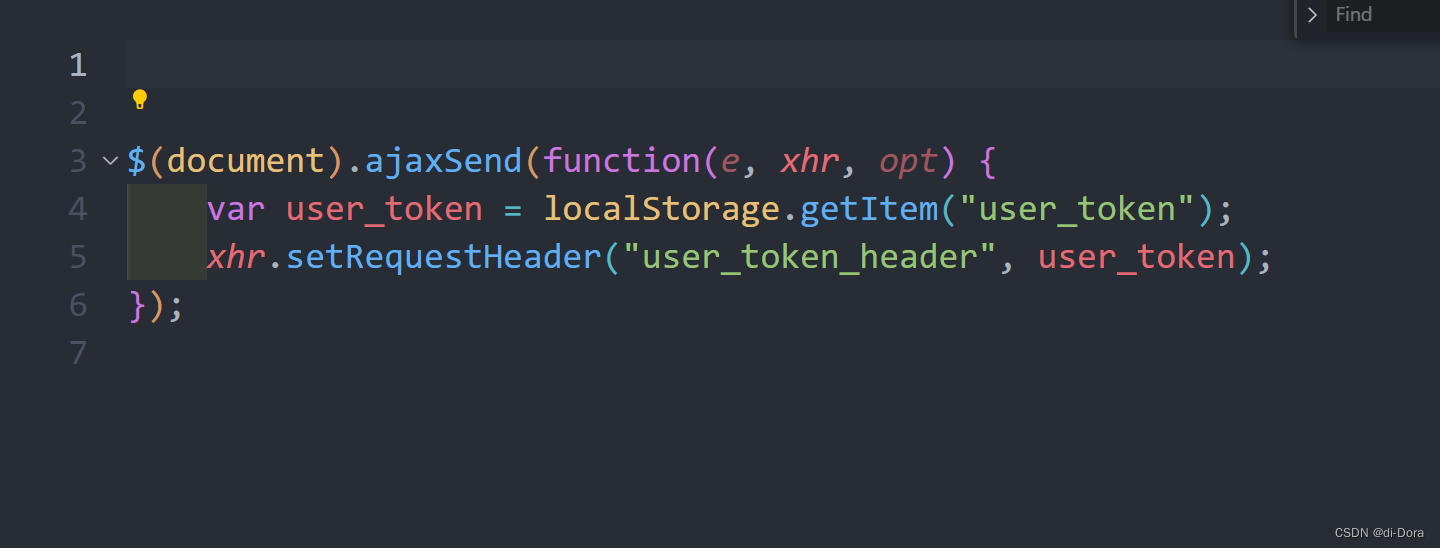
1. 前端请求时, header中统⼀添加token, 可以写在common.js中。
$(document).ajaxSend(function (e, xhr, opt) {
   var user_token = localStorage.getItem("user_token");
   xhr.setRequestHeader("user_token", user_token);
});
ajaxSend() 方法是在 AJAX 请求开始时执行的函数。它接受三个参数:
- event: 包含事件对象,描述触发了 AJAX 请求的事件。
- xhr: 包含 XMLHttpRequest 对象和XMLHttpResponse 对象,可以用来访问和操作 AJAX 请求。
- options: 包含 AJAX 请求中使用的选项,例如 URL、请求类型、数据等。
这个函数通常用于在发送 AJAX 请求之前执行一些操作,例如添加全局的 loading 动画、设置请求头部等。

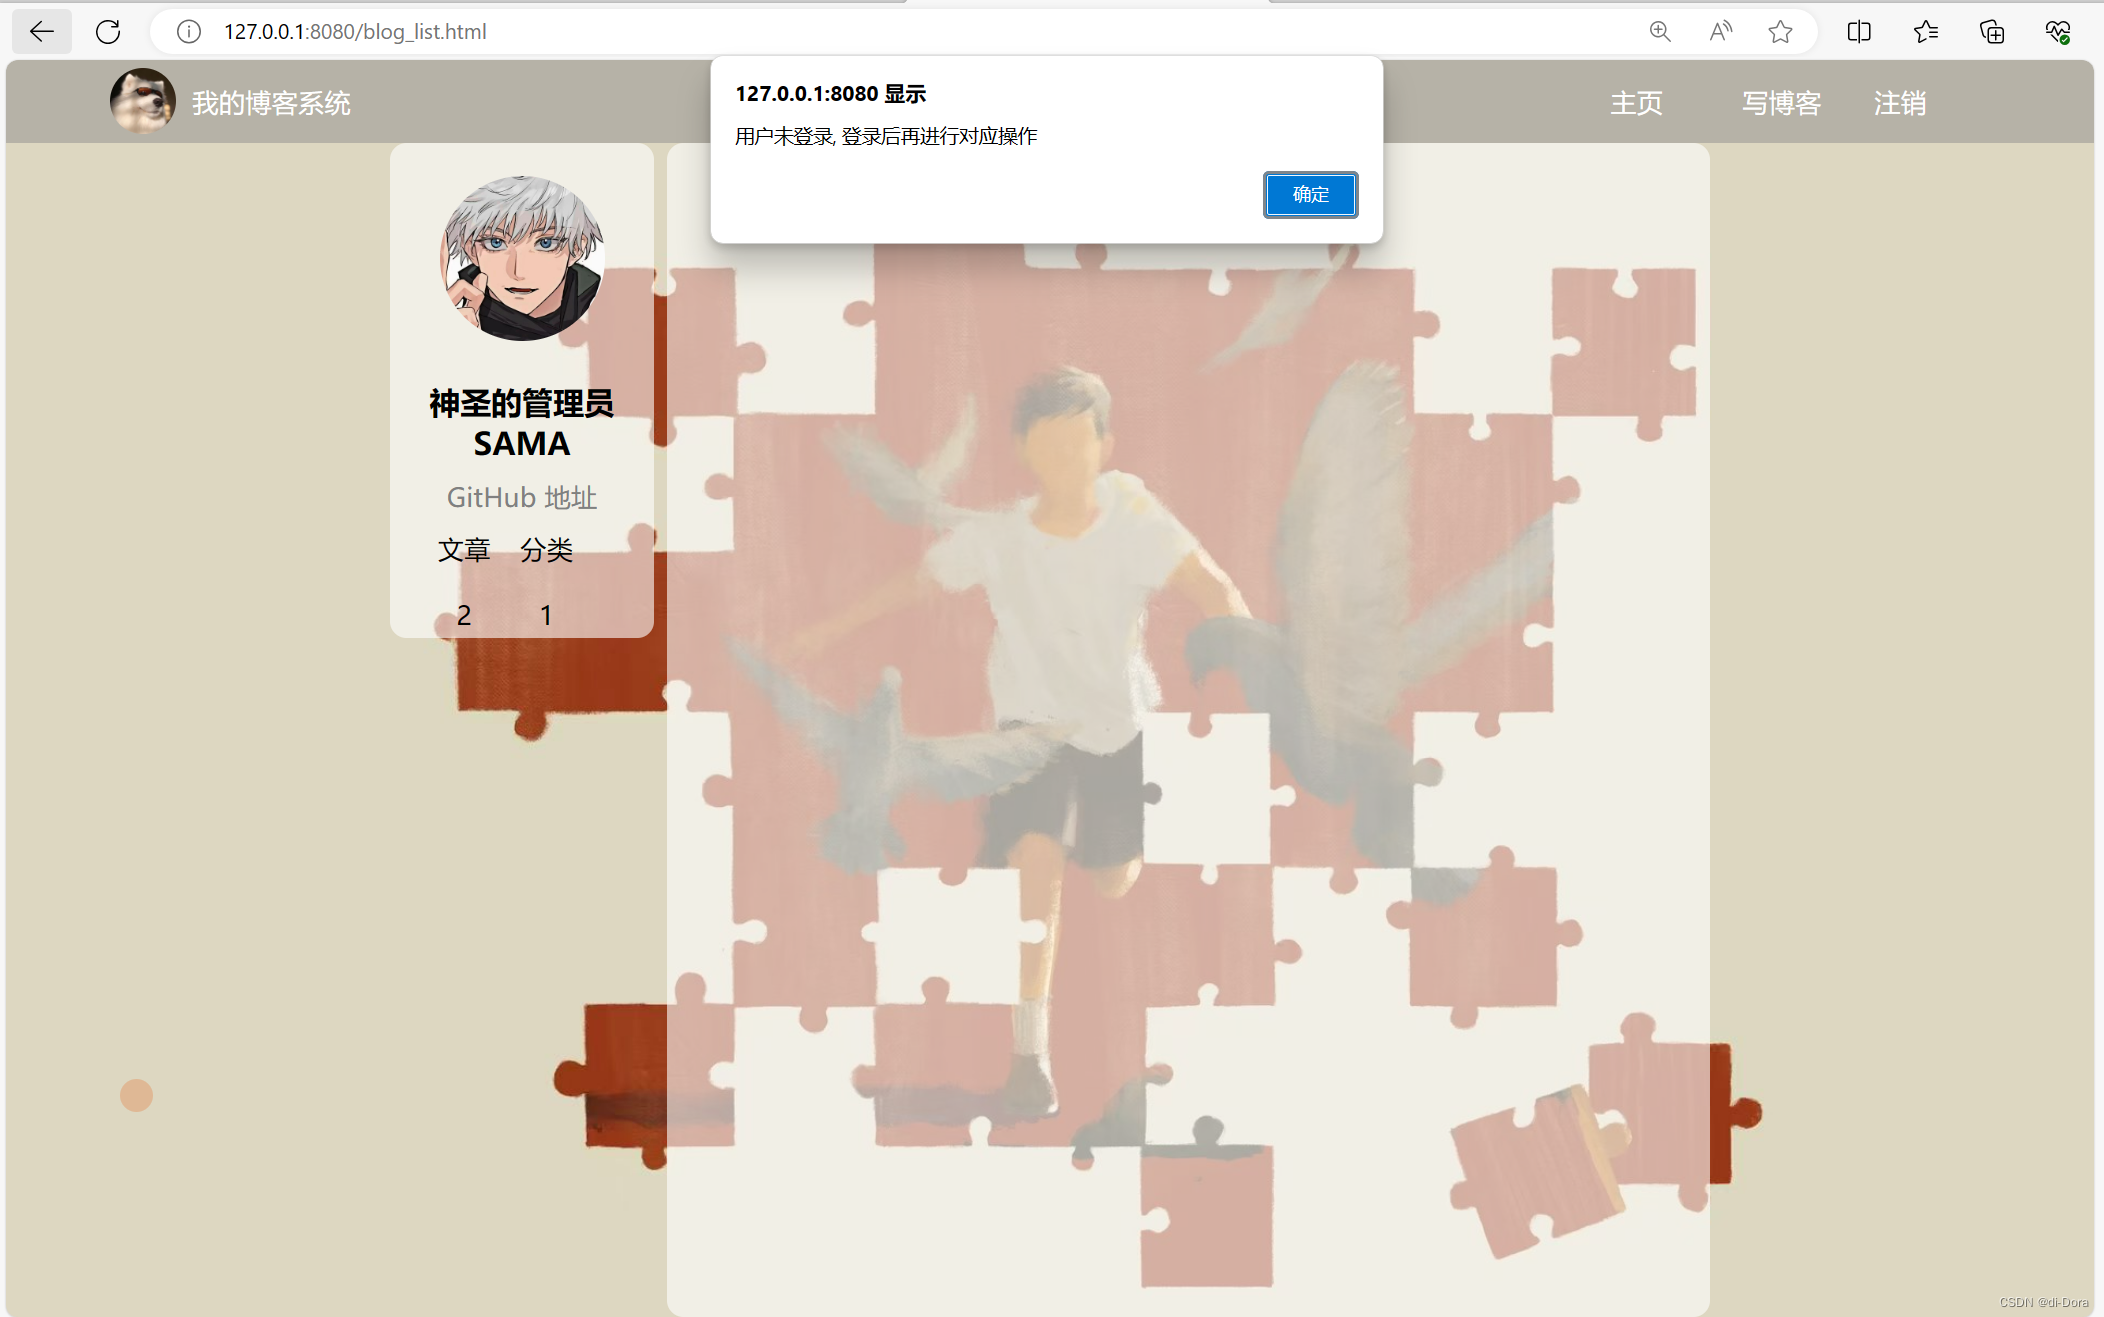
2. 修改 blog_list.html和blog_datail.html。
访问页面时,添加失败处理代码,使用 location.href 进行页面跳转。
<!DOCTYPE html>
<html lang="en">
<head>
<meta charset="UTF-8">
<meta http-equiv="X-UA-Compatible" content="IE=edge">
<meta name="viewport" content="width=device-width, initial-scale=1.0">
<title>博客列表页</title>
<link rel="stylesheet" href="css/common.css">
<link rel="stylesheet" href="css/list.css">
<link rel="stylesheet" href="css/blog_style.css">
</head>
<body>
<div class="nav">
<img src="pic/酷狗.jpg" alt="">
<span class="blog-title">我的博客系统</span>
<div class="space"></div>
<a class="nav-span" href="blog_list.html">主页</a>
<a class="nav-span" href="blog_edit.html">写博客</a>
<a class="nav-span" href="#" onclick="logout()">注销</a>
</div>
<div class="container">
<div class="left">
<div class="card">
<img src="pic/五条悟.jpg" alt="">
<h3>神圣的管理员SAMA</h3>
<a href="#">GitHub 地址</a>
<div class="row">
<span>文章</span>
<span>分类</span>
</div>
<div class="row">
<span>2</span>
<span>1</span>
</div>
</div>
</div>
<div class="right">
<!-- 动态加载博客内容 -->
</div>
</div>
<script src="js/jquery.min.js"></script>
<script src="js/common.js"></script>
<script>
// 使用 jQuery 或 JavaScript 进行博客内容的动态加载
$.ajax({
type: "get",
url: "/blog/getList",
success:function(result){
if (result.code == 200) {
if (result.data != null && result.data.length > 0) {
var finalHtml = "";
// 页面展示
for(var blog of result.data){
finalHtml += '<div class="blog">';
finalHtml += '<div class="title">'+blog.title+'</div>';
finalHtml += '<div class="date">'+blog.createTime+'</div>';
finalHtml += '<div class="desc">'+blog.content+'</div>';
finalHtml += '<a class="detail" href="blog_detail.html?blogId='+blog.id+'">查看全文>></a>';
finalHtml += '</div>';
}
$(".right").html(finalHtml);
} else {
// 数据为空时,显示提示信息
$(".right").html('<div class="no-blog">当前还没有任何博客,快去写博客吧...</div>');
}
} else {
// 其他状态码或者请求失败时,显示错误信息
$(".right").html('<div class="error-msg">加载博客列表失败,请稍后重试...</div>');
}
},
error: function (error) {
if (error != null && error.status == 401) {
// 如果未登录,强制跳转到登录页面
alert("用户未登录, 登录后再进行对应操作");
location.href = "blog_login.html";
} else {
// 请求失败时,显示错误信息
$(".right").html('<div class="error-msg">加载博客列表失败,请稍后重试...</div>');
}
}
});
</script>
</body>
</html>
<!DOCTYPE html>
<html lang="en">
<head>
<meta charset="UTF-8">
<meta http-equiv="X-UA-Compatible" content="IE=edge">
<meta name="viewport" content="width=device-width, initial-scale=1.0">
<title>博客编辑页</title>
<link rel="stylesheet" href="css/common3.css">
<link rel="stylesheet" href="css/edit.css">
<link rel="stylesheet" href="blog-editormd/css/editormd.css" />
</head>
<body>
<div class="nav">
<img src="pic/酷狗.jpg" alt="">
<span class="blog-title">我的博客系统</span>
<div class="space"></div>
<a class="nav-span" href="blog_list.html">主页</a>
<a class="nav-span" href="blog_edit.html">写博客</a>
<a class="nav-span" href="#" onclick="logout()">注销</a>
</div>
<div class="content-edit">
<div class="push">
<input type="hidden" id="blogId">
<input type="text" name="" id="title">
<input type="button" value="更新文章" id="submit" onclick="submit()">
</div>
<!-- markdown 插件 html代码 -->
<div id="editor">
<textarea style="display:none;" id="content">##在这里写下一篇博客</textarea>
</div>
</div>
<script src="js/jquery.min.js"></script>
<script src="blog-editormd/editormd.min.js"></script>
<script src="js/common.js"></script>
<script type="text/javascript">
// 在页面加载时进行检查
$(document).ready(function() {
var user_token = localStorage.getItem("user_token");
if (!user_token) {
alert("用户未登录,请先登录");
location.href = "blog_login.html";
}
// 使用 jQuery 或 JavaScript 进行博客内容的动态加载
$.ajax({
type: "get",
url: "/blog/getList",
success: function(result) {
if (result.code == 200) {
if (result.data != null && result.data.length > 0) {
var finalHtml = "";
// 页面展示
for (var blog of result.data) {
finalHtml += '<div class="blog">';
finalHtml += '<div class="title">' + blog.title + '</div>';
finalHtml += '<div class="date">' + blog.createTime + '</div>';
finalHtml += '<div class="desc">' + blog.content + '</div>';
finalHtml += '<a class="detail" href="blog_detail.html?blogId=' + blog.id + '">查看全文>></a>';
finalHtml += '</div>';
}
$(".right").html(finalHtml);
} else {
// 数据为空时,显示提示信息
$(".right").html('<div class="no-blog">当前还没有任何博客,快去写博客吧...</div>');
}
} else {
// 其他状态码或者请求失败时,显示错误信息
$(".right").html('<div class="error-msg">加载博客列表失败,请稍后重试...</div>');
}
}
// error: function(error) {
// if (error != null && error.status == 401) {
// // 如果未登录,强制跳转到登录页面
// alert("用户未登录, 登录后再进行对应操作");
// location.href = "blog_login.html";
// } else {
// // 请求失败时,显示错误信息
// $(".right").html('<div class="error-msg">加载博客列表失败,请稍后重试...</div>');
// }
// }
});
});
$(function() {
var editor = editormd("editor", {
width: "100%",
height: "550px",
path: "blog-editormd/lib/"
});
});
function submit() {
var user_token = localStorage.getItem("user_token");
if (!user_token) {
alert("用户未登录,请先登录");
location.href = "blog_login.html";
return;
}
$.ajax({
type: "post",
url: "/blog/update",
contentType: "application/json",
headers: {
"user_token_header": user_token
},
data: JSON.stringify({
"title": $("#title").val(),
"content": $("#content").val(),
"id": $("#blogId").val()
}),
success: function(result) {
if (result != null && result.code == 200 && result.data == true) {
location.href = "blog_list.html";
} else {
alert(result.msg);
}
},
error: function(error) {
if (error != null && error.status == 401) {
alert("用户未登录, 登录后再进行对应操作");
location.href = "blog_login.html";
} else {
alert("请求失败,请稍后再试");
}
}
});
}
function getBlogInfo() {
// Some code here
}
getBlogInfo();
</script>
</body>
</html>
测试的时候记得把刚刚客户端拿到的token删掉。


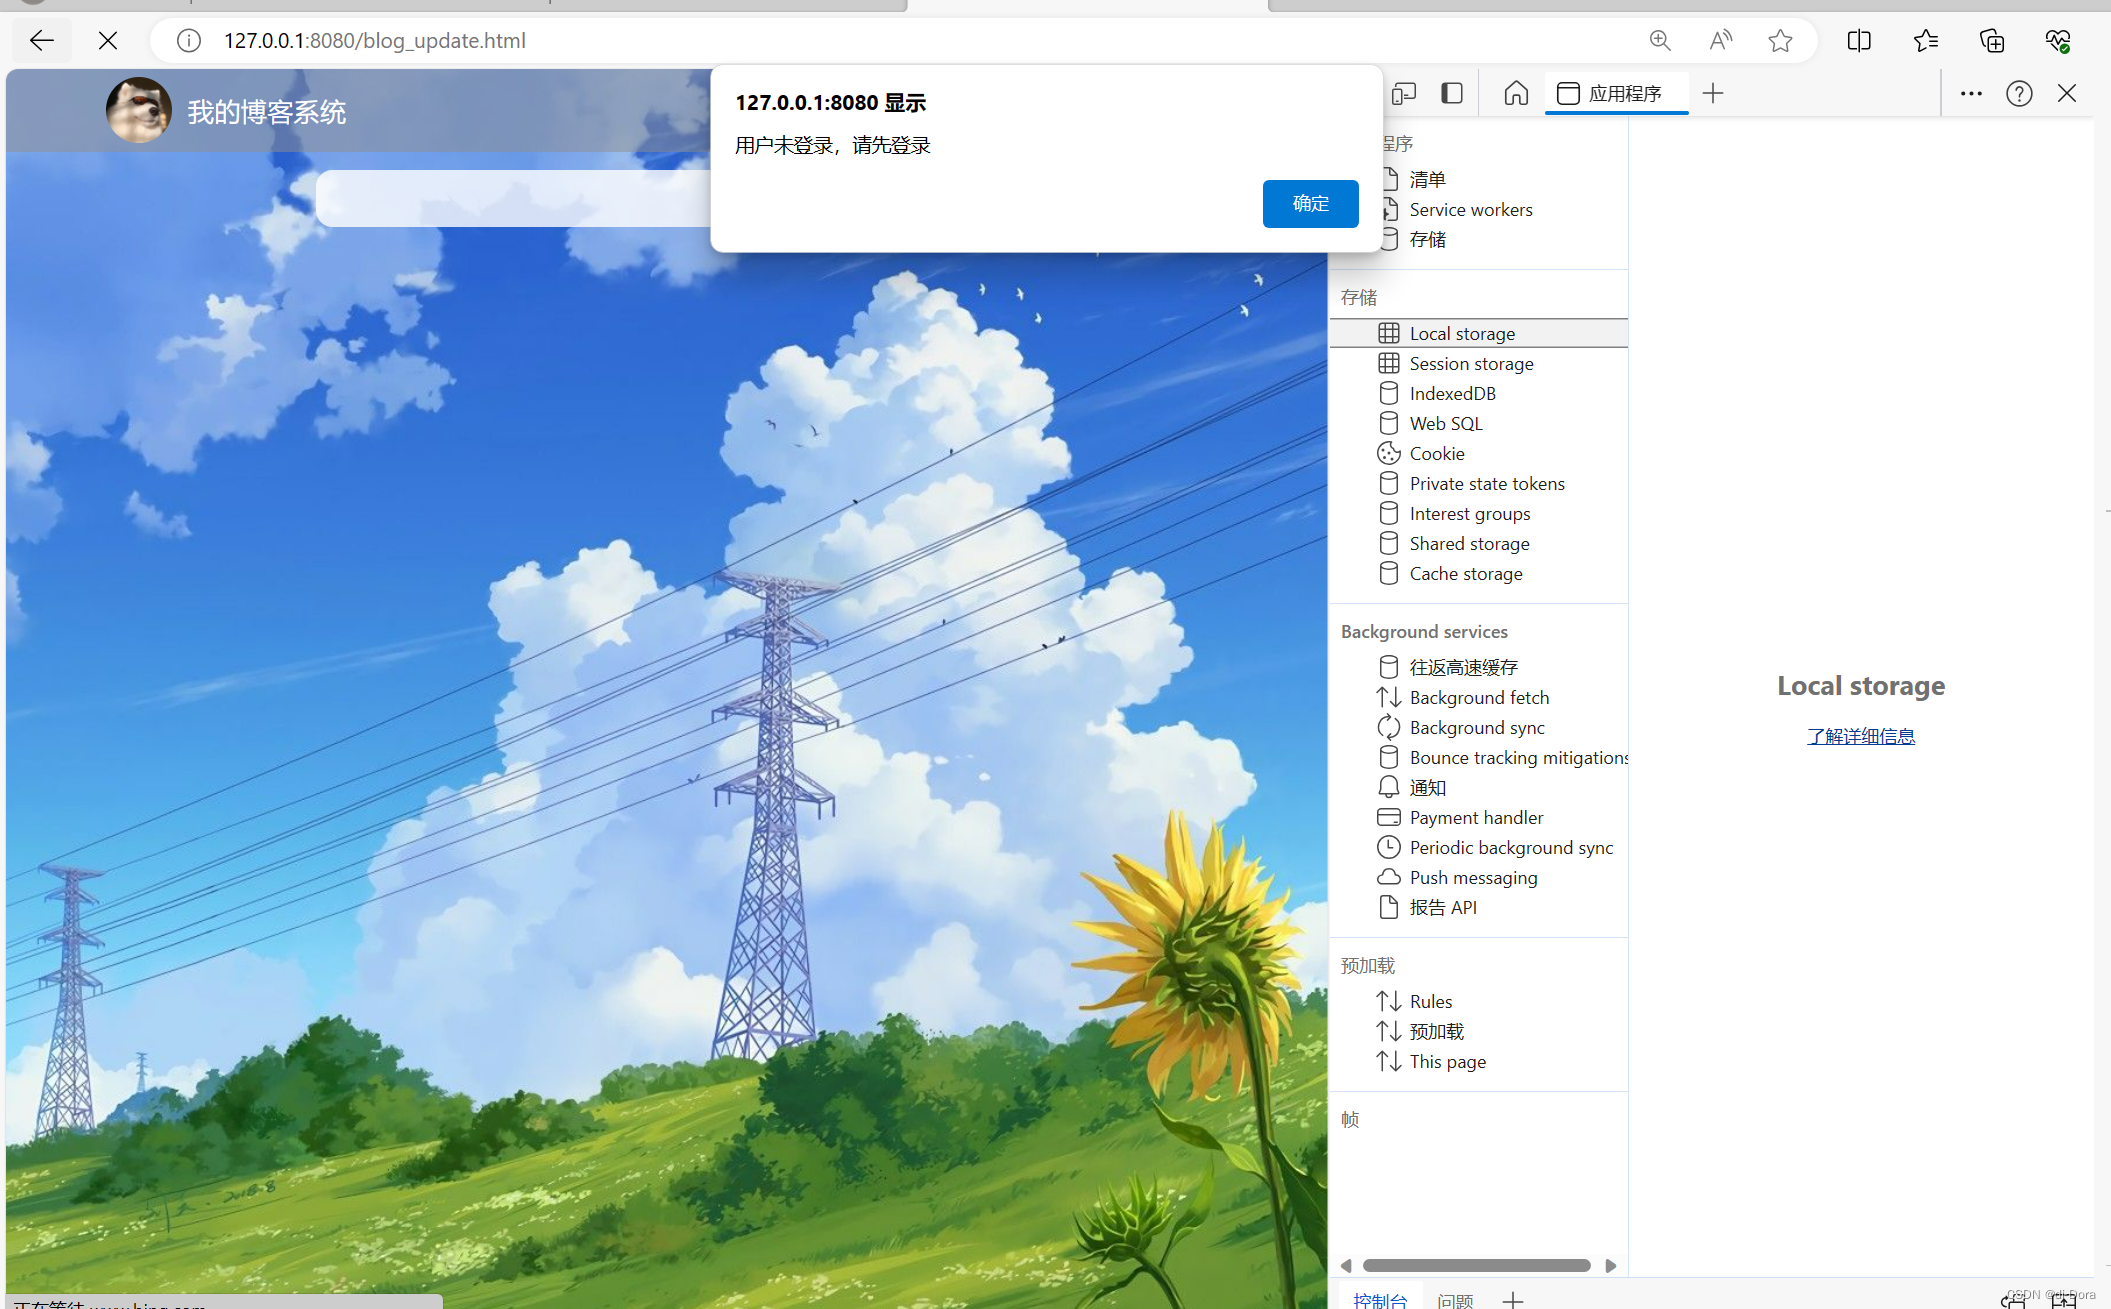
一旦正确登录,就获得token:


实现显示用户信息
目前页面的用户信息部分是写死的.,形如:

我们希望在用户登录后,页面上显示与用户相关的信息,这些信息应根据用户的登录状态和当前页面的内容而变化。
-
博客列表页面:
- 如果用户已登录,则在页面的某个位置显示当前登录用户的信息,例如用户名。
- 如果用户未登录,则显示登录/注册链接,以便用户登录或注册账号。
-
博客详情页面:
- 当用户访问某篇博客的详情页面时,除了显示博客内容外,还应显示该博客的作者信息。
- 如果用户已登录,则显示该博客作者的用户名。
- 如果用户未登录,则显示该博客的作者信息,可能是作者的用户名或者其他标识。
请注意,当前我们仅实现了显示用户的用户名,而未实现显示用户的头像、文章数量等其他信息。
约定前后端交互接口
在博客列表页,获取当前登录的用户的信息。
{
  "用户信息请求": {
    "路径": "/user/getUserInfo",
    "响应": {
      "userId": 1,
      "username": "test",
      "..."
    }
  },
在博客详情页,获取当前文章作者的用户信息
  "作者信息请求": {
    "路径": "/user/getAuthorInfo?blogId=1",
    "响应": {
      "userId": 1,
      "username": "test"
    }
  }
}
实现服务器代码
在UserService中添加代码:
package com.example.newblogsystem.service;

import com.example.newblogsystem.mapper.BlogMapper;
import com.example.newblogsystem.mapper.UserInfoMapper;
import com.example.newblogsystem.model.BlogInfo;
import com.example.newblogsystem.model.UserInfo;
import org.springframework.beans.factory.annotation.Autowired;
import org.springframework.stereotype.Service;

@Service
public class UserService {
    @Autowired
    private UserInfoMapper userMapper;
    @Autowired
    private BlogMapper blogMapper;
    public UserInfo queryUserByName(String userName) {
        return userMapper.selectByName(userName);
    }

    public UserInfo queryUserById(Integer userId) {
        return userMapper.selectById(userId);
    }

    public UserInfo getAuthorInfoByBlogId(Integer blogId) {
        //1. 根据博客ID, 获取作者ID
        //2. 根据作者ID, 获取作者信息
        BlogInfo blogInfo = blogMapper.selectById(blogId);
        if (blogInfo==null && blogInfo.getUserId()<1){
            return null;
        }
        UserInfo userInfo = userMapper.selectById(blogInfo.getUserId());
        return userInfo;
    }
}
在 UserController添加代码:
package com.example.newblogsystem.controller;
import com.example.newblogsystem.constants.Constant;
import com.example.newblogsystem.model.Result;
import com.example.newblogsystem.model.UserInfo;
import com.example.newblogsystem.service.UserService;
import com.example.newblogsystem.utils.JwtUtis;
import org.springframework.beans.factory.annotation.Autowired;
import org.springframework.util.StringUtils;
import org.springframework.web.bind.annotation.RequestMapping;
import org.springframework.web.bind.annotation.RestController;
import javax.servlet.http.HttpServletRequest;
import java.util.HashMap;
import java.util.Map;
@RequestMapping("/user")
@RestController
public class UserController {
@Autowired
private UserService userService;
//登录接口
@RequestMapping("/login")
public Result login(String userName, String password){
//1. 对参数进行校验
//2. 对密码进行校验
//3. 如果校验成功, 生成token
if (!StringUtils.hasLength(userName) || !StringUtils.hasLength(password)){
return Result.fail("用户名或密码不能为空");
}
UserInfo userInfo = userService.queryUserByName(userName);
if (userInfo==null || userInfo.getId()<=0){
return Result.fail("用户不存在");
}
if (!password.equals(userInfo.getPassword())){
return Result.fail("密码错误");
}
//密码正确了, 生成token
Map<String,Object> claim = new HashMap<>();
claim.put(Constant.USER_CLAIM_ID, userInfo.getId());
claim.put(Constant.USER_CLAIM_NAME, userInfo.getUserName());
return Result.success(JwtUtis.genToken(claim));
}
/**
* 获取当前登录用户的信息
*/
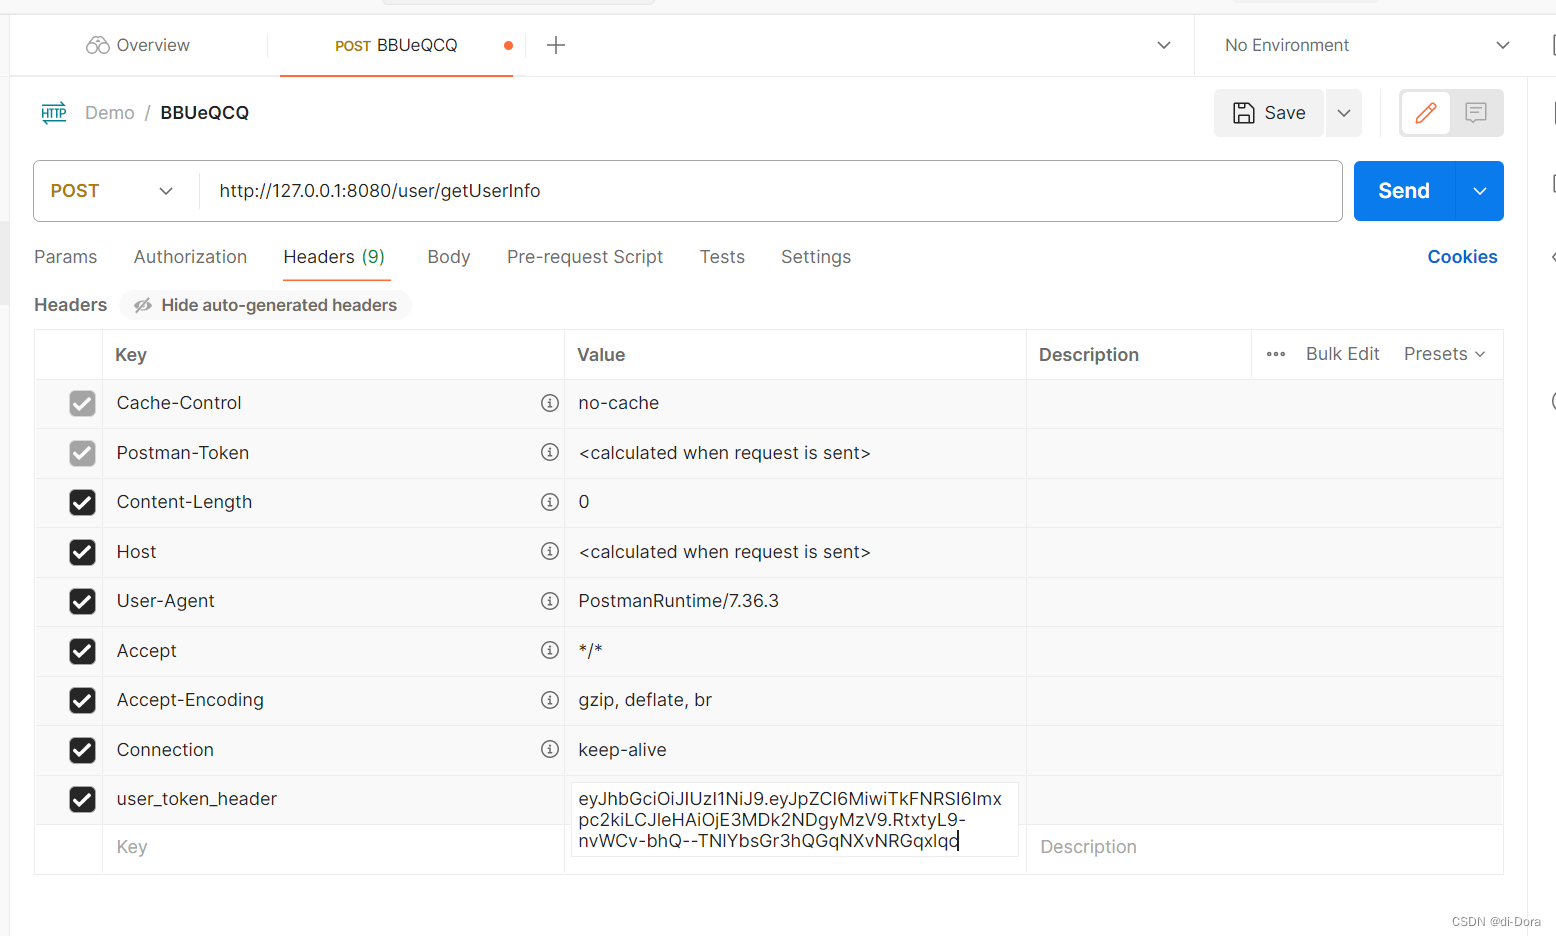
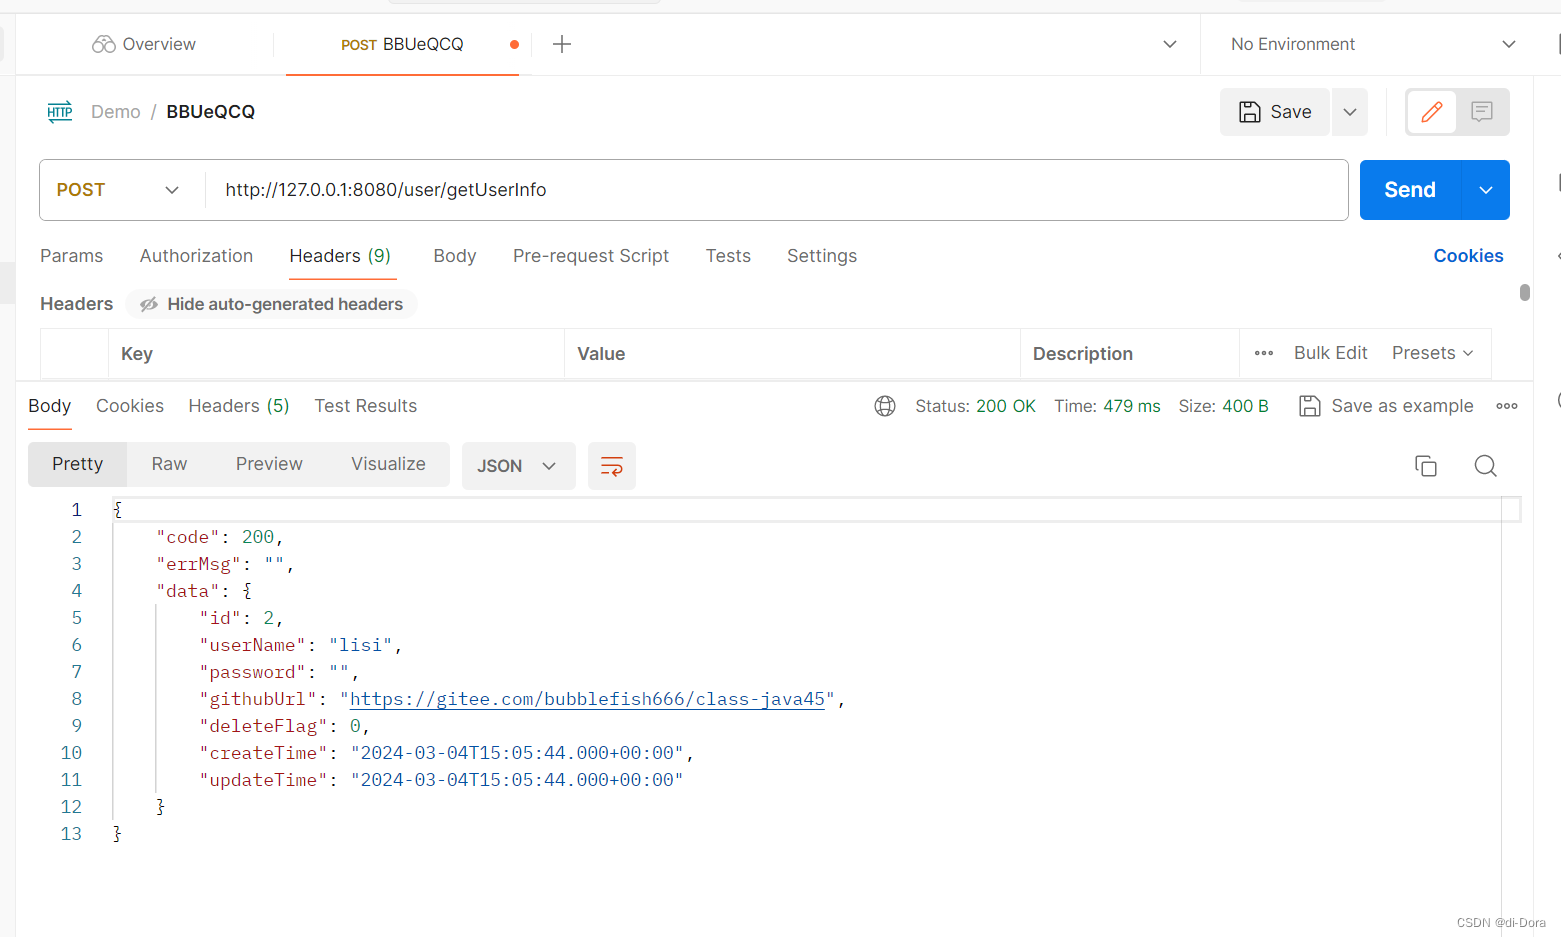
@RequestMapping("/getUserInfo")
public UserInfo getUserInfo(HttpServletRequest request){
//1. 获取token, 从token中获取ID
//2. 根据ID, 获取用户信息
String user_token = request.getHeader(Constant.USER_TOKEN_HEADER);
Integer userId = JwtUtis.getUserIdFromToken(user_token);
if (userId==null || userId<=0){
return null;
}
UserInfo userInfo = userService.queryUserById(userId);
userInfo.setPassword("");
return userInfo;
}
/**
* 根据博客ID, 获取作者信息
*/
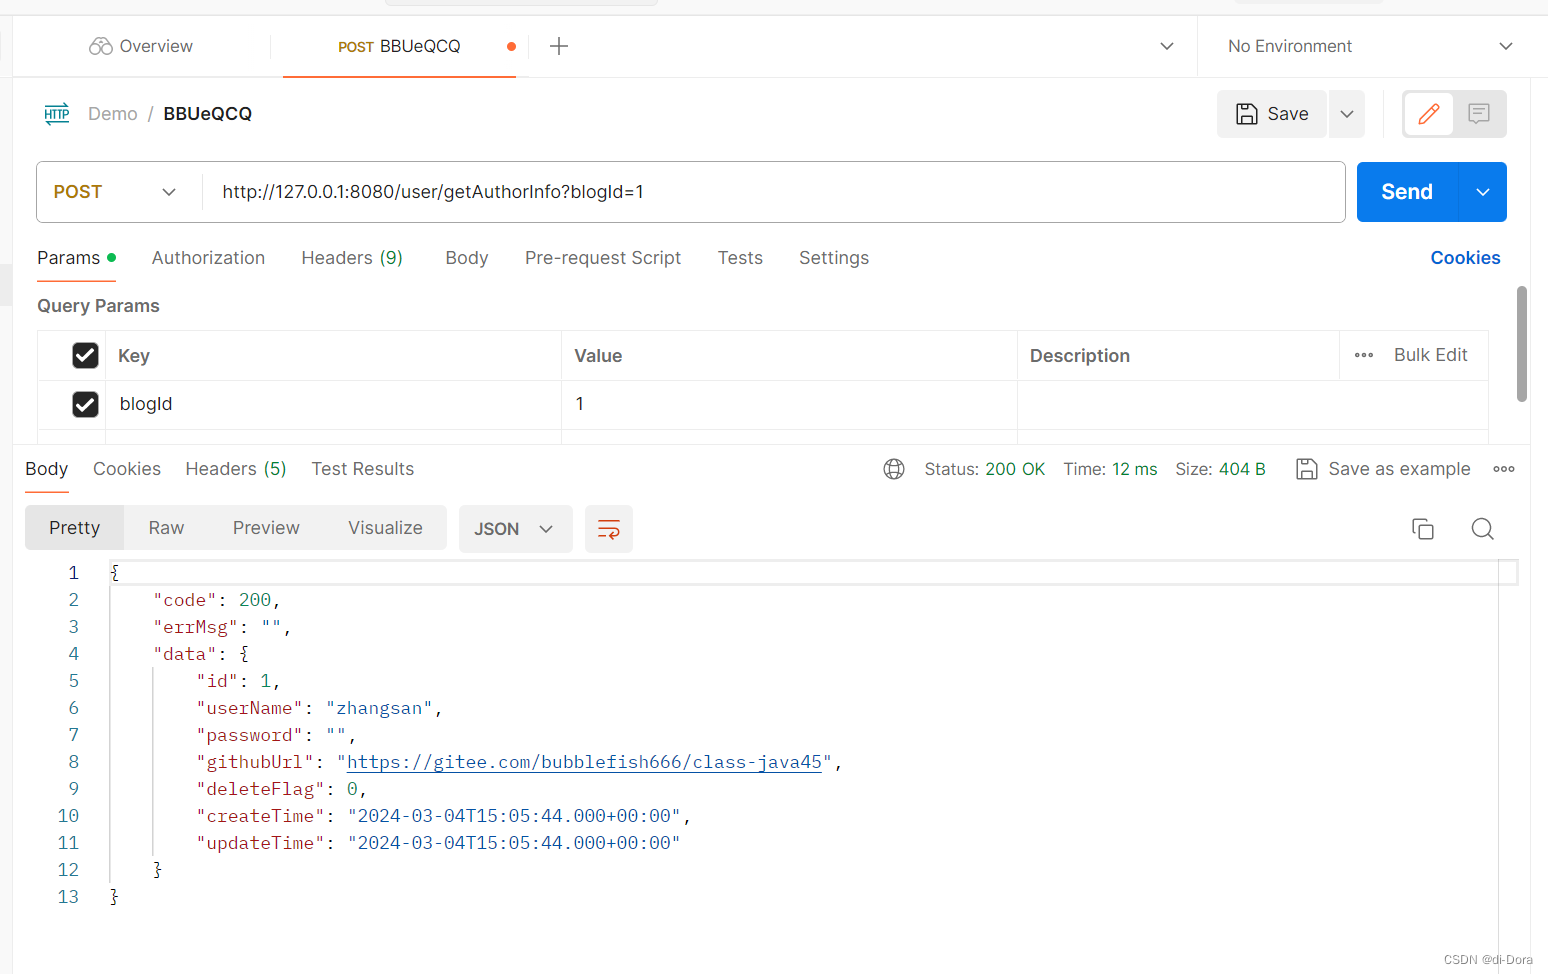
@RequestMapping("/getAuthorInfo")
public UserInfo getAuthorInfo(Integer blogId){
if (blogId!=null && blogId <1){
return null;
}
UserInfo authorInfoByBlogId = userService.getAuthorInfoByBlogId(blogId);
authorInfoByBlogId.setPassword("");
return authorInfoByBlogId;
}
}工具类JwtUtis中添加:getUserIdFromToken
package com.example.newblogsystem.utils;

import com.example.newblogsystem.constants.Constant;
import io.jsonwebtoken.*;
import io.jsonwebtoken.io.Decoders;
import io.jsonwebtoken.io.Encoders;
import io.jsonwebtoken.security.Keys;
import io.jsonwebtoken.security.SignatureException;
import lombok.extern.slf4j.Slf4j;

import javax.crypto.SecretKey;
import java.security.Key;
import java.util.Date;
import java.util.HashMap;
import java.util.Map;

@Slf4j
public class JwtUtis {
    //过期时间: 1小时的毫秒数
    private final static long EXPIRATION_DATE = 60 * 60 * 1000;
    private final static String secretString = "puPGMt1apP2Obf3/zoZRMTAJUMMoXmTvbBQIeRAgBe8=";
    private final static Key key = Keys.hmacShaKeyFor(Decoders.BASE64.decode(secretString));

    //生成令牌
    public static String genToken(Map<String, Object> claim){
        return Jwts.builder()
                .setClaims(claim)
                .setExpiration(new Date(System.currentTimeMillis()+EXPIRATION_DATE))
                .signWith(key)
                .compact();
    }
    /**
     * 解析令牌
     * @param token
     * @return
     */
    public static Claims parseToken(String token){
        JwtParser build = Jwts.parserBuilder().setSigningKey(key).build();
        Claims body = null;
        try {
            body = build.parseClaimsJws(token).getBody();
        } catch (ExpiredJwtException e) {
            log.error("token过期, 校验失败, token:",token);

        } catch (Exception e) {
            log.error("token校验失败, token:",token);
        }
        return body;
    }
    //校验令牌
    public static boolean checkToken(String token){
        Claims body = parseToken(token);
        if (body==null){
            return false;
        }
        return true;
    }
    public static Integer getUserIdFromToken(String token){
        Claims body = parseToken(token);
        if (body!=null){
            return (Integer) body.get(Constant.USER_CLAIM_ID);
        }
        return null;
    }
}
为了测试,从浏览器里面刷新出一个token:
 得到当前用户信息:
同理:
实现客户端代码
代码整合: 提取common.js:
$(document).ajaxSend(function(e, xhr, opt) {
    var user_token = localStorage.getItem("user_token");
    xhr.setRequestHeader("user_token_header", user_token);
});
function getUserInfo(url) {
    $.ajax({
        type: "get",
        url: url,
        success: function (result) {
            if (result.code == 200 && result.data != null) {
                $(".left .card h3").text(result.data.userName);
                $(".left .card a").attr("href", result.data.githubUrl);
            }
        }
    });
}
修改 blog_list.html,在响应回调函数中,根据响应中的用户名,更新界面的显示:
<!DOCTYPE html>
<html lang="en">
<head>
<meta charset="UTF-8">
<meta http-equiv="X-UA-Compatible" content="IE=edge">
<meta name="viewport" content="width=device-width, initial-scale=1.0">
<title>博客列表页</title>
<link rel="stylesheet" href="css/common.css">
<link rel="stylesheet" href="css/list.css">
<link rel="stylesheet" href="css/blog_style.css">
</head>
<body>
<div class="nav">
<img src="pic/酷狗.jpg" alt="">
<span class="blog-title">我的博客系统</span>
<div class="space"></div>
<a class="nav-span" href="blog_list.html">主页</a>
<a class="nav-span" href="blog_edit.html">写博客</a>
<a class="nav-span" href="#" onclick="logout()">注销</a>
</div>
<div class="container">
<div class="left">
<div class="card">
<img src="pic/五条悟.jpg" alt="">
<h3>神圣的管理员SAMA</h3>
<a href="#">GitHub 地址</a>
<div class="row">
<span>文章</span>
<span>分类</span>
</div>
<div class="row">
<span>2</span>
<span>1</span>
</div>
</div>
</div>
<div class="right">
<!-- 动态加载博客内容 -->
</div>
</div>
<script src="js/jquery.min.js"></script>
<script src="js/common.js"></script>
<script>
getBlogList();
function getBlogList(){
// 使用 jQuery 或 JavaScript 进行博客内容的动态加载
$.ajax({
type: "get",
url: "/blog/getList",
success:function(result){
if (result.code == 200) {
if (result.data != null && result.data.length > 0) {
var finalHtml = "";
// 页面展示
for(var blog of result.data){
finalHtml += '<div class="blog">';
finalHtml += '<div class="title">'+blog.title+'</div>';
finalHtml += '<div class="date">'+blog.createTime+'</div>';
finalHtml += '<div class="desc">'+blog.content+'</div>';
finalHtml += '<a class="detail" href="blog_detail.html?blogId='+blog.id+'">查看全文>></a>';
finalHtml += '</div>';
}
$(".right").html(finalHtml);
} else {
// 数据为空时,显示提示信息
$(".right").html('<div class="no-blog">当前还没有任何博客,快去写博客吧...</div>');
}
} else {
// 其他状态码或者请求失败时,显示错误信息
$(".right").html('<div class="error-msg">加载博客列表失败,请稍后重试...</div>');
}
},
error: function (error) {
if (error != null && error.status == 401) {
// 如果未登录,强制跳转到登录页面
alert("用户未登录, 登录后再进行对应操作");
location.href = "blog_login.html";
} else {
// 请求失败时,显示错误信息
$(".right").html('<div class="error-msg">加载博客列表失败,请稍后重试...</div>');
}
}
});
}
var url = "/user/getUserInfo";
getUserInfo(url);
</script>
</body>
</html>

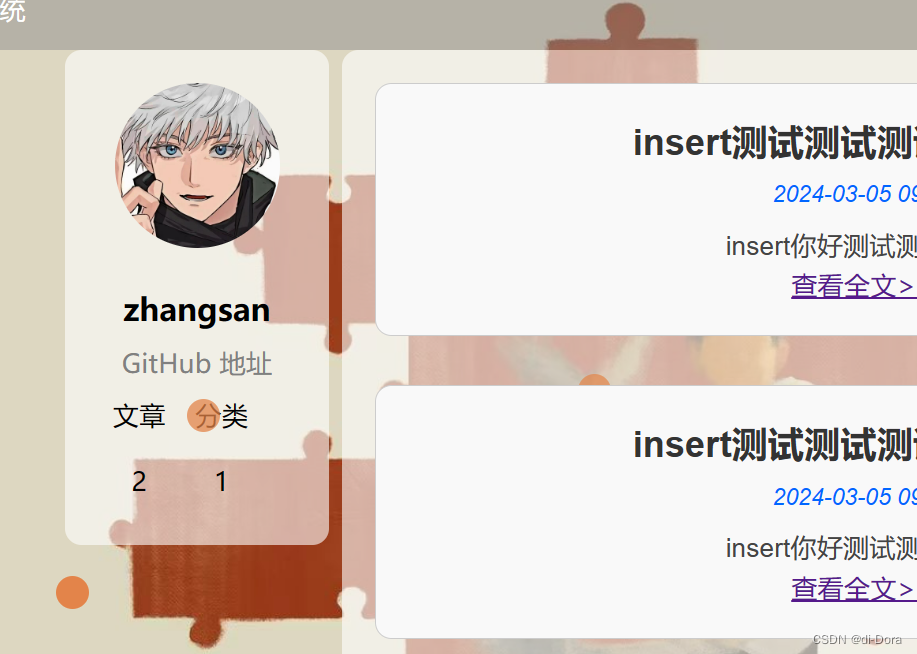
修改 blog_detail.html:
<!DOCTYPE html>
<html lang="en">
<head>
<meta charset="UTF-8">
<meta http-equiv="X-UA-Compatible" content="IE=edge">
<meta name="viewport" content="width=device-width, initial-scale=1.0">
<title>博客编辑页</title>
<link rel="stylesheet" href="css/common3.css">
<link rel="stylesheet" href="css/edit.css">
<link rel="stylesheet" href="blog-editormd/css/editormd.css" />
</head>
<body>
<div class="nav">
<img src="pic/酷狗.jpg" alt="">
<span class="blog-title">我的博客系统</span>
<div class="space"></div>
<a class="nav-span" href="blog_list.html">主页</a>
<a class="nav-span" href="blog_edit.html">写博客</a>
<a class="nav-span" href="#" onclick="logout()">注销</a>
</div>
<div class="content-edit">
<div class="push">
<input type="hidden" id="blogId">
<input type="text" name="" id="title">
<input type="button" value="更新文章" id="submit" onclick="submit()">
</div>
<!-- markdown 插件 html代码 -->
<div id="editor">
<textarea style="display:none;" id="content">##在这里写下一篇博客</textarea>
</div>
</div>
<script src="js/jquery.min.js"></script>
<script src="blog-editormd/editormd.min.js"></script>
<script src="js/common.js"></script>
<script type="text/javascript">
// 在页面加载时进行检查
$(document).ready(function() {
var user_token = localStorage.getItem("user_token");
if (!user_token) {
alert("用户未登录,请先登录");
location.href = "blog_login.html";
}
// 使用 jQuery 或 JavaScript 进行博客内容的动态加载
$.ajax({
type: "get",
url: "/blog/getList",
success: function(result) {
if (result.code == 200) {
if (result.data != null && result.data.length > 0) {
var finalHtml = "";
// 页面展示
for (var blog of result.data) {
finalHtml += '<div class="blog">';
finalHtml += '<div class="title">' + blog.title + '</div>';
finalHtml += '<div class="date">' + blog.createTime + '</div>';
finalHtml += '<div class="desc">' + blog.content + '</div>';
finalHtml += '<a class="detail" href="blog_detail.html?blogId=' + blog.id + '">查看全文>></a>';
finalHtml += '</div>';
}
$(".right").html(finalHtml);
} else {
// 数据为空时,显示提示信息
$(".right").html('<div class="no-blog">当前还没有任何博客,快去写博客吧...</div>');
}
} else {
// 其他状态码或者请求失败时,显示错误信息
$(".right").html('<div class="error-msg">加载博客列表失败,请稍后重试...</div>');
}
}
// error: function(error) {
// if (error != null && error.status == 401) {
// // 如果未登录,强制跳转到登录页面
// alert("用户未登录, 登录后再进行对应操作");
// location.href = "blog_login.html";
// } else {
// // 请求失败时,显示错误信息
// $(".right").html('<div class="error-msg">加载博客列表失败,请稍后重试...</div>');
// }
// }
});
});
$(function() {
var editor = editormd("editor", {
width: "100%",
height: "550px",
path: "blog-editormd/lib/"
});
});
function submit() {
var user_token = localStorage.getItem("user_token");
if (!user_token) {
alert("用户未登录,请先登录");
location.href = "blog_login.html";
return;
}
$.ajax({
type: "post",
url: "/blog/update",
contentType: "application/json",
headers: {
"user_token_header": user_token
},
data: JSON.stringify({
"title": $("#title").val(),
"content": $("#content").val(),
"id": $("#blogId").val()
}),
success: function(result) {
if (result != null && result.code == 200 && result.data == true) {
location.href = "blog_list.html";
} else {
alert(result.msg);
}
},
error: function(error) {
if (error != null && error.status == 401) {
alert("用户未登录, 登录后再进行对应操作");
location.href = "blog_login.html";
} else {
alert("请求失败,请稍后再试");
}
}
});
}
//显示博客作者信息
var userUrl = "/user/getAuthorInfo" + location.search;
getUserInfo(userUrl);
function deleteBlog() {
alert("删除博客");
}
function getBlogInfo() {
// Some code here
}
getBlogInfo();
</script>
</body>
</html>
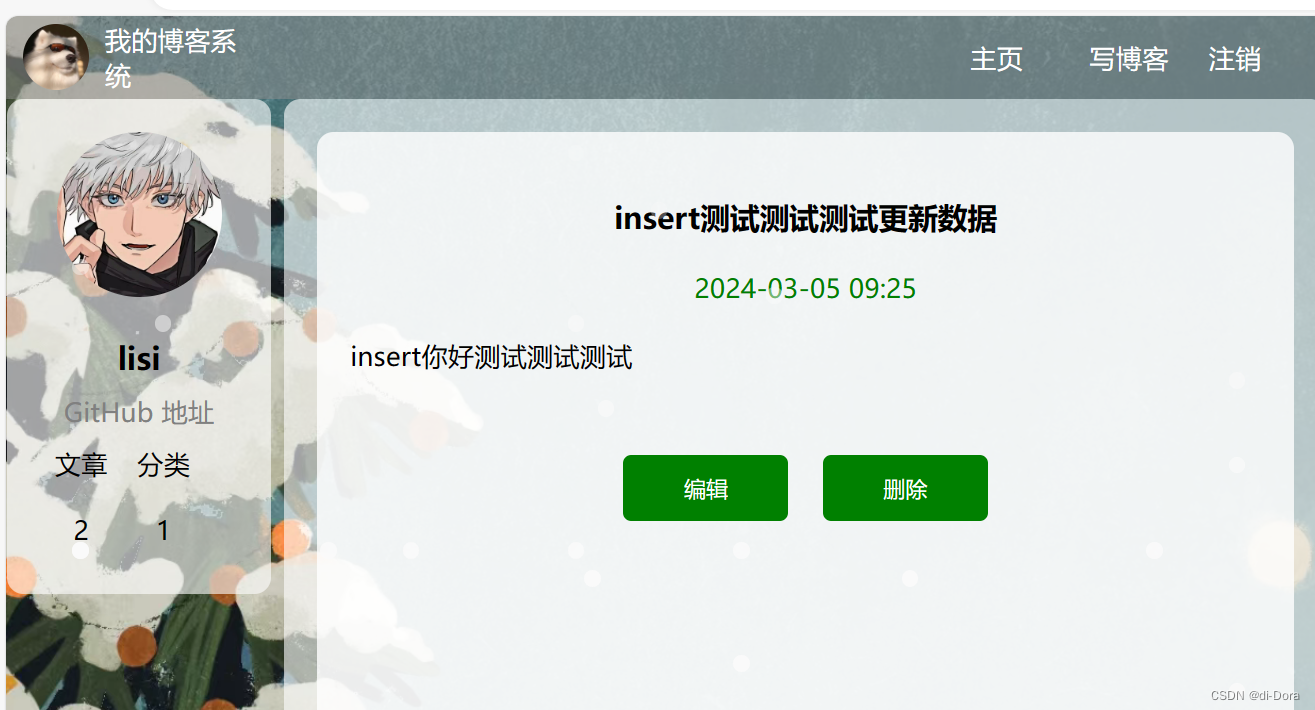
实现用户退出
前端直接清除掉token即可。
实现客户端代码
<注销>链接已经提前添加了onclick事件。

在common.js中完善logout方法:
$(document).ajaxSend(function(e, xhr, opt) {
    var user_token = localStorage.getItem("user_token");
    xhr.setRequestHeader("user_token_header", user_token);
});
function getUserInfo(url) {
    $.ajax({
        type: "get",
        url: url,
        success: function (result) {
            if (result.code == 200 && result.data != null) {
                $(".left .card h3").text(result.data.userName);
                $(".left .card a").attr("href", result.data.githubUrl);
            }
        }
    });
}

function logout(){
    localStorage.removeItem("user_token");
    location.href = "blog_login.html";
}
一定要确保所有项目都引用了js/common.js。
测试代码,成功退出。
如果没反应啥的,可能是没有清除缓存,可以F12看看有没有更新代码:
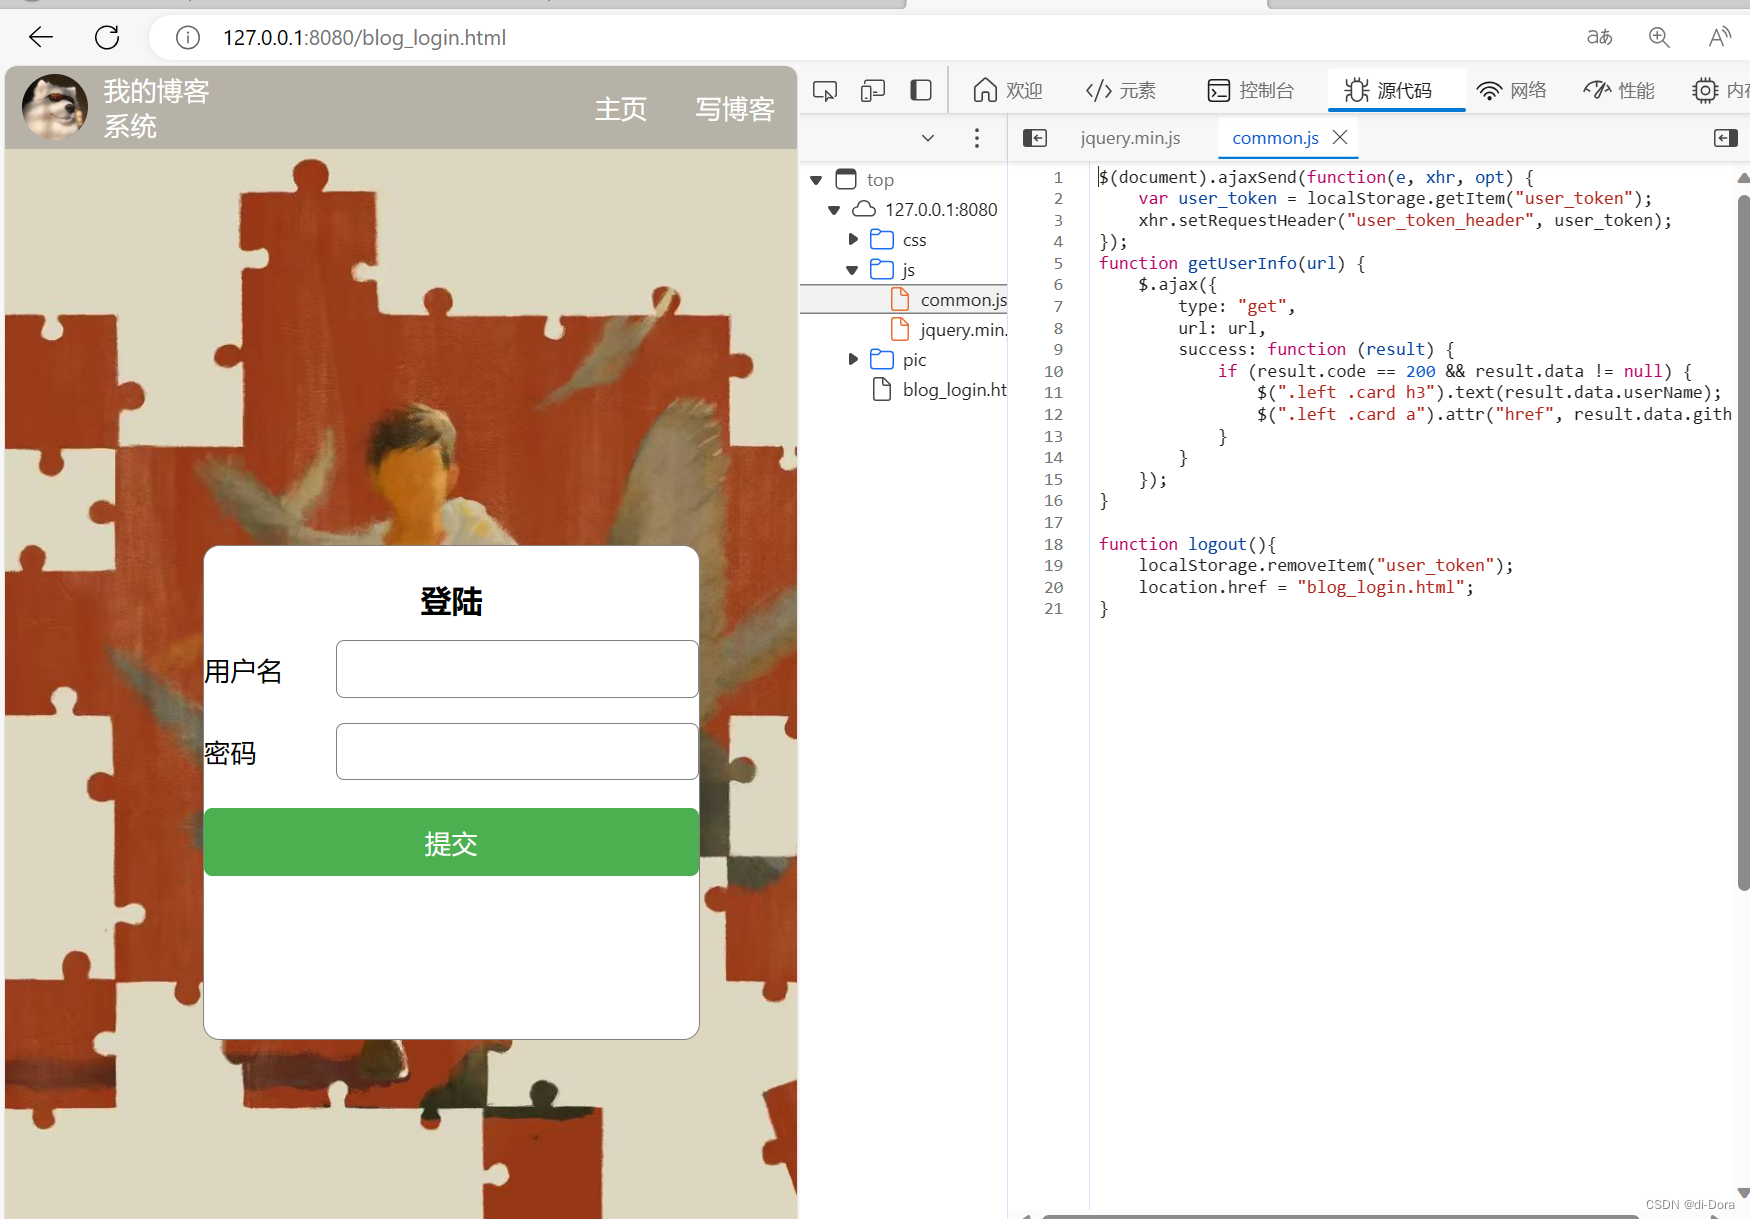
实现发布博客
约定前后端交互接口
{
"接口": {
"路径": "/blog/add",
"方法": "POST",
"请求参数": {
"title": "标题",
"content": "正文"
},
"响应": {
"code": 200,
"msg": "操作结果说明",
"data": true
},
"说明": "该接口用于向博客系统添加新的博客内容。",
"备注": "data":("true": "添加成功","false": "添加失败")
实现服务器代码
修改 BlogController,新增 add 方法:
package com.example.newblogsystem.controller;

import com.example.newblogsystem.constants.Constant;
import com.example.newblogsystem.model.BlogInfo;
import com.example.newblogsystem.service.BlogService;
import com.example.newblogsystem.utils.JwtUtis;
import lombok.extern.slf4j.Slf4j;
import org.springframework.beans.factory.annotation.Autowired;
import org.springframework.util.StringUtils;
import org.springframework.web.bind.annotation.RequestMapping;
import org.springframework.web.bind.annotation.RestController;

import javax.servlet.http.HttpServletRequest;
import java.util.List;
@Slf4j

@RequestMapping("/blog")
@RestController
public class BlogController {
    @Autowired
    private BlogService blogService;

    @RequestMapping("/getList")
    public List<BlogInfo> queryBlogList(){
        return blogService.queryBlogList();
    }
    @RequestMapping("/getBlogDetail")
    public BlogInfo queryBlogDetail(Integer blogId){
        return blogService.queryBlogDetail(blogId);
    }
    @RequestMapping("/add")
    public Boolean publishBlog(String title, String content, HttpServletRequest request){
        log.info("publishBlog, 接收参数: title:{},content:{}",title, content);
        //1. 参数校验
        //2. 获取当前登录用户
        //3. 博客发布
        if (!StringUtils.hasLength(title) || !StringUtils.hasLength(content)){
            log.error("title or content 为空");
            return false;
        }
        String user_token = request.getHeader(Constant.USER_TOKEN_HEADER);
        Integer userId = JwtUtis.getUserIdFromToken(user_token);
        if (userId==null || userId<=0){
            log.error("用户未登录");
            return false;
        }
        BlogInfo blogInfo = new BlogInfo(title, content, userId);
        Integer result = blogService.publishBlog(blogInfo);
        if (result<1){
            log.error("博客发布失败");
            return false;
        }
        return true;

    }
}
package com.example.newblogsystem.model;

import com.example.newblogsystem.utils.DateUtils;
import lombok.Data;

import java.util.Date;

@Data
public class BlogInfo {

    private Integer id;
    private String title;
    private String content;
    private Integer userId;
    private Integer deleteFlag;
    private Date createTime;
    private Date updateTime;

    public BlogInfo() {
    }

    public BlogInfo(String title, String content, Integer userId) {
        this.title = title;
        this.content = content;
        this.userId = userId;
    }

    public String getCreateTime() {
        return DateUtils.formatDate(createTime);
    }
}
BlogService 添加对应的处理逻辑:
package com.example.newblogsystem.service;

import com.example.newblogsystem.mapper.BlogMapper;
import com.example.newblogsystem.model.BlogInfo;
import org.springframework.beans.factory.annotation.Autowired;
import org.springframework.stereotype.Service;

import java.util.List;

@Service
public class BlogService {
    @Autowired
    private BlogMapper blogMapper;

    public List<BlogInfo> queryBlogList() {
        return blogMapper.selectAllBlog();
    }

    public BlogInfo queryBlogDetail(Integer blogId) {
        return blogMapper.selectById(blogId);
    }
    public Integer publishBlog(BlogInfo blogInfo) {
        return blogMapper.insertBlog(blogInfo);
    }

}
editor.md 简单介绍
Editor.md 是一个开源的页面 Markdown 编辑器组件,它提供了丰富的功能,可以方便地在网页上编辑和预览 Markdown 格式的文档。它支持实时预览、代码高亮、自定义样式和主题、多语言支持等功能,使得在网页上编辑 Markdown 文档变得更加便捷和直观。
官网参考:Editor.md - 开源在线 Markdown 编辑器 (ipandao.com)
代码实现:
Editor.md - 开源在线 Markdown 编辑器 (pandao.github.io)
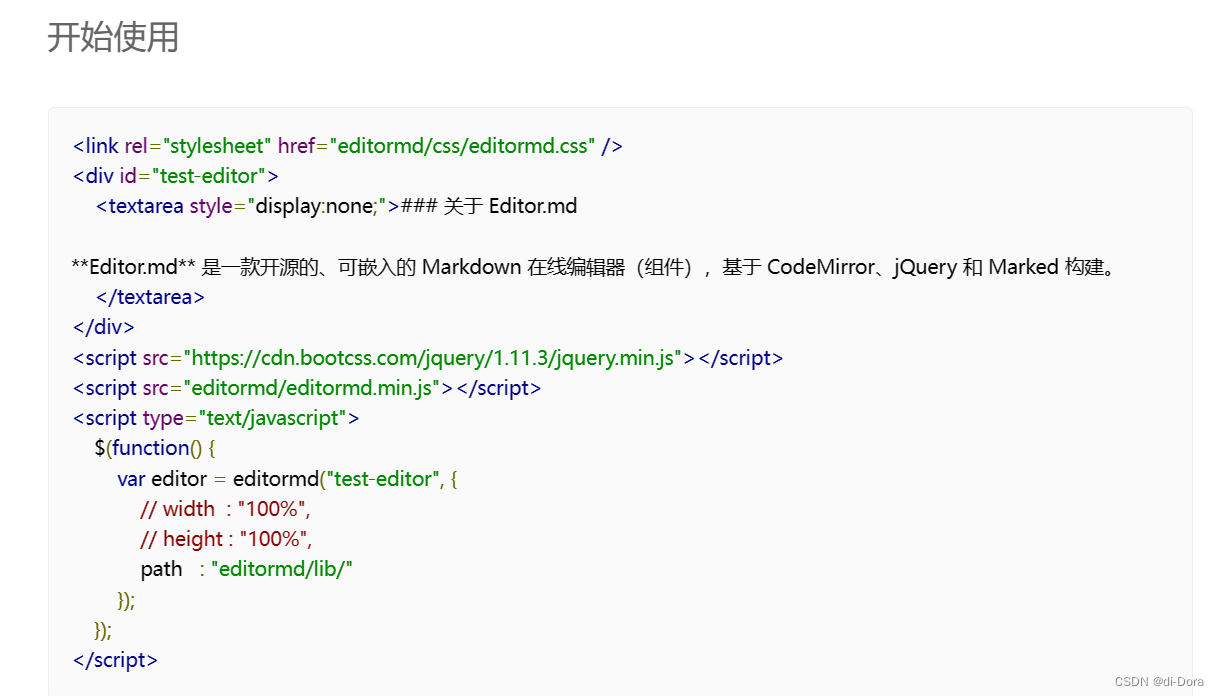
相关文件从官网上下载即可:

代码部分我们其实就是照着它的写的:
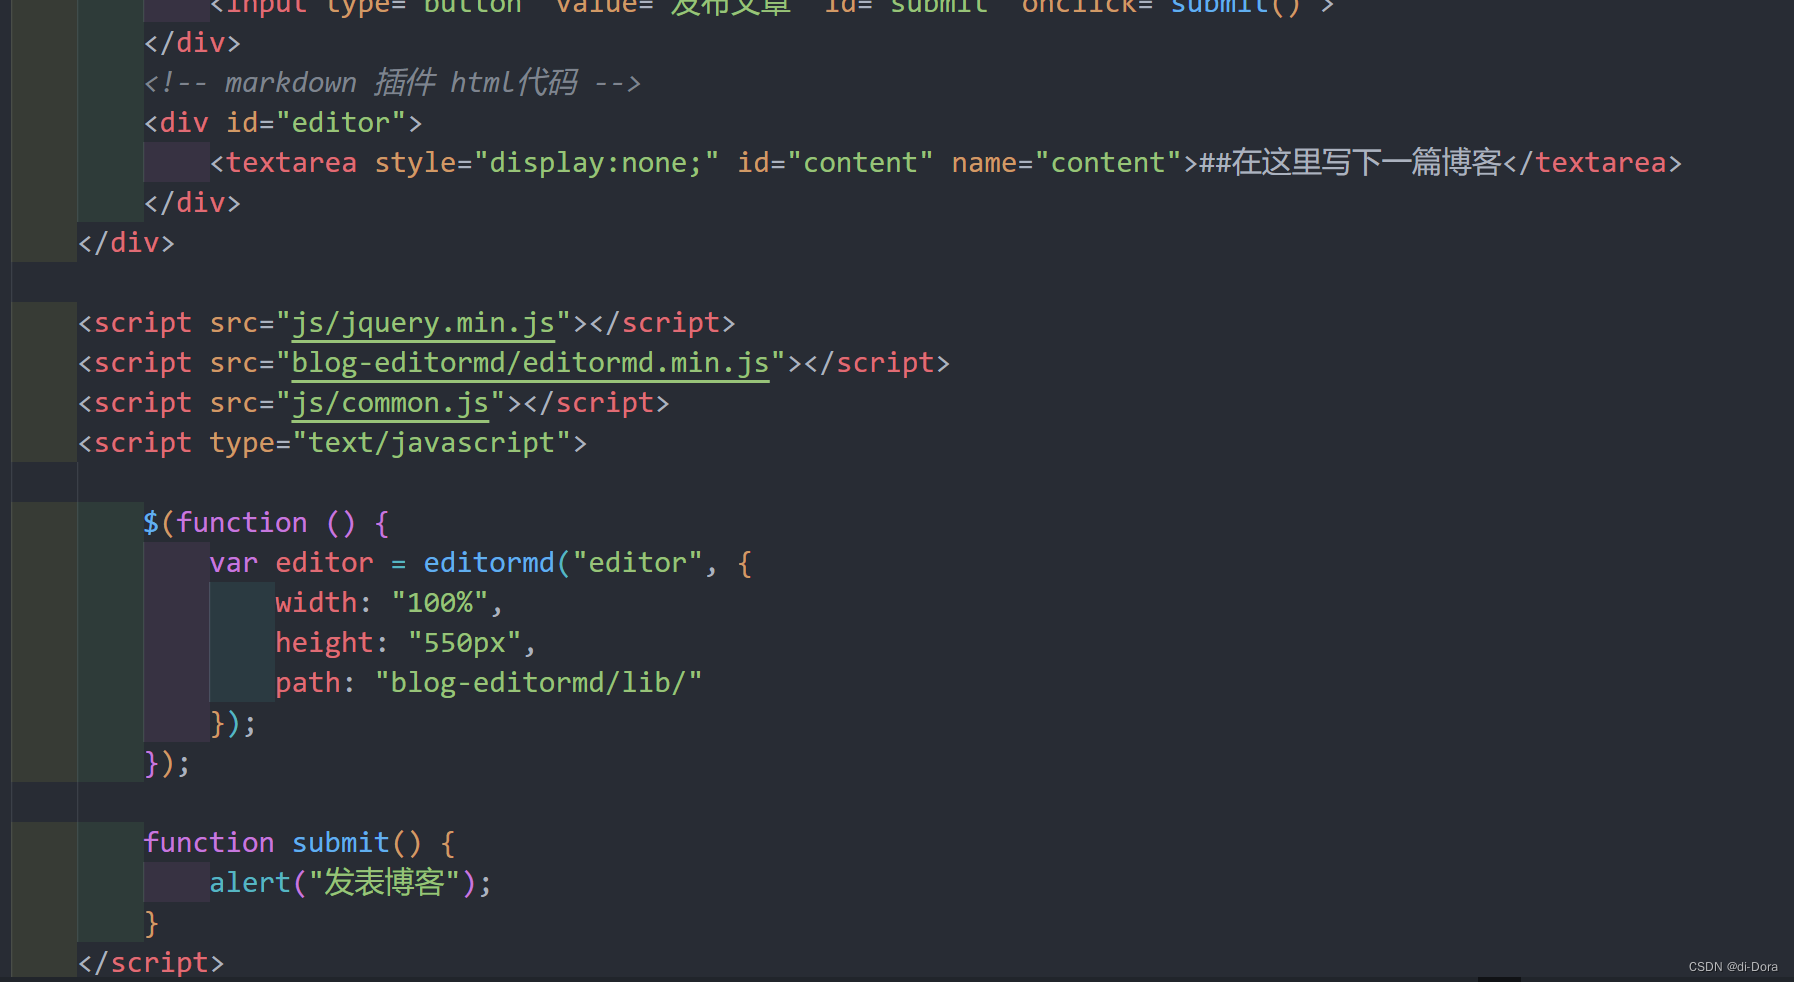
打开官网随便翻翻:
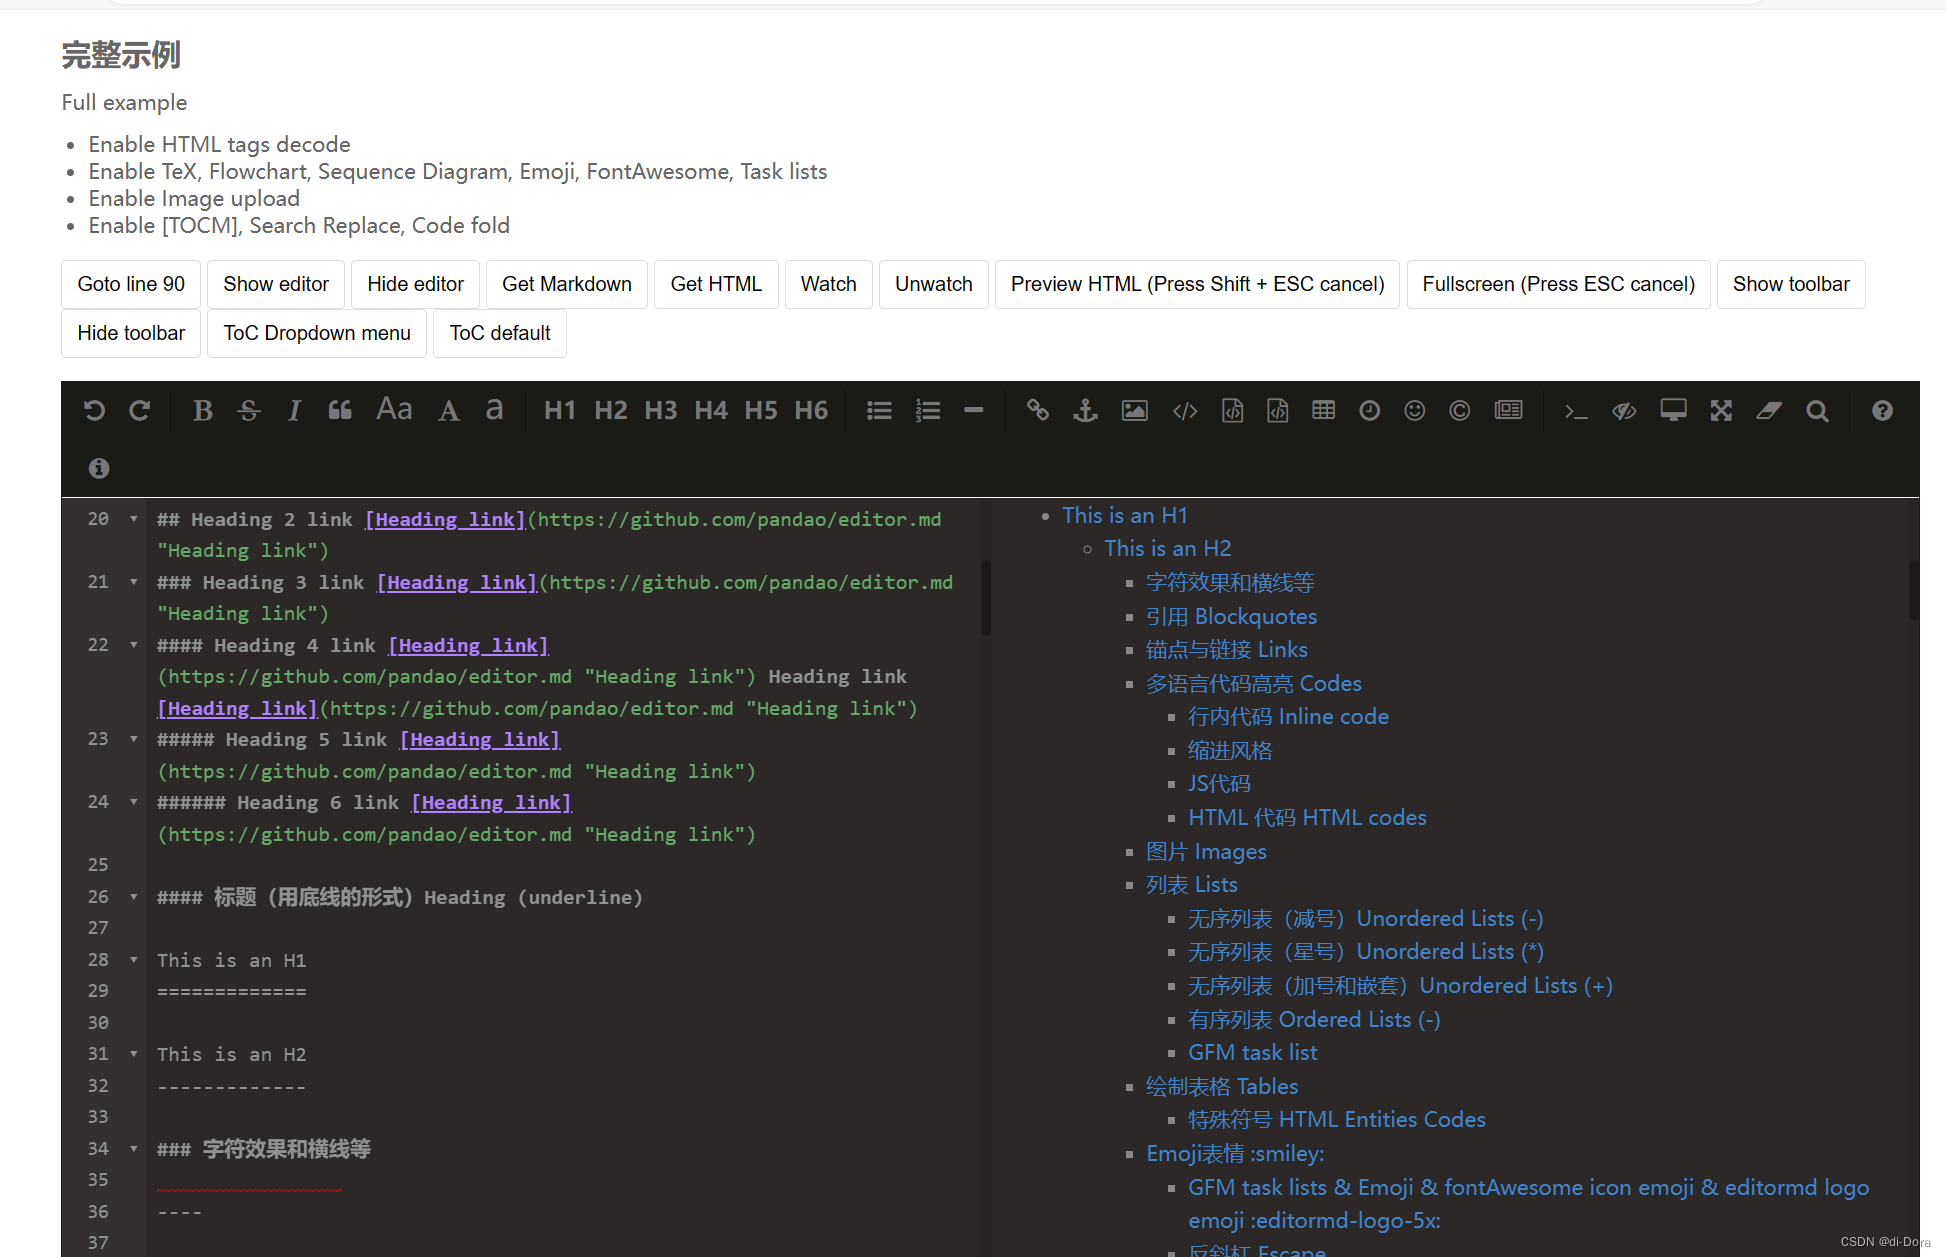
查看源代码:

就可以进行借鉴学习了。
实现客户端代码
修改 blog_edit.html,完善submit方法:
<!DOCTYPE html>
<html lang="en">

<head>
    <meta charset="UTF-8">
    <meta http-equiv="X-UA-Compatible" content="IE=edge">
    <meta name="viewport" content="width=device-width, initial-scale=1.0">
    <title>博客编辑页</title>

    <link rel="stylesheet" href="css/common3.css">
    <link rel="stylesheet" href="css/edit.css">
    <link rel="stylesheet" href="blog-editormd/css/editormd.css" />

</head>

<body>
    <div class="nav">
        <img src="pic/酷狗.jpg" alt="">
        <span class="blog-title">我的博客系统</span>
        <div class="space"></div>
        <a class="nav-span" href="blog_list.html">主页</a>
        <a class="nav-span" href="blog_edit.html">写博客</a>
        <a class="nav-span" href="#" onclick="logout()">注销</a>
    </div>
    <div class="content-edit">
        <div class="push">
            <input type="text" name="" id="title">
            <input type="button" value="发布文章" id="submit" onclick="submit()">
        </div>
        <!-- markdown 插件 html代码 -->
        <div id="editor">
            <textarea style="display:none;" id="content" name="content">##在这里写下一篇博客</textarea>
        </div>
    </div>

    <script src="js/jquery.min.js"></script>
    <script src="blog-editormd/editormd.min.js"></script>
    <script src="js/common.js"></script>
    <script type="text/javascript">

        $(function () {
            var editor = editormd("editor", {
                width: "100%",
                height: "550px",
                path: "blog-editormd/lib/"
            });
        });

        function submit() {
            $.ajax({
                type:"post",
                url: "/blog/add",
                data:{
                    title:$("#title").val(),
                    content:$("#content").val()
                },
                success:function(result){
                    if(result.code==200 && result.data==true){
                        location.href = "blog_list.html";
                    }else {
                    console.error("Error: Failed to add blog.");
                    $("#error_message").text("发布博客失败,请稍后再试……");
                }
                },
                error: function (xhr, status, error) {
                console.error("Error:", error);
                $("#error_message").text("An error occurred while processing your request. Please try again later.");
            }
            });
        }

    </script>
</body>

</html>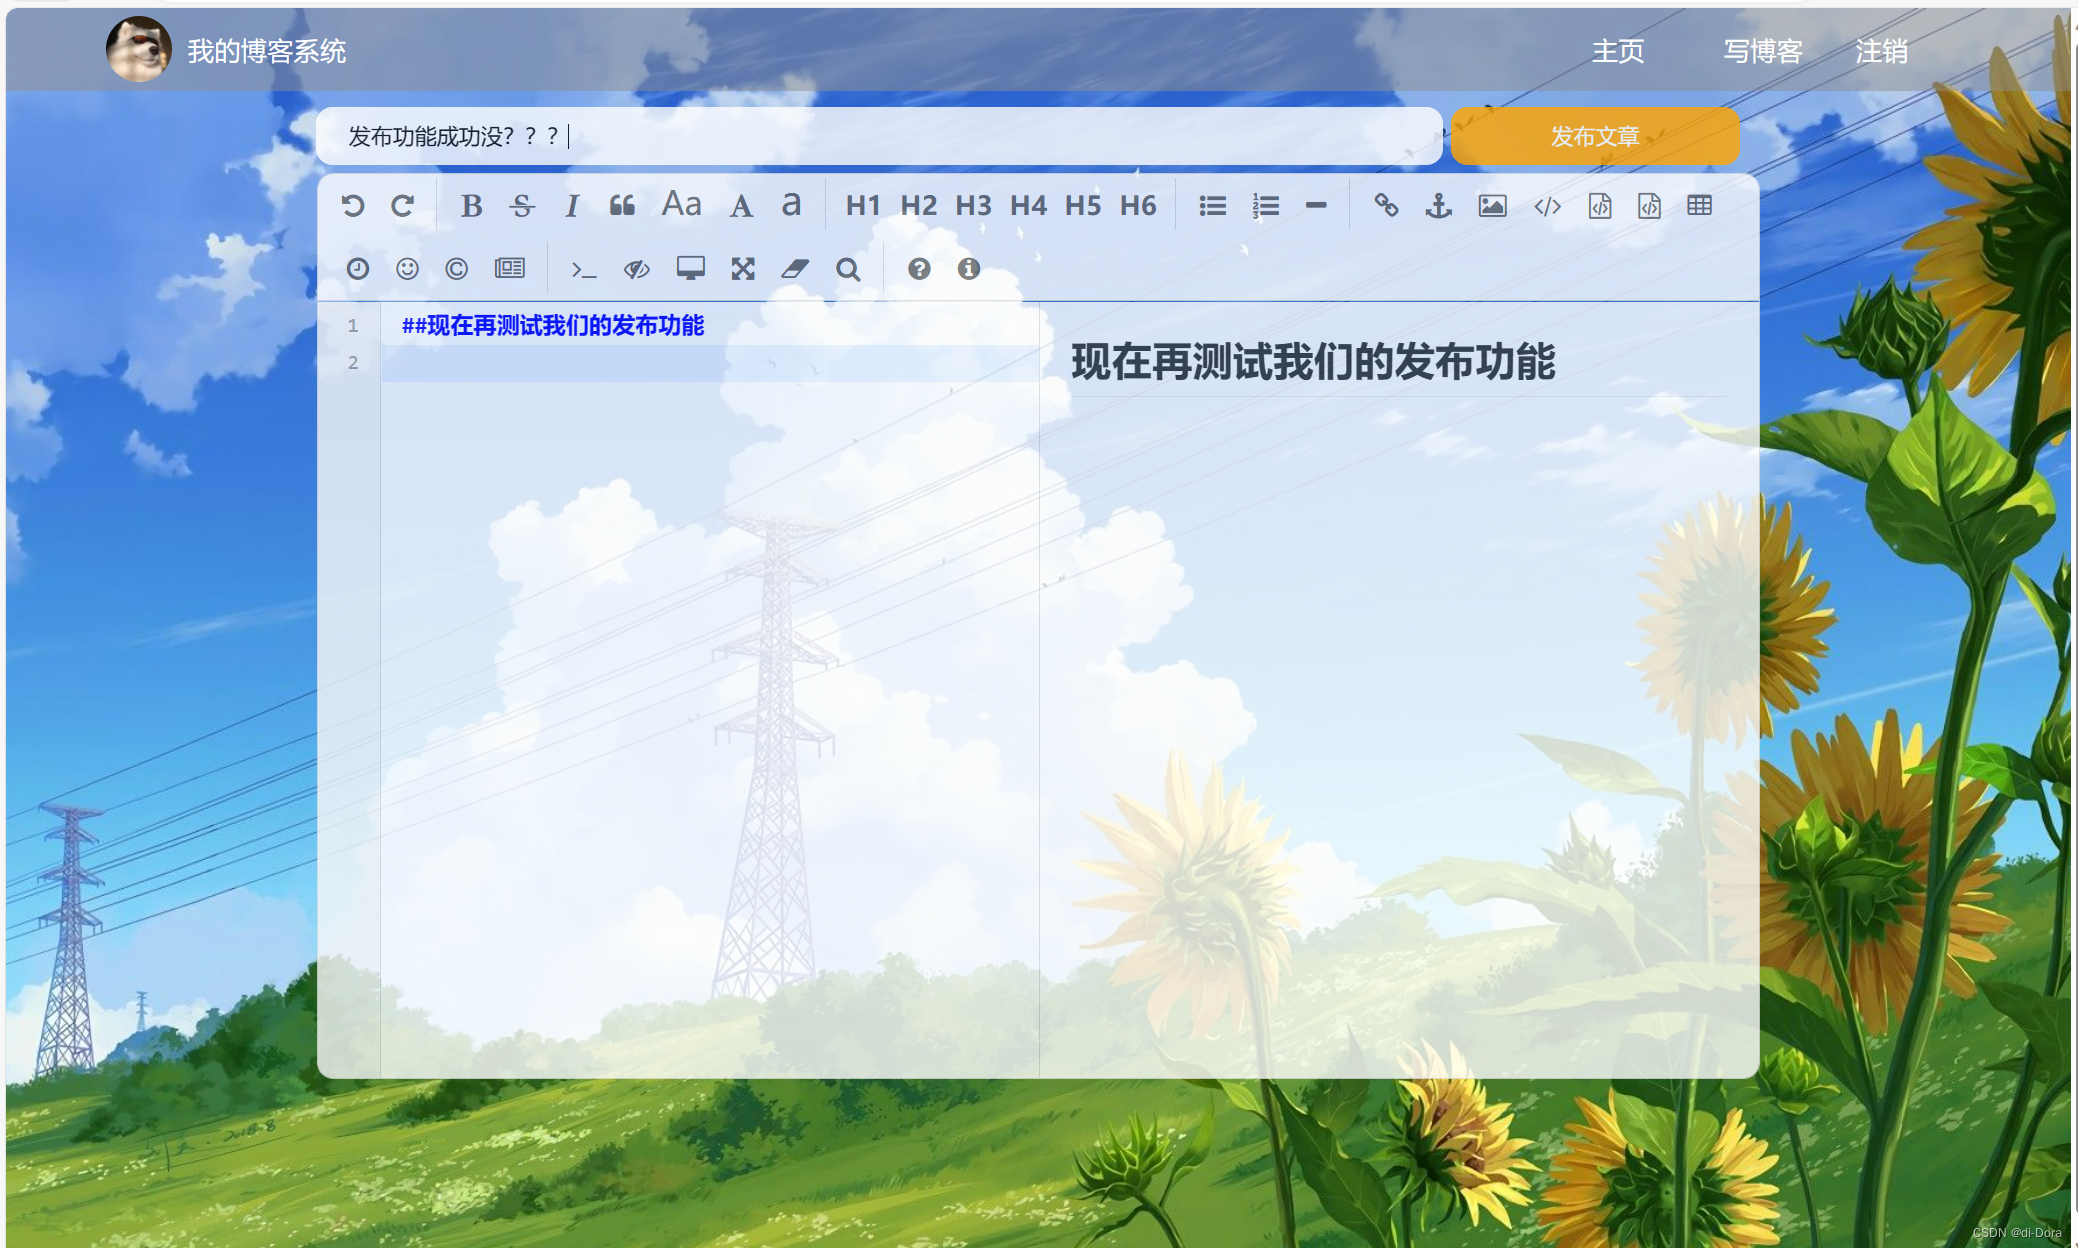
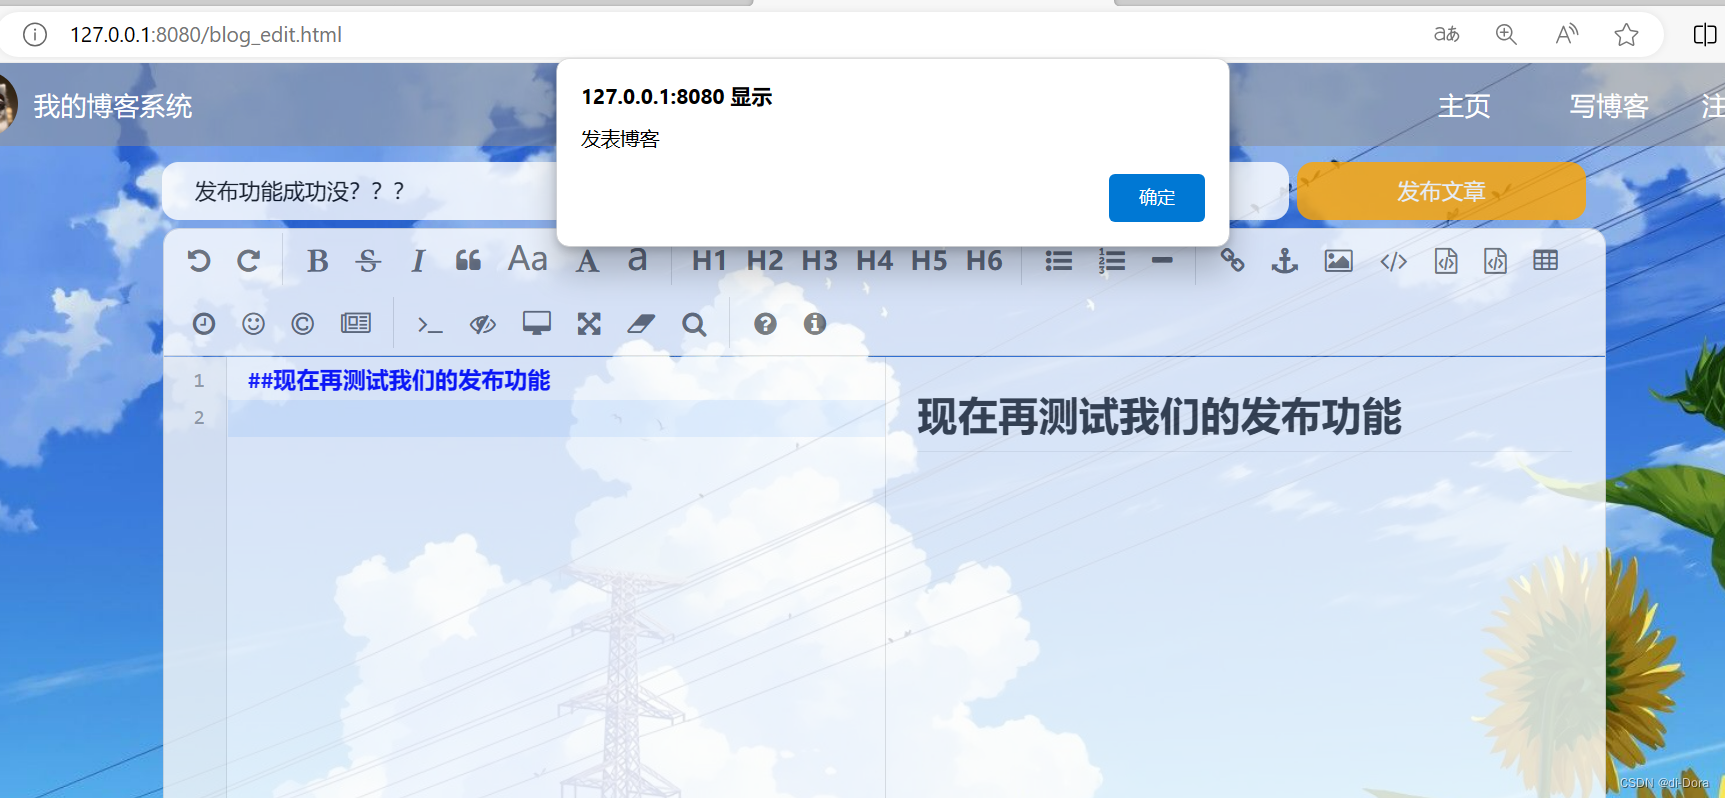
怎么弹了个框?没成功吗?
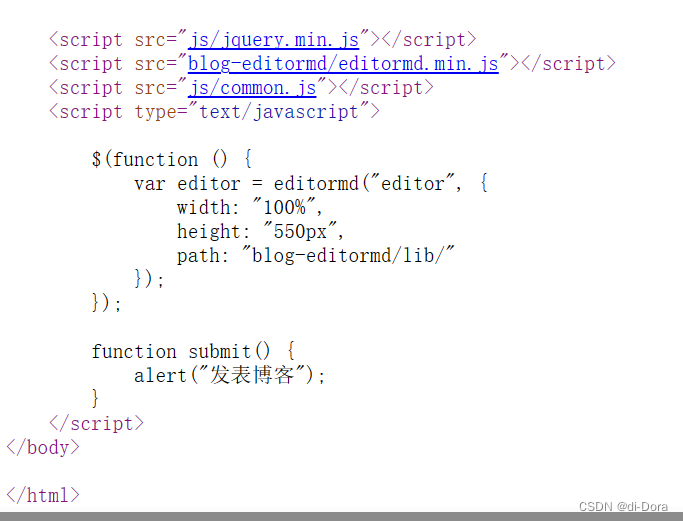
查看页面源代码可知,缓存没刷新。
刷新:
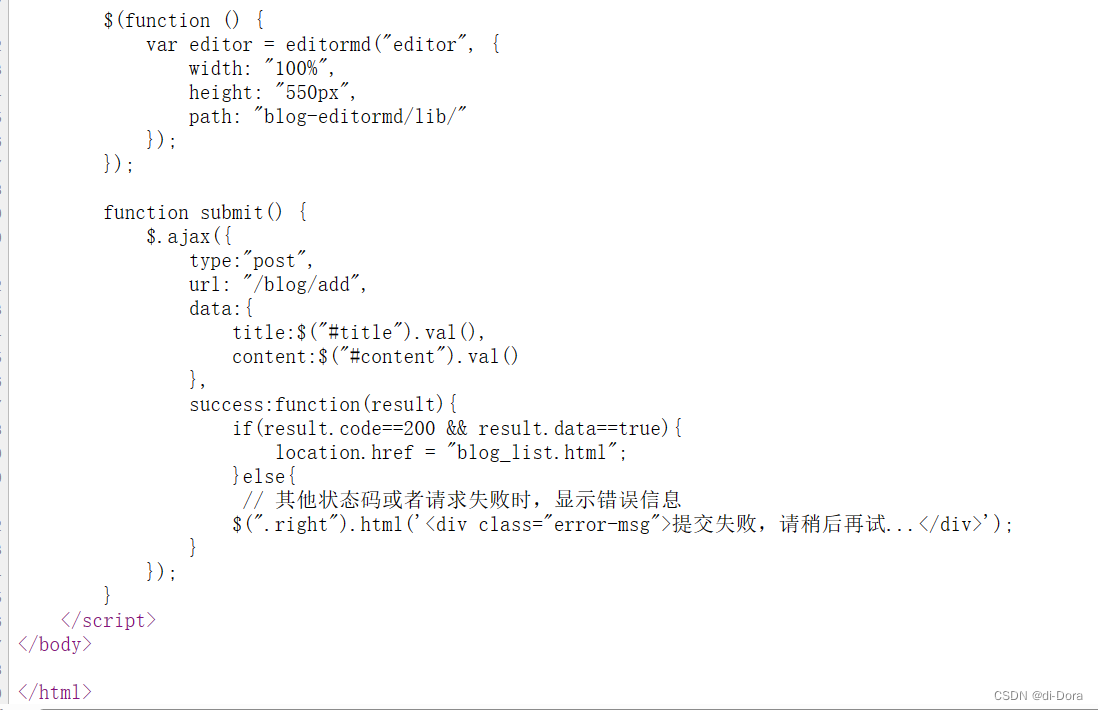
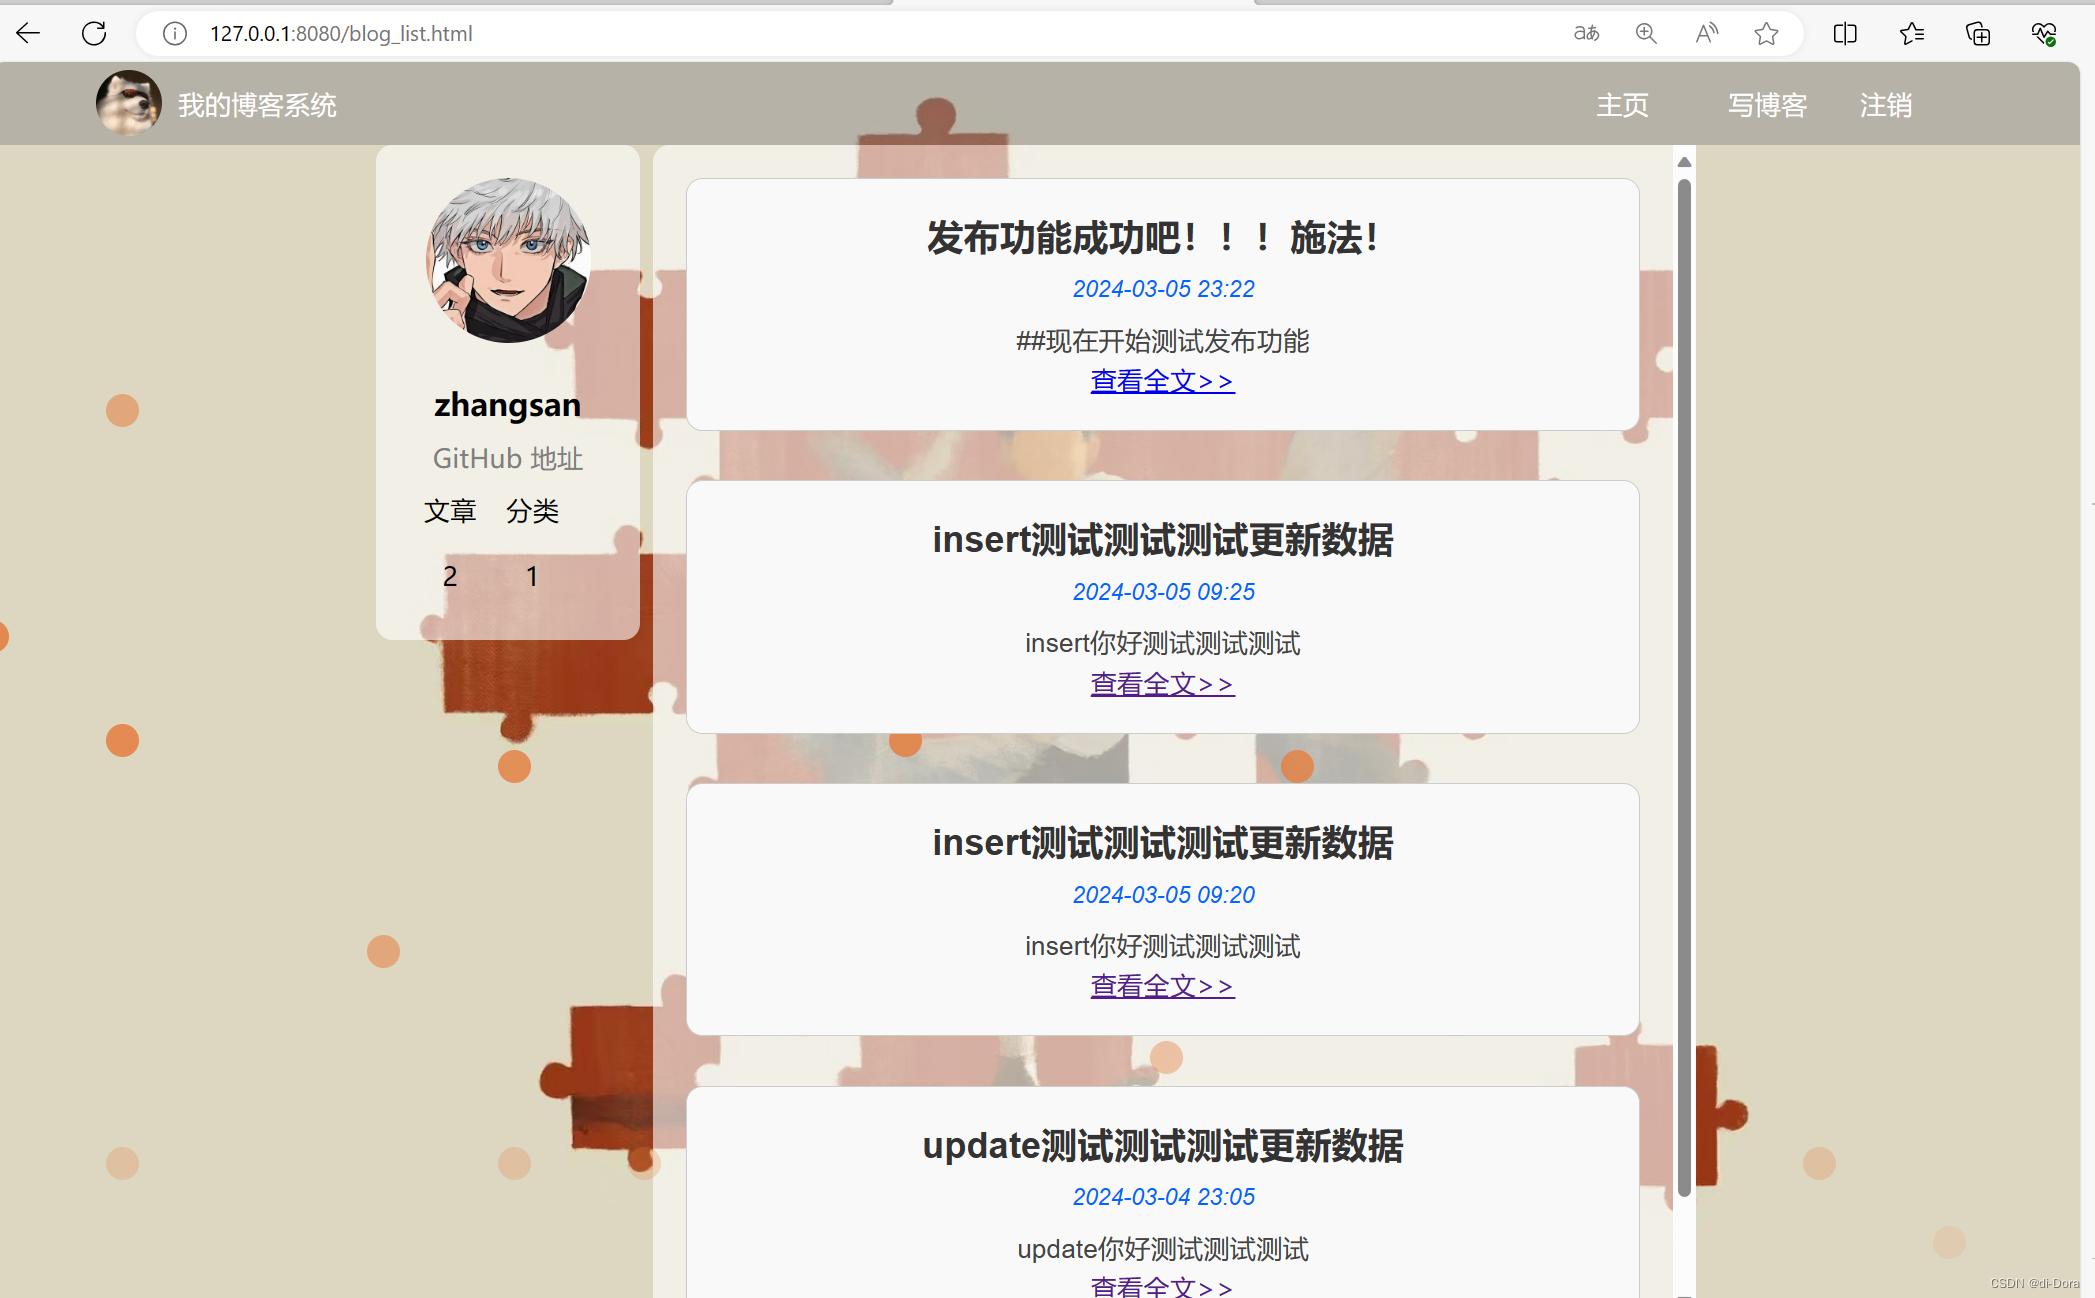
但是现在又有一个问题,仔细观察刚刚发布的内容,前面有一些##这样我们不希望展示给用户的东西……

所以我们需要把MarkDown的代码改成我们页面上的一个展示。


我们博客详情页的代码内容是这样的:
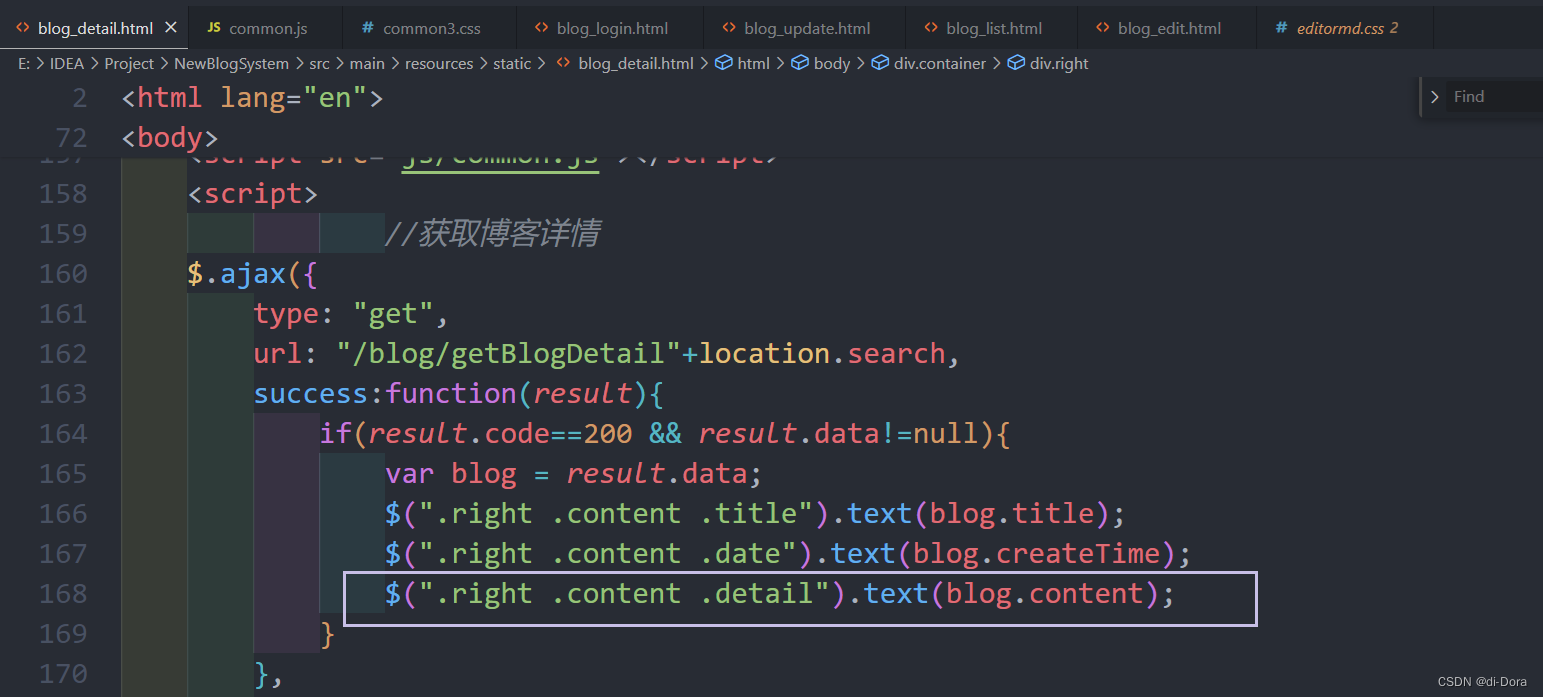
现在复制源代码:

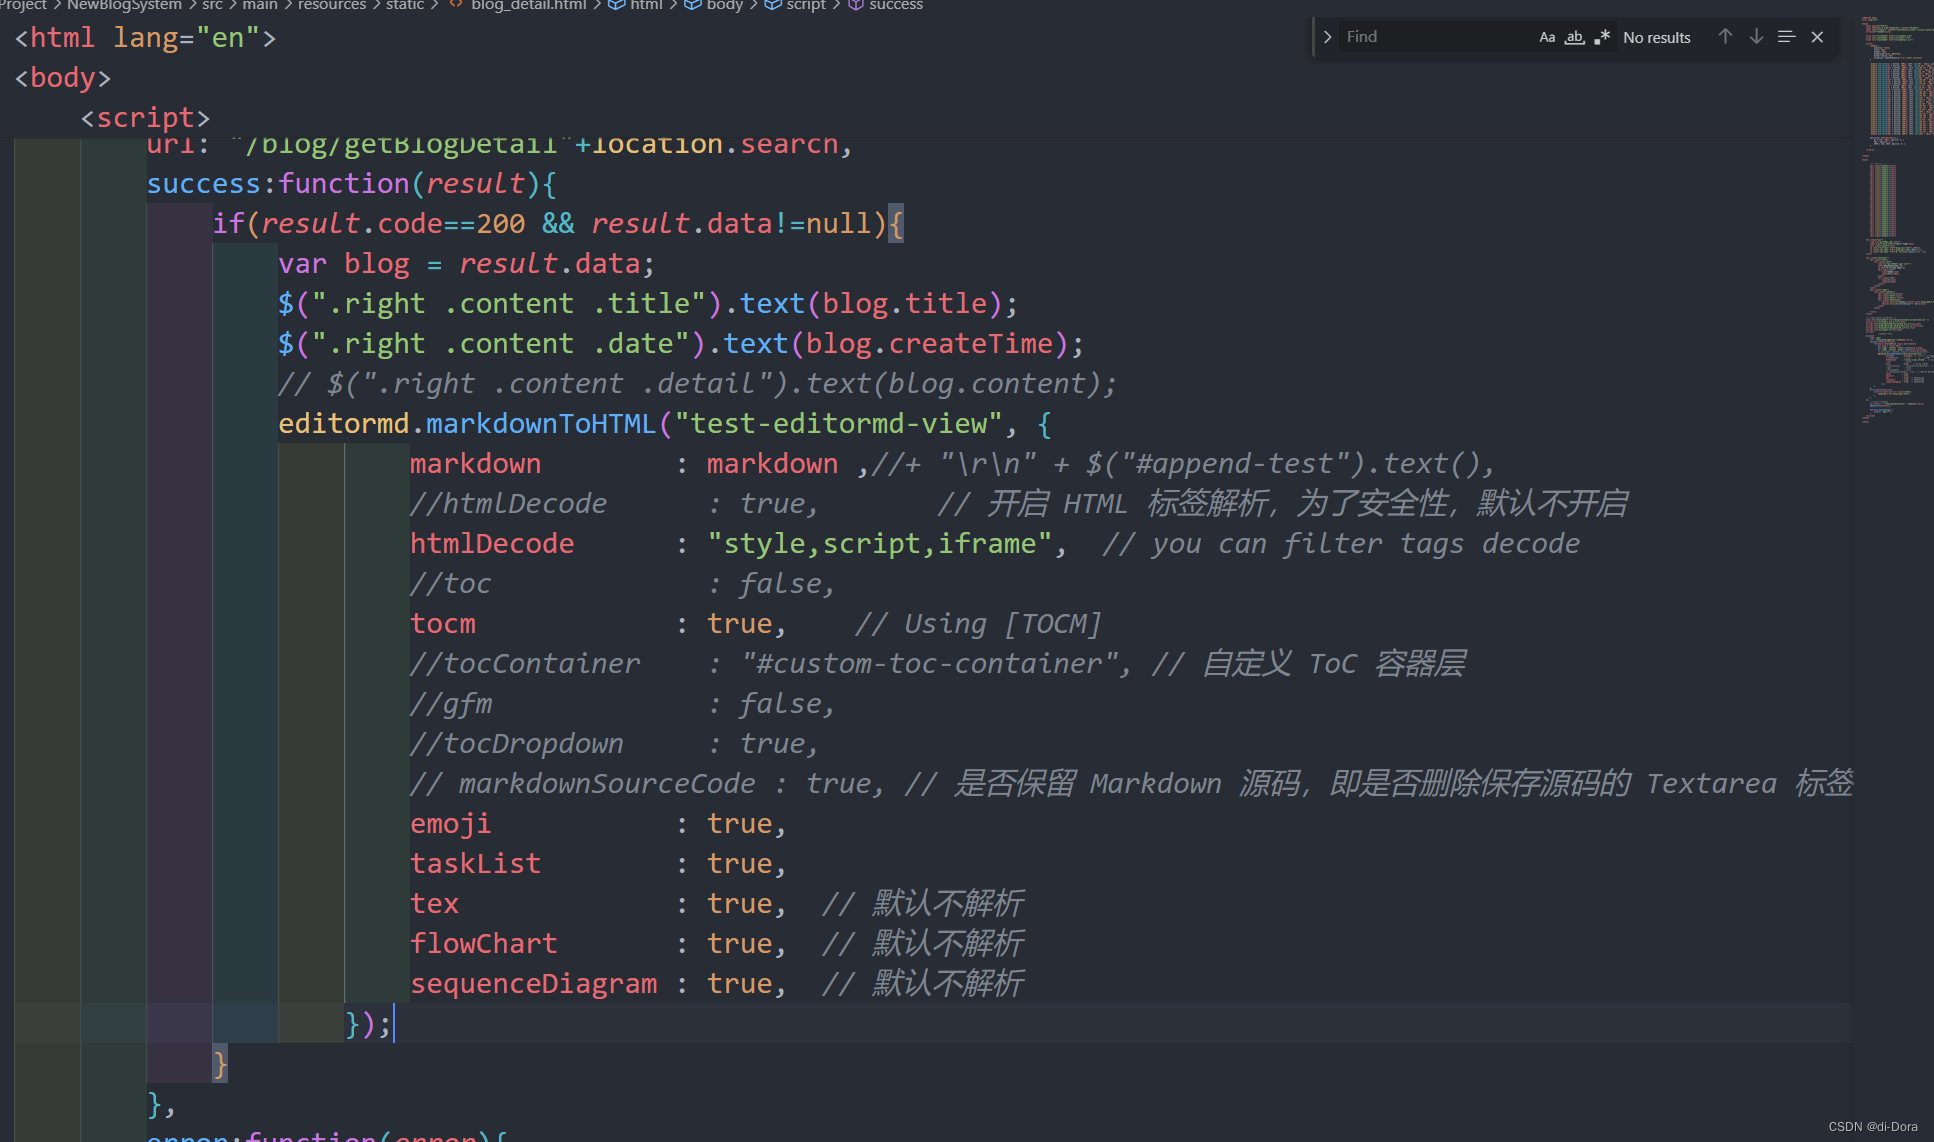
再稍微根据自己的需求进行修改:
<!DOCTYPE html>
<html lang="en">

<head>
    <meta charset="UTF-8">
    <meta http-equiv="X-UA-Compatible" content="IE=edge">
    <meta name="viewport" content="width=device-width, initial-scale=1.0">
    <title>博客详情页</title>

    <link rel="stylesheet" href="css/common2.css">
    <link rel="stylesheet" href="css/detail.css">
    <link rel="stylesheet" href="css/mydetail.css">

</head>

<body>

    <div class="nav">
        <img src="pic/酷狗.jpg" alt="">
        <span class="blog-title">我的博客系统</span>
        <div class="space"></div>
        <a class="nav-span" href="blog_list.html">主页</a>
        <a class="nav-span" href="blog_edit.html">写博客</a>
        <a class="nav-span" href="#" onclick="logout()">注销</a>
    </div>

    <div class="container">
        <div class="left">
            <div class="card">
                <img src="pic/五条悟.jpg" alt="">
                <h3>神圣的管理员SAMA</h3>
                <a href="#">GitHub 地址</a>
                <div class="row">
                    <span>文章</span>
                    <span>分类</span>
                </div>
                <div class="row">
                    <span>2</span>
                    <span>1</span>
                </div>
            </div>
        </div>
        <div class="right">
            <div class="content">
                <div class="title"></div>
                <div class="date"></div>
                <div class="detail" id="detail" style="background-color: transparent;"></div>
                <div class="operating">
                    <button onclick="window.location.href='blog_update.html'">编辑</button>
                    <button onclick="deleteBlog()">删除</button>
                </div>
            </div>

        </div>
    </div>

    <!-- 引入 editor.md 的依赖 -->
    <link rel="stylesheet" href="blog-editormd/css/editormd.css" />
    <script src="js/jquery.min.js"></script>
    <script src="blog-editormd/lib/marked.min.js"></script>
    <script src="blog-editormd/lib/prettify.min.js"></script>
    <script src="blog-editormd/editormd.js"></script>
    <script src="js/common.js"></script>
    <script>
                //获取博客详情
    $.ajax({
        type: "get",
        url: "/blog/getBlogDetail"+location.search,
        success:function(result){
            if(result.code==200 && result.data!=null){
                var blog = result.data;
                $(".right .content .title").text(blog.title);
                $(".right .content .date").text(blog.createTime);
                // $(".right .content .detail").text(blog.content);
                editormd.markdownToHTML("detail", {
                        markdown        : blog.content ,//+ "\r\n" + $("#append-test").text(),

                        htmlDecode      : "style,script,iframe",  // you can filter tags decode

                        tocm            : true,    // Using [TOCM]

                        emoji           : true,
                        taskList        : true,
                        tex             : true,  // 默认不解析
                        flowChart       : true,  // 默认不解析
                        sequenceDiagram : true,  // 默认不解析
                    });
            }
        },
        error:function(error){
            if(error!=null && error.status==401){
                location.href="blog_login.html";
            }
        }
    });
        //显示博客作者信息
        var userUrl = "/user/getAuthorInfo" + location.search;
        getUserInfo(userUrl);

        function deleteBlog() {
            alert("删除博客");
        }
    </script>
</body>

</html> 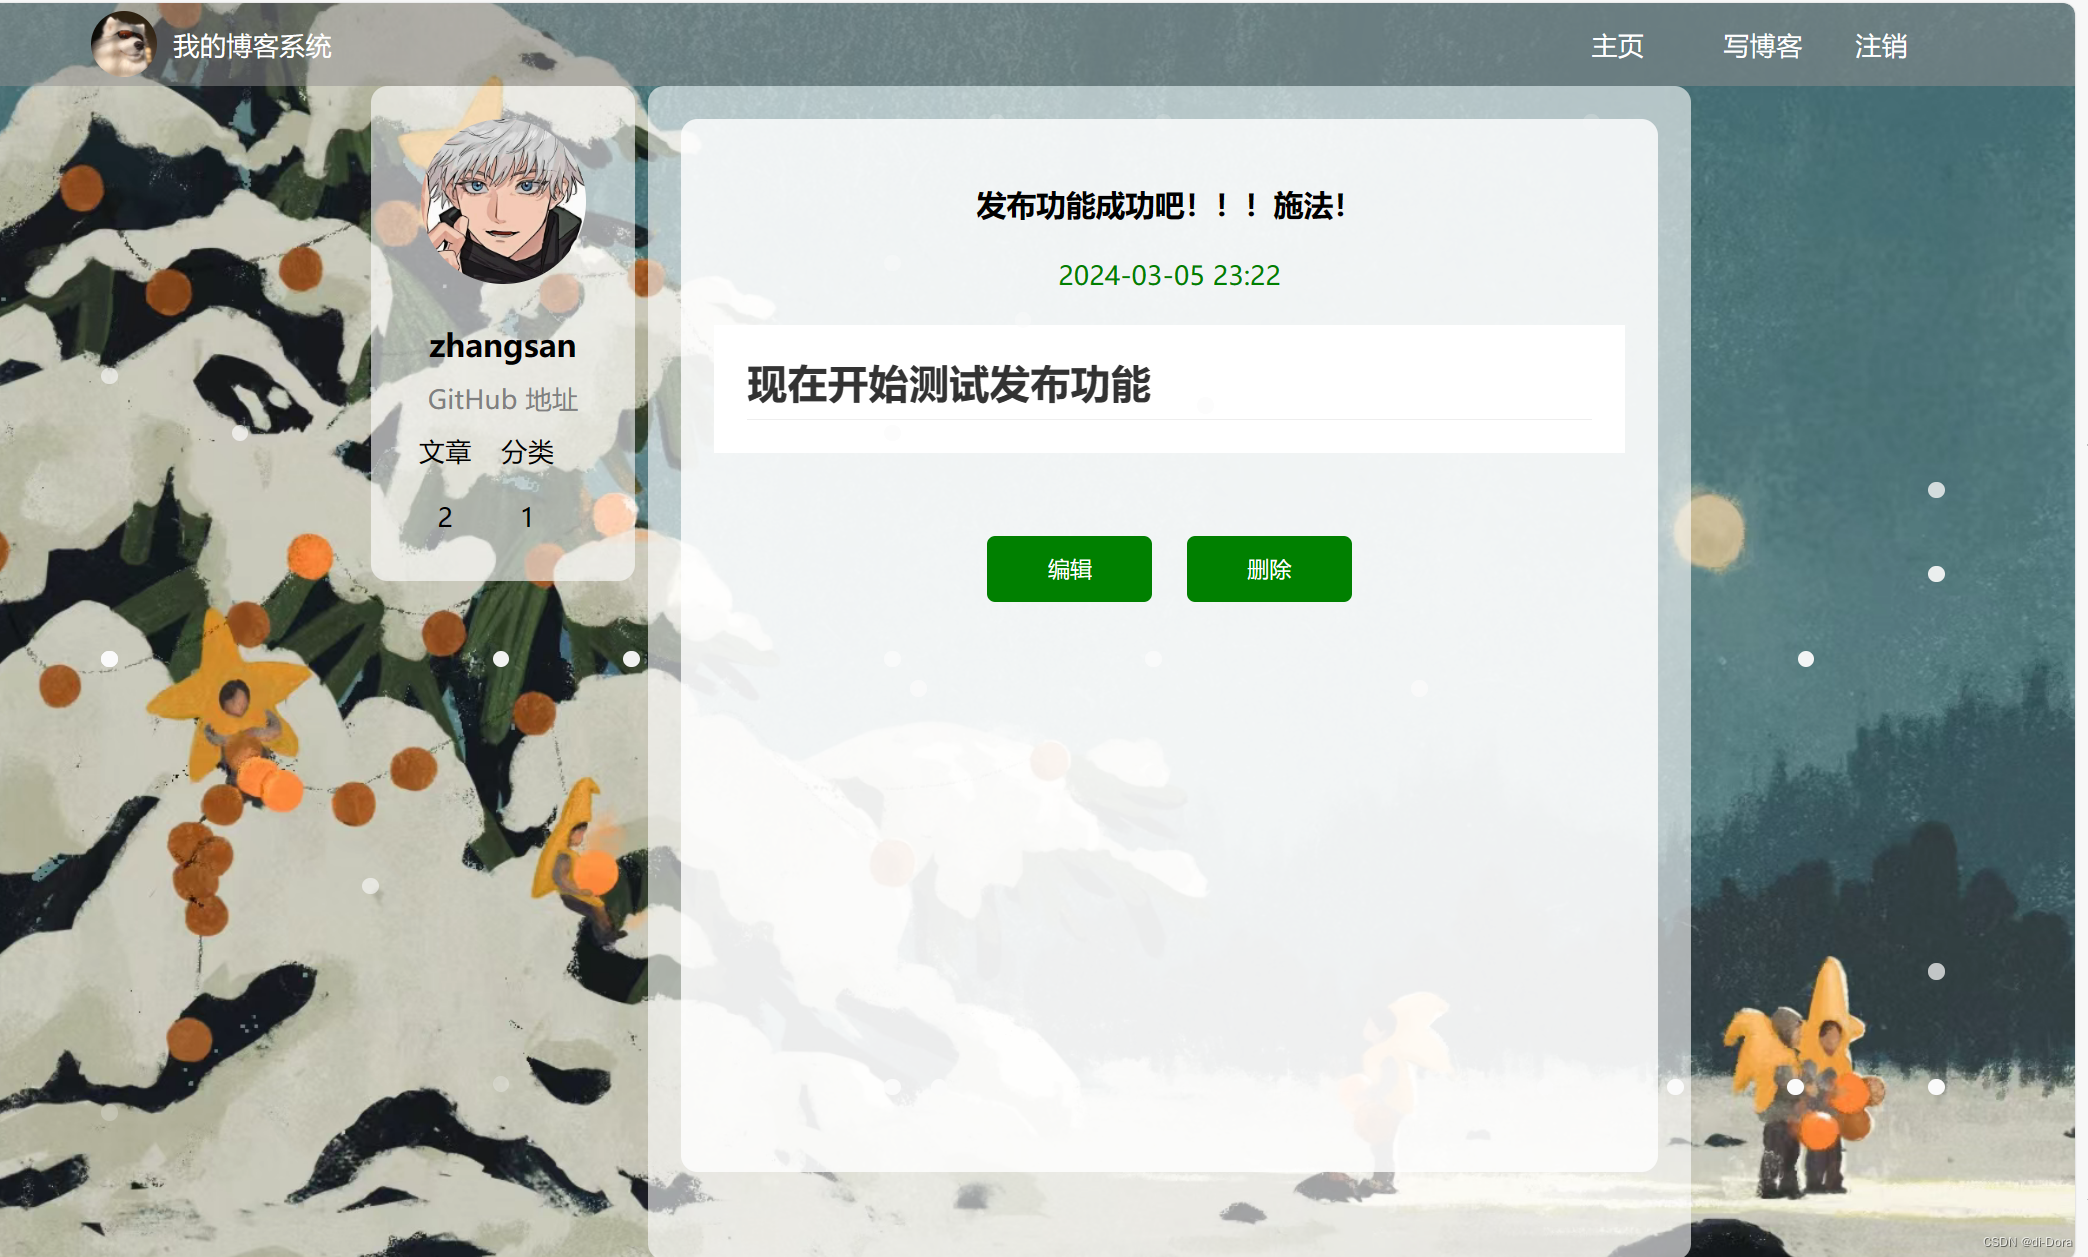
感觉又多了一个白色的框,可以修改为背景色:
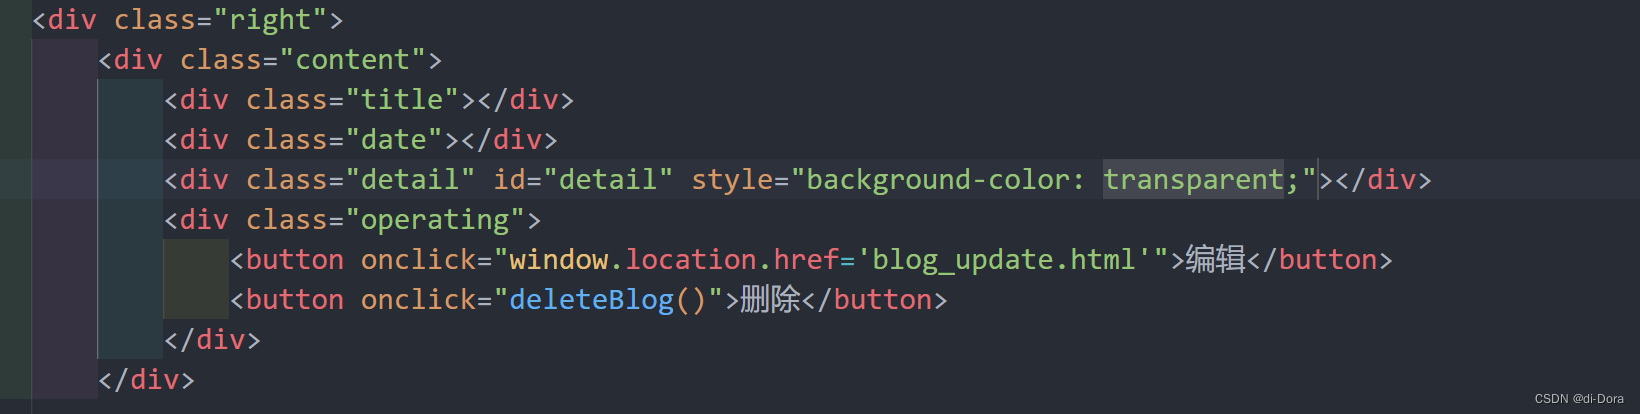
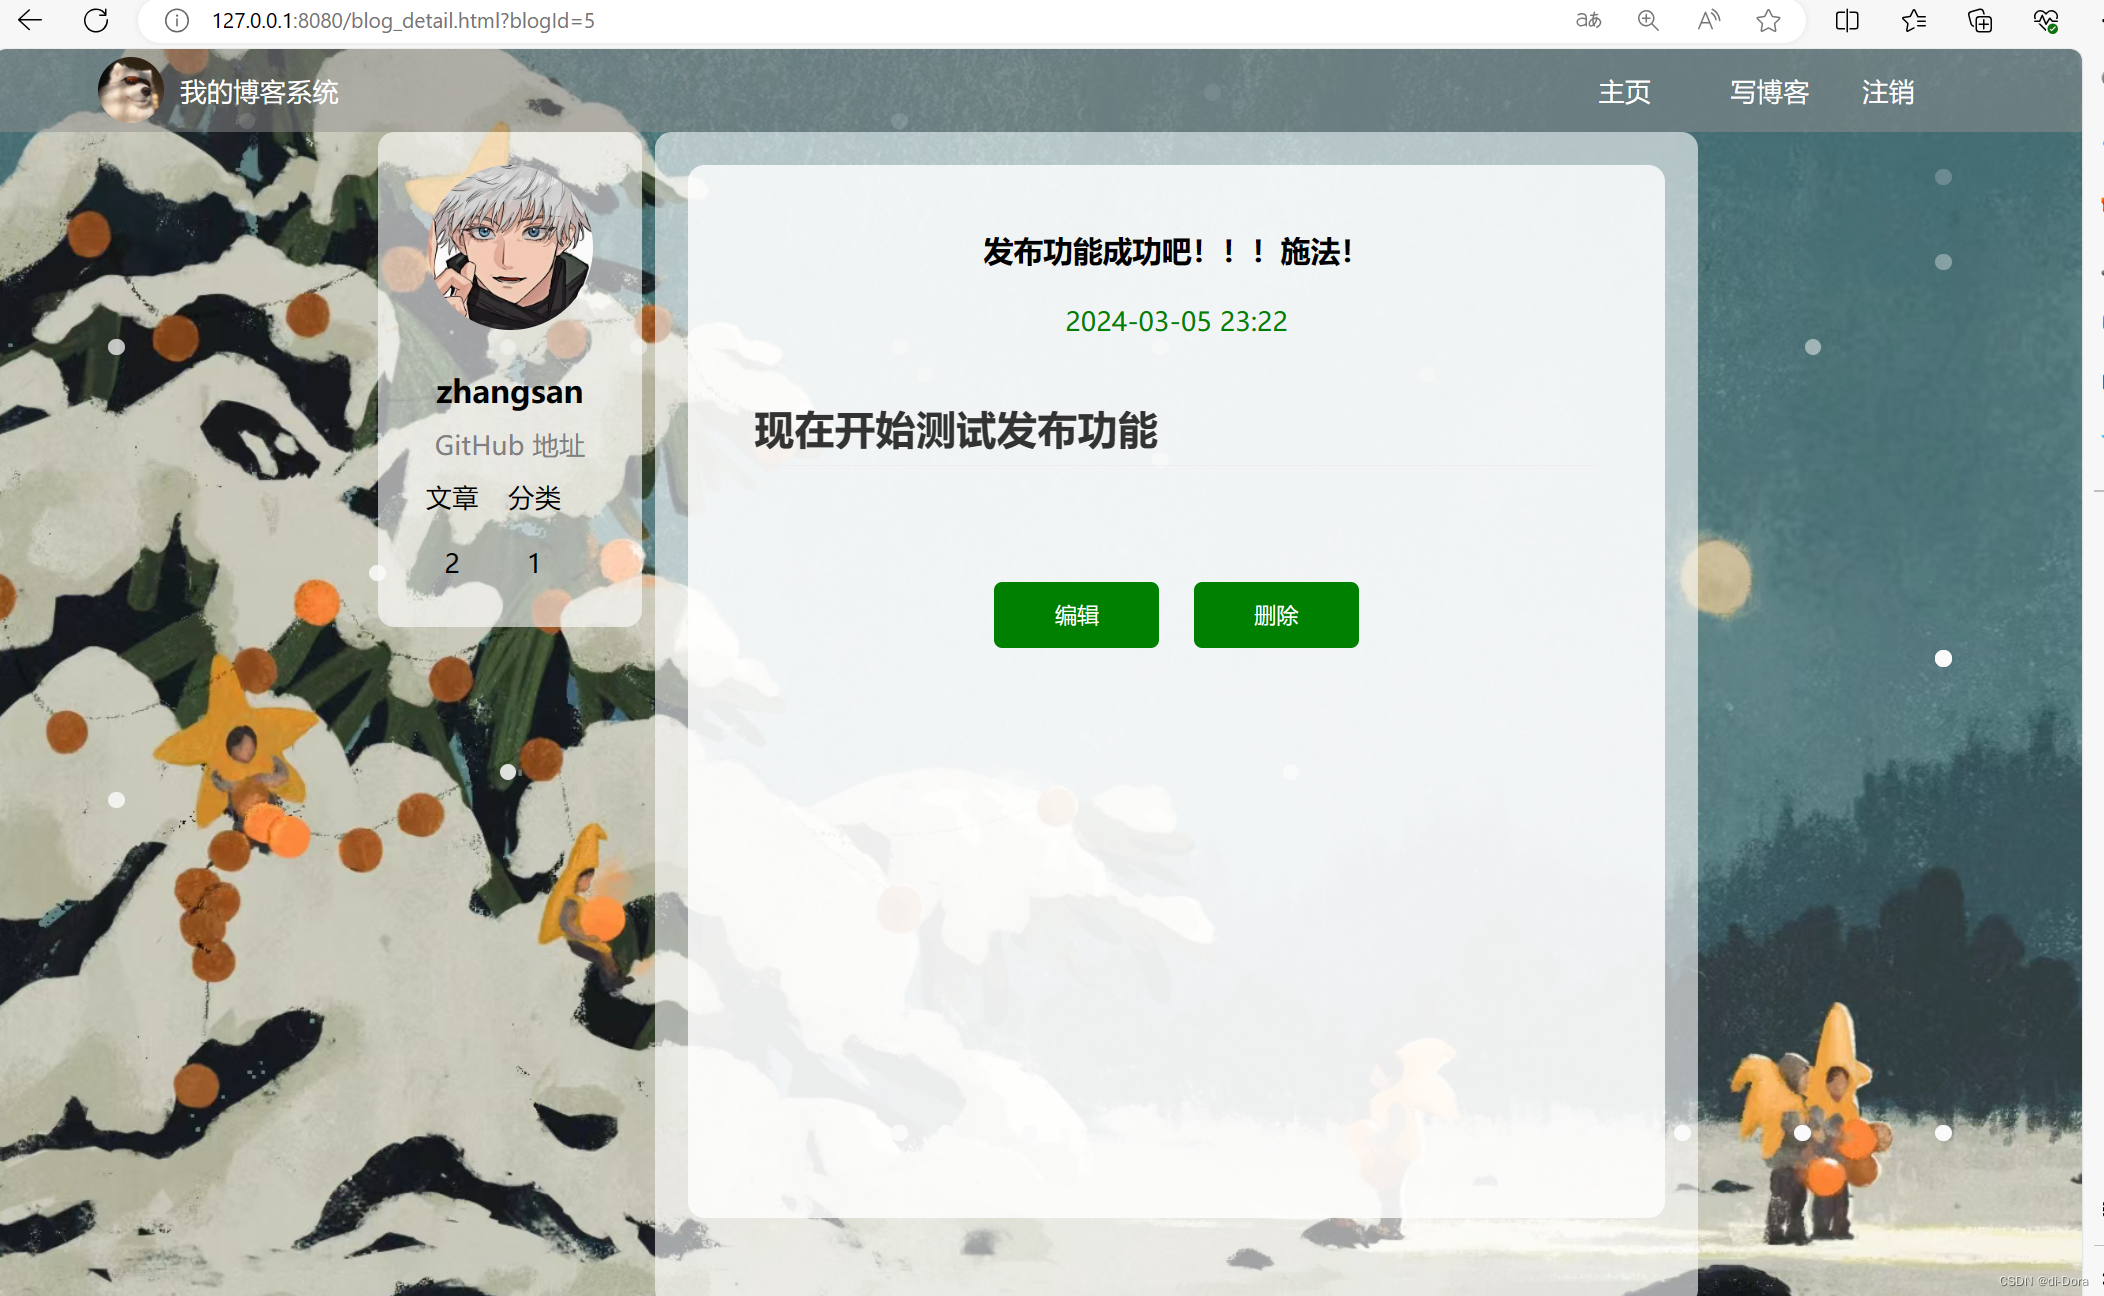
另外我们还需要考虑一个问题:如果文章字数较多,不可能全部显示在列表页,需要对其进行截断。我们考虑直接在前端代码进行操作,响应速度更快。你也可以考虑使用SQL截断或者Java截断。


$(document).ajaxSend(function(e, xhr, opt) {
    var user_token = localStorage.getItem("user_token");
    xhr.setRequestHeader("user_token_header", user_token);
});
function getUserInfo(url) {
    $.ajax({
        type: "get",
        url: url,
        success: function (result) {
            if (result.code == 200 && result.data != null) {
                $(".left .card h3").text(result.data.userName);
                $(".left .card a").attr("href", result.data.githubUrl);
            }
        }
    });
}

function logout(){
    localStorage.removeItem("user_token");
    location.href = "blog_login.html";
}

function truncateText(text, maxLength) {
    if (text.length > maxLength) {
        return text.slice(0, maxLength) + '...';
    }
    return text;
}
最后,对于我们博客列表页的文章显示也希望能够把特殊字符去除:
$(document).ajaxSend(function(e, xhr, opt) {
    var user_token = localStorage.getItem("user_token");
    xhr.setRequestHeader("user_token_header", user_token);
});
function getUserInfo(url) {
    $.ajax({
        type: "get",
        url: url,
        success: function (result) {
            if (result.code == 200 && result.data != null) {
                $(".left .card h3").text(result.data.userName);
                $(".left .card a").attr("href", result.data.githubUrl);
            }
        }
    });
}

function logout(){
    localStorage.removeItem("user_token");
    location.href = "blog_login.html";
}

function truncateText(text, maxLength) {
    if (text.length > maxLength) {
        return text.slice(0, maxLength) + '...';
    }
    return text;
}

// 移除 Markdown 标记的函数
function removeMarkdown(markdownContent) {
    // 使用正则表达式移除 Markdown 标记
    return markdownContent.replace(/[#*`_]/g, '');
}
<!DOCTYPE html>
<html lang="en">
<head>
<meta charset="UTF-8">
<meta http-equiv="X-UA-Compatible" content="IE=edge">
<meta name="viewport" content="width=device-width, initial-scale=1.0">
<title>博客列表页</title>
<link rel="stylesheet" href="css/common.css">
<link rel="stylesheet" href="css/list.css">
<link rel="stylesheet" href="css/blog_style.css">
</head>
<body>
<div class="nav">
<img src="pic/酷狗.jpg" alt="">
<span class="blog-title">我的博客系统</span>
<div class="space"></div>
<a class="nav-span" href="blog_list.html">主页</a>
<a class="nav-span" href="blog_edit.html">写博客</a>
<a class="nav-span" href="#" onclick="logout()">注销</a>
</div>
<div class="container">
<div class="left">
<div class="card">
<img src="pic/五条悟.jpg" alt="">
<h3>神圣的管理员SAMA</h3>
<a href="#">GitHub 地址</a>
<div class="row">
<span>文章</span>
<span>分类</span>
</div>
<div class="row">
<span>2</span>
<span>1</span>
</div>
</div>
</div>
<div class="right">
<!-- 动态加载博客内容 -->
</div>
</div>
<script src="js/jquery.min.js"></script>
<script src="js/common.js"></script>
<script>
getBlogList();
function getBlogList(){
// 使用 jQuery 或 JavaScript 进行博客内容的动态加载
$.ajax({
type: "get",
url: "/blog/getList",
success:function(result){
if (result.code == 200) {
if (result.data != null && result.data.length > 0) {
var finalHtml = "";
// 页面展示
for(var blog of result.data){
finalHtml += '<div class="blog">';
finalHtml += '<div class="title">'+blog.title+'</div>';
finalHtml += '<div class="date">'+blog.createTime+'</div>';
finalHtml += '<div class="desc">'+truncateText(removeMarkdown(blog.content), 200)+'</div>';
finalHtml += '<a class="detail" href="blog_detail.html?blogId='+blog.id+'">查看全文>></a>';
finalHtml += '</div>';
}
$(".right").html(finalHtml);
} else {
// 数据为空时,显示提示信息
$(".right").html('<div class="no-blog">当前还没有任何博客,快去写博客吧...</div>');
}
} else {
// 其他状态码或者请求失败时,显示错误信息
$(".right").html('<div class="error-msg">加载博客列表失败,请稍后重试...</div>');
}
},
error: function (error) {
if (error != null && error.status == 401) {
// 如果未登录,强制跳转到登录页面
alert("用户未登录, 登录后再进行对应操作");
location.href = "blog_login.html";
} else {
// 请求失败时,显示错误信息
$(".right").html('<div class="error-msg">加载博客列表失败,请稍后重试...</div>');
}
}
});
}
var url = "/user/getUserInfo";
getUserInfo(url);
</script>
</body>
</html>
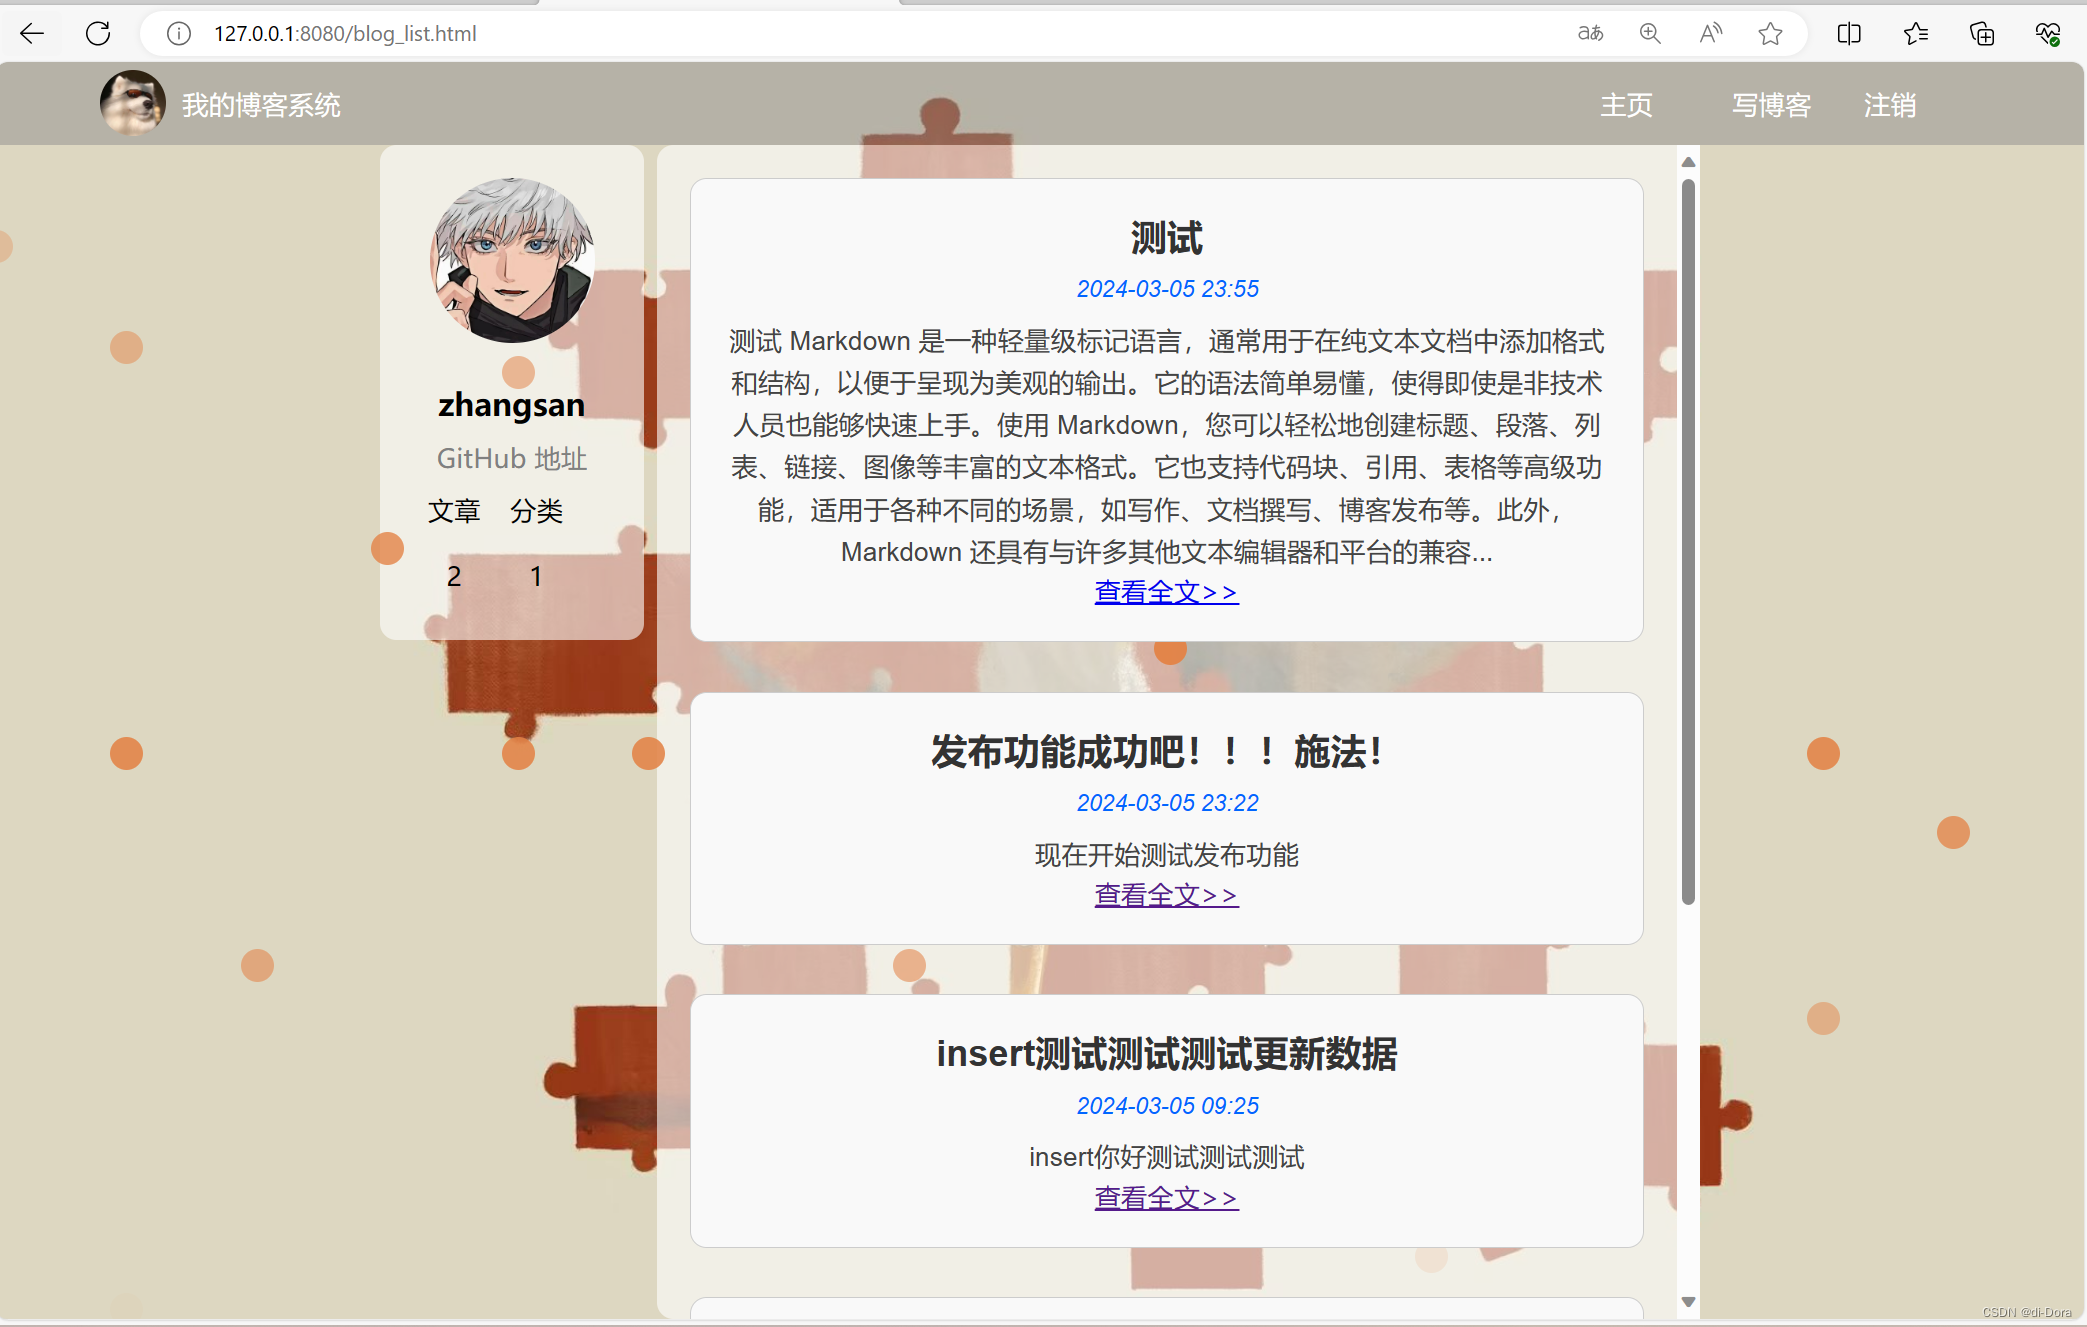
实现删除/编辑博客
进入用户详情页时,如果当前登录用户是文章作者,则在导航栏中显示 "编辑" 和 "删除" 按钮,用户点击时进行相应处理。实现这一功能需要完成两个任务:
- 判断当前博客详情页是否需要显示 "编辑" 和 "删除" 按钮。登录用户是文章作者即代表需要,不是的话就不能展示这两个按钮。
- 实现编辑和删除的逻辑功能。
对于删除操作,采用逻辑删除的方式,因此与编辑操作实际上是同一个接口。
现在大概有三种实现方式:
-
提供一个接口,判断登录用户是否是文章作者:
- 优点:这种方法将判断登录用户是否是文章作者的逻辑与获取博客详情的逻辑分开,使得系统更加解耦,各个接口的职责更加清晰。
- 缺点:可能会增加额外的接口调用次数,从而增加了前端的复杂性和后端的负担。如果页面中需要判断多个博客的作者身份,就需要发送多次请求,影响了性能。
-
提供一个接口,返回登录用户:
- 优点:通过提供一个接口返回登录用户的信息,可以简化前端的逻辑,只需要在获取博客详情的接口响应中添加登录用户的信息即可,不需要额外发送请求。
- 缺点:如果页面中并不需要登录用户的其他信息,提供登录用户的接口可能显得有些“臃肿”。
-
搭个便车,获取博客详情页时顺带返回信息:
- 优点:这种方法在获取博客详情页时直接顺带返回登录用户的信息,减少了前端发送请求的次数,简化了前端的逻辑。
- 缺点:在不需要登录用户信息的情况下,会增加不必要的数据传输量。如果页面中需要获取的其他信息较少,这种方法可能会显得有些“浪费”。
处于解耦的考虑,我们可以选择1和2;但是出于对简单性和效率的平衡,选择第三种方法,特别是在前端需要的信息不多且页面加载速度要求不是很高的情况下。
约定前后端交互接口
1、判定是否要显示[编辑] [删除] 按钮
要实现判定是否要显示 "编辑" 和 "删除" 按钮,可以通过修改获取博客信息的接口,在响应中添加一个字段。如果 loginUser 字段为 1,则表示当前博客就是登录用户自己写的,从而确定是否显示 "编辑" 和 "删除" 按钮。
[请求]
/blog/update

[参数]
Content-Type: application/json
{
   "title": "测试修改⽂章",
   "content": "在这⾥写下⼀篇博客",
   "blogId": "4"
}

[响应]
{
    "code": 200,
    "msg": "",
    "data": {
        "id": 1,
        "title": "第一篇博客",
        "content": "111我是博客正文我是博客正文我是博客正文",
        "userId": 1,
        "loginUser": 1,
        "deleteFlag": 0,
        "createTime": "2023-10-21 16:56:57",
        "updateTime": "2023-10-21T08:56:57.000+00:00"
    }
}
2、修改博客
[请求]
/blog/update

[参数]
Content-Type: application/json
 {
   "title": "测试修改⽂章",
   "content": "在这⾥写下⼀篇博客",
   "blogId": "4"
 }

[响应]
 {
   "code": 200,
   "msg": "",
   "data": true
 }
3. 删除博客
[请求]
/blog/delete?blogId=1

[响应]
{
  "code": 200,
  "msg": "",
  "data": true
}
实现服务器代码
1. 给 BlogInfo 类新增一个字段:
package com.example.newblogsystem.model;

import com.example.newblogsystem.utils.DateUtils;
import lombok.Data;

import java.util.Date;

@Data
public class BlogInfo {

    private Integer id;
    private String title;
    private String content;
    private Integer userId;
    private Integer deleteFlag;
    private Date createTime;
    private Date updateTime;
    private boolean isLoginUser;

    public BlogInfo() {
    }

    public BlogInfo(String title, String content, Integer userId) {
        this.title = title;
        this.content = content;
        this.userId = userId;
    }

    public String getCreateTime() {
        return DateUtils.formatDate(createTime);
    }
}
这里有一一个需要注意的地方! 如果是:private Boolean isLoginUser; 可能会影响到接口,而且后续的Controller里面的方法调用都会变得不一样。前端代码也要修改对应的地方。
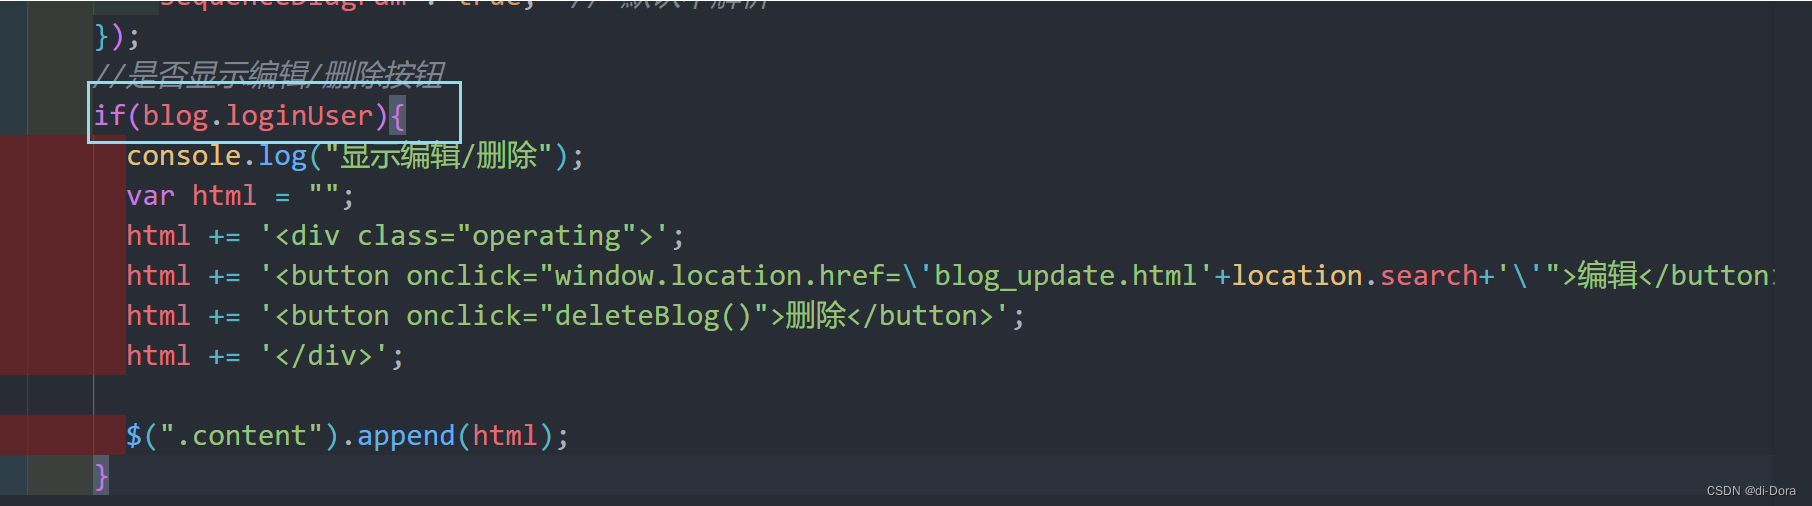
在Java中,boolean 和 Boolean 是不同的数据类型。boolean 是基本数据类型,而 Boolean 是引用数据类型,它是 boolean 的包装类。
isLoginUser 被声明为基本数据类型 boolean,这意味着它只能存储 true 或 false,而不能存储 null。如果想要表示一个可空的布尔值,可以将 isLoginUser 的类型改为 Boolean,这样它就可以接受 null 作为值。
2. 修改 BlogController 其他代码不变,只处理 "getBlogDeatail" 中的逻辑:
package com.example.newblogsystem.controller;

import com.example.newblogsystem.constants.Constant;
import com.example.newblogsystem.model.BlogInfo;
import com.example.newblogsystem.service.BlogService;
import com.example.newblogsystem.utils.JwtUtis;
import lombok.extern.slf4j.Slf4j;
import org.springframework.beans.factory.annotation.Autowired;
import org.springframework.util.StringUtils;
import org.springframework.web.bind.annotation.RequestMapping;
import org.springframework.web.bind.annotation.RestController;

import javax.servlet.http.HttpServletRequest;
import java.util.List;
@Slf4j

@RequestMapping("/blog")
@RestController
public class BlogController {
    @Autowired
    private BlogService blogService;

    @RequestMapping("/getList")
    public List<BlogInfo> queryBlogList(){
        return blogService.queryBlogList();
    }

    @RequestMapping("/getBlogDetail")
    public BlogInfo queryBlogDetail(Integer blogId,HttpServletRequest request){
        log.info("getBlogDetail, 接收参数blogId:"+blogId);
        BlogInfo blogInfo = blogService.queryBlogDetail(blogId);
        //1. 获取登录用户信息
        //2. 判断登录用户是否为作者
        String user_token = request.getHeader(Constant.USER_TOKEN_HEADER);
        Integer userId = JwtUtis.getUserIdFromToken(user_token);
        if (userId!=null && userId==blogInfo.getUserId()){
            blogInfo.setLoginUser(true);
        }else {
            blogInfo.setLoginUser(false);
        }
        log.info("queryBlogDetail, 接收参数:{}, 返回结果{}", blogId, blogInfo);
        return blogInfo;
    }

    @RequestMapping("/add")
    public Boolean publishBlog(String title, String content, HttpServletRequest request){
        log.info("publishBlog, 接收参数: title:{},content:{}",title, content);
        //1. 参数校验
        //2. 获取当前登录用户
        //3. 博客发布
        if (!StringUtils.hasLength(title) || !StringUtils.hasLength(content)){
            log.error("title or content 为空");
            return false;
        }
        String user_token = request.getHeader(Constant.USER_TOKEN_HEADER);
        Integer userId = JwtUtis.getUserIdFromToken(user_token);
        if (userId==null || userId<=0){
            log.error("用户未登录");
            return false;
        }
        BlogInfo blogInfo = new BlogInfo(title, content, userId);
        Integer result = blogService.publishBlog(blogInfo);
        if (result<1){
            log.error("博客发布失败");
            return false;
        }
        return true;

    }
}
写完之后我们可以用Postman验证一下,注意我们之前设置过令牌的时效,一个小时,如果失效了记得重新登录网页,F12打开应用程序复制一下token:

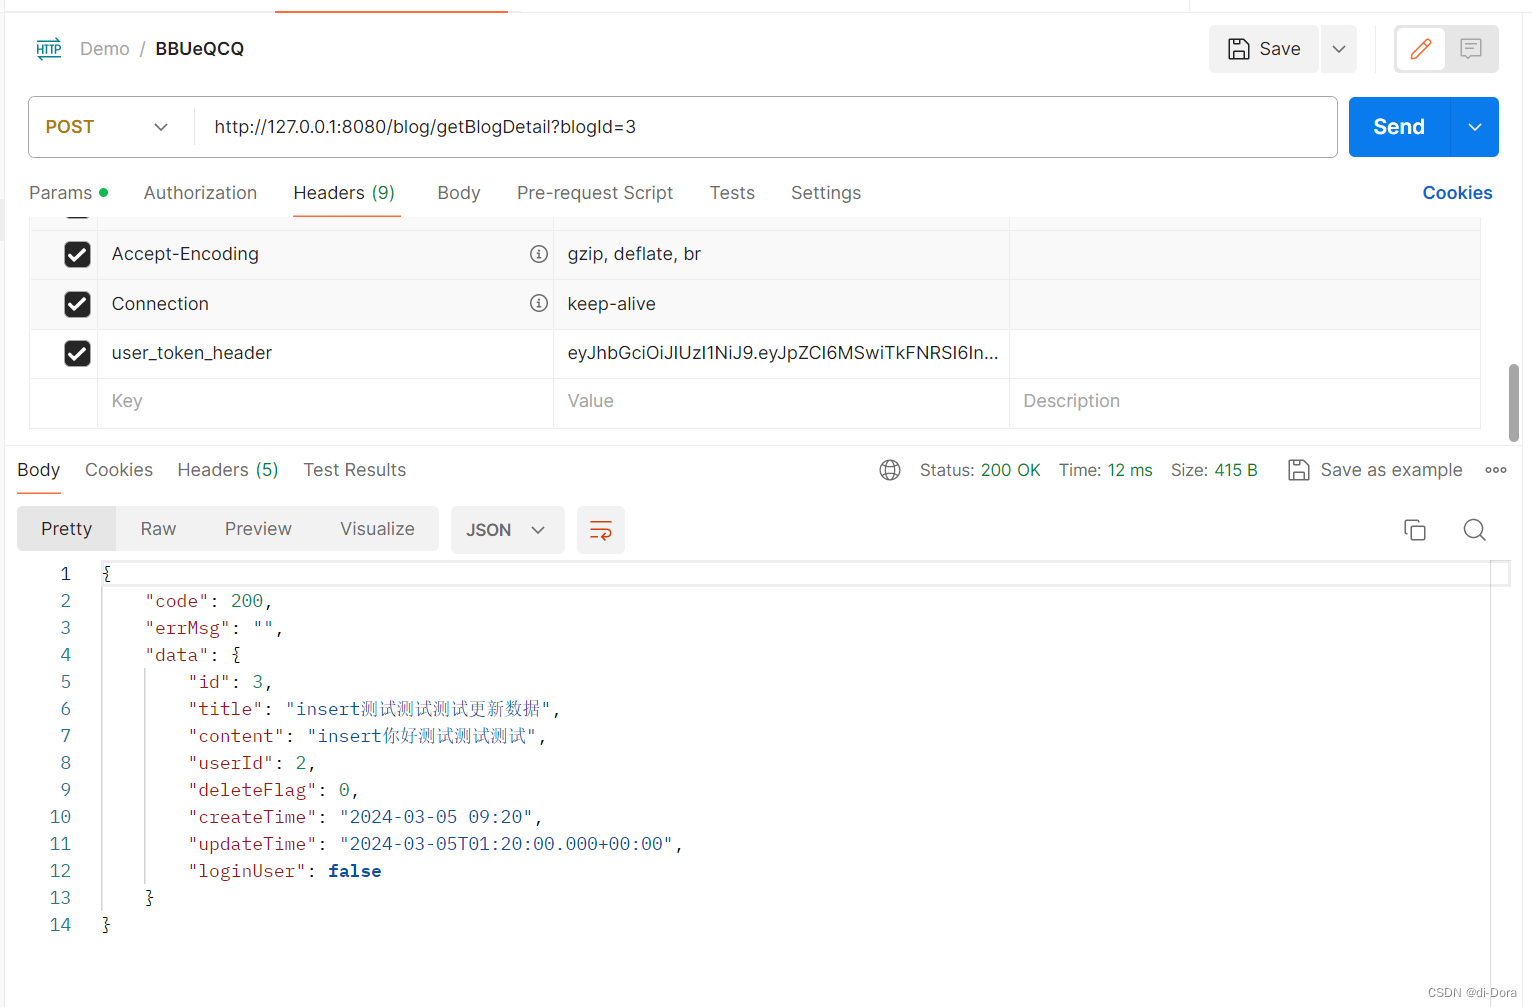
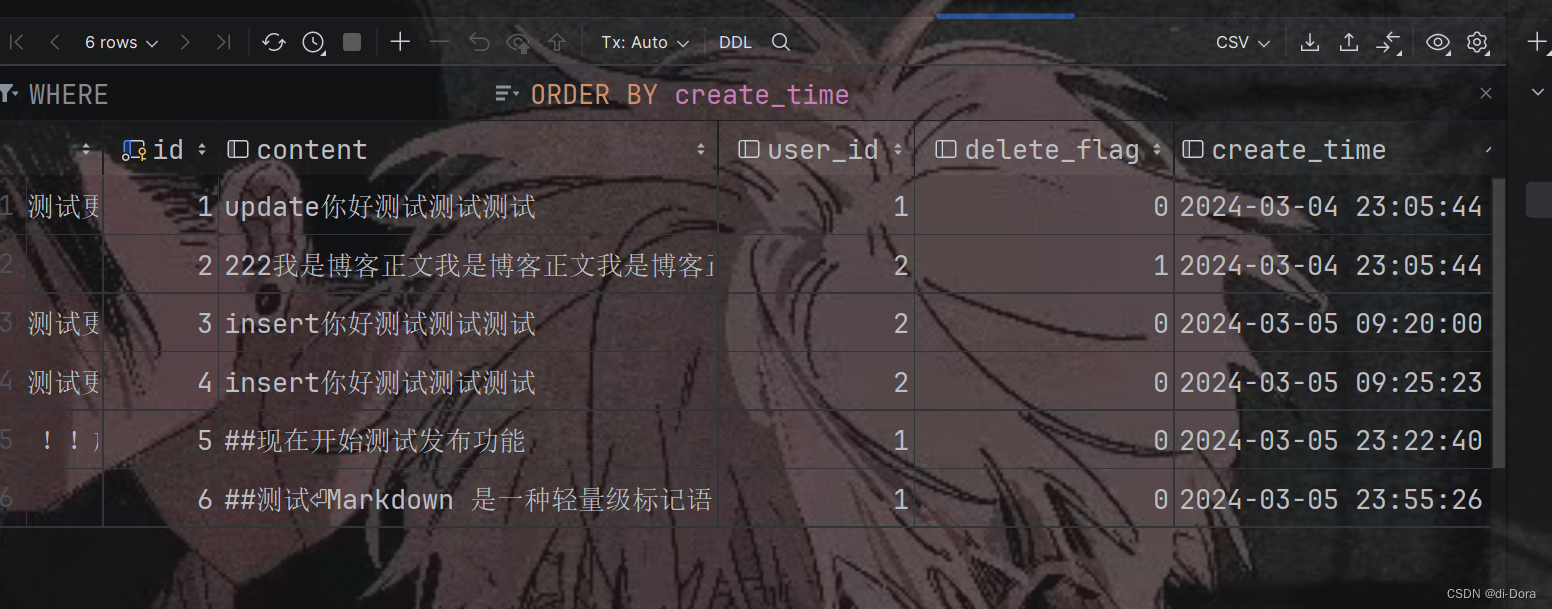
我们的获取博客详情页的后端一切正常。
3. 修改 BlogController,增加 update/delete 方法,处理修改/删除逻辑:
package com.example.newblogsystem.controller;

import com.example.newblogsystem.constants.Constant;
import com.example.newblogsystem.model.BlogInfo;
import com.example.newblogsystem.service.BlogService;
import com.example.newblogsystem.utils.JwtUtis;
import lombok.extern.slf4j.Slf4j;
import org.springframework.beans.factory.annotation.Autowired;
import org.springframework.util.StringUtils;
import org.springframework.web.bind.annotation.RequestMapping;
import org.springframework.web.bind.annotation.RestController;

import javax.servlet.http.HttpServletRequest;
import java.util.List;
@Slf4j

@RequestMapping("/blog")
@RestController
public class BlogController {
    @Autowired
    private BlogService blogService;

    @RequestMapping("/getList")
    public List<BlogInfo> queryBlogList(){
        return blogService.queryBlogList();
    }

    @RequestMapping("/getBlogDetail")
    public BlogInfo queryBlogDetail(Integer blogId,HttpServletRequest request){
        log.info("getBlogDetail, 接收参数blogId:"+blogId);
        BlogInfo blogInfo = blogService.queryBlogDetail(blogId);
        //1. 获取登录用户信息
        //2. 判断登录用户是否为作者
        String user_token = request.getHeader(Constant.USER_TOKEN_HEADER);
        Integer userId = JwtUtis.getUserIdFromToken(user_token);
        if (userId!=null && userId==blogInfo.getUserId()){
            blogInfo.setLoginUser(true);
        }else {
            blogInfo.setLoginUser(false);
        }
        log.info("queryBlogDetail, 接收参数:{}, 返回结果{}", blogId, blogInfo);
        return blogInfo;
    }

    @RequestMapping("/add")
    public Boolean publishBlog(String title, String content, HttpServletRequest request){
        log.info("publishBlog, 接收参数: title:{},content:{}",title, content);
        //1. 参数校验
        //2. 获取当前登录用户
        //3. 博客发布
        if (!StringUtils.hasLength(title) || !StringUtils.hasLength(content)){
            log.error("title or content 为空");
            return false;
        }
        String user_token = request.getHeader(Constant.USER_TOKEN_HEADER);
        Integer userId = JwtUtis.getUserIdFromToken(user_token);
        if (userId==null || userId<=0){
            log.error("用户未登录");
            return false;
        }
        BlogInfo blogInfo = new BlogInfo(title, content, userId);
        Integer result = blogService.publishBlog(blogInfo);
        if (result<1){
            log.error("博客发布失败");
            return false;
        }
        return true;

    }
    /**
     * 编辑博客
     */
    @RequestMapping("/update")
    public Boolean update(Integer blogId, String title, String content){
        log.info("updateBlog,接收参数 title:{}, content:{}", title,content);
        if (blogId==null || !StringUtils.hasLength(title) || !StringUtils.hasLength(content)){
            log.error("ID/标题/内容不合法");
            return false;
        }
        BlogInfo blogInfo = new BlogInfo();
        blogInfo.setId(blogId);
        blogInfo.setTitle(title);
        blogInfo.setContent(content);
        //Id没设置是不会报错的
        Integer result = blogService.updateBlog(blogInfo);
        if (result<1){
            return false;
        }
        return true;

    }
    /**
     * 删除博客
     */
    @RequestMapping("/delete")
    public Boolean delete(Integer blogId){
        log.info("deleteBlog, blogId:"+blogId);
        BlogInfo blogInfo = new BlogInfo();
        blogInfo.setId(blogId);
        blogInfo.setDeleteFlag(1);
        Integer result = blogService.updateBlog(blogInfo);
        if (result<1){
            return false;
        }
        return true;
    }
}
package com.example.newblogsystem.service;

import com.example.newblogsystem.mapper.BlogMapper;
import com.example.newblogsystem.model.BlogInfo;
import org.springframework.beans.factory.annotation.Autowired;
import org.springframework.stereotype.Service;

import java.util.List;

@Service
public class BlogService {
    @Autowired
    private BlogMapper blogMapper;

    public List<BlogInfo> queryBlogList() {
        return blogMapper.selectAllBlog();
    }

    public BlogInfo queryBlogDetail(Integer blogId) {
        return blogMapper.selectById(blogId);
    }

    public Integer publishBlog(BlogInfo blogInfo) {
        return blogMapper.insertBlog(blogInfo);
    }

    public Integer updateBlog(BlogInfo blogInfo) {
        return blogMapper.updateBlog(blogInfo);
    }
}
实现客户端代码
1. 判断是否显示 [编辑] [删除] 按钮:
<!DOCTYPE html>
<html lang="en">

<head>
    <meta charset="UTF-8">
    <meta http-equiv="X-UA-Compatible" content="IE=edge">
    <meta name="viewport" content="width=device-width, initial-scale=1.0">
    <title>博客详情页</title>

    <link rel="stylesheet" href="css/common2.css">
    <link rel="stylesheet" href="css/detail.css">
    <link rel="stylesheet" href="css/mydetail.css">
</head>

<body>

    <div class="nav">
        <img src="pic/酷狗.jpg" alt="">
        <span class="blog-title">我的博客系统</span>
        <div class="space"></div>
        <a class="nav-span" href="blog_list.html">主页</a>
        <a class="nav-span" href="blog_edit.html">写博客</a>
        <a class="nav-span" href="#" onclick="logout()">注销</a>
    </div>

    <div class="container">
        <div class="left">
            <div class="card">
                <img src="pic/五条悟.jpg" alt="">
                <h3>神圣的管理员SAMA</h3>
                <a href="#">GitHub 地址</a>
                <div class="row">
                    <span>文章</span>
                    <span>分类</span>
                </div>
                <div class="row">
                    <span>2</span>
                    <span>1</span>
                </div>
            </div>
        </div>
        <div class="right">
            <div class="content">
                <div class="title"></div>
                <div class="date"></div>
                <div class="detail" id="detail" style="background-color: transparent;"></div>
                <!-- <div class="operating">
                    <button onclick="window.location.href='blog_update.html'">编辑</button>
                    <button onclick="deleteBlog()">删除</button>
                </div> -->
            </div>

        </div>
    </div>

    <!-- 引入 editor.md 的依赖 -->
    <link rel="stylesheet" href="blog-editormd/css/editormd.css" />
    <script src="js/jquery.min.js"></script>
    <script src="blog-editormd/lib/marked.min.js"></script>
    <script src="blog-editormd/lib/prettify.min.js"></script>
    <script src="blog-editormd/editormd.js"></script>
    <script src="js/common.js"></script>
    <script>
                //获取博客详情
    $.ajax({
        type: "get",
        url: "/blog/getBlogDetail"+location.search,
        success:function(result){
            if(result.code==200 && result.data!=null){
                var blog = result.data;
                $(".right .content .title").text(blog.title);
                $(".right .content .date").text(blog.createTime);
                // $(".right .content .detail").text(blog.content);
                editormd.markdownToHTML("detail", {
                        markdown: blog.content ,//+ "\r\n" + $("#append-test").text(),
                    });
                console.log(blog);
                //是否显示编辑/删除按钮
                if(blog.loginUser){
                    console.log("显示编辑/删除");
                    var html = "";
                    html += '<div class="operating">';
                    html += '<button onclick="window.location.href=\'blog_update.html'+location.search+'\'">编辑</button>';
                    html += '<button onclick="deleteBlog()">删除</button>';
                    html += '</div>';

                    $(".content").append(html);
                    }
            }
        },
        error:function(error){
            if(error!=null && error.status==401){
                location.href="blog_login.html";
            }
        }
    });
        //显示博客作者信息
        var userUrl = "/user/getAuthorInfo" + location.search;
        getUserInfo(userUrl);

        function deleteBlog() {
            //……
            }
        }
    </script>
</body>

</html>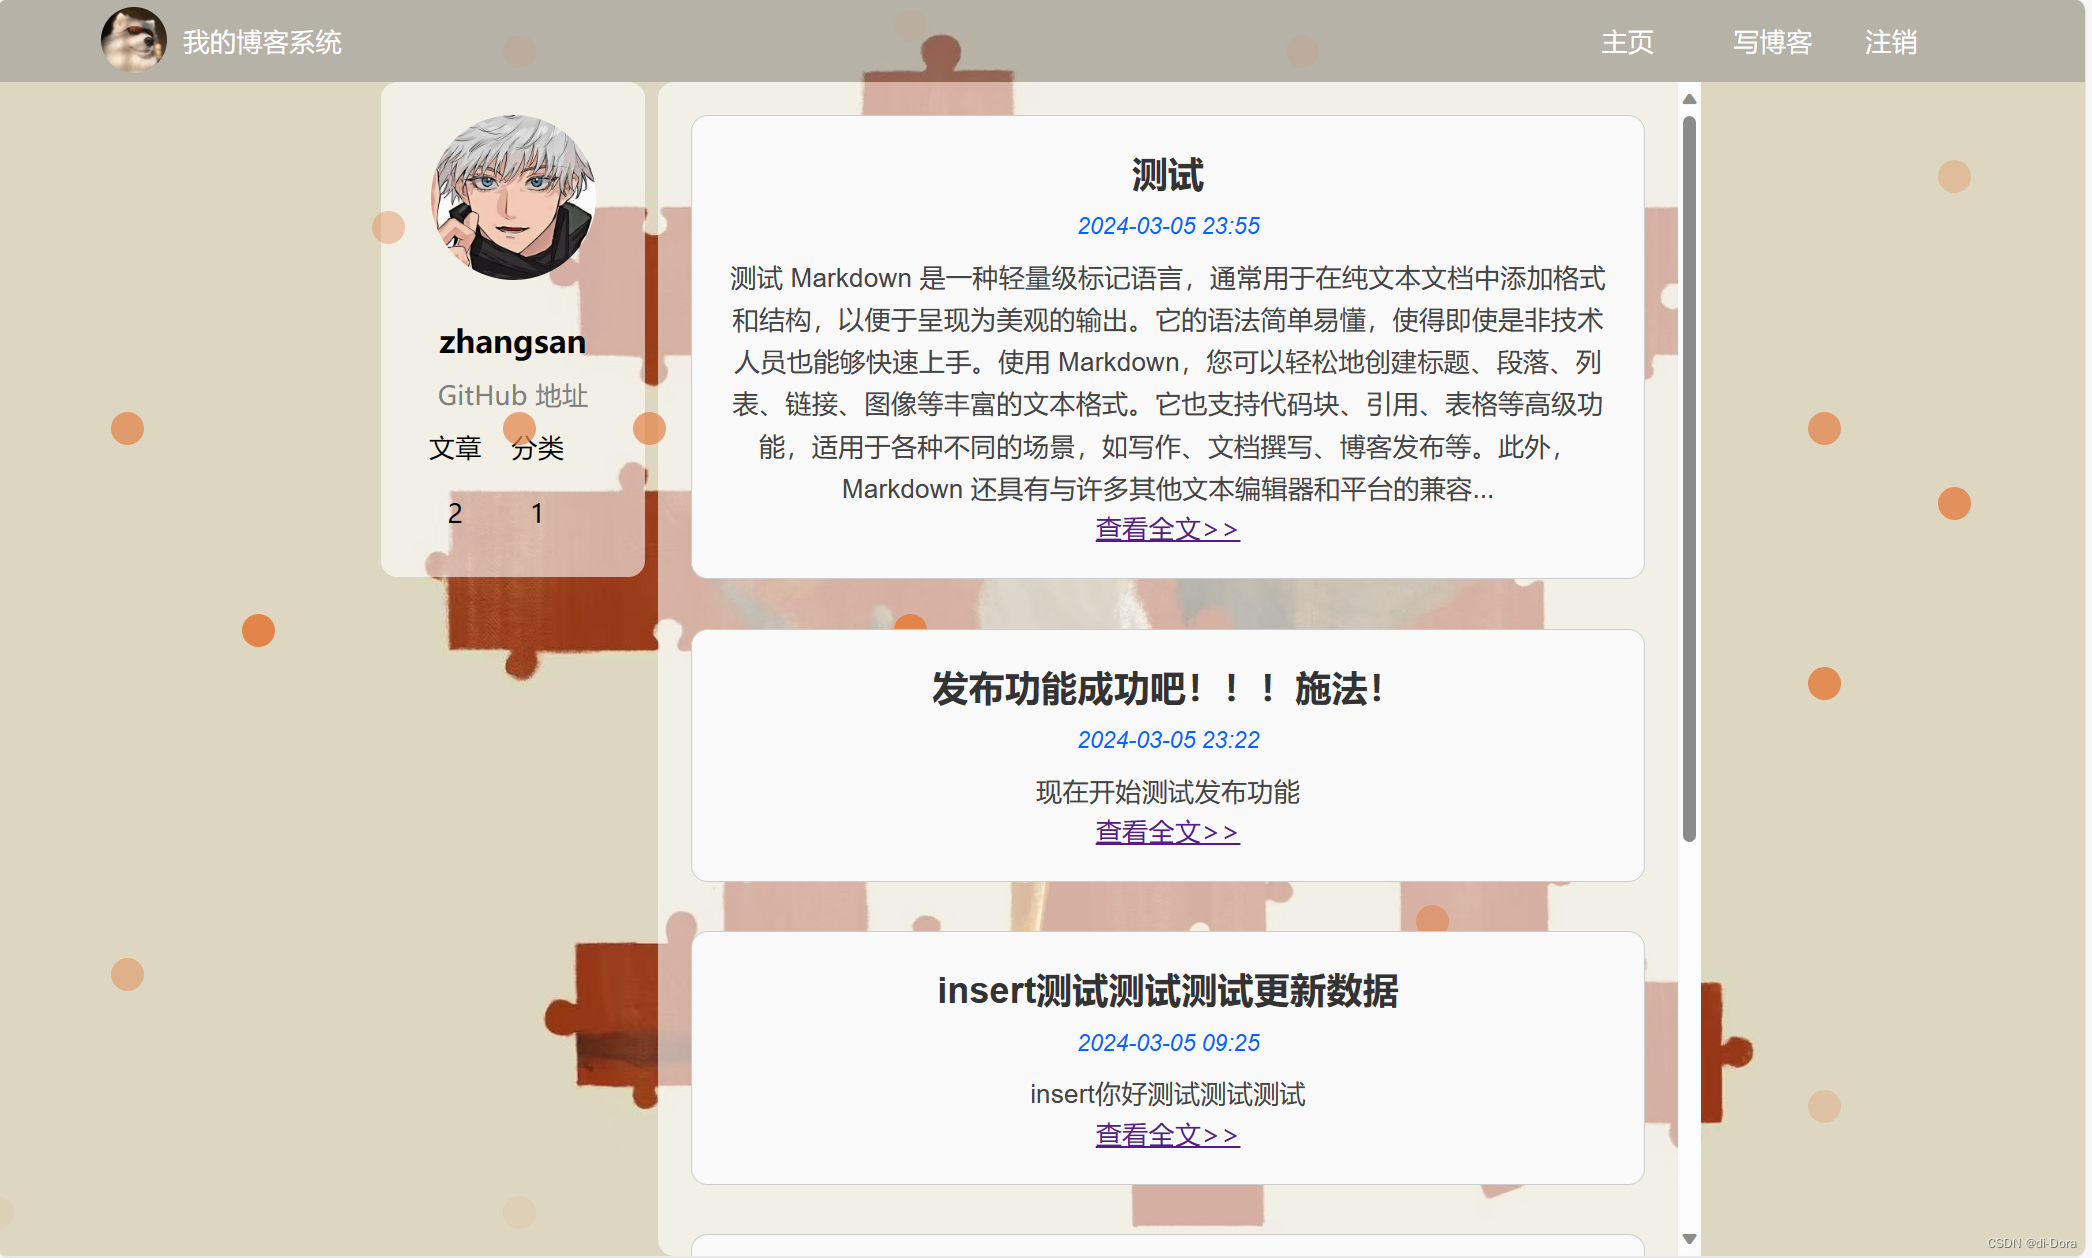
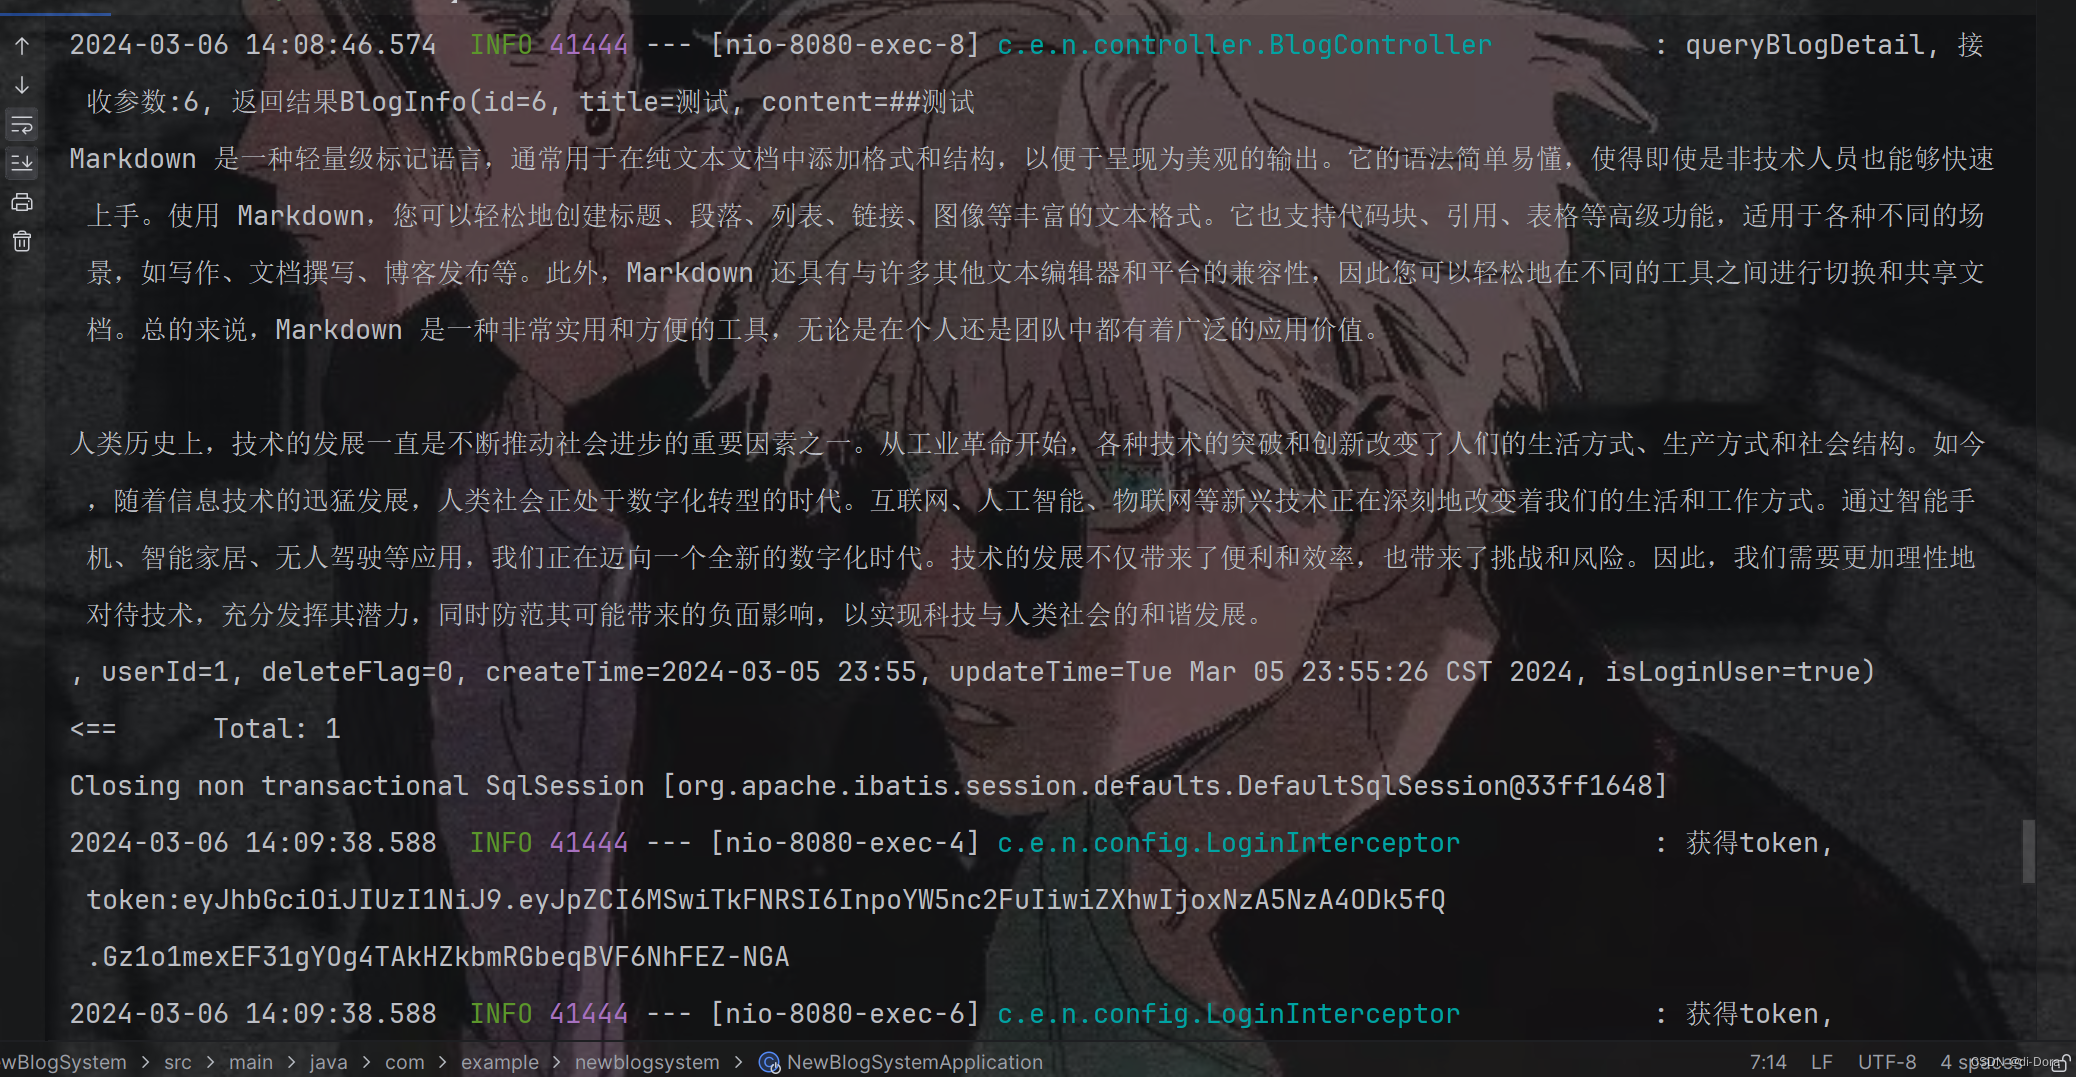
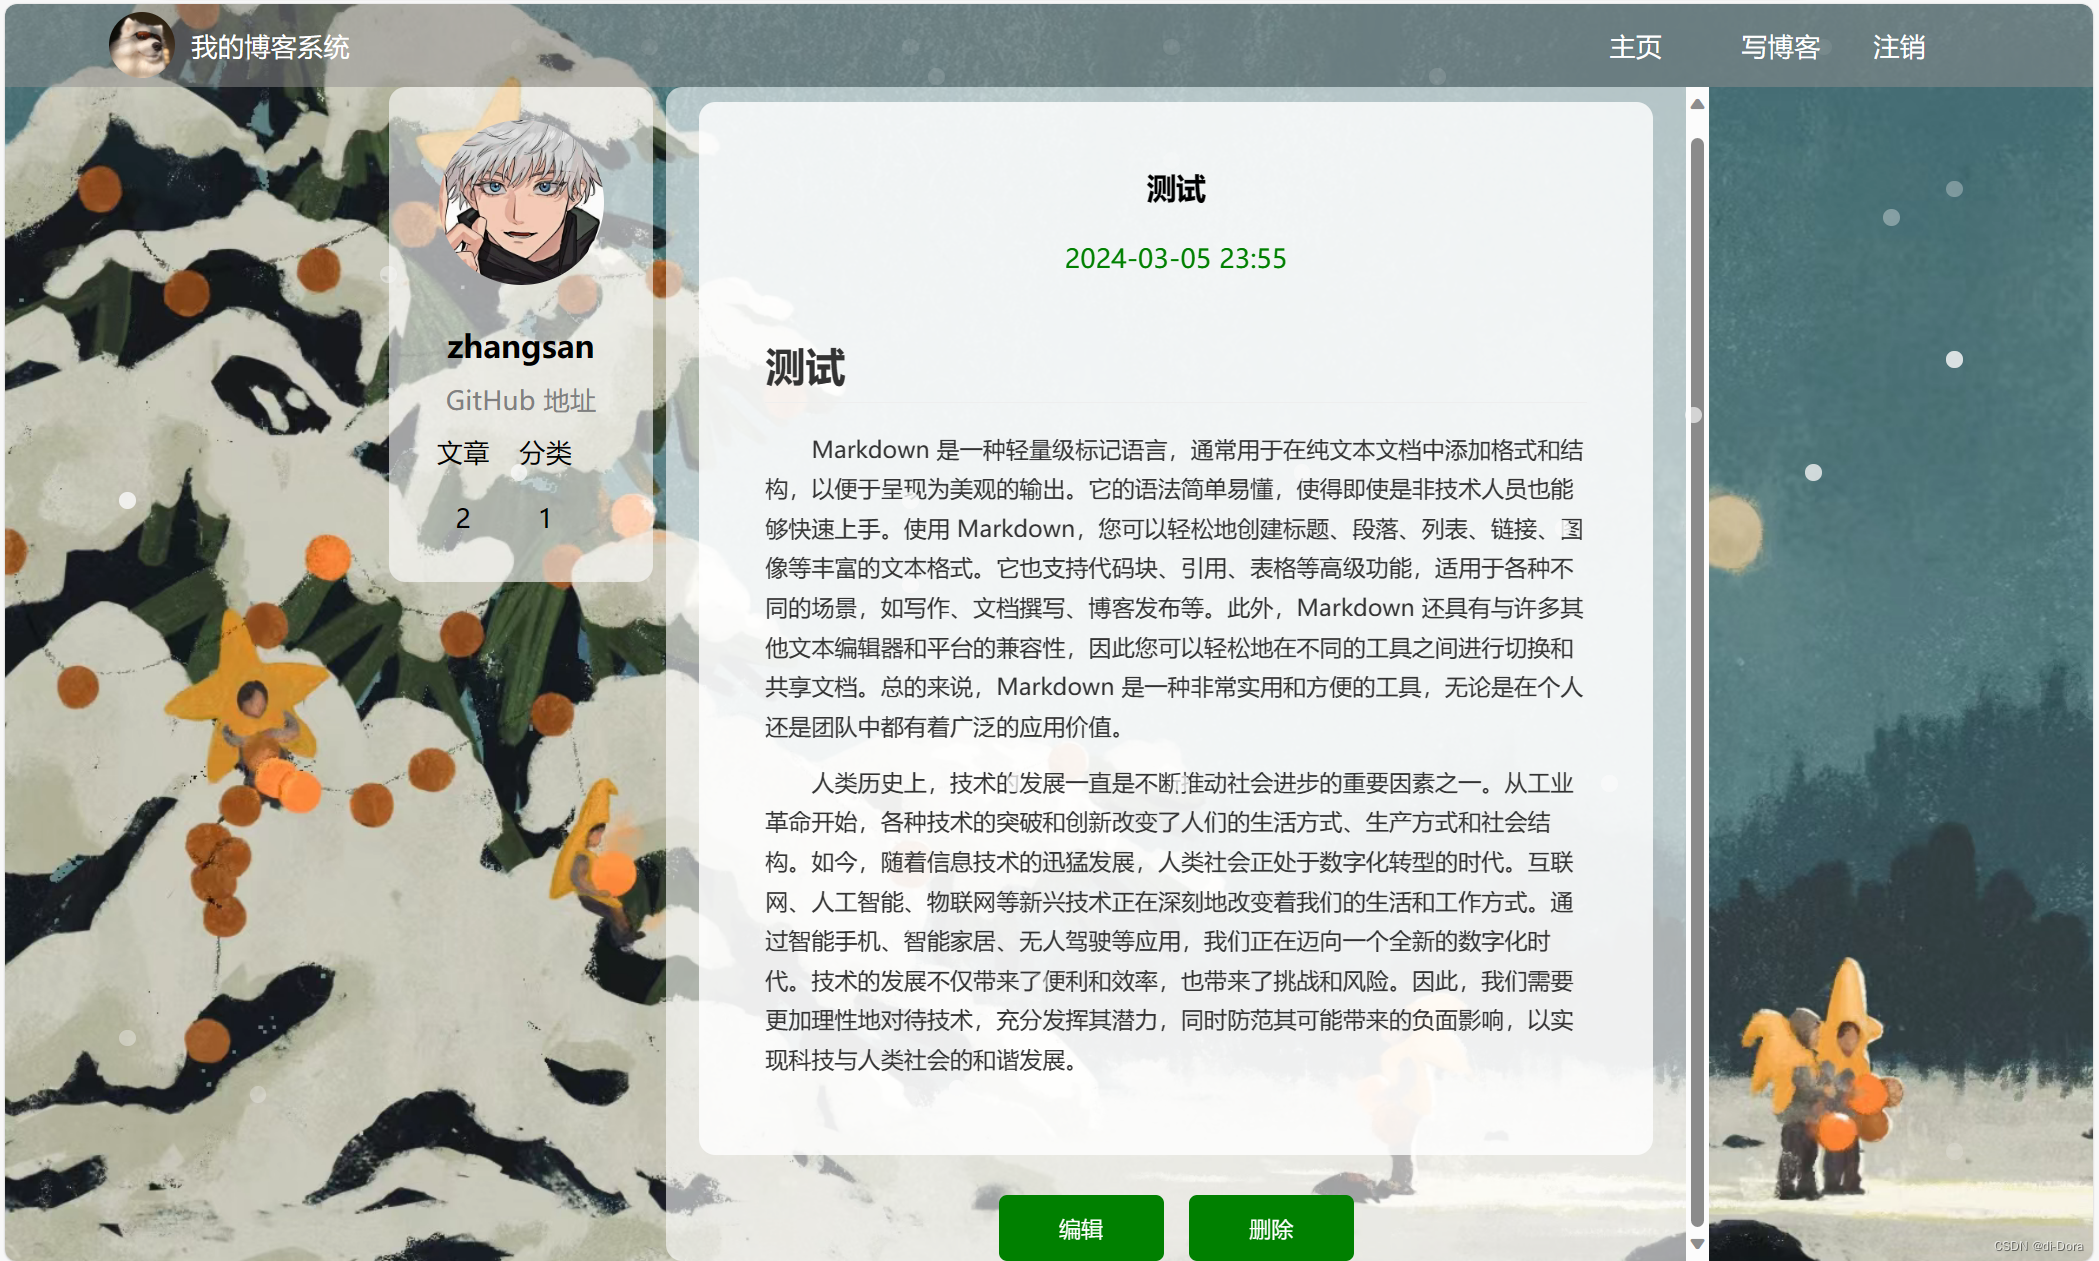

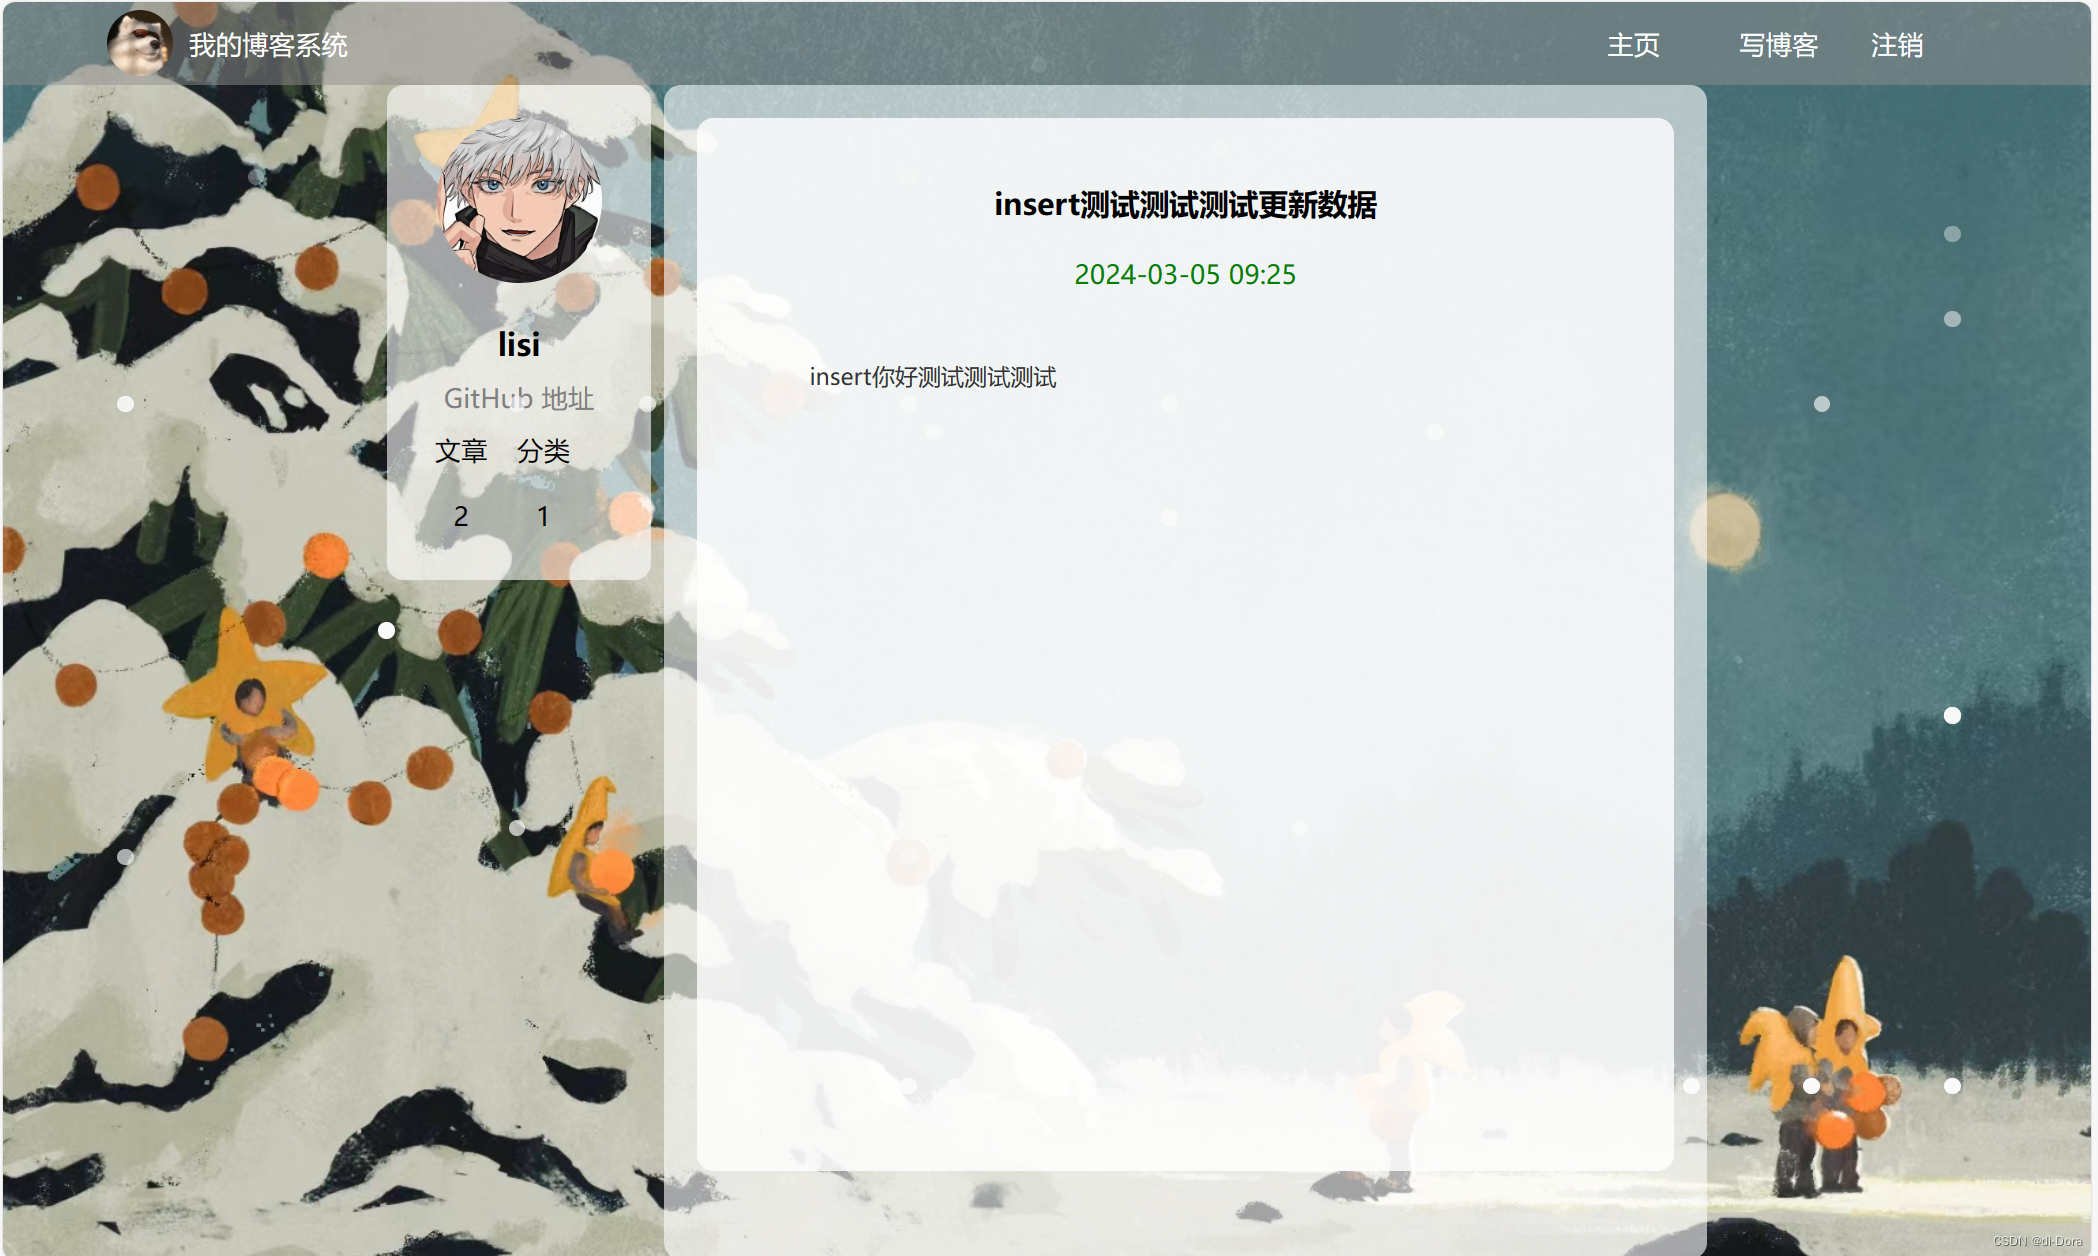
2、编辑博客逻辑:修改blog_update.html
<!DOCTYPE html>
<html lang="en">
<head>
<meta charset="UTF-8">
<meta http-equiv="X-UA-Compatible" content="IE=edge">
<meta name="viewport" content="width=device-width, initial-scale=1.0">
<title>博客编辑页</title>
<link rel="stylesheet" href="css/common3.css">
<link rel="stylesheet" href="css/edit.css">
<link rel="stylesheet" href="blog-editormd/css/editormd.css" />
</head>
<body>
<div class="nav">
<img src="pic/酷狗.jpg" alt="">
<span class="blog-title">我的博客系统</span>
<div class="space"></div>
<a class="nav-span" href="blog_list.html">主页</a>
<a class="nav-span" href="blog_edit.html">写博客</a>
<a class="nav-span" href="#" onclick="logout()">退出</a>
</div>
<div class="content-edit">
<div class="push">
<input type="hidden" id="blogId">
<input type="text" name="" id="title">
<input type="button" value="更新文章" id="submit" onclick="submit()">
</div>
<!-- markdown 插件 html代码 -->
<div id="editor">
<textarea style="display:none;" id="content">##在这里写下一篇博客</textarea>
</div>
</div>
<script src="js/jquery.min.js"></script>
<script src="blog-editormd/editormd.min.js"></script>
<script src="js/common.js"></script>
<script type="text/javascript">
// 在页面加载时进行检查
$(document).ready(function() {
var user_token = localStorage.getItem("user_token");
if (!user_token) {
alert("用户未登录,请先登录");
location.href = "blog_login.html";
}
// 使用 jQuery 或 JavaScript 进行博客内容的动态加载
$.ajax({
type: "get",
url: "/blog/getList",
success: function(result) {
if (result.code == 200) {
if (result.data != null && result.data.length > 0) {
var finalHtml = "";
// 页面展示
for (var blog of result.data) {
finalHtml += '<div class="blog">';
finalHtml += '<div class="title">' + blog.title + '</div>';
finalHtml += '<div class="date">' + blog.createTime + '</div>';
finalHtml += '<div class="desc">' + blog.content + '</div>';
finalHtml += '<a class="detail" href="blog_detail.html?blogId=' + blog.id + '">查看全文>></a>';
finalHtml += '</div>';
}
$(".right").html(finalHtml);
} else {
// 数据为空时,显示提示信息
$(".right").html('<div class="no-blog">当前还没有任何博客,快去写博客吧...</div>');
}
} else {
// 其他状态码或者请求失败时,显示错误信息
$(".right").html('<div class="error-msg">加载博客列表失败,请稍后重试...</div>');
}
}
// error: function(error) {
// if (error != null && error.status == 401) {
// // 如果未登录,强制跳转到登录页面
// alert("用户未登录, 登录后再进行对应操作");
// location.href = "blog_login.html";
// } else {
// // 请求失败时,显示错误信息
// $(".right").html('<div class="error-msg">加载博客列表失败,请稍后重试...</div>');
// }
// }
});
});
// $(function() {
// var editor = editormd("editor", {
// width: "100%",
// height: "550px",
// path: "blog-editormd/lib/"
// });
// });
function submit() {
var user_token = localStorage.getItem("user_token");
if (!user_token) {
alert("用户未登录,请先登录");
location.href = "blog_login.html";
return;
}
$.ajax({
type: "post",
url: "/blog/update",
contentType: "application/json",
headers: {
"user_token_header": user_token
},
data: JSON.stringify({
"title": $("#title").val(),
"content": $("#content").val(),
"id": $("#blogId").val()
}),
success: function(result) {
if (result != null && result.code == 200 && result.data == true) {
location.href = "blog_list.html";
} else {
alert(result.msg);
}
},
error: function(error) {
if (error != null && error.status == 401) {
alert("用户未登录, 登录后再进行对应操作");
location.href = "blog_login.html";
} else {
alert("请求失败,请稍后再试");
}
}
});
}
//显示博客作者信息
var userUrl = "/user/getAuthorInfo" + location.search;
getUserInfo(userUrl);
function deleteBlog() {
alert("删除博客");
}
function getBlogInfo() {
$.ajax({
type:"get",
url:"/blog/getBlogDetail"+location.search,
success:function(result){
if (result.code == 200 && result.data != null) {
$("#blogId").val(result.data.id);
$("#title").val(result.data.title);
// $("#content").val(result.data.content);
editormd("editor", {
width : "100%",
height : "550px",
path: "blog-editormd/lib/",
onload : function() {
this.watch()
this.setMarkdown(result.data.content);
}
});
}
}
});
}
getBlogInfo();
</script>
</body>
</html>
注意里面完善发表博客的逻辑:
       <script>
            function submit() {
            var user_token = localStorage.getItem("user_token");
            if (!user_token) {
                alert("用户未登录,请先登录");
                location.href = "blog_login.html";
                return;
            }
            $.ajax({
                type:"post",
                url:"/blog/update",
                data:{
                    blogId: $("#blogId").val(),
                    title:$("#title").val(),
                    content:$("#content").val()
                },
                success: function(result) {
                    if (result != null && result.code == 200 && result.data == true) {
                        alert("博客更新成功!");
                        location.href = "blog_list.html";
                    } else {
                        alert(result.msg);
                    }
                },
                error: function(error) {
                    if (error != null && error.status == 401) {
                        alert("用户未登录, 登录后再进行对应操作");
                        location.href = "blog_login.html";
                    } else {
                        alert("请求失败,请稍后再试");
                    }
                }
            });
        }
    </script>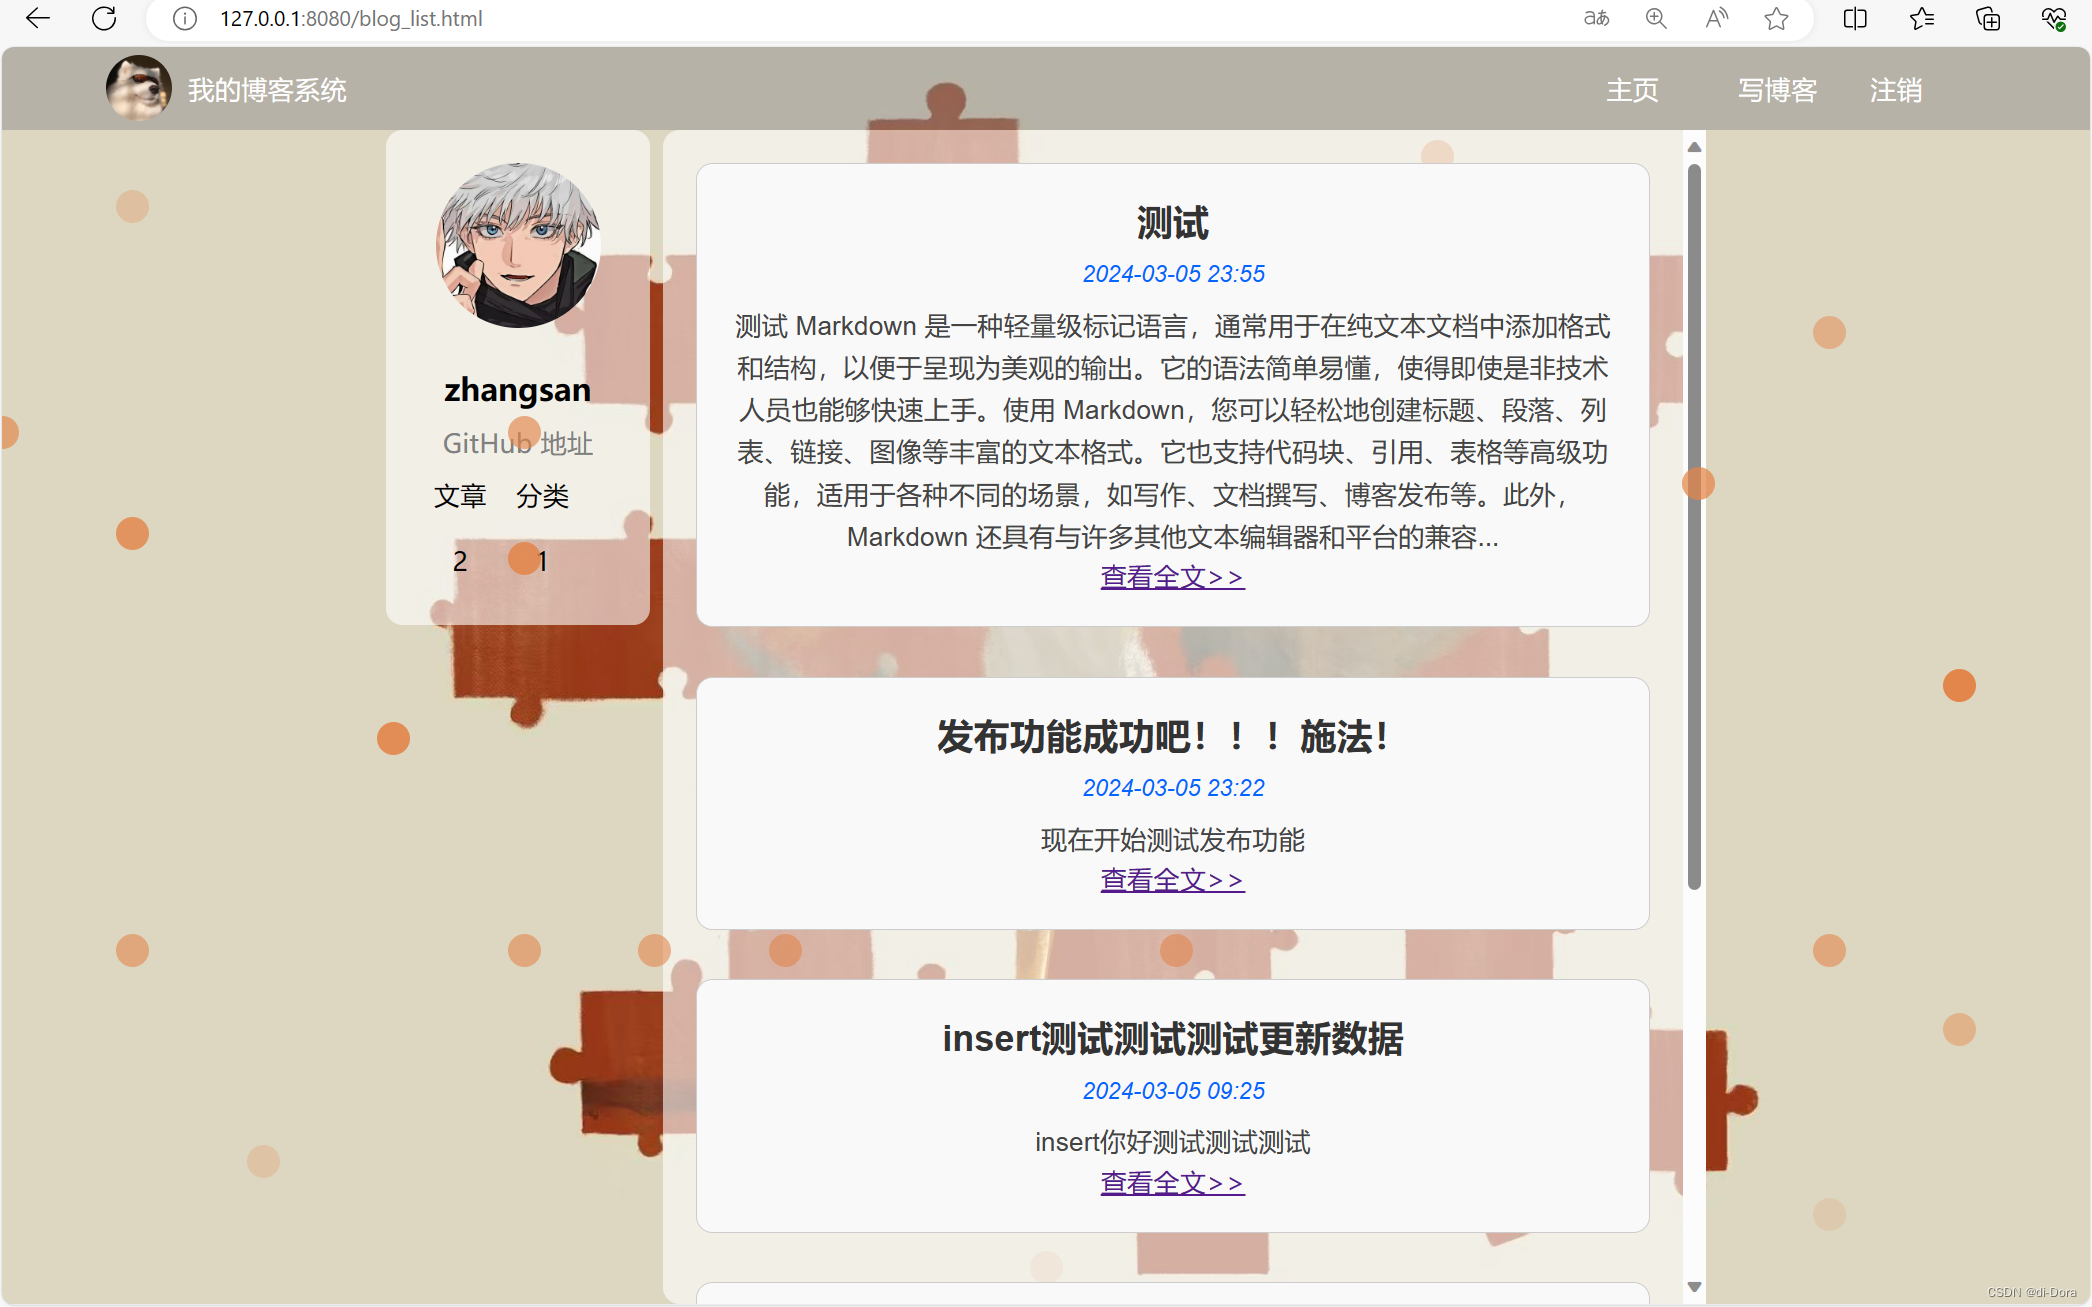
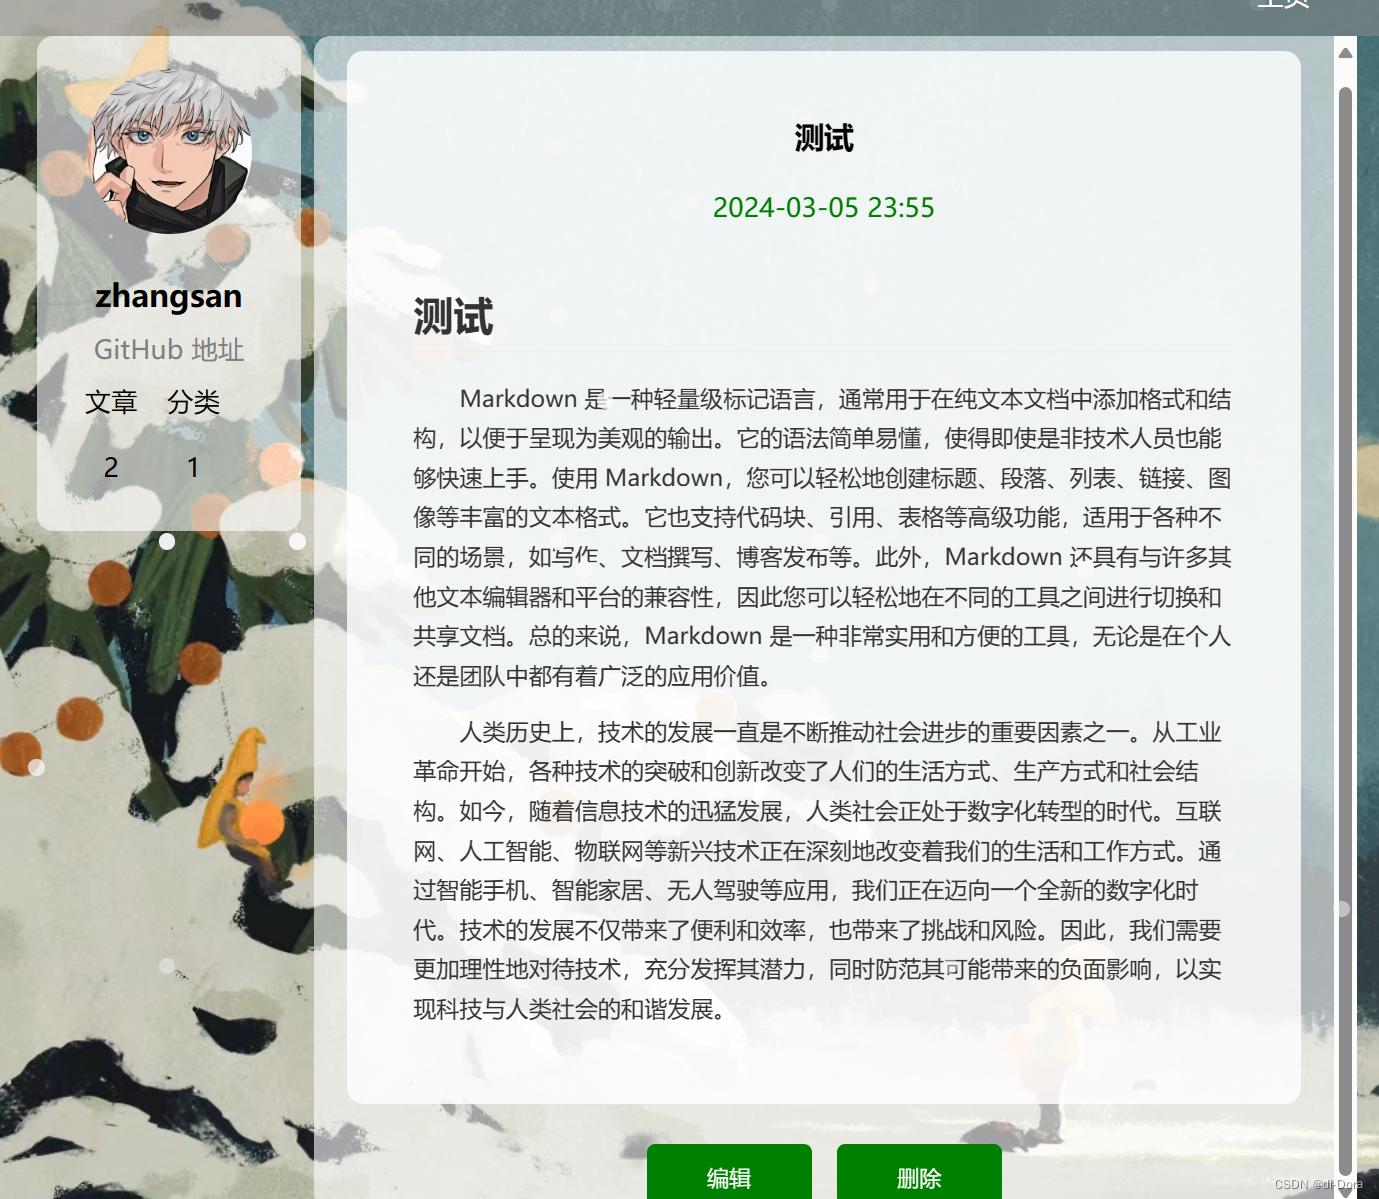

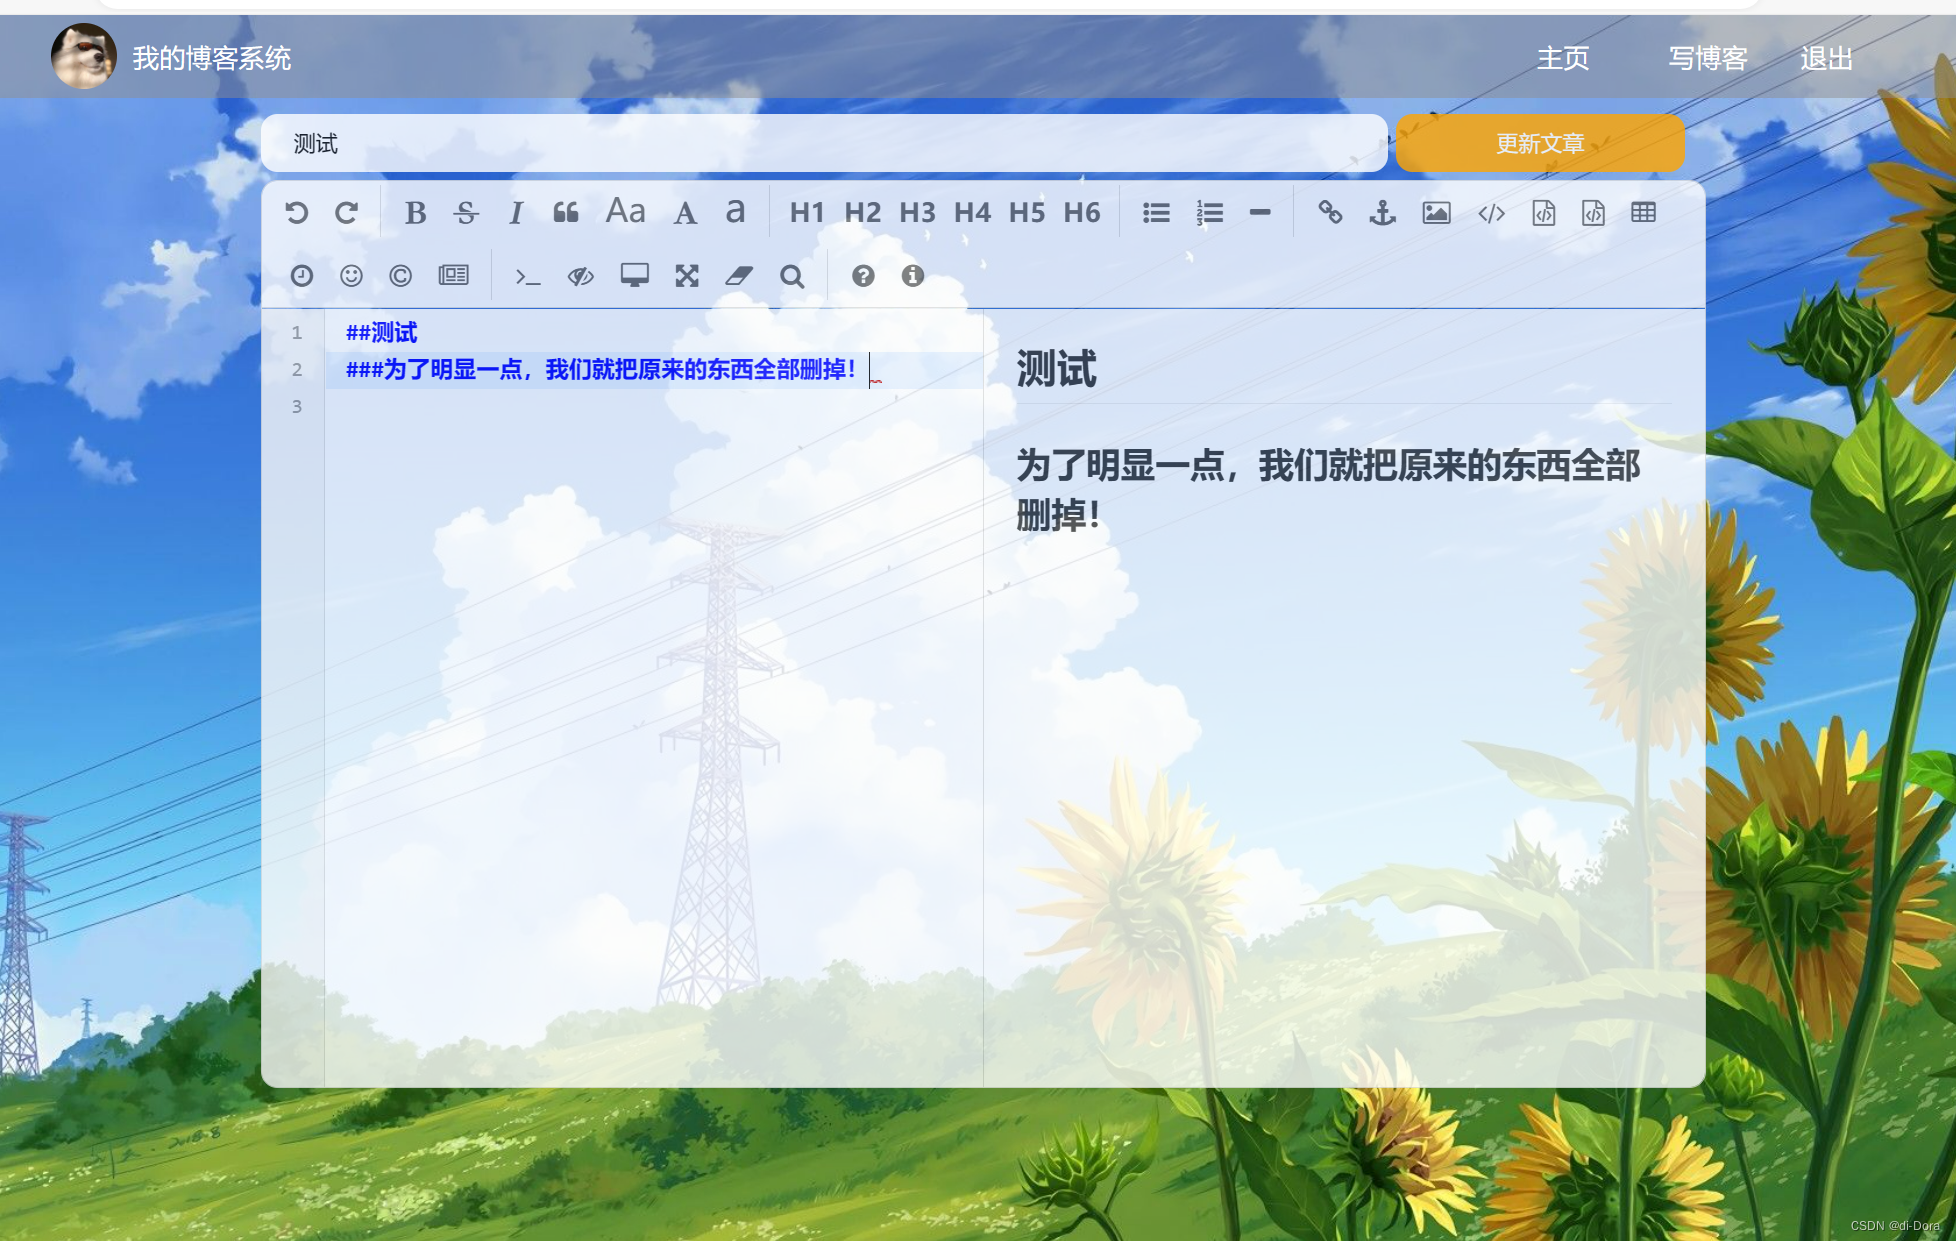


完成博客删除功能
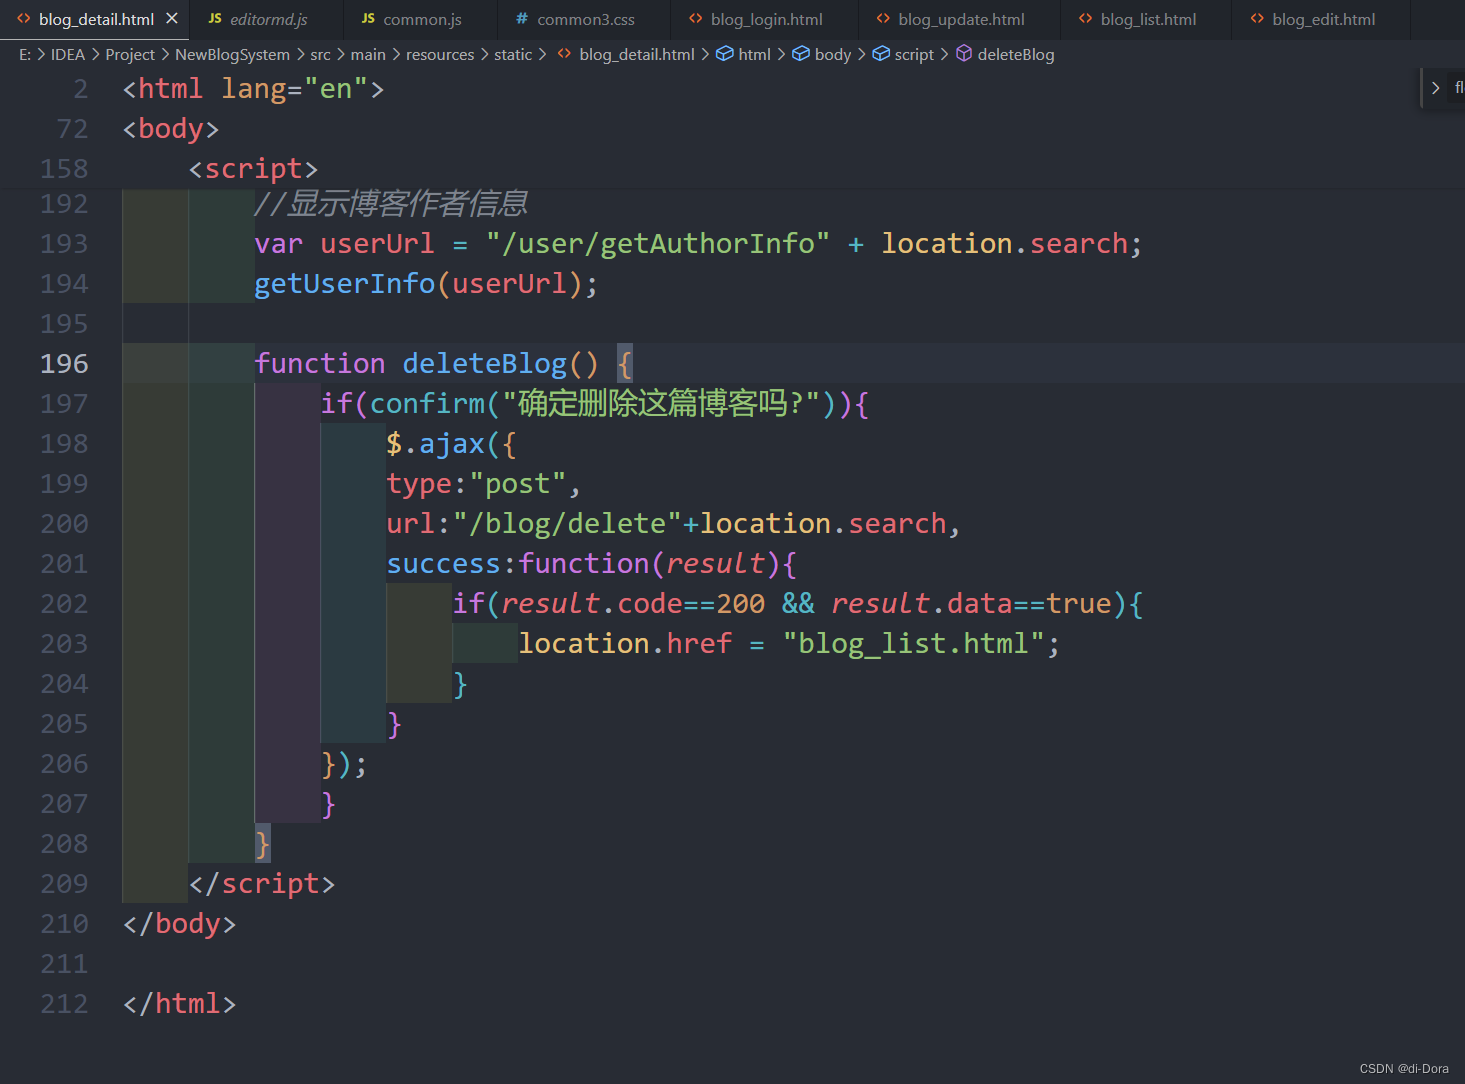
blog_detail.html:
<!DOCTYPE html>
<html lang="en">

<head>
    <meta charset="UTF-8">
    <meta http-equiv="X-UA-Compatible" content="IE=edge">
    <meta name="viewport" content="width=device-width, initial-scale=1.0">
    <title>博客详情页</title>

    <link rel="stylesheet" href="css/common2.css">
    <link rel="stylesheet" href="css/detail.css">
    <link rel="stylesheet" href="css/mydetail.css">

</head>

<body>
    <div class="nav">
        <img src="pic/酷狗.jpg" alt="">
        <span class="blog-title">我的博客系统</span>
        <div class="space"></div>
        <a class="nav-span" href="blog_list.html">主页</a>
        <a class="nav-span" href="blog_edit.html">写博客</a>
        <a class="nav-span" href="#" onclick="logout()">注销</a>
    </div>

    <div class="container">
        <div class="left">
            <div class="card">
                <img src="pic/五条悟.jpg" alt="">
                <h3>神圣的管理员SAMA</h3>
                <a href="#">GitHub 地址</a>
                <div class="row">
                    <span>文章</span>
                    <span>分类</span>
                </div>
                <div class="row">
                    <span>2</span>
                    <span>1</span>
                </div>
            </div>
        </div>
        <div class="right">
            <div class="content">
                <div class="title"></div>
                <div class="date"></div>
                <div class="detail" id="detail" style="background-color: transparent;"></div>
                <!-- <div class="operating">
                    <button onclick="window.location.href='blog_update.html'">编辑</button>
                    <button onclick="deleteBlog()">删除</button>
                </div> -->
            </div>

        </div>
    </div>

    <!-- 引入 editor.md 的依赖 -->
    <link rel="stylesheet" href="blog-editormd/css/editormd.css" />
    <script src="js/jquery.min.js"></script>
    <script src="blog-editormd/lib/marked.min.js"></script>
    <script src="blog-editormd/lib/prettify.min.js"></script>
    <script src="blog-editormd/editormd.js"></script>
    <script src="js/common.js"></script>
    <script>
                //获取博客详情
    $.ajax({
        type: "get",
        url: "/blog/getBlogDetail"+location.search,
        success:function(result){
            if(result.code==200 && result.data!=null){
                var blog = result.data;
                $(".right .content .title").text(blog.title);
                $(".right .content .date").text(blog.createTime);
                // $(".right .content .detail").text(blog.content);
                editormd.markdownToHTML("detail", {
                        markdown: blog.content ,//+ "\r\n" + $("#append-test").text(),
                    });
                console.log(blog);
                //是否显示编辑/删除按钮
                if(blog.loginUser){
                    console.log("显示编辑/删除");
                    var html = "";
                    html += '<div class="operating">';
                    html += '<button onclick="window.location.href=\'blog_update.html'+location.search+'\'">编辑</button>';
                    html += '<button onclick="deleteBlog()">删除</button>';
                    html += '</div>';

                    $(".content").append(html);
                    }
            }
        },
        error:function(error){
            if(error!=null && error.status==401){
                location.href="blog_login.html";
            }
        }
    });
        //显示博客作者信息
        var userUrl = "/user/getAuthorInfo" + location.search;
        getUserInfo(userUrl);

        function deleteBlog() {
            if(confirm("确定删除这篇博客吗?")){
                $.ajax({
                type:"post",
                url:"/blog/delete"+location.search,
                success:function(result){
                    if(result.code==200 && result.data==true){
                        location.href = "blog_list.html";
                    }
                }
            });
            }
        }
    </script>
</body>

</html>
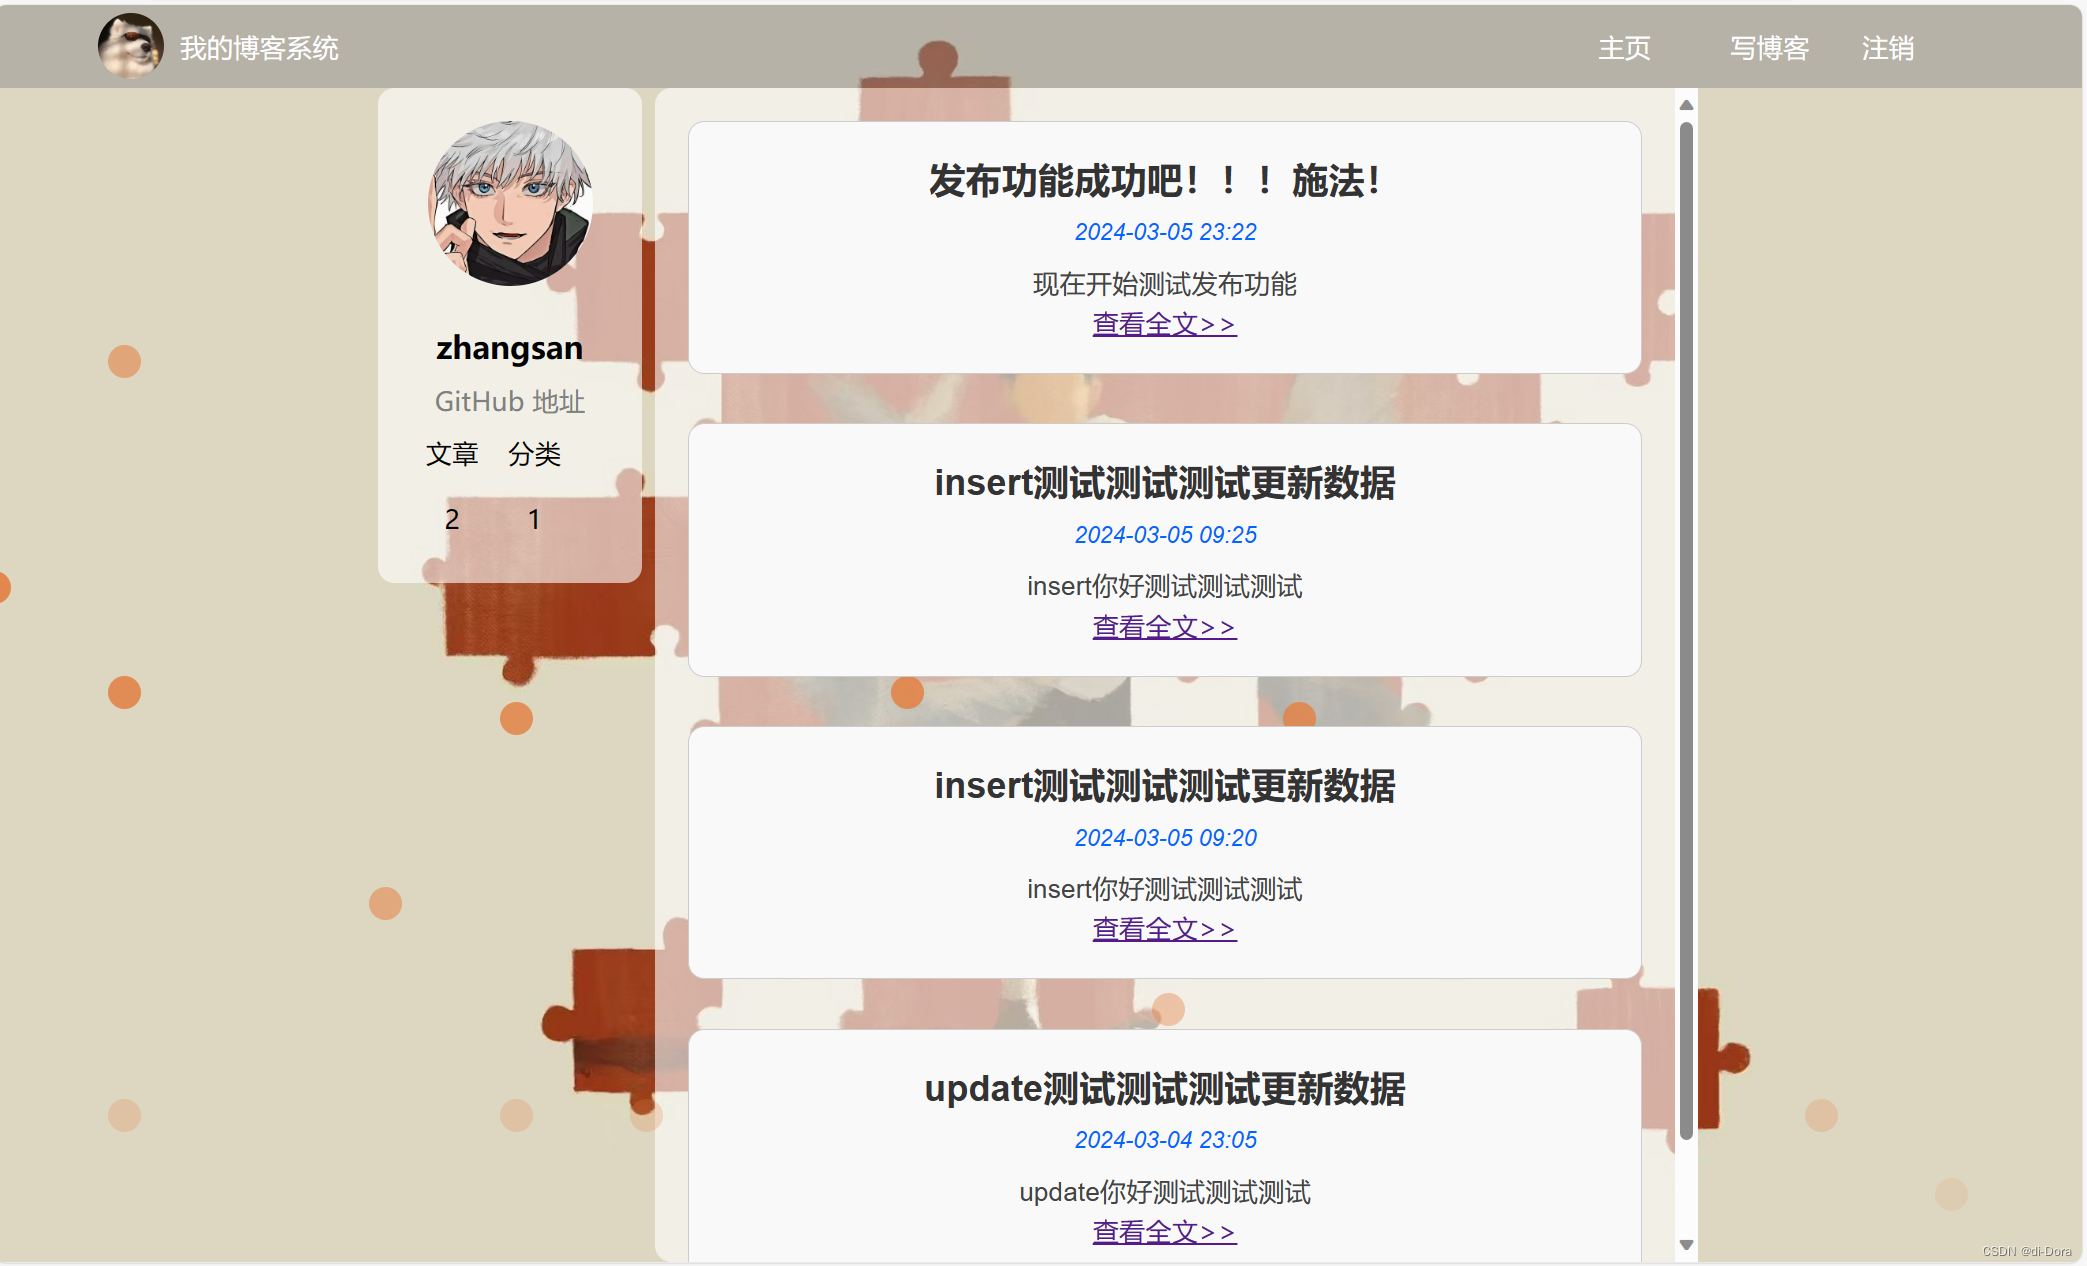
加密/加盐
加密介绍
加密是一种安全技术,它通过将数据转换为难以理解的形式,以保护敏感信息免受未经授权的访问。在MySQL数据库中,保护密码、身份证号码、手机号码等敏感信息的安全至关重要。如果这些信息以明文形式存储在数据库中,那么一旦黑客入侵数据库,他们就能够轻松地获取到用户的相关信息。这样的信息泄漏不仅可能导致用户个人隐私泄露,还可能给用户或企业带来财产损失。
为了应对这些威胁,我们需要对用户的密码进行加密处理。加密是一种将信息转换为密文的技术,使得即使黑客获取到数据,也无法直接理解其中的内容。在加密过程中,用户输入的密码会经过一系列复杂的算法,转换为一串看似毫无意义的字符,这样即使攻击者获取到这些字符,也难以还原出原始密码。
也就是说,通过加密用户密码,即使黑客成功获取到数据库的数据,也无法轻易地获取到用户的真实密码。相反,他们将不得不进行破解工作,这需要耗费大量的时间和资源。因此,加密为用户密码提供了一层额外的安全保障,有助于减少信息泄露的风险,保护用户的隐私和数据安全。
密码算法分类

密码算法主要分为三类:对称密码算法、非对称密码算法和摘要算法。
-
对称密码算法:对称密码算法指的是加密和解密所使用的密钥相同的算法。常见的对称密码算法包括:AES(高级加密标准)、DES(数据加密标准)、3DES(三重数据加密标准)、RC4、RC5、RC6等。在对称密码算法中,同一个密钥用于加密和解密数据,因此安全性依赖于密钥的保管和传输。
-
非对称密码算法:非对称密码算法是指加密和解密所使用的密钥不同的算法。该算法使用一对密钥进行加密和解密操作:公钥和私钥。公钥用于加密数据,私钥用于解密数据。常见的非对称密码算法包括:RSA(Rivest-Shamir-Adleman)、DSA(数字签名算法)、ECDSA(椭圆曲线数字签名算法)、ECC(椭圆曲线密码学)等。非对称密码算法通过使用不同的密钥,解决了对称密码算法中密钥传输的安全性问题。
-
摘要算法:摘要算法是一种将任意长度的输入消息数据转换为固定长度的输出数据的密码算法。摘要算法是不可逆的,即无法通过摘要值反推出原始消息数据。通常用于验证数据的完整性。常见的摘要算法包括:MD5、SHA系列(如SHA1、SHA2等)、CRC(循环冗余校验,包括CRC8、CRC16、CRC32等)。摘要算法常用于对数据进行哈希计算,然后比较摘要值,以确定数据是否一致,从而确保数据的完整性和安全性。
加密思路
博客系统中,我们采⽤MD5算法来进行加密。
问题1: MD5如何验证?
MD5的验证方式是通过对相同的明文使用相同的摘要算法处理后,得到的结果应该是一致的。你可以在网上找几个MD5的网站进行互相加密解密,以验证这一点。

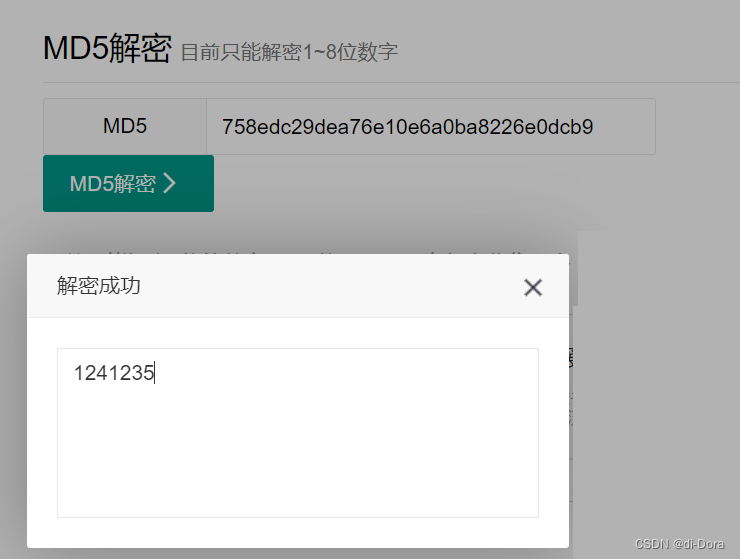
换一个网站解密看看行不行:
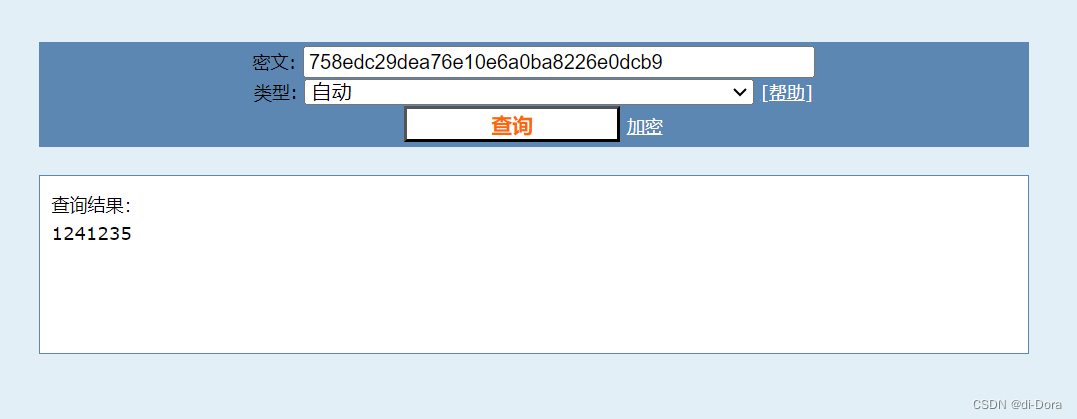
解决方案: 验证的方法很简单,我们只需要验证经过摘要算法处理后的结果即可。如果两个明文经过MD5处理后得到的密文是相同的,那么我们就可以认为这两个明文是一样的。一般来说,数据库中存储的是用户密码的密文,而用户输入的是明文。因此,我们将用户输入的明文经过MD5处理后与数据库中的密文进行对比,如果结果一致,就可以认为密码正确。
问题2: 为什么一些网站能够解密MD5?这是否意味着MD5非常不安全?
解决方案: 事实上,并不是MD5算法本身存在漏洞,导致一些网站能够解密MD5。这些网站之所以能够解密MD5,是因为它们在后台存储了大量常见密码及其对应的明文,比如8位以内的数字密码。
尽管经过MD5加密后的密文无法被直接解密,但是相同的密码经过MD5哈希之后得到的密文是相同的。因此,当存储用户密码的数据库泄露后,攻击者会很容易地找到相同密码的用户,从而降低了破解密码的难度。为了增加密码的安全性,我们需要对密码进行一定的包装处理,即使是相同的密码,也应该保存为不同的密文。即使用户输入的是弱密码,我们也需要进行增强处理,以增加密码被攻破的难度。
其中一个常见的方法是对密码进行“加盐”处理,即在密码前后添加一个随机生成的字符串,这个随机字符串称为“盐”。通过加盐处理,即使黑客获取到了加密串,他拿到的明文也不会是我们加密前的原始字符串,而是加密前的字符串和盐的组合字符串,这样相对来说增加了密码的安全性。
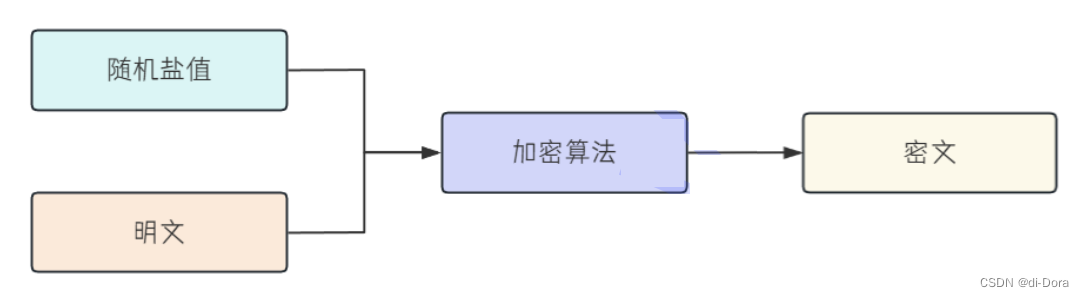
加盐后解密流程
由于MD5是不可逆的哈希算法,我们通常采用“判断哈希值是否一致”来验证密码的正确性。
在加盐后的情况下,密码验证的过程是这样的:
首先,我们可以从数据库中获取用户的信息,其中包括加上随机盐值后的密码密文,以及盐值本身。此外,我们还可以获得用户输入的明文密码。 接着,将用户输入的密码与预先设置的盐值拼接在一起形成一个新的字符串。然后,对这个新字符串进行加密算法处理,得到的密文。 最后,将得到的密文与数据库中存储的密文进行对比。如果两者相同,那么我们就认为密码是正确的。(因为密文相同,盐值相同,我们可以推测明文也相同)。 值得注意的是,在用户注册时,我们需要将随机盐值存储起来,以备后续验证密码时使用。 通过这样的加盐处理,即使攻击者获取了数据库中的密文和盐值,也难以通过密文来推测原始密码,因为他们无法得知盐值。这有效地增加了密码破解的难度,从而提升了系统的安全性。
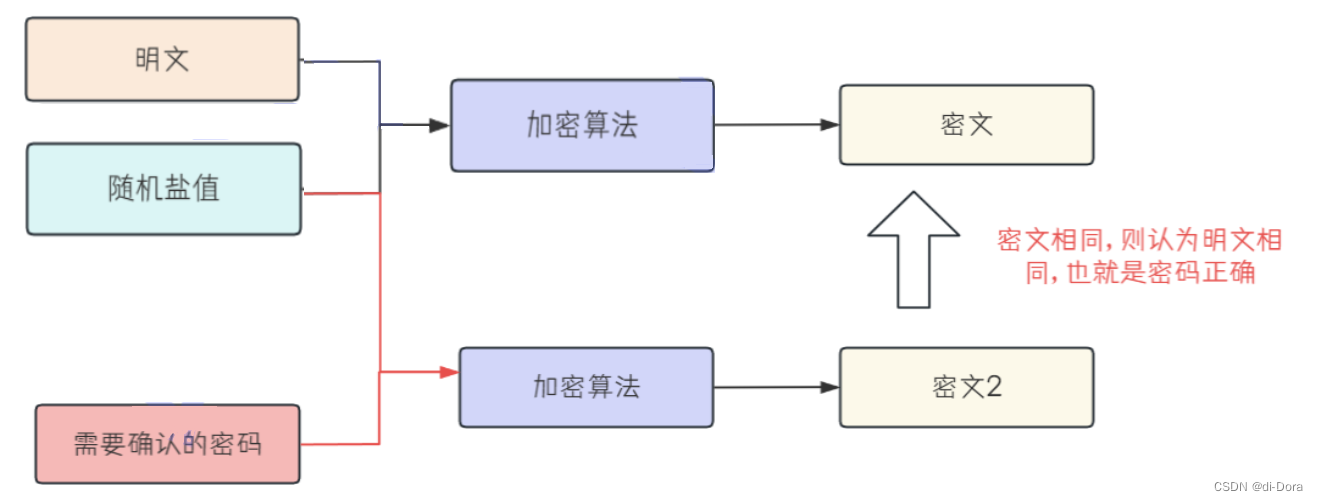
我们先来写一个测试类,整理一下思路:
package com.example.newblogsystem;

import org.junit.jupiter.api.Test;
import org.springframework.util.DigestUtils;

import java.util.UUID;

public class SecurityUtisTest {
    @Test
    public void encrypt(){
        //明文
        String password = "123456";
        //MD5提供的包,进行加密
        String md5Str = DigestUtils.md5DigestAsHex(password.getBytes());
        System.out.println("明文加密后:"+md5Str);
        //生成一个随机的永不重复的字符串,我们拿来作盐值
        String salt = UUID.randomUUID().toString().replace("-","");
        System.out.println("生成的盐值去掉连接符之后:"+salt);
        //密文内容: 盐值+明文拼接的字符串进行加密的
        String securityPassword = DigestUtils.md5DigestAsHex((salt+password).getBytes());
        //salt+密文  存储在数据库中
        String finalPassword = salt+securityPassword;
        System.out.println(finalPassword);
    }

    @Test
    public void verify(){
        String inputPassword = "123456";
        String sqlPassword = "9a9e48d9991a4652af83fa0049213068e1f54421a919c65bd13a411f83103941";
        //sqlPassword  是  salt+ md5(salt+password)
        if (sqlPassword==null || sqlPassword.length()!=64){
            System.out.println("校验失败");
        }
        String salt = sqlPassword.substring(0,32);
        String secretPassword = DigestUtils.md5DigestAsHex((salt+inputPassword).getBytes());
        String finalPassword = salt +secretPassword;
        if (finalPassword.equals(sqlPassword)) {
            System.out.println("校验成功");
        }else {
            System.out.println("校验失败");
        }
    }
}
DigestUtils是Spring Framework提供的一个工具类,其中包含了各种常用的摘要算法,如MD5、SHA等。它简化了对数据进行摘要处理的过程。
UUID是Java标准库中的一个类,用于生成唯一的标识符。这些标识符是基于时间、节点等信息生成的,通常用于标识对象或者生成随机字符串。
而且你仔细观察的话会发现UUID生成的字符串去掉中间的连接符之后和我们的md5几乎一样,非常类似,两者放在一起迷惑性非常高,大大提高了安全性。
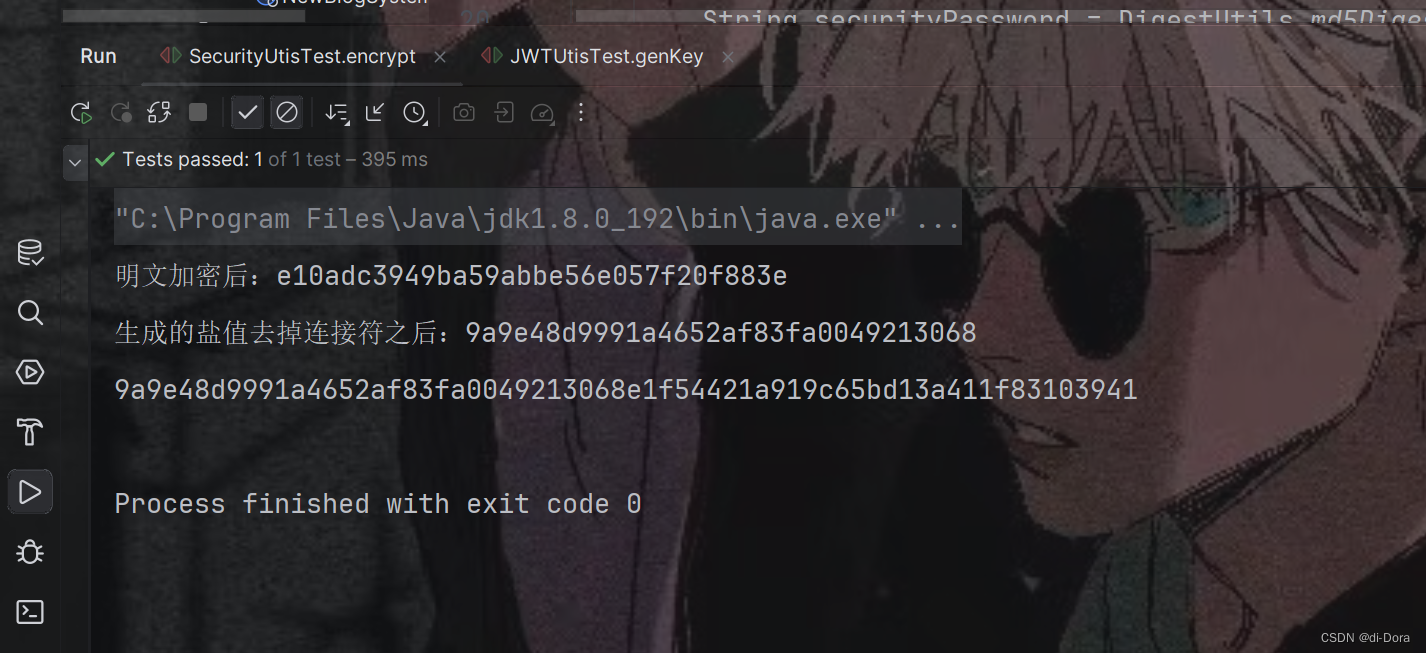
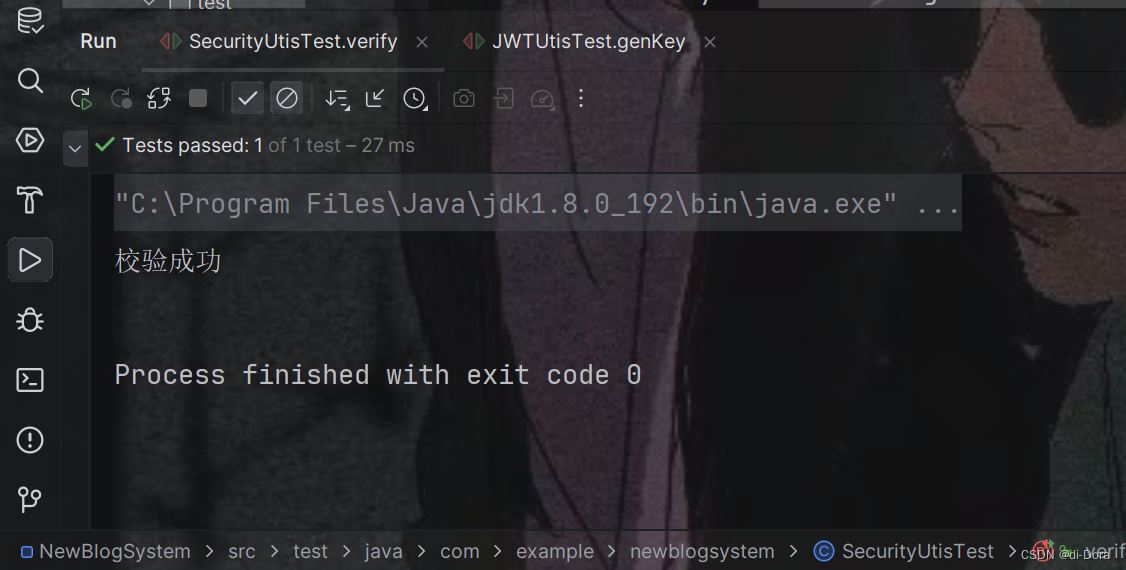
写加密/解密工具类
package com.example.newblogsystem.utils;

import lombok.extern.slf4j.Slf4j;
import org.springframework.util.DigestUtils;

import java.util.UUID;

@Slf4j
public class SecurityUtils {
    /**
     * 根据明文, 进行加密
     * @param password
     * @return
     */
    public static String encrypt(String password){
        String md5Str = DigestUtils.md5DigestAsHex(password.getBytes());
        String salt = UUID.randomUUID().toString().replace("-","");
        //密文内容: 盐值+明文拼接的字符串进行加密的
        String securityPassword = DigestUtils.md5DigestAsHex((salt+password).getBytes());
        //salt+密文  存储在数据库中
        return salt+securityPassword;
    }

    /**
     * 密码校验
     * @param inputPassword
     * @param sqlPassword
     * @return
     */
    public static boolean verify(String inputPassword, String sqlPassword){
        //sqlPassword  是  salt+ md5(salt+password)
        if (sqlPassword==null || sqlPassword.length()!=64){
            log.error("数据库中的密码格式不对");
            return false;
        }
        String salt = sqlPassword.substring(0,32);
        String secretPassword = DigestUtils.md5DigestAsHex((salt+inputPassword).getBytes());
        return sqlPassword.equals(salt +secretPassword);
    }
}
修改一下数据库密码

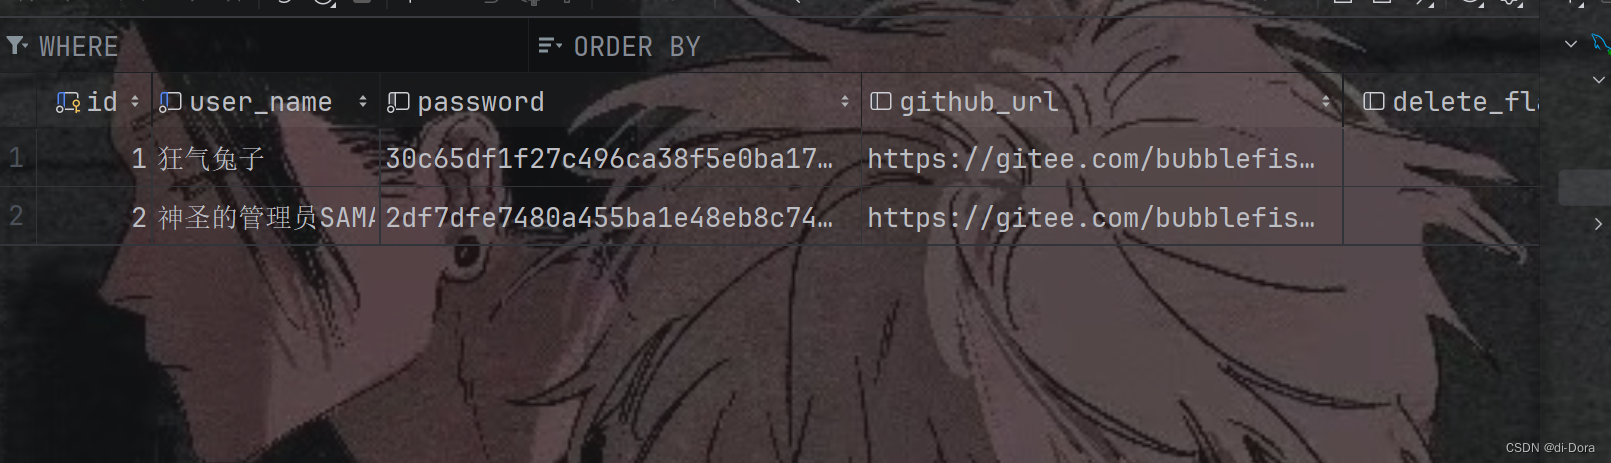
修改登录接口
UserController里面的登录逻辑修改一下:
package com.example.newblogsystem.controller;

import com.example.newblogsystem.constants.Constant;
import com.example.newblogsystem.model.Result;
import com.example.newblogsystem.model.UserInfo;
import com.example.newblogsystem.service.UserService;
import com.example.newblogsystem.utils.JwtUtis;
import com.example.newblogsystem.utils.SecurityUtils;
import org.springframework.beans.factory.annotation.Autowired;
import org.springframework.util.StringUtils;
import org.springframework.web.bind.annotation.RequestMapping;
import org.springframework.web.bind.annotation.RestController;

import javax.servlet.http.HttpServletRequest;
import java.util.HashMap;
import java.util.Map;

@RequestMapping("/user")
@RestController
public class UserController {
    @Autowired
    private UserService userService;
    //登录接口
    @RequestMapping("/login")
    public Result login(String userName, String password){
        //1. 对参数进行校验
        //2. 对密码进行校验
        //3. 如果校验成功, 生成token
        if (!StringUtils.hasLength(userName) || !StringUtils.hasLength(password)){
            return Result.fail("用户名或密码不能为空");
        }
        UserInfo userInfo = userService.queryUserByName(userName);
        if (userInfo==null || userInfo.getId()<=0){
            return Result.fail("用户不存在");
        }
        if (!SecurityUtils.verify(password, userInfo.getPassword())){
            return Result.fail("密码错误");
        }
        //密码正确了, 生成token
        Map<String,Object> claim = new HashMap<>();
        claim.put(Constant.USER_CLAIM_ID, userInfo.getId());
        claim.put(Constant.USER_CLAIM_NAME, userInfo.getUserName());
        return Result.success(JwtUtis.genToken(claim));

    }
    /**
     * 获取当前登录用户的信息
     */
    @RequestMapping("/getUserInfo")
    public UserInfo getUserInfo(HttpServletRequest request){
        //1. 获取token, 从token中获取ID
        //2. 根据ID, 获取用户信息
        String user_token = request.getHeader(Constant.USER_TOKEN_HEADER);
        Integer userId = JwtUtis.getUserIdFromToken(user_token);
        if (userId==null || userId<=0){
            return null;
        }
        UserInfo userInfo = userService.queryUserById(userId);
        userInfo.setPassword("");
        return userInfo;
    }
    /**
     * 根据博客ID, 获取作者信息
     */
    @RequestMapping("/getAuthorInfo")
    public UserInfo getAuthorInfo(Integer blogId){

        if (blogId!=null && blogId <1){
            return null;
        }
        UserInfo authorInfoByBlogId = userService.getAuthorInfoByBlogId(blogId);
        authorInfoByBlogId.setPassword("");
        return authorInfoByBlogId;
    }
}
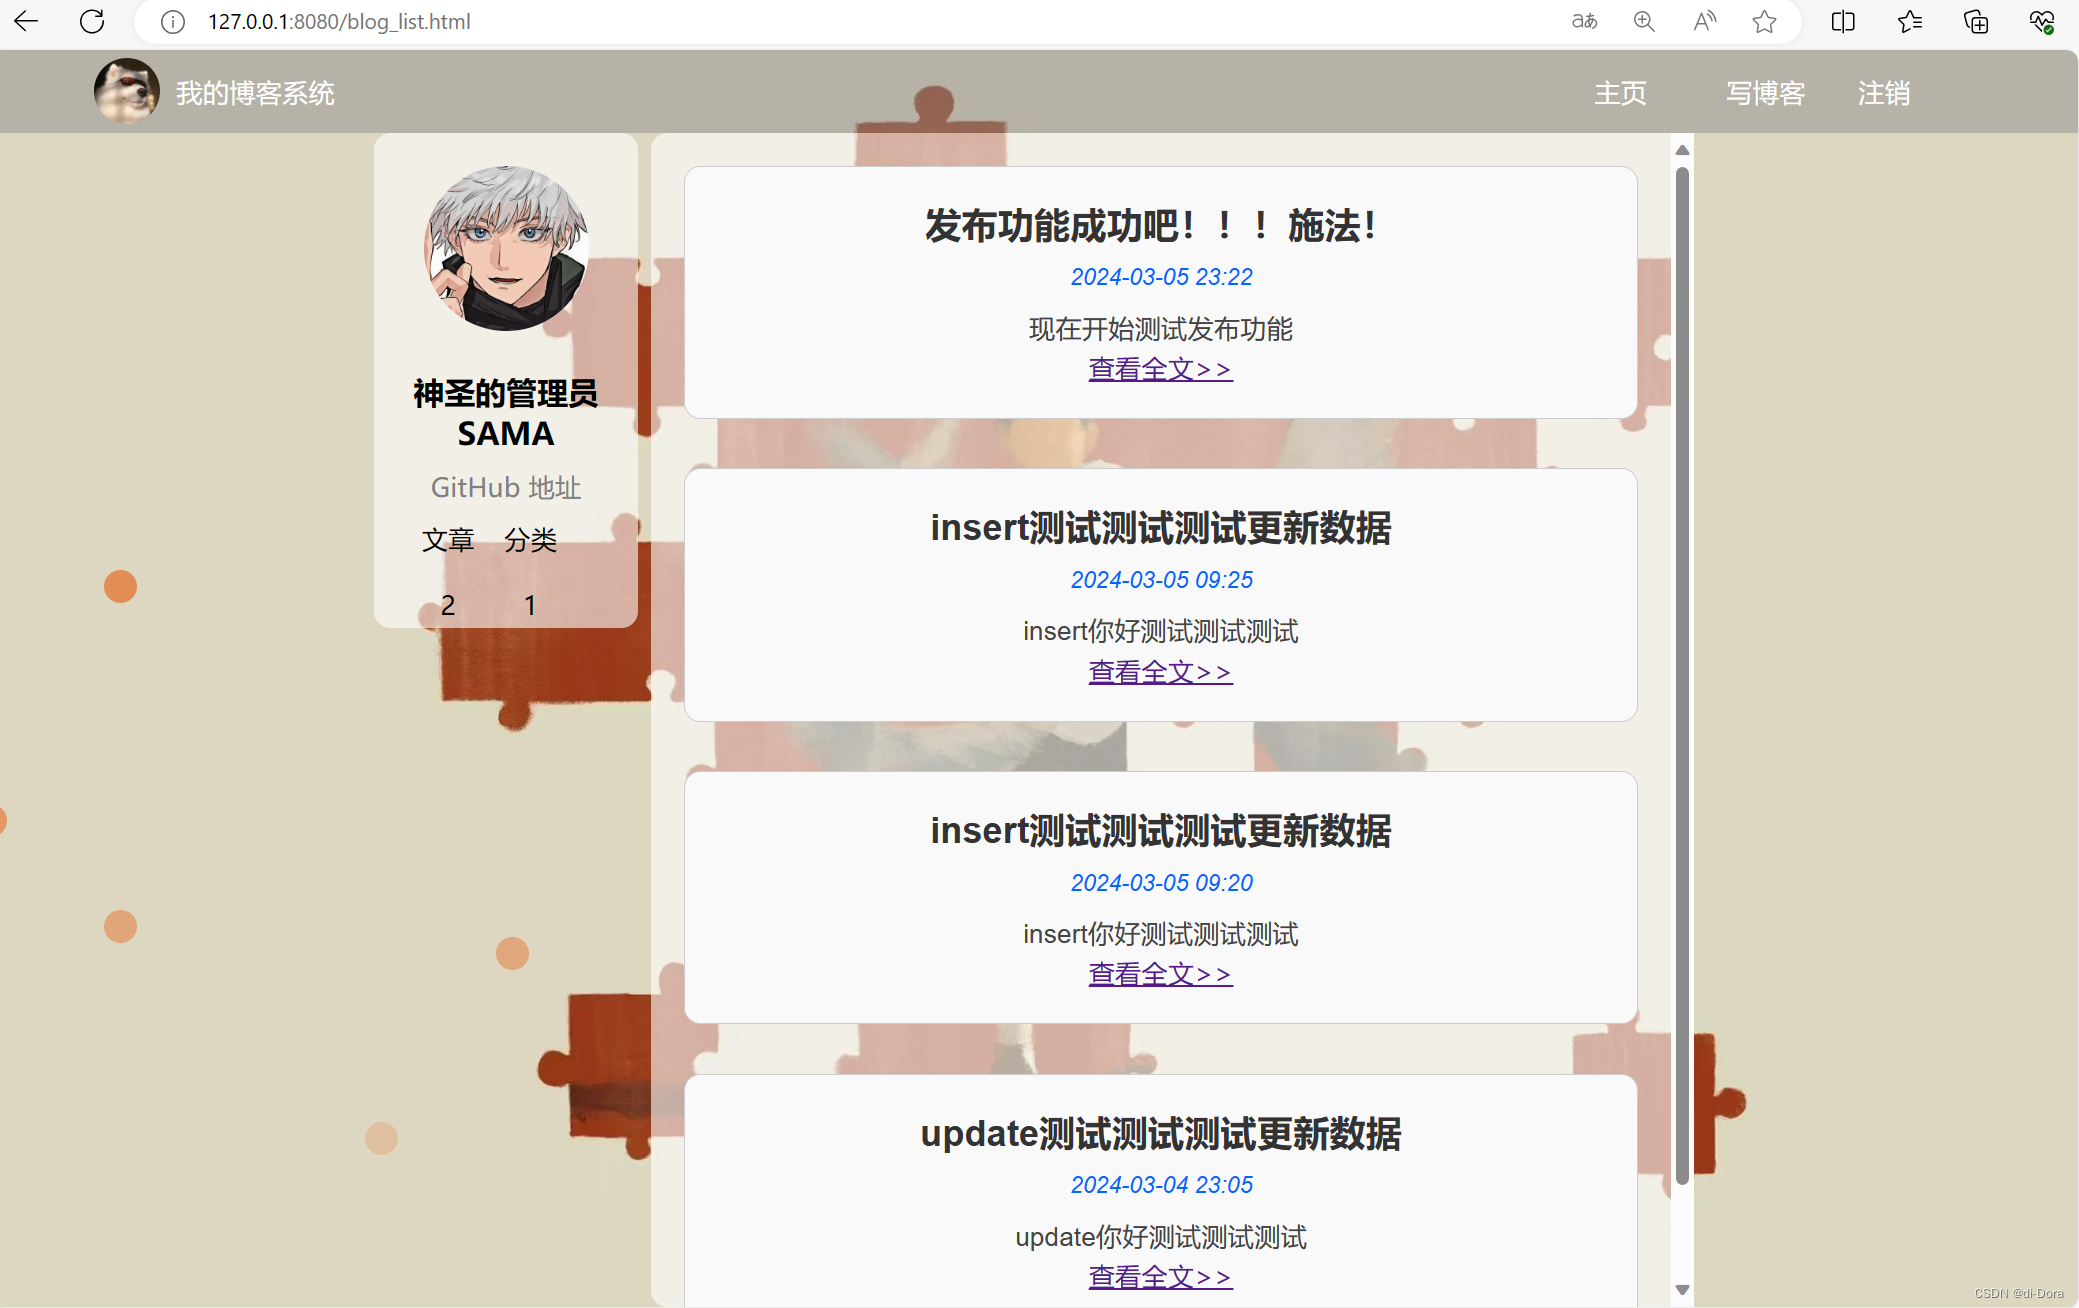
大功告成!!!
接下来就是把我们的博客系统部署到Linux服务器上……