前言
UITableView(UITableViewController)是iOS开发使用频率最高的一个组件。
不管是使用UITableView还是还是UITableViewController,在开发的时候,我们都需要实现两个协议:
UITableViewControllerDataSourceUITableViewControllerDelegate
这两个协议的代码不是写在Controller里就是写在ViewModel里,并且这些方法很难复用。关于Controller瘦身的更多细节,可以参我之前的一篇博客:
是否有一种更好的方式来开发TableView呢?如果是Model驱动,而不是代理方法驱动的就好了,如果是Model驱动,开发的时候只需要:
- 创建Row和Section对应的Model
- 由一个Manager去管理这些Model,并且对Client隐藏DataSource和Delegate方法
- 把TableView绑定到Manager
基于这些理念,开发了一个model-driven-tableView框架,
问题
重复代码
Delegate/DataSource中,有许多重复的代码。比如:
-(NSInteger)numberOfSectionsInTableView:(UITableView *)tableView{
    return 1;
}
-(NSInteger)tableView:(UITableView *)tableView numberOfRowsInSection:(NSInteger)section{
    return _dataArray.count;
}
-(CGFloat)tableView:(UITableView *)tableView heightForRowAtIndexPath:(NSIndexPath *)indexPath{
    return 80.0;
}
这些代码的逻辑其实是一样的,一个section,一个数组作为Model,row的数量就是数组元素的个数。但是,很多时候我们都是在一个一个Controller之间进行copy/paste。
Render代码
通常,在cellForRowAtIndexPath或者willDisplay中,我们会对Cell进行重新配置,保证cell在复用的时候显示正确。于是,对Cell进行配置的代码耦合到了ViewController里,
- (UITableViewCell *)tableView:(UITableView *)tableView cellForRowAtIndexPath:(NSIndexPath *)indexPath{
    YourCustomCell * cell = [tableView dequeueReusableCellWithIdentifier:@"cell"];
    if (cell == nil) {
        cell = [[YourCustomCell alloc] initWithStyle:UITableViewCellStyleDefault reuseIdentifier:@"cell"];
    }
    cell.leftLabel.text = titleArray[indexPath.row];
    cell.infoIcon.image = [UIImage imageNamed:imageArray[indexPath.row]];
    cell.rightLabel.text = rightArray[indexPath.row];
    return infoCell;
}
大量的if/else
当Cell的种类多了起来,或者点击cell的动作复杂起来,你会发现代码里充斥着各种各样的if/else(switch也一样)。大量的if/else导致代码难以阅读和维护。
- (NSInteger)tableView:(UITableView *)tableView numberOfRowsInSection:(NSInteger)section {
if (section == 0) {
}else if(section == 1){
}else{
}
}
- (UITableViewCell *)tableView:(UITableView *)tableView cellForRowAtIndexPath:(NSIndexPath *)indexPath {
if (indexPath.section == 0) {
}else if(indexPath.section == 1){
}else{
}
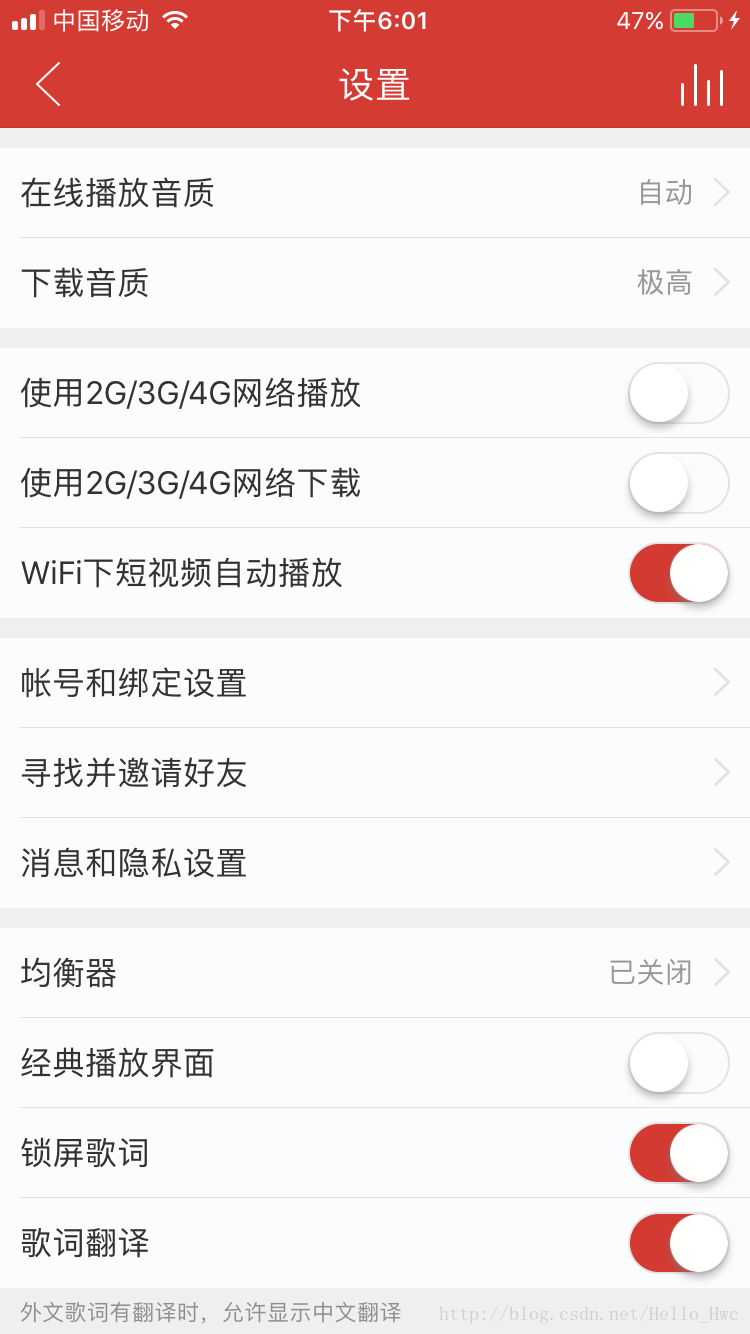
}这种情况,在设置界面尤其明显,比如这是网易云音乐的设置界面:
思考一下,如果让你来写,你会怎么写?
解决方案
基类
继承是一个实现代码复用的解决方案,通过在基类中实现-子类重写的方式进行服复用。
比如:
@interface SingleSectionTableViewController : UITableViewController
@property (strong, nonatomic)NSMutableArray * dataArray;
@end
@implementation SingleSectionTableViewController

#pragma mark - Table view data source

- (NSInteger)numberOfSectionsInTableView:(UITableView *)tableView {
    return 1;
}
- (NSInteger)tableView:(UITableView *)tableView numberOfRowsInSection:(NSInteger)section {
    return self.dataArray.count;
}
- (UITableViewCell *)tableView:(UITableView *)tableView cellForRowAtIndexPath:(NSIndexPath *)indexPath {
    [NSException raise:@"Com.table.exception" format:@"You must override this method"];
    return nil;
}
@end
当然,除了这些,你还可以在基类中配置好你的下拉刷新和上拉加载等逻辑。
CellModel
在cellForRowAtIndexPath中,写了大量的cell render代码,从MVVM的角度来看,我们可以通过建立CellModel的方式把这部分代码抽离出来。
在开发的时候,要始终牢记单一功能原则。Cell是一个纯粹的View层,那么其对业务应该尽可能的少知道。
我们来看看,引入了CellModel后,如何进行代码的编写:
Model
@interface Person : NSObject
@property (assign, nonatomic) NSUInteger age;
@property (copy, nonatomic) NSString * name;
@property (copy, nonatomic) NSString * city;
@end
ViewModel
@interface CustomCellModel : NSObject
- (instancetype)initWithModel:(Person *)person;
@property (strong, nonatomic) Person * person;
@property (assign, nonatomic) NSString * nameText;
@property (assign, nonatomic) NSString * ageText;
@end

@implementation CustomCellModel
- (instancetype)initWithModel:(Person *)person{
    if (self = [super init]) {
        self.person = person;
        self.nameText = person.name;
        self.ageText = [NSString stringWithFormat:@"%ld",(long)person.age];
    }
    return self;
}
@end
View
@interface CustomTableViewCell : UITableViewCell
@property (strong, nonatomic) UILabel * nameLabel;
@property (strong, nonatomic) UILabel * ageLabel;
@property (strong, nonatomic) CustomCellModel * cellModel;
- (void)bindWithCellModel:(CustomCellModel *)cellModel;
@end

@implementation CustomTableViewCell
- (void)bindWithCellModel:(CustomCellModel *)cellModel{
    self.cellModel = cellModel;
    self.nameLabel.text = cellModel.nameText;
    self.ageLabel.text = cellModel.ageText;
}
@end
这时候,Controller中的代码
- (UITableViewCell *)tableView:(UITableView *)tableView cellForRowAtIndexPath:(NSIndexPath *)indexPath {
    CustomTableViewCell * cell = [tableView dequeueReusableCellWithIdentifier:@"cell" forIndexPath:indexPath];
    Person * model = [self.dataArray objectAtIndex:indexPath.row];
    CustomCellModel * cellModel = [[CustomCellModel alloc] initWithModel:model];
    [cell bindWithCellModel:cellModel];
    return nil;
}
可以看到,引入了Cell Model后,
- View和Model十分纯粹,view只做展示,Modle只做业务的模型化
- ViewModel层作为View与Model的枢纽,把Model层的数据转换成View层需要显示用的数据
- Controller根据Model合成ViewModel,并且绑定给View
当代码和业务复杂起来的时候,你会发现引入了ViewModel让你的工程更清晰,也更容易测试和维护
Note:MVVM中有两个原则一定要遵守,否则就不是MVVM
- View持有ViewModel的引用,反之不持有
- ViewModel持有Model的引用,反之不持有
Dispatch
还记得那令人恶心的一大堆if/else么?那么,iOS开发中有什么更好的方式来实现这个机制呢?
这里,以selector的方式来解决didClickRowAtIndexPath.
定义一个协议,来表示ViewModel可以用来进行方法dispatch
@protocol CellActionDispatchable <NSObject>
@property (copy, nonatomic) NSString * selNameForDidSelected;
@end
然后,让ViewModel遵循这个协议,并且提供SEL的name:
@interface CustomCellModel : NSObject<CellActionDispatchable>
@property (copy, nonatomic) NSString * selNameForDidSelected;
@end然后,在didSelectRowAtIndexPath中,执行这个SEL
- (void)tableView:(UITableView *)tableView didSelectRowAtIndexPath:(NSIndexPath *)indexPath{
    [tableView deselectRowAtIndexPath:indexPath animated:true];
    id<CellActionDispatchable> cellModel = [self.dataArray objectAtIndex:indexPath.row];
    NSString * selName = cellModel.selNameForDidSelected;
#pragma clang diagnostic push
#pragma clang diagnostic ignored "-Warc-performSelector-leaks"
    [self performSelector:NSSelectorFromString(selName) withObject:indexPath];
#pragma clang diagnostic pop
}
抽离数据源
这部分参考自:
- objc.io: 更轻量的 View Controllers
抽离数据源是通过把对应的通用逻辑抽离出来,比如对于一个单一的ArrayDataSource:
@implementation SingleSectionDataSource

+ (instancetype)dataSourceWithData:(NSArray *)dataArray
                   reuseIdentifier:(NSString *)reuseIdentifier
                          onRender:(void (^)(UITableViewCell *, id))renderBlock{
    SingleSectionDataSource * ds = [[SingleSectionDataSource alloc] init];
    ds.dataArray = dataArray;
    ds.renderBlock = renderBlock;
    ds.reuseIdentifier = reuseIdentifier;
    return ds;
}

- (NSInteger)tableView:(UITableView *)tableView numberOfRowsInSection:(NSInteger)section{
    return self.dataArray.count;
}

- (UITableViewCell *)tableView:(UITableView *)tableView cellForRowAtIndexPath:(NSIndexPath *)indexPath{
    UITableViewCell * cell = [tableView dequeueReusableCellWithIdentifier:self.reuseIdentifier forIndexPath:indexPath];
    if (self.renderBlock) {
        id item = [self itemAtIndexPath:indexPath];
        self.renderBlock(cell, item);
    }
    return cell;
}

- (id)itemAtIndexPath:(NSIndexPath *)indexPath{
    return self.dataArray[indexPath.row];
}
@end
然后,就可以这么使用:
// self.navigationItem.rightBarButtonItem = self.editButtonItem;
self.customDataSource = [SingleSectionDataSource dataSourceWithData:dataArray
                                                    reuseIdentifier:"cell"
                                                           onRender:^(UITableViewCell *, id item) {

                                                           }];
self.tableView.dataSource = self.customDataSource;
MDTable
MDTable是一个模型驱动的响应式框架,使用MDTable,开发者不需要关注复杂的Delegate/DataSource方法。MDTable只关注三件事情
- Row - 用来表示每一行的模型。你可以选择继承ReactiveRow基类(更简单),或者实现协议RowConvertable
- Section - 实现
SectionConvertable协议的实例,用来表示每一个Section,使用框架提供的Section类型即可。 - Cell - MDTableViewCell及其子类,用来表示每一行如何展示。
在使用MDTable的时候,开发者只需要
- 根据数据生成RowModel和SectionModel
- 根据RowModel和SectionModel创建Manager
- 把Manager绑定到TableView。
//创建Row
let row0_0 = SystemRow(title: "System Cell", accessoryType: .disclosureIndicator)
let row0_1 = SystemRow(title: "Custom Cell", accessoryType: .disclosureIndicator)
//创建Section
let section0 = SystemSection(rows: [row0_0,row0_1]])
section0.titleForHeader = "Basic"
section0.heightForHeader = 30.0
//创建Manager
tableView.manager = TableManager(sections: [section0,section1])
Cell
为了能够让子类重写,MDTable提供了MDTableViewCell(对UITableViewCell的简单封装)。并且提供了类Row来表示SystemTableViewCell对应的Model。
- image
- title
- detailTitle
- accessoryType
- rowHeight
- cellStyle
- reuseIdentifier 复用标识符
- initalType 初始化类型(通过xib/还是代码)
事件
MDTable采用响应式的API来进行事件回调:
row.onWillDisplay { (tableView, cell, indexPath) in
    //Access manager with tableView.manager
}
row.onDidSelected { (tableView, indexPath) in

}
自定义Cell
自定义Cell,你需要以下两个步骤:
创建Model类
创建一个类型,继承ReactiveRow
class XibRow:ReactiveRow{
    //Data
    var title:String
    var subTitle:String
    var image:UIImage
    init(title:String, subTitle:String, image:UIImage) {
        self.title = title
        self.subTitle = subTitle
        self.image = image
        super.init()
        self.rowHeight = 80.0
        self.reuseIdentifier = "XibRow"
        self.initalType = RowConvertableInitalType.xib(xibName: "CusomCellWithXib")
    }
}
创建MDTableViewCell的子类
可以用XIB,或者Class。只要与RowModel的initalType一致即可。然后,重写Render方法
class CusomCellWithXib: MDTableViewCell{
    override func render(with row: TableRow) {
        guard let row = row as? XibRow else{
            return;
        }
        //Render the cell
    }
}
接着,在Controller中,使用RowModel即可:
import MDTable

class CustomCellWithXibController: UITableViewController {
    override func viewDidLoad() {
        super.viewDidLoad()
        navigationItem.title = "Custom cell with XIB"
        let rows = (1..<100).map { (index) -> CustomXibRow in
            let row = CustomXibRow(title: "Title\(index)", subTitle: "Subtitle \(index)", image: UIImage(named: "avatar")!)
            row.didSelectRowAt = { (tableView, indexPath) in
                tableView.manager.delete(row: indexPath)
                tableView.deleteRows(at: [indexPath], with: .automatic)
            }
            return row
        }
        let section = SystemSection(rows: rows)
        section.heightForHeader = 30.0
        section.titleForHeader = "Tap Row to Delete"
        tableView.manager = TableManager(sections: [section])
    }
}
动态行高
由于行高是在RowModel里提供的,所以你需要在这里动态计算行高
   var rowHeight: CGFloat{
        get{
            let attributes = [NSFontAttributeName: CustomCellWithCodeConfig.font]
            let size = CGSize(width: CustomCellWithCodeConfig.cellWidth, height: .greatestFiniteMagnitude)
            let height = (self.title as NSString).boundingRect(with: size,
                                                               options: [.usesLineFragmentOrigin],
                                                               attributes: attributes,
                                                               context: nil).size.height
            return height + 8.0
        }
    }
由于是模型驱动的,你可以对行高进行缓存或者预计算来让UI更丝滑。
编辑
如果某一行支持编辑,那么它需要实现协议EditableRow
class SwipteToDeleteRow: ReactiveRow, EditableRow{
    var titleForDeleteConfirmationButton: String? = "Delete"
    var editingStyle:UITableViewCellEditingStyle = .delete
}MDTable提供了Editor(协议)来处理编辑相关的逻辑,并且提供了一个默认的TableEditor
比如,最简单的滑动删除
let rows = (1..<100).map { (index) -> SwipteToDeleteRow in
    let row = SwipteToDeleteRow(title: "\(index)")
    return row
}
let section = Section(rows: rows)
section.heightForHeader = 30.0
section.titleForHeader = "Swipe to Delete"
let tableEditor = TableEditor()
tableEditor.editingStyleCommitForRowAt = { (tableView, style, indexPath) in
    if style == .delete{
        tableView.manager.delete(row: indexPath)
        tableView.deleteRows(at: [indexPath], with: .automatic)
    }
}
tableView.manager = TableManager(sections: [section],editor:tableEditor)
排序
排序也在EditableRow协议中
class ReorderRow: ReactiveRow, EditableRow{
    var titleForDeleteConfirmationButton: String? = nil
    var editingStyle:UITableViewCellEditingStyle = .none
    var canMove: Bool = true
    var shouldIndentWhileEditing: Bool = false
}
同样,你需要创建一个TableEditor,来管理排序相关的逻辑:
tableView.setEditing(true, animated: false)
let rows = (1..<100).map { (index) -> ReorderRow in
    let row = ReorderRow(title: "\(index)")
    return row
}
let section = Section(rows: rows)
section.heightForHeader = 0.0
let tableEditor = TableEditor()
tableEditor.moveRowAtSourceIndexPathToDestinationIndexPath = { (tableview,sourceIndexPath,destinationIndexPath) in
    tableview.manager.exchange(sourceIndexPath, with: destinationIndexPath)
}
tableView.manager = TableManager(sections: [section],editor:tableEditor)
Index Title
IndexTitle的实现非常容易,只需要配置Section的sectionIndexTitle属性即可
section.sectionIndexTitle = "A"总结
TableView的deleage/dataSource方法让开发变的很灵活,却也让代码变的很丑陋。MDTable是笔者一次封装实践,源码地址: