12.4 Nginx配置
LNMP环境搭建好之后,其实仅仅是安装上了软件,我们还有很多具体的配置工作要做。
默认虚拟主机
默认虚拟主机指的是,任何一个域名指向这台服务器,只要是没有对应的虚拟主机,就会由这个默认虚拟主机来处理。
与httpd相同,在Nginx中也有默认虚拟主机,并且类似的,第一个被Nginx加载的虚拟主机就是默认主机。但不同的是,它还有一个配置用来标记默认虚拟主机,也就是说,如果没有这个标记,第一个虚拟主机为默认虚拟主机。
- 要先修改主配置文件:
[root@localhost nginx-1.12.1]# vim /usr/local/nginx/conf/nginx.conf
     include vhost/*.conf;      //在结束符号 } 上面加入这行配置
}
上面那行配置就是加载 /usr/local/nginx/conf/vhost/ 下面的所有以.conf结尾的文件,这样我们就可以把所有虚拟主机的配置文件放到vhost目录下面了
- 编辑默认主机配置文件:
[root@localhost nginx-1.12.1]# mkdir /usr/local/nginx/conf/vhost
[root@localhost nginx-1.12.1]# cd /usr/local/nginx/conf/vhost
[root@localhost vhost]# vim default.conf    //这里是新文件,写入下面内容
server
{
    listen 80 default_server;    // 有这个 default_server 标记的就是默认虚拟主机
    server_name 123.com;
    index index.html index.htm index.php;
    root /data/nginx/default;
}- 验证上面配置
[root@localhost vhost]# /usr/local/nginx/sbin/nginx -t      //检验上面配置
nginx: the configuration file /usr/local/nginx/conf/nginx.conf syntax is ok
nginx: configuration file /usr/local/nginx/conf/nginx.conf test is successful      //说明配置没有问题
[root@localhost vhost]# /usr/local/nginx/sbin/nginx -s reload     //重载配置,这样就不用重启了
[root@localhost vhost]# mkdir -p  /data/nginx/default/
[root@localhost vhost]# echo "default" > /data/nginx/default/index.html      //创建索引页
[root@localhost vhost]# curl -x127.0.0.1:80 123.com
default
[root@localhost vhost]# curl -x192.168.33.128:80 123.com
default          //这里输入127.0.0.1和192.168.33.128(linux的IP)都行
[root@localhost vhost]# curl -x127.0.0.1:80 aaa.com
default     //访问一个没有定义过的域名,也会访问到123.com
如果想让真实Windows机器访问到这个,可以这样;
[root@localhost vhost]# iptables -I INPUT -p tcp --dport 80 -j ACCEPT //打开linux的80端口然后再在浏览器上访问即可

用户认证
在用户访问网站的时候,需要输入用户名密码才能顺利访问,一些重要的站点或网站后台通常会加上用户认证,目的当然是保障安全。
- 创建一个新的虚拟主机:
[root@localhost vhost]# cd /usr/local/nginx/conf/vhost/
[root@localhost vhost]# vim test.com.conf     //这是新文件,写入下面内容
server
{
   listen 80;
   server_name test.com;
   index index.html index.htm index.php;
   root /data/nginx/test.com;
   location /
   {
      auth_basic  "Auth";         //auth_basic打开用户认证
      auth_basic_user_file   /usr/local/nginx/conf/htpasswd;       //指定用户密码文件
   }
}- 验证上面配置
[root@localhost vhost]# /usr/local/nginx/sbin/nginx -t
nginx: the configuration file /usr/local/nginx/conf/nginx.conf syntax is ok
nginx: configuration file /usr/local/nginx/conf/nginx.conf test is successful
[root@localhost vhost]# /usr/local/nginx/sbin/nginx -s reload
[root@localhost vhost]# yum install -y httpd   //安装httpd,因为生成密码文件需要用到htpasswd命令
[root@localhost vhost]# htpasswd -c /usr/local/nginx/conf/htpasswd lzx      //创建lzx用户,并设置密码
New password:
Re-type new password:
Adding password for user lzx
[root@localhost vhost]# mkdir /data/nginx/test.com
[root@localhost vhost]# echo "test" > /data/nginx/test.com/index.html
[root@localhost vhost]# curl -x127.0.0.1:80 test.com -I
HTTP/1.1 401 Unauthorized        //状态码401说明该网站需要验证
Server: nginx/1.12.1
Date: Thu, 05 Jul 2018 08:06:39 GMT
Content-Type: text/html
Content-Length: 195
Connection: keep-alive
WWW-Authenticate: Basic realm="Auth"
打开Windows的hosts文件,加入一行:
192.168.33.128 test.com //192.168.33.128是我的linux机器的IP然后在浏览器中访问test.com:

点击取消之后出现:

输入账号密码:
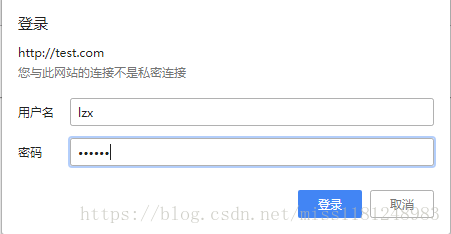
然后出现:

另外,如果是针对某个目录做用户认证,需要配置location后面的路径:
location /admin/       //这里以admin目录为例
   {
      auth_basic  "Auth";
      auth_basic_user_file   /usr/local/nginx/conf/htpasswd;
   }
域名重定向
Nginx和httpd的域名重定向和httpd的类似。
- 配置虚拟主机文件:
[root@localhost vhost]# vim test.com.conf
server
{
   listen 80;
   server_name test.com test1.com test2.com;    //Nginx中,server_name 后面可以跟多个域名
   index index.html index.htm index.php;
   root /data/nginx/test.com;
   if ($host != 'test.com')
   {
   rewrite ^/(.*)$ http://test.com/$1 permanent;   //permanent为永久重定向,相当于httpd的R=301;还有个redirect,为临时重定向,相当于R=302
   }
} - 验证上面配置:
[root@localhost vhost]# /usr/local/nginx/sbin/nginx -t
nginx: the configuration file /usr/local/nginx/conf/nginx.conf syntax is ok
nginx: configuration file /usr/local/nginx/conf/nginx.conf test is successful
[root@localhost vhost]# /usr/local/nginx/sbin/nginx -s reload
[root@localhost vhost]# curl -x127.0.0.1:80 test1.com/123.txt -I
HTTP/1.1 301 Moved Permanently      //301 永久moved
Server: nginx/1.12.1
Date: Thu, 05 Jul 2018 08:41:51 GMT
Content-Type: text/html
Content-Length: 185
Connection: keep-alive
Location: http://test.com/123.txt        //这里变成test.com/123.txt
Nginx的访问日志
先查看一下Nginx的日志格式:
[root@localhost vhost]# grep -A2 log_format /usr/local/nginx/conf/nginx.conf
    log_format combined_realip '$remote_addr $http_x_forwarded_for [$time_local]'
    ' $host "$request_uri" $status'
    ' "$http_referer" "$http_user_agent"';
和httpd类似,也是在主配置文件中定义的日志格式
combined_realip 为日志格式的名字,后面可以调用它;
$remote_addr为访问网站的用户的出口ip;
$http_x_forwarded_for为代理服务器的ip,如果使用了代理则会记录代理的ip;
$time_local为当前的时间;
$host为访问的主机名;
$request_uri为访问的URL地址;
$status为状态码;
$http_referer为referer地址;
$http_user_agent为user_agent。
- 指定访问日志的路径:
[root@localhost ~]# cd /usr/local/nginx/conf/vhost/
[root@localhost vhost]# vim test.com.conf
server
{
   listen 80;
   server_name test.com test1.com test2.com;
   index index.html index.htm index.php;
   root /data/nginx/test.com;
   if ($host != 'test.com')
   {
   rewrite ^/(.*)$ http://test.com/$1 permanent;
   }
   access_log /tmp/1.log combined_realip;          //使用access_log来指定日志的存储路径,最后面指定日志的格式名字
}- 验证上面配置:
[root@localhost vhost]# /usr/local/nginx/sbin/nginx -t
nginx: the configuration file /usr/local/nginx/conf/nginx.conf syntax is ok
nginx: configuration file /usr/local/nginx/conf/nginx.conf test is successful
[root@localhost vhost]# /usr/local/nginx/sbin/nginx -s reload
[root@localhost vhost]# curl -x127.0.0.1:80 test.com/111
<html>
<head><title>404 Not Found</title></head>
<body bgcolor="white">
<center><h1>404 Not Found</h1></center>
<hr><center>nginx/1.12.1</center>
</body>
</html>
[root@localhost vhost]# cat /tmp/1.log
127.0.0.1 - [06/Jul/2018:11:15:12 +0800] test.com "/111" 404 "-" "curl/7.29.0"     //curl访问记录
192.168.33.1 - [06/Jul/2018:11:18:35 +0800] test.com "/" 200 "-" "Mozilla/5.0 (Windows NT 10.0; Win64; x64) AppleWebKit/537.36 (KHTML, like Gecko) Chrome/67.0.3396.99 Safari/537.36"    //Windows上面浏览器访问记录
192.168.33.1 - [06/Jul/2018:11:18:35 +0800] test.com "/favicon.ico" 404 "http://test.com/" "Mozilla/5.0 (Windows NT 10.0; Win64; x64) AppleWebKit/537.36 (KHTML, like Gecko) Chrome/67.0.3396.99 Safari/537.36"
192.168.33.1 - [06/Jul/2018:11:18:41 +0800] test.com "/111" 404 "-" "Mozilla/5.0 (Windows NT 10.0; Win64; x64) AppleWebKit/537.36 (KHTML, like Gecko) Chrome/67.0.3396.99 Safari/537.36"
Nginx的日志比较简单,但没有像httpd那样自带的切割工具,要想切割Ngin日志需要借助系统的切割工具或自定义脚本。
这里我们自定义一个日志切割脚本:
[root@localhost vhost]# vim /usr/local/sbin/nginx_log_rotate.sh        //写入下面内容
#! /bin/bash
d= `data -d "-1 day" +%Y%m%d`
logdir="/data/logs"      //假设Nginx的日志存放路径为/data/logs
nginx_pid="/usr/local/nginx/logs/nginx.log"
cd $logdir
for log in `ls *.log`
do
  mv $log $log-$d
done
/bin/kill -HUP `cat $nginx_pid`
写完脚本之后,还需要增加任务计划:
[root@localhost vhost]# 0 0 * * * /bin/bash /usr/local/sbin/nginx_log_rotate.sh配置静态文件不记录日志并添加过期时间
- 修改虚拟主机配置文件:
[root@localhost vhost]# vim test.com.conf
 listen 80;
   server_name test.com test1.com test2.com;
   index index.html index.htm index.php;
   root /data/nginx/test.com;
   if ($host != 'test.com')
   {
   rewrite ^/(.*)$ http://test.com/$1 permanent;
   }
   location ~ .*\.(gif|jpg|jpeg|png|bmp|swf)$      //指定对于的静态文件
   {
     expires   7d;          //配置过期时间
     access_log off;        //off就不记录访问日志了
   }
   location ~ .*\.(js|css)$
   {
     expires    12h;
     access_log off;
   }
   access_log /tmp/1.log combined_realip;
} - 验证上面配置:
[root@localhost vhost]# /usr/local/nginx/sbin/nginx -t
nginx: the configuration file /usr/local/nginx/conf/nginx.conf syntax is ok
nginx: configuration file /usr/local/nginx/conf/nginx.conf test is successful
[root@localhost vhost]# /usr/local/nginx/sbin/nginx -s reload
[root@localhost vhost]# echo "111" > /data/nginx/test.com/1.js       //创建js文件
[root@localhost vhost]# echo "222" > /data/nginx/test.com//2.jpg        //创建jpg文件
[root@localhost vhost]# touch /data/nginx/test.com/3.jss        //创建一个对比文件
[root@localhost vhost]# curl -x127.0.0.1:80 test.com/1.js -I
HTTP/1.1 200 OK
Server: nginx/1.12.1
Date: Fri, 06 Jul 2018 03:52:47 GMT
Content-Type: application/javascript
Content-Length: 4
Last-Modified: Fri, 06 Jul 2018 03:50:55 GMT
Connection: keep-alive
ETag: "5b3ee71f-4"
Expires: Fri, 06 Jul 2018 15:52:47 GMT
Cache-Control: max-age=43200       //43200秒即12小时,js文件过期时间为12h
Accept-Ranges: bytes
[root@localhost vhost]# curl -x127.0.0.1:80 test.com/2.jpg -I
HTTP/1.1 200 OK
Server: nginx/1.12.1
Date: Fri, 06 Jul 2018 03:56:15 GMT
Content-Type: image/jpeg
Content-Length: 4
Last-Modified: Fri, 06 Jul 2018 03:51:35 GMT
Connection: keep-alive
ETag: "5b3ee747-4"
Expires: Fri, 13 Jul 2018 03:56:15 GMT
Cache-Control: max-age=604800         //jpg文件过期时间为7天
Accept-Ranges: bytes
[root@localhost vhost]# curl -x127.0.0.1:80 test.com/3.jss -I        //jss文件无过期时间
HTTP/1.1 200 OK
Server: nginx/1.12.1
Date: Fri, 06 Jul 2018 03:57:33 GMT
Content-Type: application/octet-stream
Content-Length: 0
Last-Modified: Fri, 06 Jul 2018 03:52:00 GMT
Connection: keep-alive
ETag: "5b3ee760-0"
Accept-Ranges: bytes
[root@localhost vhost]# cat /tmp/1.log
127.0.0.1 - [06/Jul/2018:11:15:12 +0800] test.com "/111" 404 "-" "curl/7.29.0"
192.168.33.1 - [06/Jul/2018:11:18:35 +0800] test.com "/" 200 "-" "Mozilla/5.0 (Windows NT 10.0; Win64; x64) AppleWebKit/537.36 (KHTML, like Gecko) Chrome/67.0.3396.99 Safari/537.36"
192.168.33.1 - [06/Jul/2018:11:18:35 +0800] test.com "/favicon.ico" 404 "http://test.com/" "Mozilla/5.0 (Windows NT 10.0; Win64; x64) AppleWebKit/537.36 (KHTML, like Gecko) Chrome/67.0.3396.99 Safari/537.36"
192.168.33.1 - [06/Jul/2018:11:18:41 +0800] test.com "/111" 404 "-" "Mozilla/5.0 (Windows NT 10.0; Win64; x64) AppleWebKit/537.36 (KHTML, like Gecko) Chrome/67.0.3396.99 Safari/537.36"
127.0.0.1 - [06/Jul/2018:11:57:33 +0800] test.com "/3.jss" 200 "-" "curl/7.29.0"       //这里可以看到,并没有js和jpg文件的访问日志记录
Nginx防盗链
- 修改虚拟主机的配置文件:
[root@localhost vhost]# vim test.com.conf
server
{
   listen 80;
   server_name test.com test1.com test2.com;
   index index.html index.htm index.php;
   root /data/nginx/test.com;
   if ($host != 'test.com')
   {
   rewrite ^/(.*)$ http://test.com/$1 permanent;
   }
   location ~* ^.+\.(gif|jpg|png|swf|flv|rar|zip|doc|pdf|gz|bz2|jpeg|bmp|xls)$
   {
      expires  7d;
      valid_referers none blocked server_names *.test.com;
      if ($invalid_referer)
     {
      return 403;
     }
      access_log off;
   }
   access_log /tmp/1.log combined_realip;
} - 验证上面配置:
[root@localhost vhost]# /usr/local/nginx/sbin/nginx -t
nginx: the configuration file /usr/local/nginx/conf/nginx.conf syntax is ok
nginx: configuration file /usr/local/nginx/conf/nginx.conf test is successful
[root@localhost vhost]# /usr/local/nginx/sbin/nginx -s reload
[root@localhost vhost]# curl -x127.0.0.1:80 -e "http://123.com/1.txt" test.com/2.jpg -I         //使用-e选项时,必须补全http://
HTTP/1.1 403 Forbidden
Server: nginx/1.12.1
Date: Fri, 06 Jul 2018 04:13:19 GMT
Content-Type: text/html
Content-Length: 169
Connection: keep-alive
[root@localhost vhost]# curl -x127.0.0.1:80 -e "http://test.com/1.txt" test.com/2.jpg -I
HTTP/1.1 200 OK
Server: nginx/1.12.1
Date: Fri, 06 Jul 2018 04:15:06 GMT
Content-Type: image/jpeg
Content-Length: 4
Last-Modified: Fri, 06 Jul 2018 03:51:35 GMT
Connection: keep-alive
ETag: "5b3ee747-4"
Expires: Fri, 13 Jul 2018 04:15:06 GMT
Cache-Control: max-age=604800      //过期时间为7d
Accept-Ranges: bytes
可以看到不仅有过期时间,还有防盗链的功能
访问控制
Nginx需要限制某些IP不能访问或只允许某些IP访问,配置访问和httpd类似
- 使访问admin目录的请求只允许192.168.33.128和127.0.0.1访问:
location /admin/
{
      allow 192.168.33.128;
      allow 127.0.0.1;
      deny all;
}
配置httpd的时候还有个order来先定义allow或deny,在Nginx中没有,只要逐条匹配规则就结束了
[root@localhost vhost]# /usr/local/nginx/sbin/nginx -t
nginx: the configuration file /usr/local/nginx/conf/nginx.conf syntax is ok
nginx: configuration file /usr/local/nginx/conf/nginx.conf test is successful
[root@localhost vhost]# /usr/local/nginx/sbin/nginx -s reload
[root@localhost vhost]# mkdir /data/nginx/test.com/admin/
[root@localhost vhost]# echo "123" > /data/nginx/test.com/admin/1.html
[root@localhost vhost]# curl -x127.0.0.1:80 test.com/admin/1.html
123
[root@localhost vhost]# curl -x192.168.33.129:80 test.com/admin/1.html
<html>
<head><title>403 Forbidden</title></head>
<body bgcolor="white">
<center><h1>403 Forbidden</h1></center>
<hr><center>nginx/1.12.1</center>
</body>
</html>
配置文件中的IP也可以为IP段,比如可以写成 allow 192.168.33.0/24。如果只是拒绝几个IP,可以写成这样:
location /admin/
{
      deny 192.168.33.128;
      deny 127.0.0.1;
}
Nginx默认就是允许所有,所以不需要写 allow all
另外,还可以根据正则匹配来限制:
location ~ .*(abc|image)/.*\.php$      //禁止解析PHP
{
    return 403;
}
|为分隔符,表示“或者”的意思,这样就可以把访问的URL中带有abc或者image字符串,并且是PHP的请求拒绝访问
在Nginx里,也可以针对user_agent做一些限制:
if ($http_user_agent ~ `Spider/3.0|YoudaoBot|Tomato`)
{
    return 403;
}
~为匹配符,只要user_agent中含有Spider3.0或者YoudaoBot或者Tomato字符串的,都会被拒绝
Nginx解析PHP
在LNMP中,PHP是以一个服务(php—fpm)的形式存在的,首先要启动php-fpm服务,然后Nginx再和php-fpm通信。
下面是相关配置:
[root@localhost vhost]# vim test.com.conf
server
{
   listen 80;
   server_name test.com test1.com test2.com;
   index index.html index.htm index.php;
   root /data/nginx/test.com;
   if ($host != 'test.com')
   {
   rewrite ^/(.*)$ http://test.com/$1 permanent;
   }
   location ~ \.php$
  {
      include fastcgi_params;
      fastcgi_pass unix:/tmp/php-fcgi.sock;
      fastcgi_index index.php;
      fastcgi_param SCRIPT_FILENAME /data/nginx/test.com$fastcgi_script_name;
  }
   access_log /tmp/1.log combined_realip;
}
其中fastcgi_pass用来指定php-fom的地址,fastcgi_param SCRIPT_FILENAME后面跟的路径为该站点的根目录,和前面定义的root的路径保持一致
Nginx代理
Nginx的代理功能非常实用,如果一个没有公网IP的服务器要提供web服务,就可以通过Nginx代理来实现。如果Nginx后面有多台服务器,如果同时代理,那Nginx在这里就起到一个负载均衡的作用。
- 配置Nginx代理:
server
{
   listen 80;
   server_name 123.com;
   location /
   {
      proxy_pass  http://121.201.9.155/;
      proxy_set_header HOST $host;
      proxy_set_header X-Real-IP  $remote_addr;
      proxy_set_header X-Forwarded_For $proxy_add_x_forwarded_for;
   }
}
Proxy_pass指定要代理的域名所在的服务器IP
后面的三行为定义发往后端web服务取的请求头,第二行必须有,否则代理不成功,它表示后端web服务器的域名和当前配置文件中的server_name保持一致
第三行和第四行可以省略
配置文件保存后,重新加载Nginx服务并验证:
[root@localhost vhost]# /usr/local/nginx/sbin/nginx -t
nginx: the configuration file /usr/local/nginx/conf/nginx.conf syntax is ok
nginx: configuration file /usr/local/nginx/conf/nginx.conf test is successful
[root@localhost vhost]# /usr/local/nginx/sbin/nginx -s reload
[root@localhost vhost]# curl -x127.0.0.1:80 123.com -I
更多资料参考:
针对请求的uri来代理
nginx算法分析
nginx中的root和alias区别
Nginx反向代理配置
rewrite中的break和last
nginx location优先级