一:eclipse 创建项目
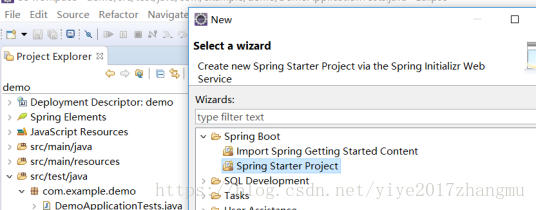
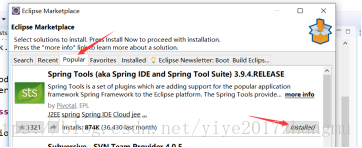
如果没有安装sts的可以在eclipse中快速安装
二.在Pom.xml配置文件中添加所需的jar包
</dependency>
		  <dependency>
            <groupId>com.alibaba</groupId>
            <artifactId>druid</artifactId>
            <version>1.1.0</version>
        </dependency>
<plugin>
<groupId>org.mybatis.generator</groupId>
<artifactId>mybatis-generator-maven-plugin</artifactId>
<version>1.3.6</version>
<configuration>
<configurationFile>${basedir}/src/main/resources/generator/generatorConfig.xml</configurationFile>
<overwrite>true</overwrite>
<verbose>true</verbose>
</configuration>
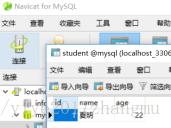
</plugin>三.数据库创建表
四.通过Maven build 运行generatorConfig.xml生成Bean和mapper
<?xml version="1.0" encoding="UTF-8" ?>
<!DOCTYPE generatorConfiguration PUBLIC "-//mybatis.org//DTD MyBatis Generator Configuration 1.0//EN" "http://mybatis.org/dtd/mybatis-generator-config_1_0.dtd" >
<generatorConfiguration >
<classPathEntry
            location="G:\spring-framework-4.2.8.RELEASE\mysql-connector-java-5.0.8.tar\mysql-connector-java-5.0.8\mysql-connector-java-5.0.8-bin.jar"/>
  <context id="context1" >
    <jdbcConnection driverClass="com.mysql.jdbc.Driver" connectionURL="jdbc:mysql://127.0.0.1:3306/mysql" userId="root" password="xxxxx" />
    <javaModelGenerator targetPackage="com.example.model" targetProject="src\main\java" />
    <sqlMapGenerator targetPackage="com.example.mapper" targetProject="src\main\java" />
    <javaClientGenerator targetPackage="com.example.dao" targetProject="src\main\java" type="XMLMAPPER" />
    <!-- 生成表并且不生成example -->
        <table schema="" tableName="student"  enableCountByExample="false" enableDeleteByExample="false" enableSelectByExample="false"
               enableUpdateByExample="false" />
  </context>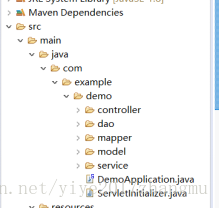
</generatorConfiguration>注意:spring boot启动DemoAplication是需要扫描它下面的Controller等类的,所以将DemoApplication移动到com/demo目录下,各种其他包也得放在该目录下
五.mapper接口创建
package com.example.demo.dao;

import org.apache.ibatis.annotations.Mapper;
import org.apache.ibatis.annotations.Select;

import com.example.demo.model.Student;

@Mapper
public interface StudentMapper {
	@Select("select *from student ")
     public Student getAll();
}
六.主函数前面加入浏览包的注解
#默认使用配置
spring:
  profiles:
    active: dev

#公共配置与profiles选择无关 mapperLocations指的路径是src/main/resources
mybatis:
  typeAliasesPackage: com.example.demo.model
  mapperLocations: classpath:com.example.demo.mapper/*.xml


---

#开发配置
spring:
  profiles: dev

  datasource:
    url: jdbc:mysql://localhost:3306/mysql
    username: root
    password: xxxxx
    driver-class-name: com.mysql.jdbc.Driver
    # 使用druid数据源
    type: com.alibaba.druid.pool.DruidDataSource
七.测试类进行测试
package com.example.demo;


import org.junit.Test;
import org.junit.runner.RunWith;
import org.springframework.beans.factory.annotation.Autowired;
import org.springframework.boot.test.context.SpringBootTest;
import org.springframework.test.context.junit4.SpringRunner;


import com.example.demo.model.Student;
import com.example.demo.service.studentService;

@RunWith(SpringRunner.class)
@SpringBootTest
public class DemoApplicationTests {
	@Autowired
    private studentService studentService;
	@Test
	public void contextLoads() {
	Student student=studentService.showAll();
	 System.out.println(student);
	}

}