在前面的文章中我们已经学习了如何去搭建一个Springboot以及如何将mybatis 集成在Springboot中 ,接下来的内容我们将学习如何在Springboot中集成Swagger API 文档工具。
在这个提倡前后端分离的时代,前后端分工合作,界限明确无疑是可以很好的提升工作效率,前端负责页面编写和页面对接,后端负责返回数据以及提供接口文档!
那在这个时候后端如何来提供接口文档就很关键了,如果说只是传统的试验DOC文档的方式来写API文档 这样文档不仅难以维护 而且也不明确难以调用。但是如果使用Swagger API工具就不一样了,它是一个在线的API工具 用户可直接在线上去调用测试API 很方便而且直观!
废话不多说,接下来我们就开始在Springboot中集成Swagger文档吧!
首先,我们是先加入Swagger 包
<!-- http://mvnrepository.com/artifact/io.springfox/springfox-swagger2 -->
        <dependency>
            <groupId>io.springfox</groupId>
            <artifactId>springfox-swagger2</artifactId>
            <version>2.5.0</version>
        </dependency>

        <!-- http://mvnrepository.com/artifact/io.springfox/springfox-swagger-ui -->
        <dependency>
            <groupId>io.springfox</groupId>
            <artifactId>springfox-swagger-ui</artifactId>
            <version>2.5.0</version>
        </dependency>
接下来因为Springboot 已经没有配置文件了,所以我们要为Swagger 编写配置类我这里的文件层级如下(可根据个人喜好配置)
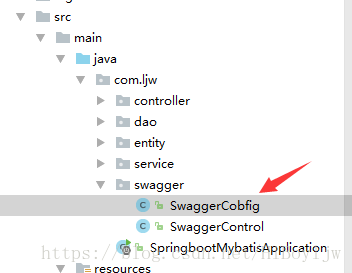
一下是代码内容:
package com.ljw.swagger;

import org.springframework.context.annotation.Bean;
import org.springframework.context.annotation.Configuration;
import org.springframework.web.context.request.async.DeferredResult;
import springfox.documentation.builders.PathSelectors;
import springfox.documentation.service.ApiInfo;
import springfox.documentation.service.Contact;
import springfox.documentation.spi.DocumentationType;
import springfox.documentation.spring.web.plugins.Docket;
import springfox.documentation.swagger2.annotations.EnableSwagger2;

/**
 * Created by Administrator on 2018/6/27.
 */
@EnableSwagger2
@Configuration
public class SwaggerCobfig {

    @Bean
    public Docket api() {
        return new Docket(DocumentationType.SWAGGER_2)
                .groupName("demo")
                .genericModelSubstitutes(DeferredResult.class)
                .useDefaultResponseMessages(false)
                .forCodeGeneration(false)
                .pathMapping("/")
                .select()
                .paths(PathSelectors.any())
                .build()
                .apiInfo(demoApiInfo());
    }

    private ApiInfo demoApiInfo() {
        ApiInfo apiInfo = new ApiInfo(
                "SPRING BOOT AND SWAGGER TEST API",//大标题
                "Test REST API, all the applications could access the Object model data via JSON.",//小标题
                "1.0",//版本
                "NO terms of service",//服务条款
                new Contact("test","66666","双击关注"),//作者
                "Spring Boot Demo",//链接显示文字
                "http://localhost:8080/swagger"//网站链接
        );
        return apiInfo;
    }
}
如上代码所示,通过@Configuration注解,让Spring来加载该类配置。再通过@EnableSwagger2注解来启用Swagger2。
再通过createRestApi函数创建Docket的Bean之后,apiInfo()用来创建该Api的基本信息(这些基本信息会展现在文档页面中)。select()函数返回一个ApiSelectorBuilder实例用来控制哪些接口暴露给Swagger来展现,本例采用指定扫描的包路径来定义,Swagger会扫描该包下所有Controller定义的API,并产生文档内容(除了被@ApiIgnore指定的请求)。
好了,到这里之后我们就已经是成功的集成了Swagger 了,那么具体如何使用呢? 很简单,我们只要在Controller 的方法上加入注释就行了
package com.ljw.controller;

import com.ljw.entity.User;
import com.ljw.service.IUserService;
import io.swagger.annotations.ApiOperation;
import org.slf4j.Logger;
import org.slf4j.LoggerFactory;
import org.springframework.beans.factory.annotation.Autowired;
import org.springframework.beans.factory.annotation.Qualifier;
import org.springframework.stereotype.Controller;
import org.springframework.web.bind.annotation.RequestMapping;
import org.springframework.web.bind.annotation.RequestMethod;
import org.springframework.web.bind.annotation.RequestParam;
import org.springframework.web.bind.annotation.ResponseBody;

import java.util.List;
import java.util.Map;


/**
 * Created by Administrator on 2018/6/27.
 */
@Controller
@RequestMapping("/user")
public class UserControler {
    private static final Logger log  = LoggerFactory.getLogger(UserControler.class);

    @Autowired(required = false)
    @Qualifier("userService")
    private IUserService userService;

    @ApiOperation(value = "saddsadsa" ,notes ="接口测试" )
    @RequestMapping(value = "/all",method = RequestMethod.GET)
    @ResponseBody
    private String getAllUser(){
        List<User> userList = userService.getAllUser();
        for (User u: userList) {
            System.out.println(u.toString());
            log.info("user getall:"+u.toString());
        }
        return "shahha";
    }
    @ApiOperation(value = "获取所有信息" ,notes ="接口测试" )
    @RequestMapping(value = "/getAll",method = RequestMethod.GET)
    public String testDemo(@RequestParam String id, Map<String,Object> map) {
        List<User> demos = userService.getAllUser();
        map.put("data", demos);
        System.out.println(demos.toString());
        return ("/testDemo");
    }
    @ApiOperation(value = "获取所有信息" ,notes ="接口测试" )
    @RequestMapping(value="/test", method = RequestMethod.DELETE)
    @ResponseBody
    private String test(){

        return "sucssceSSSss";
    }
}
我们通过@ApiOperation注解来给API增加说明、通过@ApiImplicitParams、@ApiImplicitParam注解来给参数增加说明。具体使用可以自行去查阅
在完成以上内容之后我们可以访问:http://localhost:8080/swagger-ui.html 就可以看到我们的Swagger api了
如图:
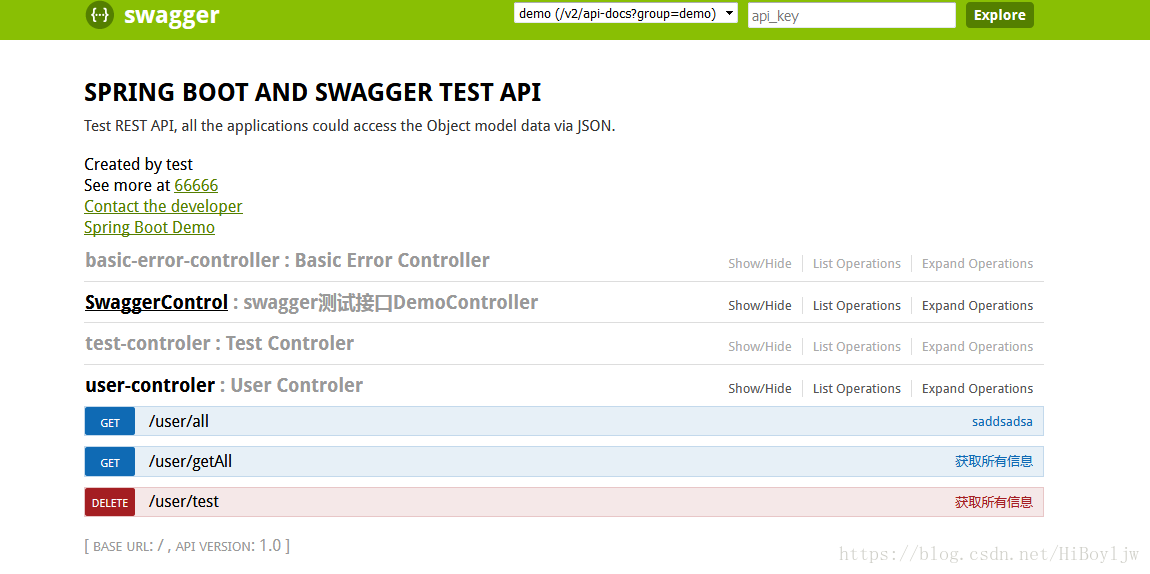
以上就是我们今天的教程了!感觉动手去试试吧