开发客户端一定要做的就是自动更新模块,否则每次版本升级都是一个头疼的事。
下面是Electron应用使用electron-builder配合electron-updater实现自动更新的解决方案。
1.安装 electron-updater 包模块
1 npm install electron-updater --save
2.配置package.json文件
2.1 为了打包时生成latest.yml文件,需要在 build 参数中添加 publish 配置。
 1   "build": {
 2     "productName": "***",//隐藏软件名称
 3     "appId": "**",//隐藏appid
 4     "directories": {
 5       "output": "build"
 6     },
 7     "publish": [
 8       {
 9         "provider": "generic",
10         "url": "http://**.**.**.**:3002/download/",//隐藏版本服务器地址
11       }
12     ],
13     "files": [
14       "dist/electron/**/*"
15     ],
16     "dmg": {
17       "contents": [
18         {
19           "x": 410,
20           "y": 150,
21           "type": "link",
22           "path": "/Applications"
23         },
24         {
25           "x": 130,
26           "y": 150,
27           "type": "file"
28         }
29       ]
30     },
31     "mac": {
32       "icon": "build/icons/icon.icns",
33       "artifactName": "${productName}_setup_${version}.${ext}"
34     },
35     "win": {
36       "icon": "build/icons/icon.ico",
37       "artifactName": "${productName}_setup_${version}.${ext}"
38     },
39     "linux": {
40       "icon": "build/icons",
41       "artifactName": "${productName}_setup_${version}.${ext}"
42     }
43   }
注意:配置了publish才会生成latest.yml文件,用于自动更新的配置信息;latest.yml文件是打包过程生成的文件,为避免自动更新出错,打包后禁止对latest.yml文件做任何修改。如果文件有误,必须重新打包获取新的latest.yml文件!!!
2.2 增加nsis配置(可省略)
nsis配置不会影响自动更新功能,但是可以优化用户体验,比如是否允许用户自定义安装位置、是否添加桌面快捷方式、安装完成是否立即启动、配置安装图标等。nsis 配置也是添加在 build 参数中。


 1 "nsis": {
 2       "oneClick": true,
 3       "perMachine": true,
 4       "allowElevation": true,
 5       "allowToChangeInstallationDirectory": true,
 6       "createDesktopShortcut": true,
 7       "runAfterFinish": true,
 8       "installerIcon": "./build/icon.ico",
 9       "uninstallerIcon": "./build/icon.ico"
10     },
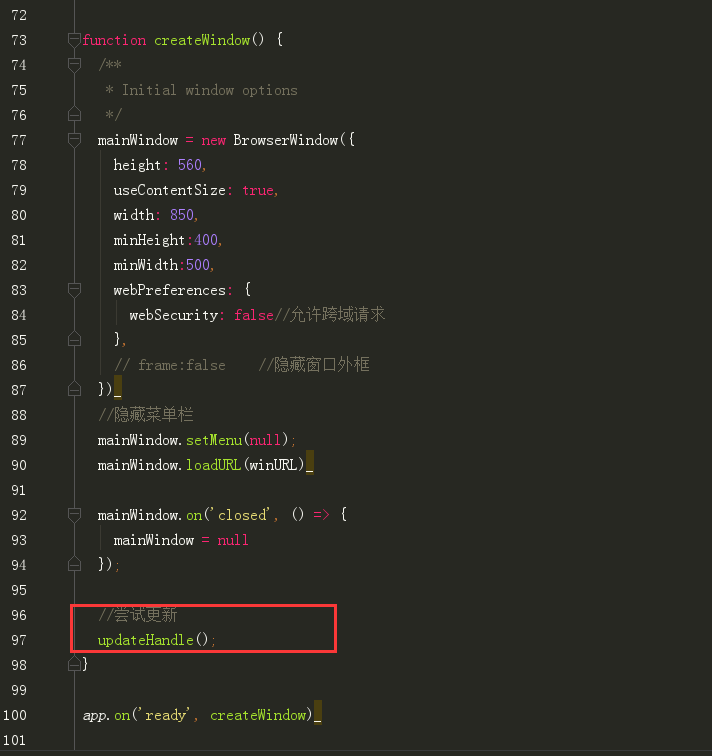
3.配置主进程main.js文件(或主进程main中的index.js文件),引入 electron-updater 文件,添加自动更新检测和事件监听:
注意:一定要是主进程main.js文件(或主进程main中的index.js文件),否则会报错。
 1 import { app, BrowserWindow, ipcMain } from 'electron'
 2
 3 // 注意这个autoUpdater不是electron中的autoUpdater
 4 import { autoUpdater } from "electron-updater"
 5 import {uploadUrl} from "../renderer/config/config";
 6
 7 // 检测更新,在你想要检查更新的时候执行,renderer事件触发后的操作自行编写
 8 function updateHandle() {
 9   let message = {
10     error: '检查更新出错',
11     checking: '正在检查更新……',
12     updateAva: '检测到新版本,正在下载……',
13     updateNotAva: '现在使用的就是最新版本,不用更新',
14   };
15   const os = require('os');
16
17   autoUpdater.setFeedURL(uploadUrl);
18   autoUpdater.on('error', function (error) {
19     sendUpdateMessage(message.error)
20   });
21   autoUpdater.on('checking-for-update', function () {
22     sendUpdateMessage(message.checking)
23   });
24   autoUpdater.on('update-available', function (info) {
25     sendUpdateMessage(message.updateAva)
26   });
27   autoUpdater.on('update-not-available', function (info) {
28     sendUpdateMessage(message.updateNotAva)
29   });
30
31   // 更新下载进度事件
32   autoUpdater.on('download-progress', function (progressObj) {
33     mainWindow.webContents.send('downloadProgress', progressObj)
34   })
35   autoUpdater.on('update-downloaded', function (event, releaseNotes, releaseName, releaseDate, updateUrl, quitAndUpdate) {
36
37     ipcMain.on('isUpdateNow', (e, arg) => {
38       console.log(arguments);
39       console.log("开始更新");
40       //some code here to handle event
41       autoUpdater.quitAndInstall();
42     });
43
44     mainWindow.webContents.send('isUpdateNow')
45   });
46
47   ipcMain.on("checkForUpdate",()=>{
48       //执行自动更新检查
49       autoUpdater.checkForUpdates();
50   })
51 }
52
53 // 通过main进程发送事件给renderer进程,提示更新信息
54 function sendUpdateMessage(text) {
55   mainWindow.webContents.send('message', text)
56 }
注意:在添加自动更新检测和事件监听之后,在主进程createWindow中需要调用一下updateHandle()。如下图所示:
4.在视图(View)层中触发自动更新,并添加自动更新事件的监听。
触发自动更新:
1 ipcRenderer.send("checkForUpdate");
监听自动更新事件:
 1   import { ipcRenderer } from "electron";
 2   ipcRenderer.on("message", (event, text) => {
 3             console.log(arguments);
 4             this.tips = text;
 5         });
 6         //注意:“downloadProgress”事件可能存在无法触发的问题,只需要限制一下下载网速就好了
 7         ipcRenderer.on("downloadProgress", (event, progressObj)=> {
 8             console.log(progressObj);
 9             this.downloadPercent = progressObj.percent || 0;
10         });
11         ipcRenderer.on("isUpdateNow", () => {
12             ipcRenderer.send("isUpdateNow");
13         });
注意:子进程中“downloadProgress”事件可能出现无法触发的问题,那是因为下载速度很快,就会跳过“downloadProgress”事件;只需要限制一下本地下载网速就好了!
为避免多次切换页面造成监听的滥用,切换页面前必须移除监听事件:
1 //组件销毁前移除所有事件监听channel
2         ipcRenderer.removeAll(["message", "downloadProgress", "isUpdateNow"]);//remove只能移除单个事件,单独封装removeAll移除所有事件
5.项目打包
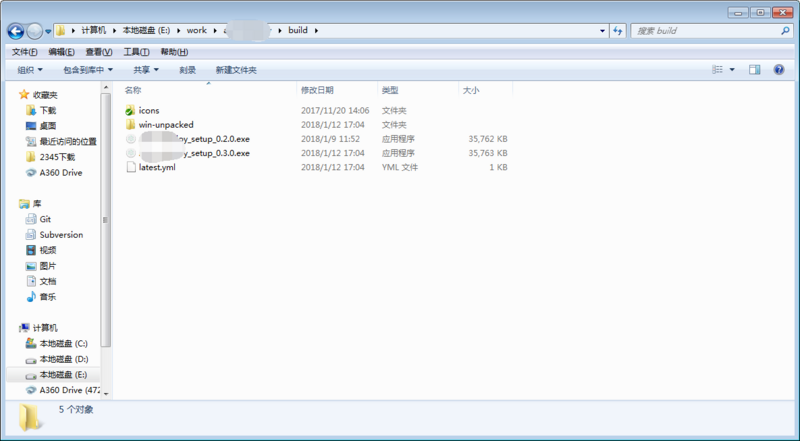
执行electron-builder进行打包,windows下会生成安装包exe和latest.yml等文件,执行exe安装软件;Mac下会生成安装包dmg和latest-mac.yml文件,执行dmg安装软件。
注意:mac上不签名也可以打包成功,但是涉及到自动更新等需要身份认证的功能则不能用,也不能发布到mac app store中。所以说经过代码签名的MAC包才是完整的包。我们这里一定是经过代码签名的完整包!切记!
windows打包生成文件:
Mac打包生成文件:

6.软件升级版本,修改package.json中的version属性,例如:改为 version: “1.1.0” (之前为1.0.0);
7.再次执行electron-builder打包,将新版本latest.yml文件和exe文件放到package.json中build -> publish中的url对应的地址下;
8.在应用中触发更新检查,electron-updater自动会通过对应url下的yml文件检查更新;
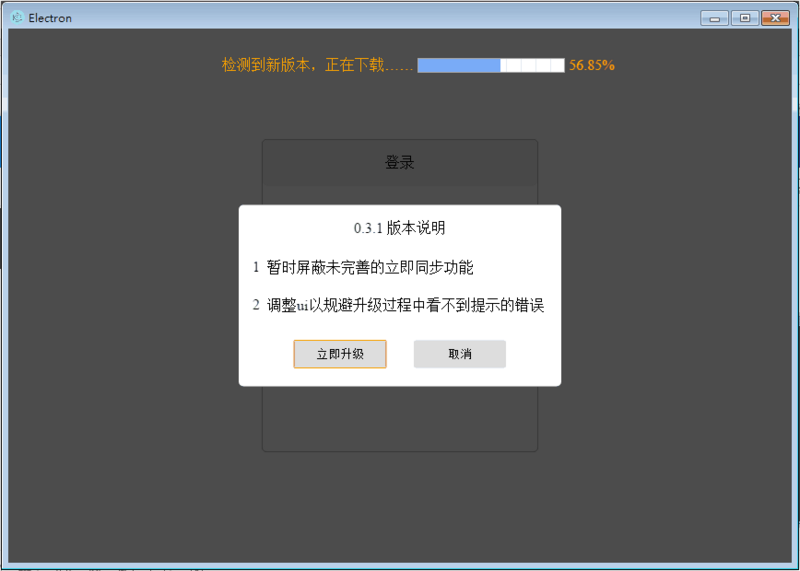
更新示例:

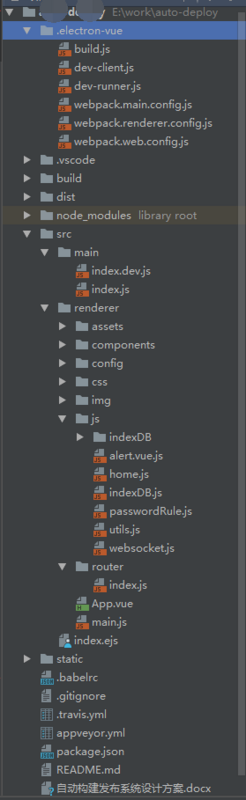
附:项目目录层次: