父组件给子组件传参,子组件通过prop属性进行接收
简单搭建组件部分如下,其中父元素身上有两个数据,分别是字符型数据1,json型数据2
子组件分别从父组件获取这两个数据并展示,其次子组件有自己的数据
子组件通过$emit()事件想父组件发射数据
页面结构:其中child-a为子组件:
<template>
<div>
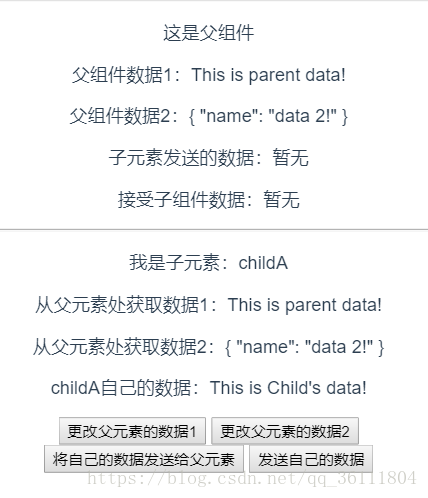
<p>这是父组件</p>
<p>父组件数据1:{{msg}}</p>
<p>父组件数据2:{{json}}</p>
<p>子元素发送的数据:{{child}}</p>
<p>接受子组件数据:{{receive}}</p>
<hr>
<child-a :msg="msg" :json="json" @childEvent="showChildData"></child-a>
</div>
</template>data数据:
 data(){
    return{
      msg:"This is parent data!",
      json:{name:'data 2!'},
      child:'暂无',
      receive:'暂无'
    }
  },
child-a:
<template>
  <div>
    <p>我是子元素:childA</p>
    <p>从父元素处获取数据1:{{newMsg}}</p>
    <p>从父元素处获取数据2:{{json}}</p>
    <p>childA自己的数据:{{self}}</p>
    <button @click="changeParentData1">更改父元素的数据1</button>
    <button @click="changeParentData2">更改父元素的数据2</button>
    <button @click="transferData">将自己的数据发送给父元素</button>
    <button @click="transfer">发送自己的数据</button>
  </div>
</template>
data数据:
data(){
    return {
      newMsg:'',
      self:"This is Child's data!"
    }
  },
由于vue2.x不能直接对从父级获取的数据进行更改,会报错,这里额外给一个变量,用来存放从父级那里获取的msg
mounted(){
    this.newMsg=this.msg;
  },
child-a里面设置props,用来存放从父级拿回来的数据:
props:['msg','json'],注意:在<child-a :msg="msg" :json="json" @childEvent="showChildData"></child-a>中 属性名必须与props里面的一致。
至此,在父级中更改对应的数据,子组件也会发生变化,证明,父组件的数据已经传递给了子组件
子组件更改父组件的两种方法
1.由于不能直接进行更改,所以只能借助自己的数据来更改,如上述例子,更改newMsg即可,但是此时更改,只有子组件里面发生变化,父组件不变
 methods:{
    changeParentData1(){
      this.newMsg="数据1被改了"
    }
  }
2.由于async被废弃,若想在子组件中更改数据同时把父组件中的数据也更改掉,可以将数据以json的格式传递,在子组件中可直接对其更改
methods:{
    changeParentData2(){
      this.json.name="data2 changed!"
    }
  }
父组件向子组件的方法,实质上都是通过$emit()时间来发送,这里提供两种使用
1.组件上直接通过时间绑定来调用
child-a中,进行数据发射:
child-a中,进行数据发射:
    transferData(){
      this.$emit('childEvent',this.self);
    },
组件通过v-on调用:
<child-a :msg="msg" :json="json" @childEvent="showChildData"></child-a> methods:{
showChildData(data){
this.child=data;
}
}2.借助新的VUE实例将数据挂载在这个新的VUE实例上
var tempVm = new Vue();在child-a中:事件名为:childA-data
  methods:{
    transfer(){
      tempVm.$emit('childA-data',this.self);
    }
  }
其他地方通过$on(name,callback)调用,此处父组件中:
mounted(){
    tempVm.$on('childA-data',function(data){
      this.receive=data;
    }.bind(this));
  },