本文导读
- 本文承接《Spring MVC 自动配置原理》,全靠 Spring Boot 对 SpringMVC 的自动配置来开发应用是不够的,所以需要对其进行扩展和定制,本文主要讲扩展
- 现在就以下面这两个平时开发应用中常见的例子进行Spring MVC 自动配置扩展
    <!-- 配置拦截器-->
    <mvc:interceptors>
        <mvc:interceptor>
            <mvc:mapping path="/**"/>
            <bean class="com.lct.interceptors.LoginInterceptor"/>
        </mvc:interceptor>
    </mvc:interceptors>

    <!-- 当页面输入"localhost:8080/应用上下文路径/hello"之后,跳转到 classpath:/templates/home.html 页面-->
    <mvc:view-controller path="/hello" view-name="home"/>
需求分析
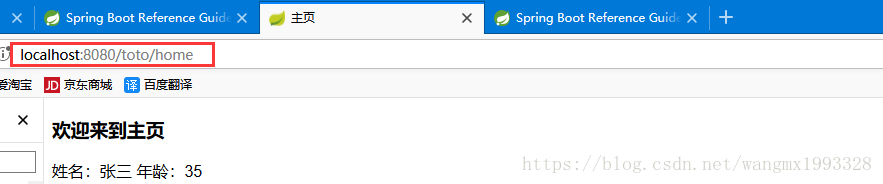
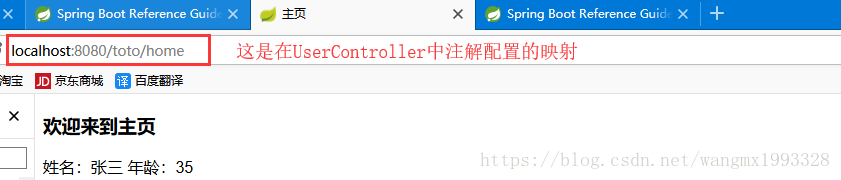
- 需求:页面输入“http://localhost:8080/toto/home” 后进入“home.html”页面
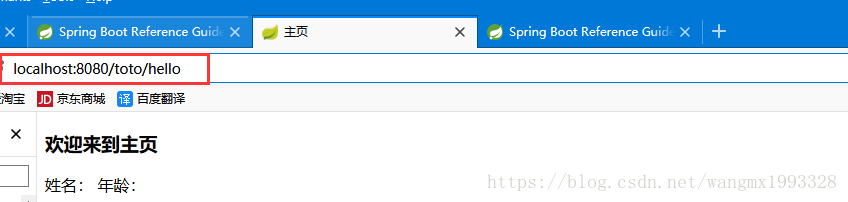
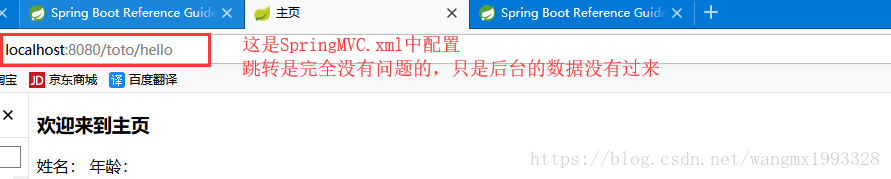
- 页面输入“http://localhost:8080/toto/hello” 后进入“home.html”页面
- 所有页面请求都要经过自定义“LoginInterceptor”拦截器进行拦截
@ImportResource (value = {"classpath: springMVC. xml"})
- 一种很容易理解的方式就是以前SpringMVC.xml怎么写的,现在仍然怎么写,而且同一放在类路径下,再通过@ImportResource进行引用即可
UserController
package com.lct.controller;

import org.springframework.stereotype.Controller;
import org.springframework.web.bind.annotation.RequestMapping;

import java.util.Map;

/**
 * Created by Administrator on 2018/7/17 0017.
 * 用户控制器
 */
@Controller
public class UserController {

    /**
     * 全部基于 Spring Boot给 Thymeleaf的默认配置
     * 所以下面会跳转到 classpath:/templates/home.html 页面
     *
     * @param paramMap
     * @return
     */
    @RequestMapping("home")
    public String goHome(Map<String, Object> paramMap) {
        /** 默认Map的内容会放大请求域中,页面可以直接使用Thymeleaf取值*/
        paramMap.put("name", "张三");
        paramMap.put("age", 35);
        return "home";
    }

}
LoginInterceptor
package com.lct.interceptors;

import org.springframework.web.servlet.HandlerInterceptor;
import org.springframework.web.servlet.ModelAndView;

import javax.servlet.http.HttpServletRequest;
import javax.servlet.http.HttpServletResponse;
import java.util.Date;

/**
 * Created by Administrator on 2018/7/17 0017.
 */
public class LoginInterceptor implements HandlerInterceptor {

    @Override
    public boolean preHandle(HttpServletRequest request, HttpServletResponse response, Object handler) throws Exception {
        System.out.println(new Date() + "----------拦截器拦截前 " + request.getRequestURL());
        return true;
    }

    @Override
    public void afterCompletion(HttpServletRequest request, HttpServletResponse response, Object handler, Exception ex) throws Exception {
        System.out.println(new Date() + "----------拦截器拦截后");
    }

    @Override
    public void postHandle(HttpServletRequest request, HttpServletResponse response, Object handler, ModelAndView modelAndView) throws Exception {

    }
}
home.html
<!DOCTYPE html>
<html xmlns:th="http://www.thymeleaf.org">
<head lang="en">
    <meta charset="UTF-8">
    <title>主页</title>
</head>
<body>
<h3>欢迎来到主页</h3>
    <!--Thymeleaf 语法取值-->
    姓名:<span th:text="${name}">未知</span>
    年龄:<span th:text="${age}">未知</span>
</body>
</html>
application.properties
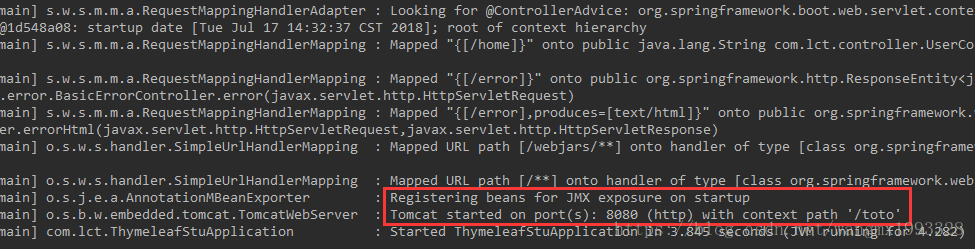
server.servlet.context-path=/toto
springMVC.xml
<?xml version="1.0" encoding="UTF-8"?>
<beans xmlns="http://www.springframework.org/schema/beans"
       xmlns:xsi="http://www.w3.org/2001/XMLSchema-instance"
       xmlns:mvc="http://www.springframework.org/schema/mvc"
       xmlns:context="http://www.springframework.org/schema/context"
       xmlns:task="http://www.springframework.org/schema/task"
       xsi:schemaLocation="http://www.springframework.org/schema/beans
						http://www.springframework.org/schema/beans/spring-beans-3.0.xsd
						http://www.springframework.org/schema/mvc
						http://www.springframework.org/schema/mvc/spring-mvc.xsd http://www.springframework.org/schema/context http://www.springframework.org/schema/context/spring-context.xsd http://www.springframework.org/schema/task http://www.springframework.org/schema/task/spring-task.xsd">
    <!-- 配置拦截器-->
    <mvc:interceptors>
        <mvc:interceptor>
            <mvc:mapping path="/**"/>
            <bean class="com.lct.interceptors.LoginInterceptor"/>
        </mvc:interceptor>
    </mvc:interceptors>

    <!-- 当页面输入"localhost:8080/应用上下文路径/hello"之后,跳转到 classpath:/templates/home.html 页面-->
    <mvc:view-controller path="/hello" view-name="home"/>
</beans>
应用启动类
package com.lct;

import org.springframework.boot.SpringApplication;
import org.springframework.boot.autoconfigure.SpringBootApplication;
import org.springframework.boot.autoconfigure.web.servlet.WebMvcAutoConfiguration;
import org.springframework.context.annotation.ImportResource;
import org.springframework.web.servlet.ViewResolver;

@ImportResource(value = {"classpath:springMVC.xml"})
@SpringBootApplication
public class ThymeleafStuApplication {

	public static void main(String[] args) {
		SpringApplication.run(ThymeleafStuApplication.class, args);
	}
}
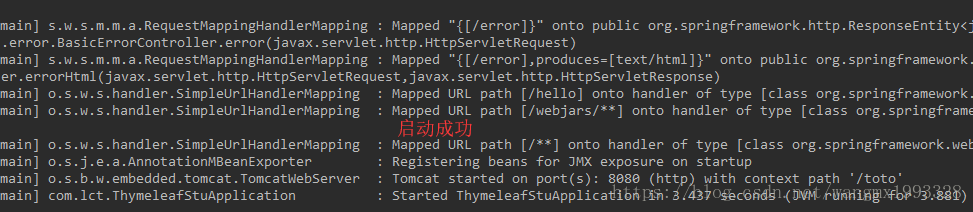
运行测试

WebMvcConfigurerAdapter
- 编写一个配置类(@Configuration)继承 WebMvcConfigurerAdapter ,注意不加 @EnableWebMvc,然后重写指定的方法即可扩展自动配置
- 既保留了所有的自动配置,也能用自己扩展的配置;
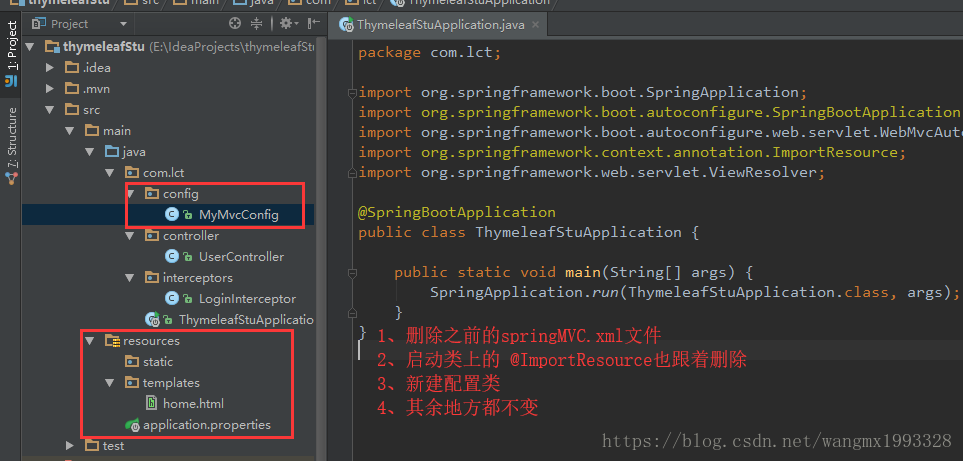
MyMvcConfig
package com.lct.config;

import com.lct.interceptors.LoginInterceptor;
import org.springframework.context.annotation.Configuration;
import org.springframework.web.servlet.config.annotation.InterceptorRegistry;
import org.springframework.web.servlet.config.annotation.ViewControllerRegistry;
import org.springframework.web.servlet.config.annotation.WebMvcConfigurerAdapter;

/**
 * Created by Administrator on 2018/7/17 0017.
 * 针对应用中 Spring MVC 扩展的配置类---实现 WebMvcConfigurerAdapter
 */
@Configuration
public class MyMvcConfig extends WebMvcConfigurerAdapter {

    /**
     * 添加拦截器配置
     *
     * @param registry
     */
    @Override
    public void addInterceptors(InterceptorRegistry registry) {
        registry.addInterceptor(new LoginInterceptor());
    }

    /**
     * 添加视图控制器映射
     * @param registry
     */
    @Override
    public void addViewControllers(ViewControllerRegistry registry) {
        /**
         * 当页面输入"localhost:8080/应用上下文路径/hello"之后,跳转到 classpath:/templates/home.html 页面
         */
        registry.addViewController("/hello").setViewName("home");
    }
}
运行测试