1.2018激活码
随着技术日新月异,好多激活码都用不了了,百度一大片全是旧的东西,也许在当时可以用,但现在真的用不了啦!!!
EB101IWSWD has been cancelled这类都用不了了,所以同事给了我新的分享一下给大家

http://active.chinapyg.com/
意不意外?惊不惊喜?
2.
- 关于配置文件的位置
一旦开始使用IDEA之后,就需要做很多的配置相关工作,使得IDEA越来越符合你的个人习惯,让你使用起来得心应手。
而这些配置信息,都保存在C盘,比如我的就会默认保存在如图所示的位置
而默认放在C盘是不好的习惯,一旦重装系统之后,所有的配置信息都丢失了,又要全部重头来过,所以本知识点讲解如何配置在其他盘下面C:\Documents and Settings\Administrator\.IntelliJIdea2017.2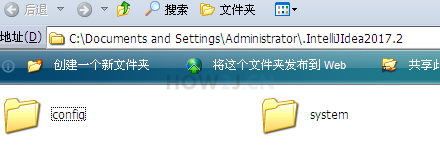
- 关闭IDEA
首先关闭已经打开的IDEA - 打开idea.properties
IDEA的配置信息存放在idea.properties,如图所示,我的位置是在:D:\software\IntelliJ IDEA 2017.2\bin\idea.properties
- 修改配置位置
如图所示,需要修改者两个位置。(注意要把前面的#去掉,否则就处于注释状态)
我是修改在了d:/software/.IntelliJIdea这个目录下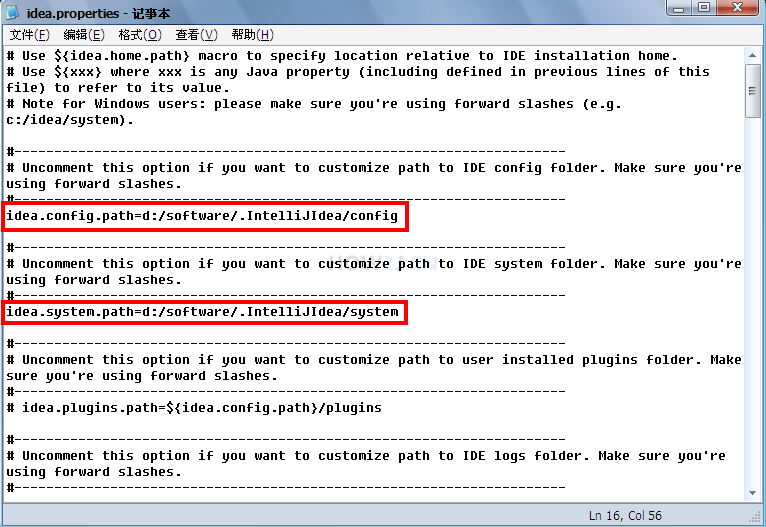
- 再次启动IDEA
再次启动后,就可以发现配置信息都保存在d:\software\.IntelljIIdea下了,这样即便是重装了系统,相关信息也不会丢失了。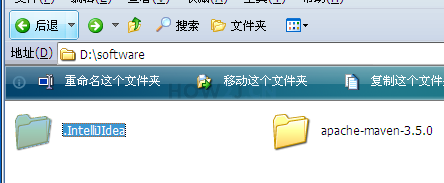
3.解压hadoop
windows解压文件时,出错:不能创建符号链接xxxxxxx客户端没有所需得特权
Windows再解压文件时,出现错误提示,截图如下:
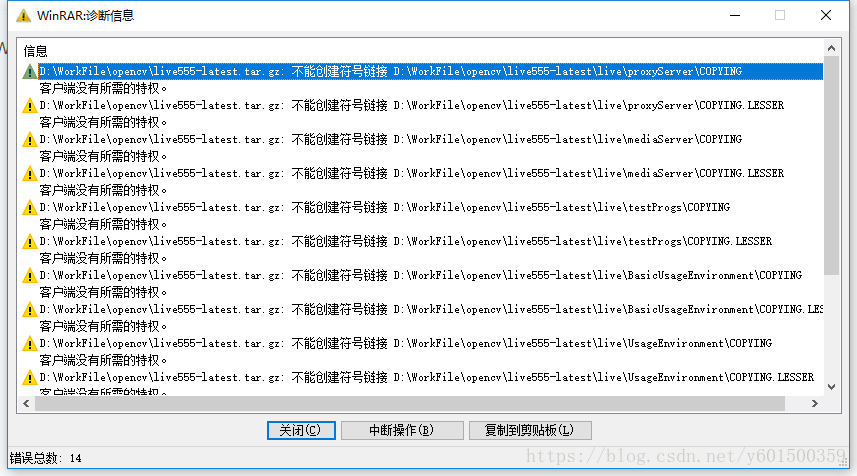

解决方案:用户管理员权限(必须管理权权限,否则无效)启动cmd:
start winrar x -y live555-latest.tar.gz D:\WorkFile\opencv如果已经进入到带解压文件目录,也可以直接:
start winrar x -y live555-latest.tar.gz
现在给出解压出错和通过cmd解压对比截图:
用鼠标右键winrar解压:

用cmd命令解压:

有没有发现什么不一样得。
4.Hadoop Intellij IDEA本地开发环境搭建
首先我们需要新建一个java工程用于开发Mapper与Reducer,同时我们也需要导入hadoop的依赖包,这些包可以在hadoop的 share/hadoop 目录下找到,你可以把这些包单独取出来作为之后项目的备用。
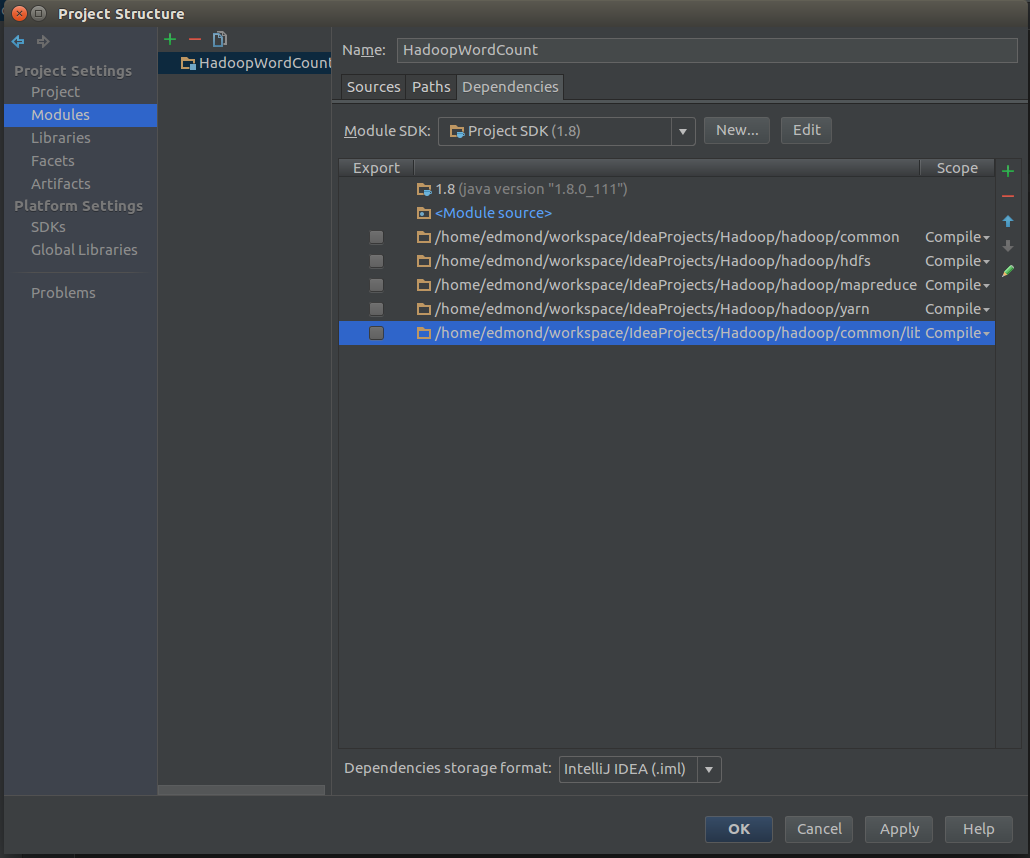
打开Project Structure

找到module点击右侧的小加号JARS or directories…
添加
common
hdfs
mapreduce
yarn
comom/lib- 1
- 2
- 3
- 4
- 5
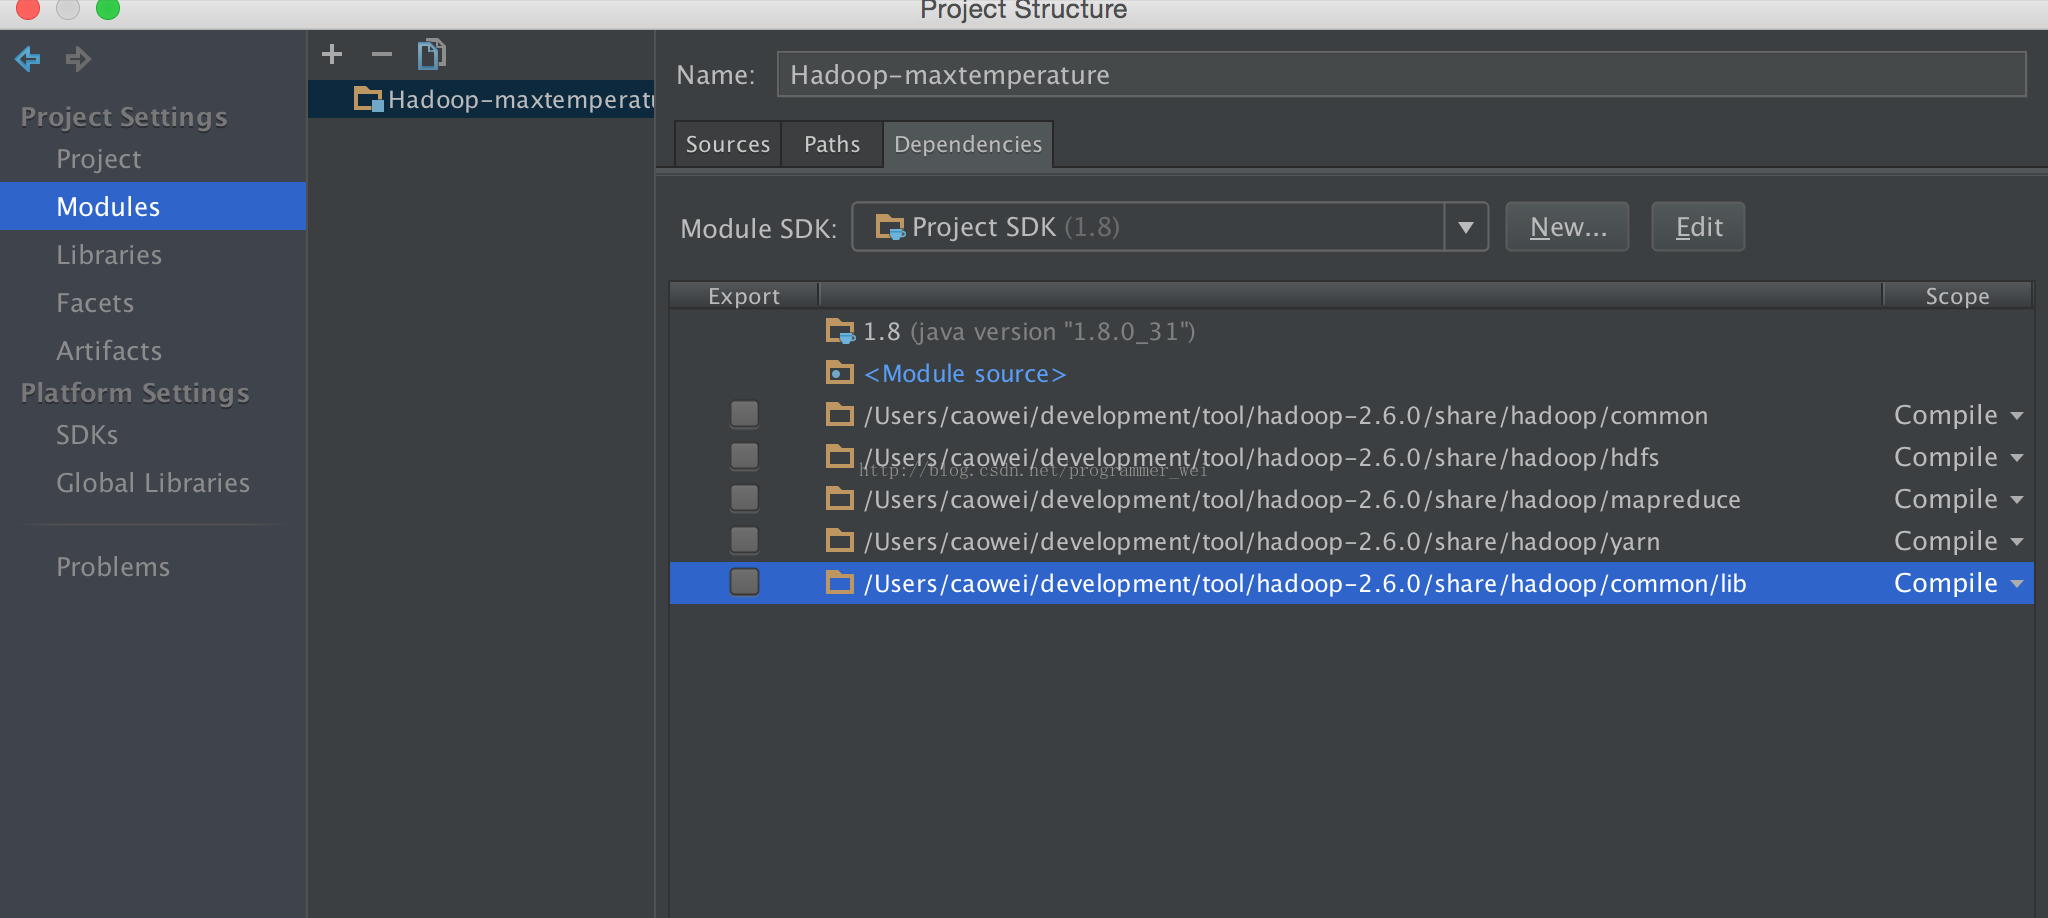
添加完成之后应该像下图
然后是Artifacts

点击加号,新建一个jar,jar->empty
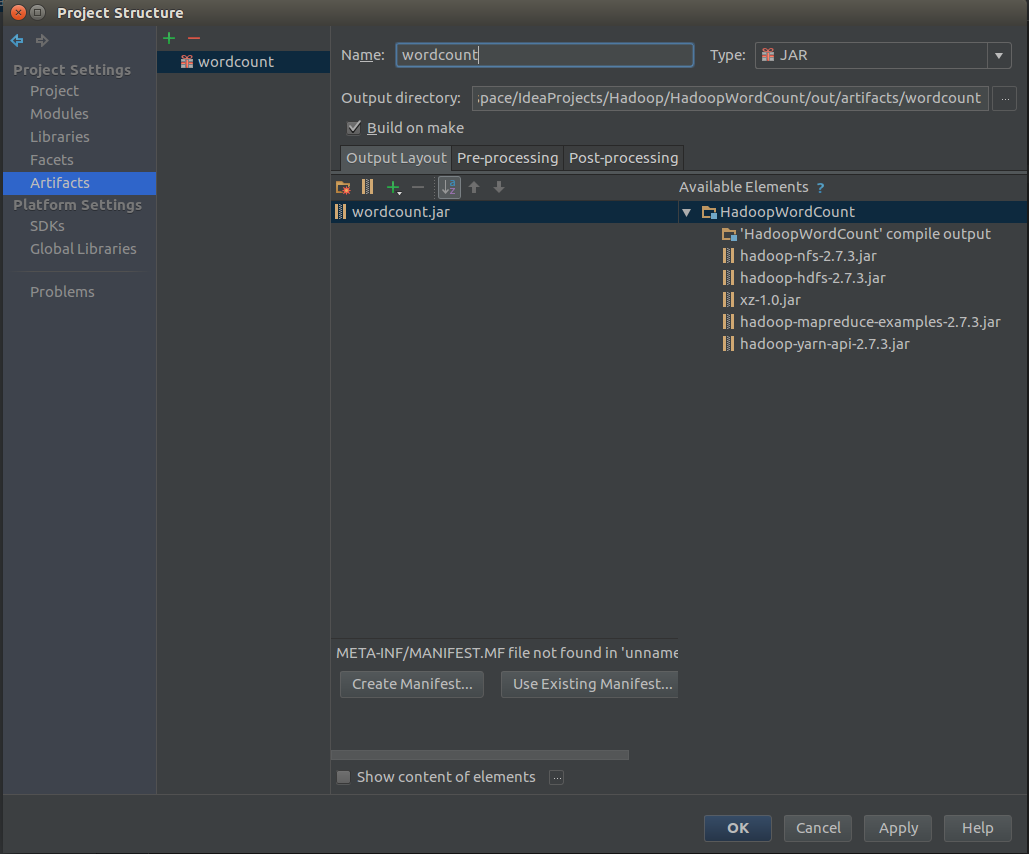
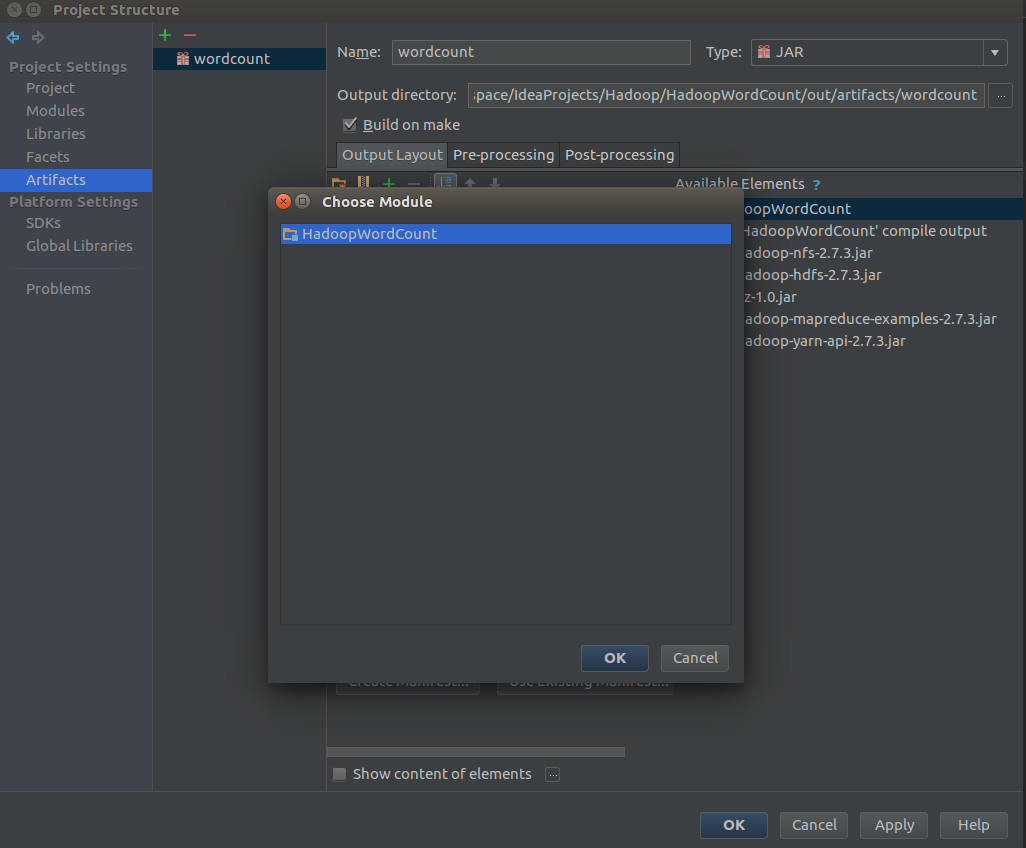
给自己的jar包取个名字,然后点击下面的绿色加号,Module output,在弹出的对话框中选择当前的项目,然后点击ok保存。
接着要新建一个Application
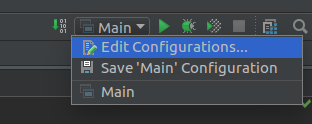
Edit Configurations
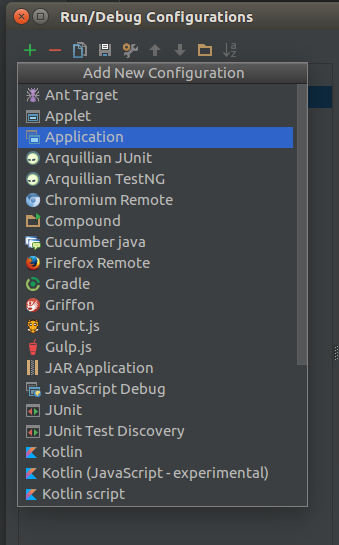
点击加号新建,选择Application
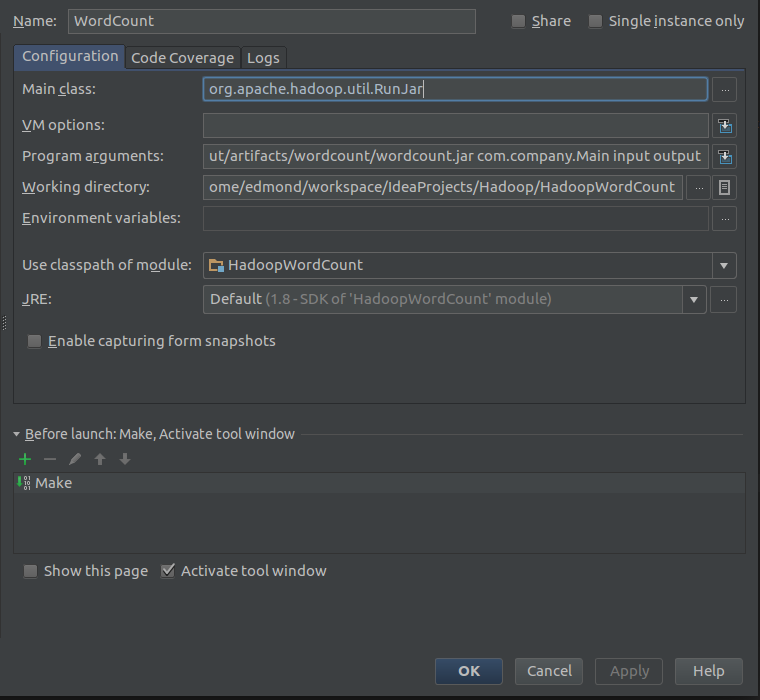

然后取个名字,在右侧的Main class中输入org.apache.hadoop.util.RunJar
Working directory当然是选择当前项目的目录了
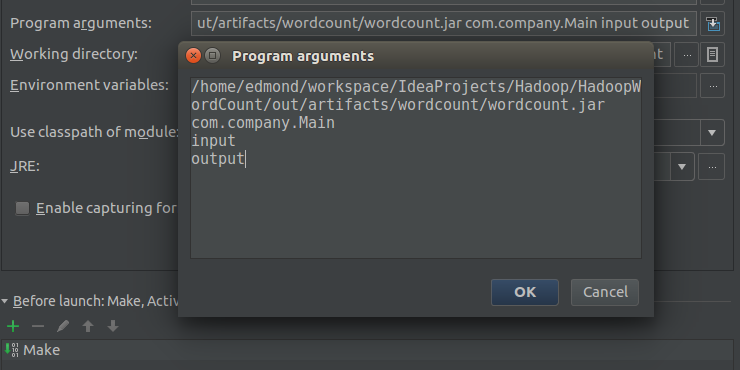
最后是Program arguments,这个是设置默认参数的会在程序执行的时候传递进去
/home/edmond/workspace/IdeaProjects/Hadoop/HadoopWordCount/out/artifacts/wordcount/wordcount.jar
com.company.Main
input
output- 1
- 2
- 3
- 4
第一个是jar包所在的位置
第二个是Main函数所在的类
第三四两个参数是由自己决定的(这两个参数会作为args[0]和args[1]传入)
点击ok保存。
然后我们需要开始对Mapper以及Reducer进行编写,首先先创建一个Mapper类
public class WordCountMapper extends Mapper<LongWritable,Text,Text,IntWritable>{

    private final static IntWritable one = new IntWritable(1);
    private Text word = new Text();

    @Override
    protected void map(LongWritable key, Text value, Context context) throws IOException, InterruptedException {
        StringTokenizer itr = new StringTokenizer(value.toString());
        while (itr.hasMoreTokens()){
            word.set(itr.nextToken());
            context.write(word,one);
        }
    }
}- 1
- 2
- 3
- 4
- 5
- 6
- 7
- 8
- 9
- 10
- 11
- 12
- 13
- 14
如果类都可以正常导入说明jar包没有问题
接着是Reducer类
public class WordCountReducer extends Reducer<Text,IntWritable,Text,IntWritable>{

    private IntWritable result = new IntWritable();

    @Override
    protected void reduce(Text key, Iterable<IntWritable> values, Context context) throws IOException, InterruptedException {
        int sum = 0;
        for(IntWritable val:values){
            sum += val.get();
        }

        result.set(sum);
        context.write(key,result);
    }
}- 1
- 2
- 3
- 4
- 5
- 6
- 7
- 8
- 9
- 10
- 11
- 12
- 13
- 14
- 15
最后我们需要编写main方法作为测试
public static void main(String[] args) throws IOException, ClassNotFoundException, InterruptedException {
    // write your code here

        Configuration configuration = new Configuration();

        if(args.length!=2){
            System.err.println("Usage:wordcount <input><output>");
            System.exit(2);
        }

        Job job = new Job(configuration,"word count");

        job.setJarByClass(Main.class);
        job.setMapperClass(WordCountMapper.class);
        job.setReducerClass(WordCountReducer.class);
        job.setOutputKeyClass(Text.class);
        job.setOutputValueClass(IntWritable.class);
        FileInputFormat.addInputPath(job,new Path(args[0]));
        FileOutputFormat.setOutputPath(job,new Path(args[1]));

        System.exit(job.waitForCompletion(true)?0:1);
}- 1
- 2
- 3
- 4
- 5
- 6
- 7
- 8
- 9
- 10
- 11
- 12
- 13
- 14
- 15
- 16
- 17
- 18
- 19
- 20
- 21
- 22
这样main方法启动就会使用hadoop的mapper和reducer来处理数据
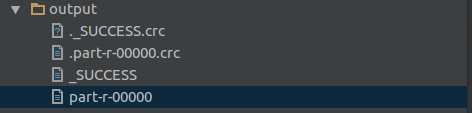
我们在项目目录下面创建一个input文件夹,在文件夹中创建一个文件,然后在文件中随意输入一些字符串,保存,然后运行刚刚新建的Application,等待运行完成会发现项目目录下多了一个output文件夹,打开里面的‘part-r-00000’文件就会发现里面是对你输入字符串的出现个数的统计。
当你第二次运行的时候因为hadoop不会自动删除output目录所以可能会出现错误,请手动删除之后再运行。
这样就可以使用intellij来开发hadoop程序并进行调试了。
5.版本二
我的intellij idea版本是14,hadoop版本2.6,使用《hadoop权威指南》的天气统计源码作为示例。
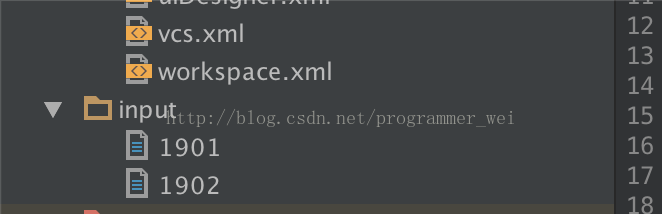
下面附上源码,数据集在http://hadoopbook.com/code.html可以下载1901和1902两年数据:
-
package com.hadoop.maxtemperature;
-
-
import java.io.IOException;
-
import org.apache.hadoop.io.IntWritable;
-
import org.apache.hadoop.io.LongWritable;
-
import org.apache.hadoop.io.Text;
-
import org.apache.hadoop.mapreduce.Mapper;
-
-
public class MaxTemperatureMapper
-
extends Mapper< LongWritable, Text, Text, IntWritable> { //注1
-
private static final int MISSING = 9999;
-
-
public void map(LongWritable key, Text value, Context context)
-
throws IOException, InterruptedException {
-
String line = value.toString();
-
String year = line.substring( 15, 19);
-
int airTemperature;
-
if (line.charAt( 87) == '+') { // parseInt doesn't like leading plus signs
-
airTemperature = Integer.parseInt(line.substring( 88, 92));
-
} else {
-
airTemperature = Integer.parseInt(line.substring( 87, 92));
-
}
-
String quality = line.substring( 92, 93);
-
if (airTemperature != MISSING && quality.matches( "[01459]")) {
-
context.write( new Text(year), new IntWritable(airTemperature));
-
}
-
}
-
}
-
package com.hadoop.maxtemperature;
-
-
-
import java.io.IOException;
-
import org.apache.hadoop.io.IntWritable;
-
import org.apache.hadoop.io.Text;
-
import org.apache.hadoop.mapreduce.Reducer;
-
-
public class MaxTemperatureReducer
-
extends Reducer< Text, IntWritable, Text, IntWritable> {
-
-
public void reduce(Text key, Iterable<IntWritable> values,
-
Context context)
-
throws IOException, InterruptedException {
-
int maxValue = Integer.MIN_VALUE;
-
for (IntWritable value : values) {
-
maxValue = Math.max(maxValue, value.get());
-
}
-
context.write(key, new IntWritable(maxValue));
-
}
-
}
-
package com.hadoop.maxtemperature;
-
-
-
import org.apache.hadoop.fs.Path;
-
import org.apache.hadoop.io.IntWritable;
-
import org.apache.hadoop.io.Text;
-
import org.apache.hadoop.mapreduce.Job;
-
import org.apache.hadoop.mapreduce.lib.input.FileInputFormat;
-
import org.apache.hadoop.mapreduce.lib.output.FileOutputFormat;
-
-
public class MaxTemperature {
-
public static void main(String[] args) throws Exception {
-
if (args.length != 2) {
-
System.err.println( "Usage: MaxTemperature <input path> <output path>");
-
System.exit(- 1);
-
}
-
Job job = new Job();
-
job.setJarByClass(MaxTemperature.class);
-
job.setJobName( "Max temperature");
-
-
FileInputFormat.addInputPath(job, new Path(args[ 0]));
-
FileOutputFormat.setOutputPath(job, new Path(args[ 1]));
-
-
job.setMapperClass(MaxTemperatureMapper.class);
-
job.setReducerClass(MaxTemperatureReducer.class);
-
-
job.setOutputKeyClass(Text.class); //注1
-
job.setOutputValueClass(IntWritable.class);
-
-
System.exit(job.waitForCompletion( true) ? 0 : 1);
-
}
-
}
1、首先在hadoop官网上下载hadoop到本地(不需要进行环境变量的配置,仅仅只用下载hadoop的包即可)。
2、打开intellij idea创建一个空项目,并且将源码粘贴进去,如图
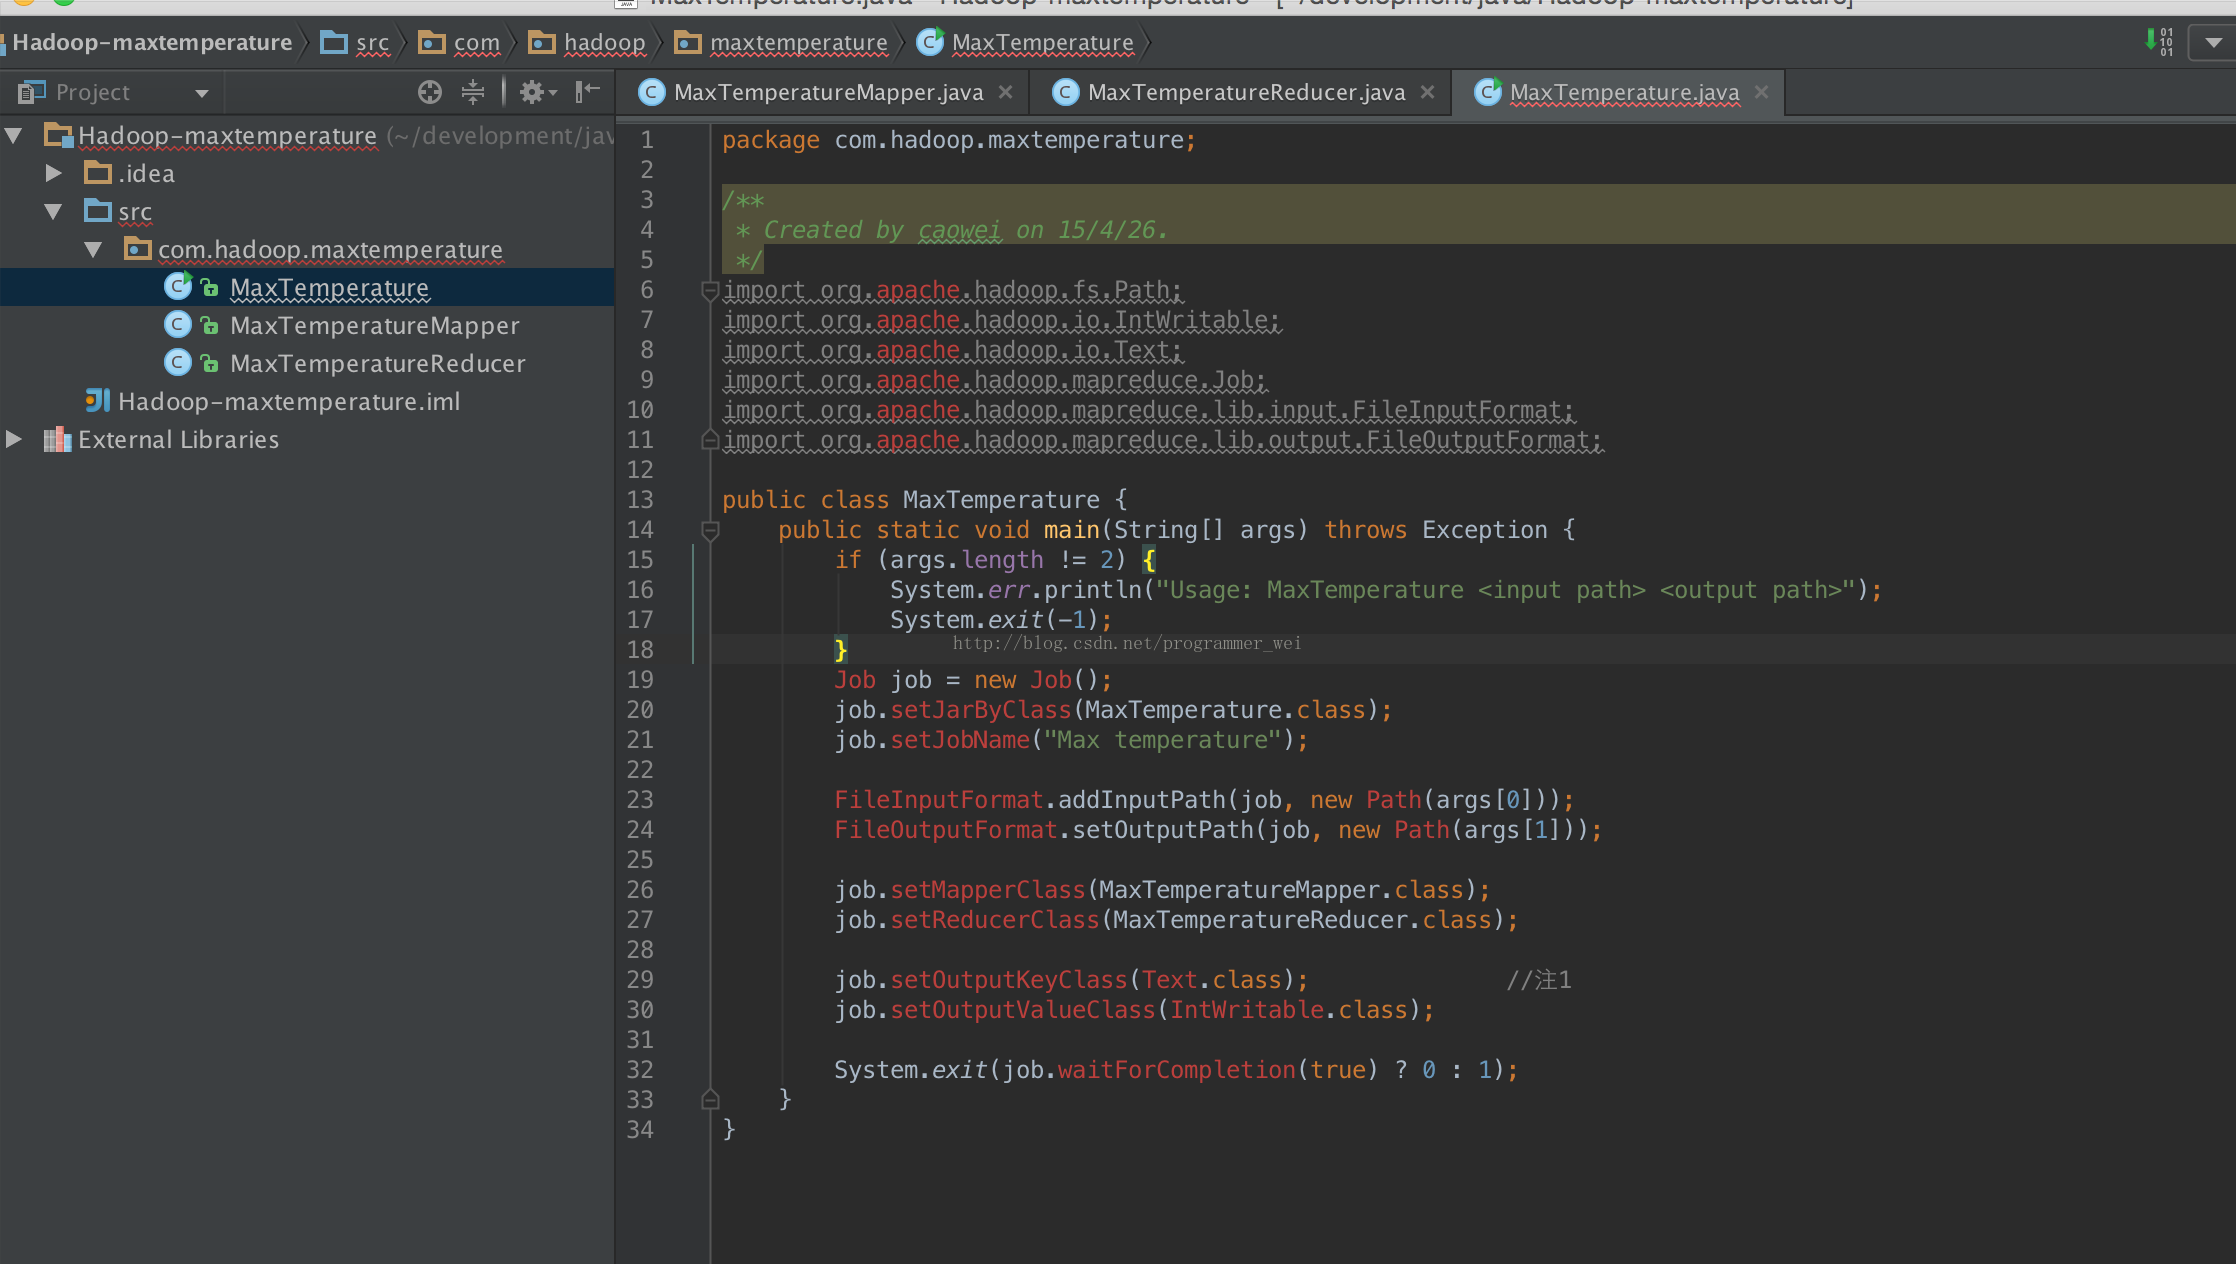
2、这时可以看见代码中的许多类是无法识别的,别急。接下来打开project structure,在左侧找到modules
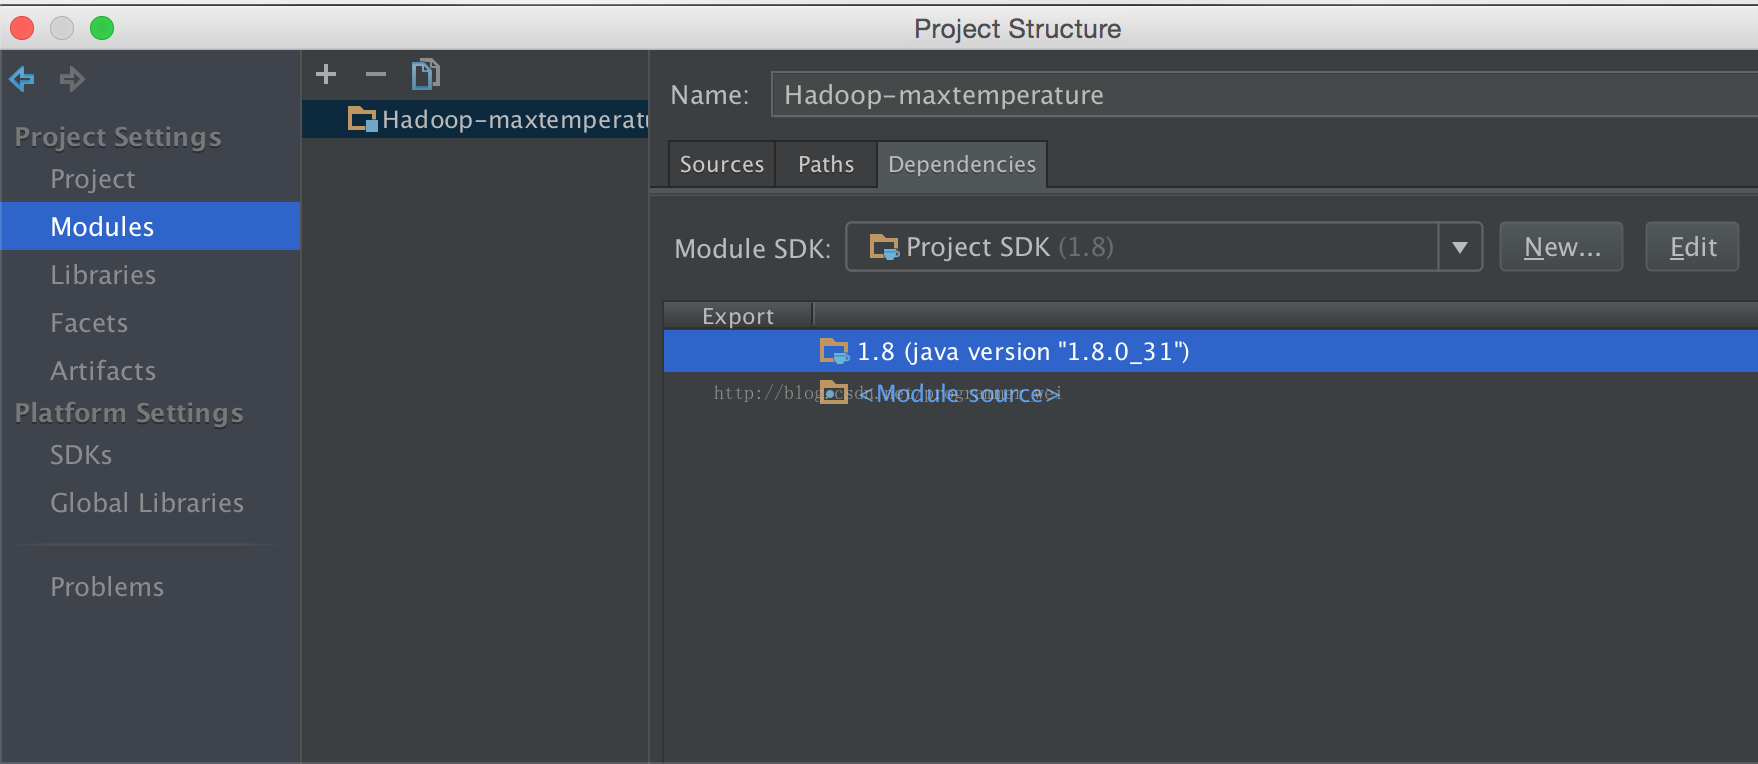
3、点击下方箭头天假jar或目录

4、将刚才下载的hadoop目录下的share文件夹中的相应目录添加进来
5、点击左侧的artifacts,添加一个空jar
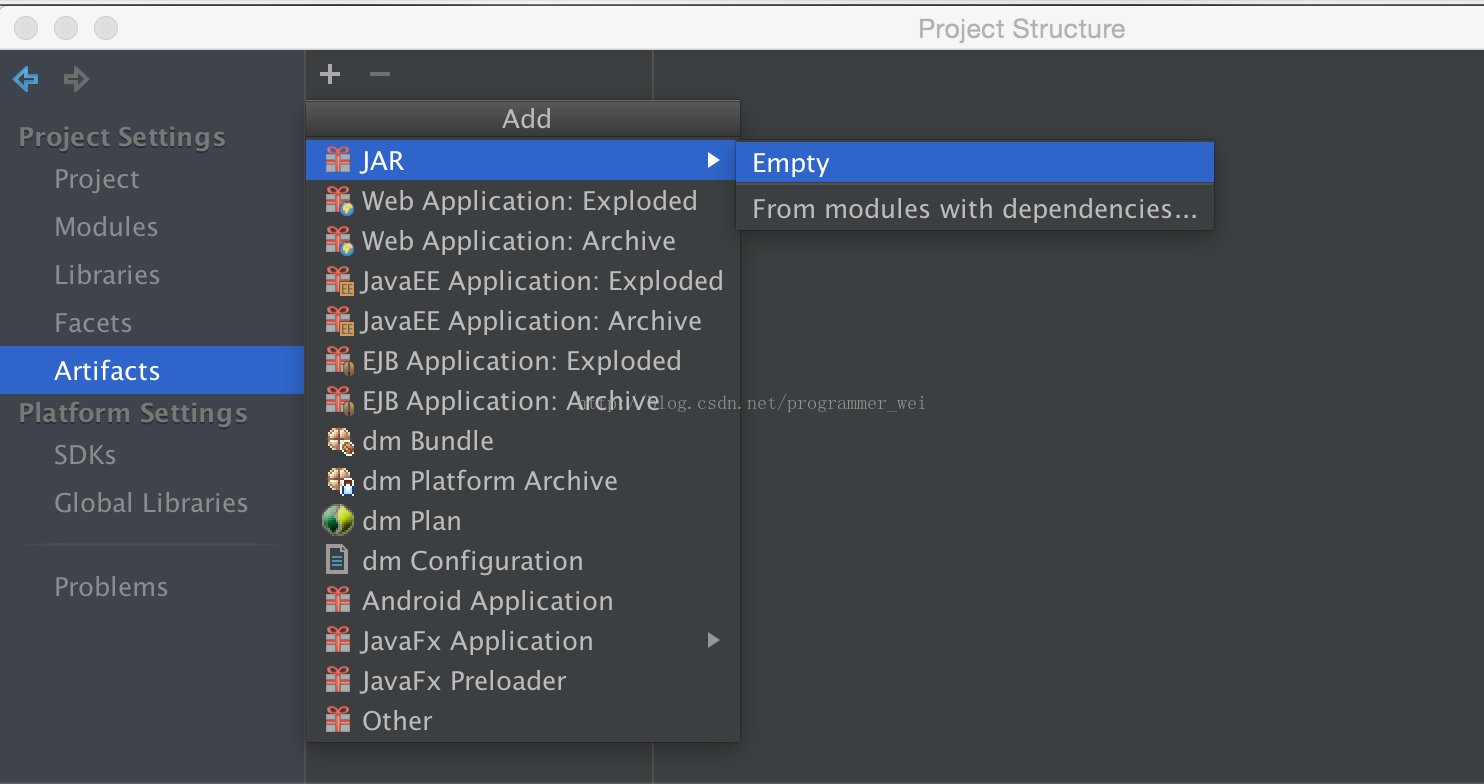
6、输入jar的名称,这里我们输入maxtemperature
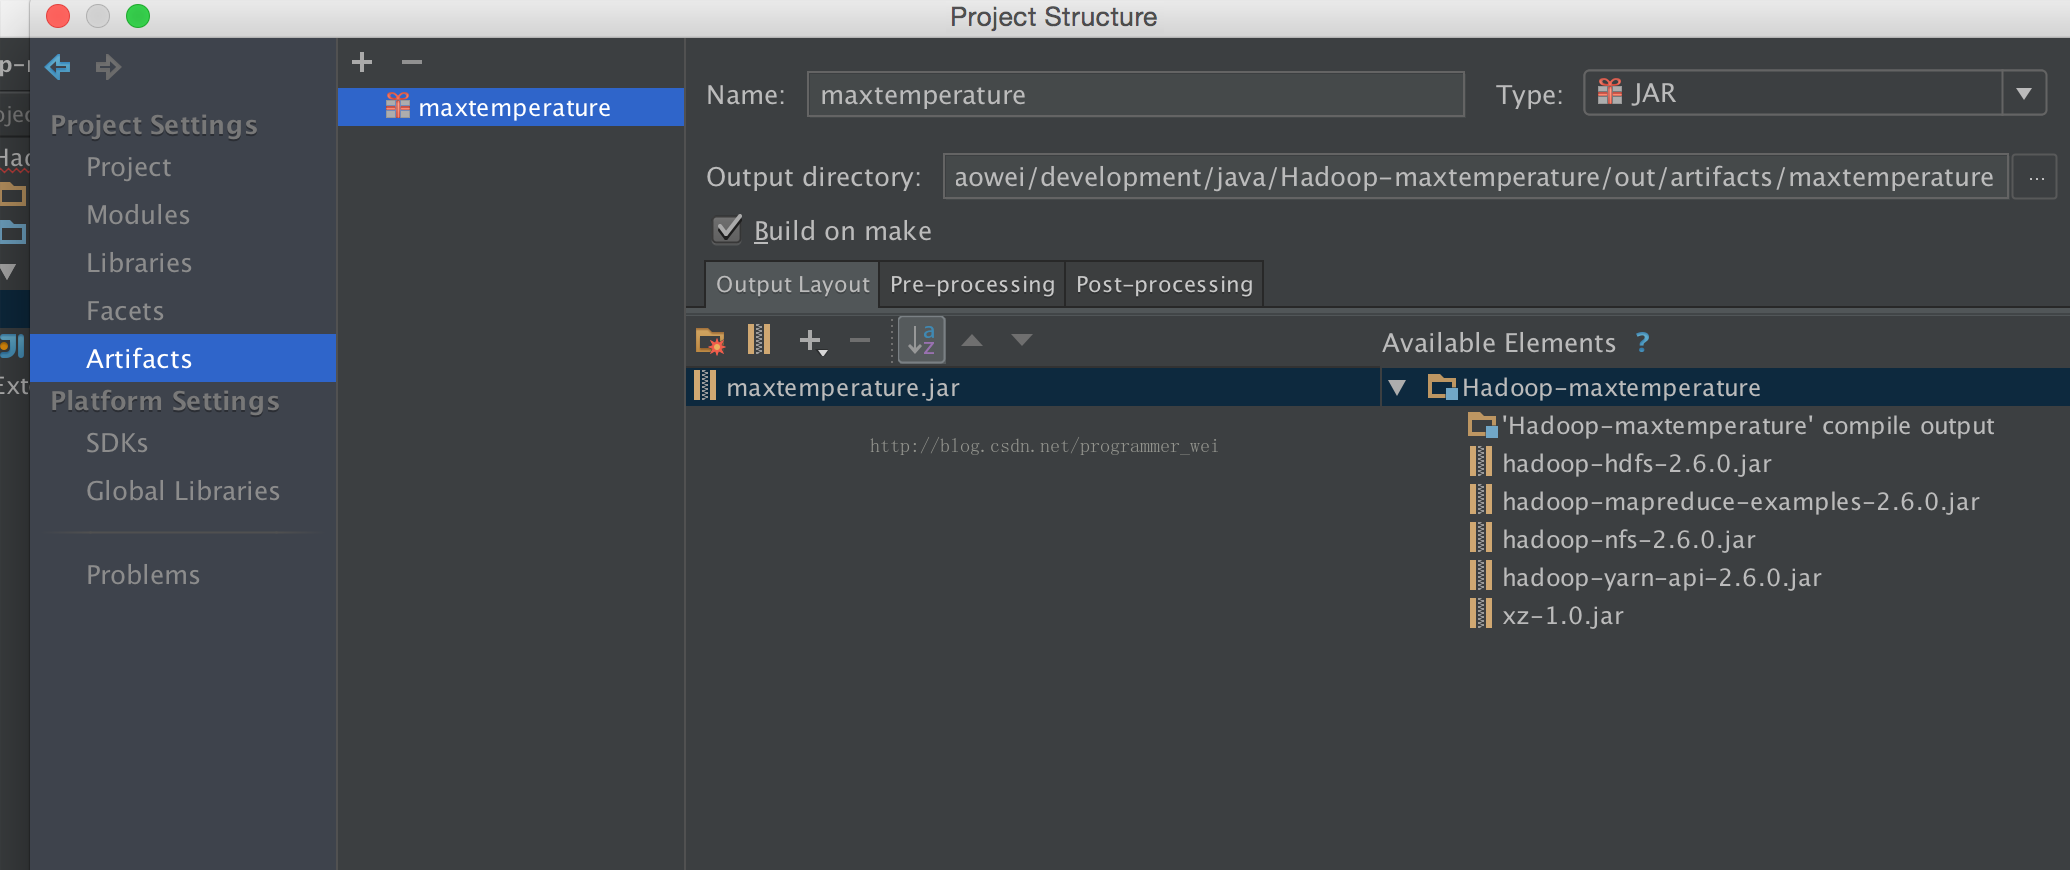
7、点击output layout下方的小箭头,选择module output,然后勾选我们的项目,点击确定
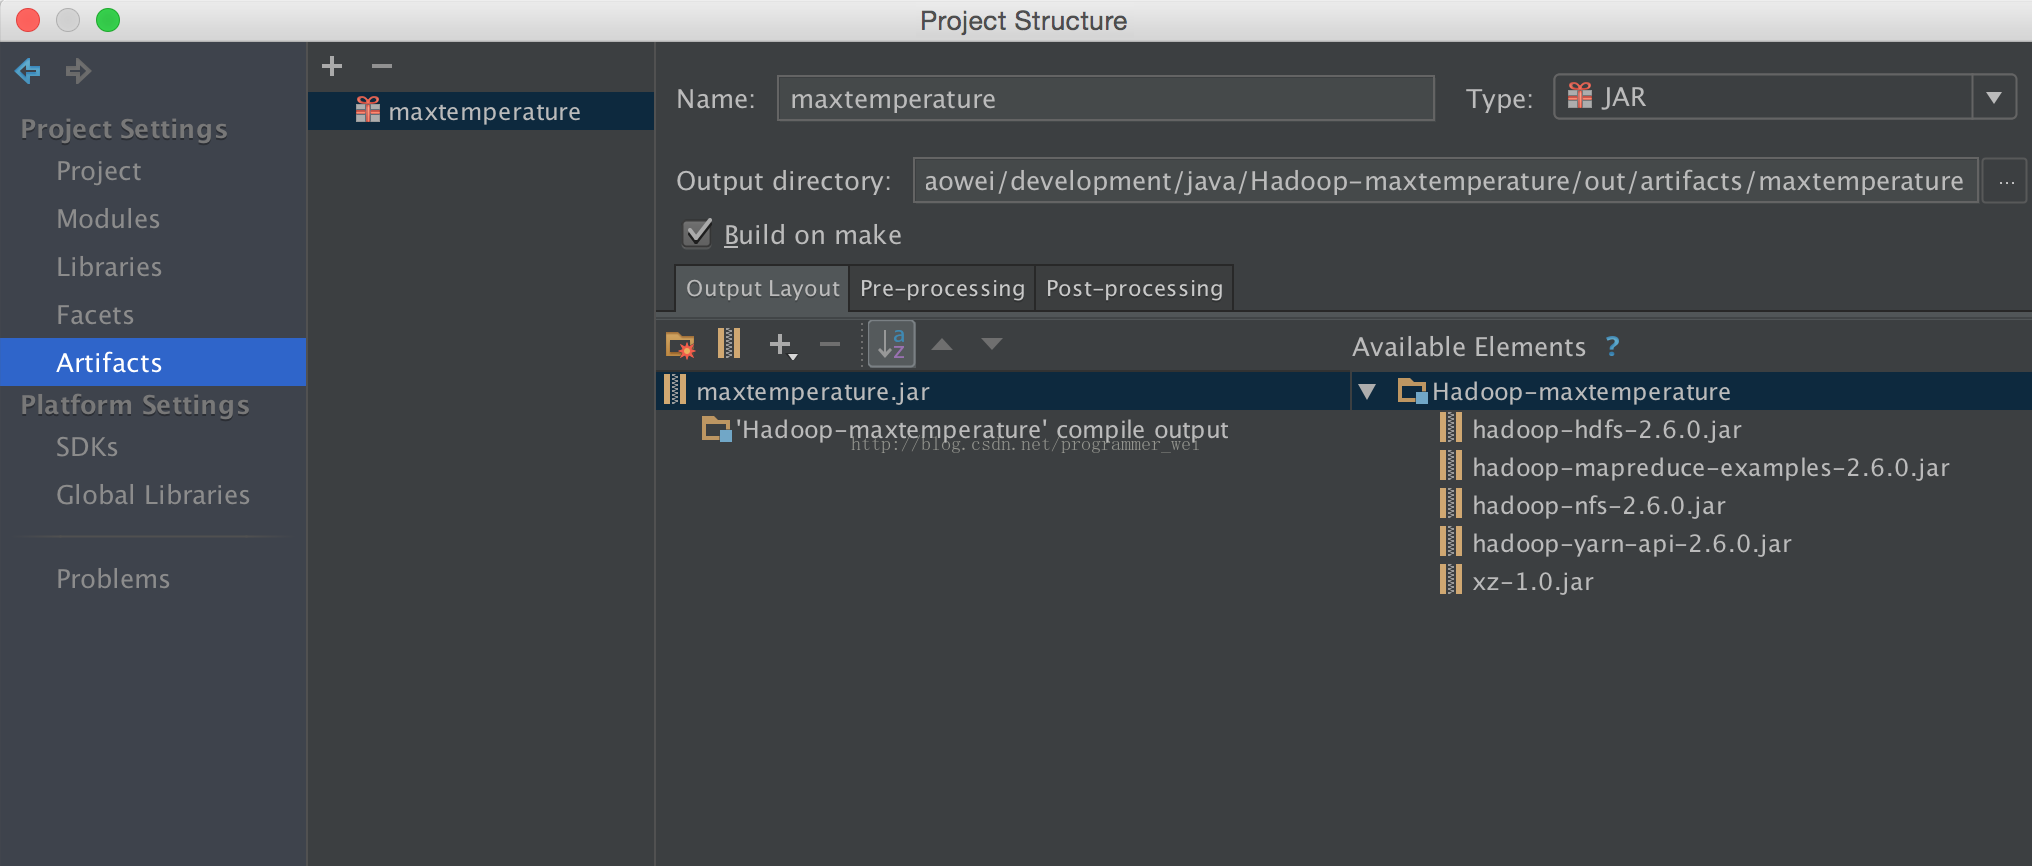
8、这时候,刚才显示的各种包和类的缺失错误信息就全部没有了。

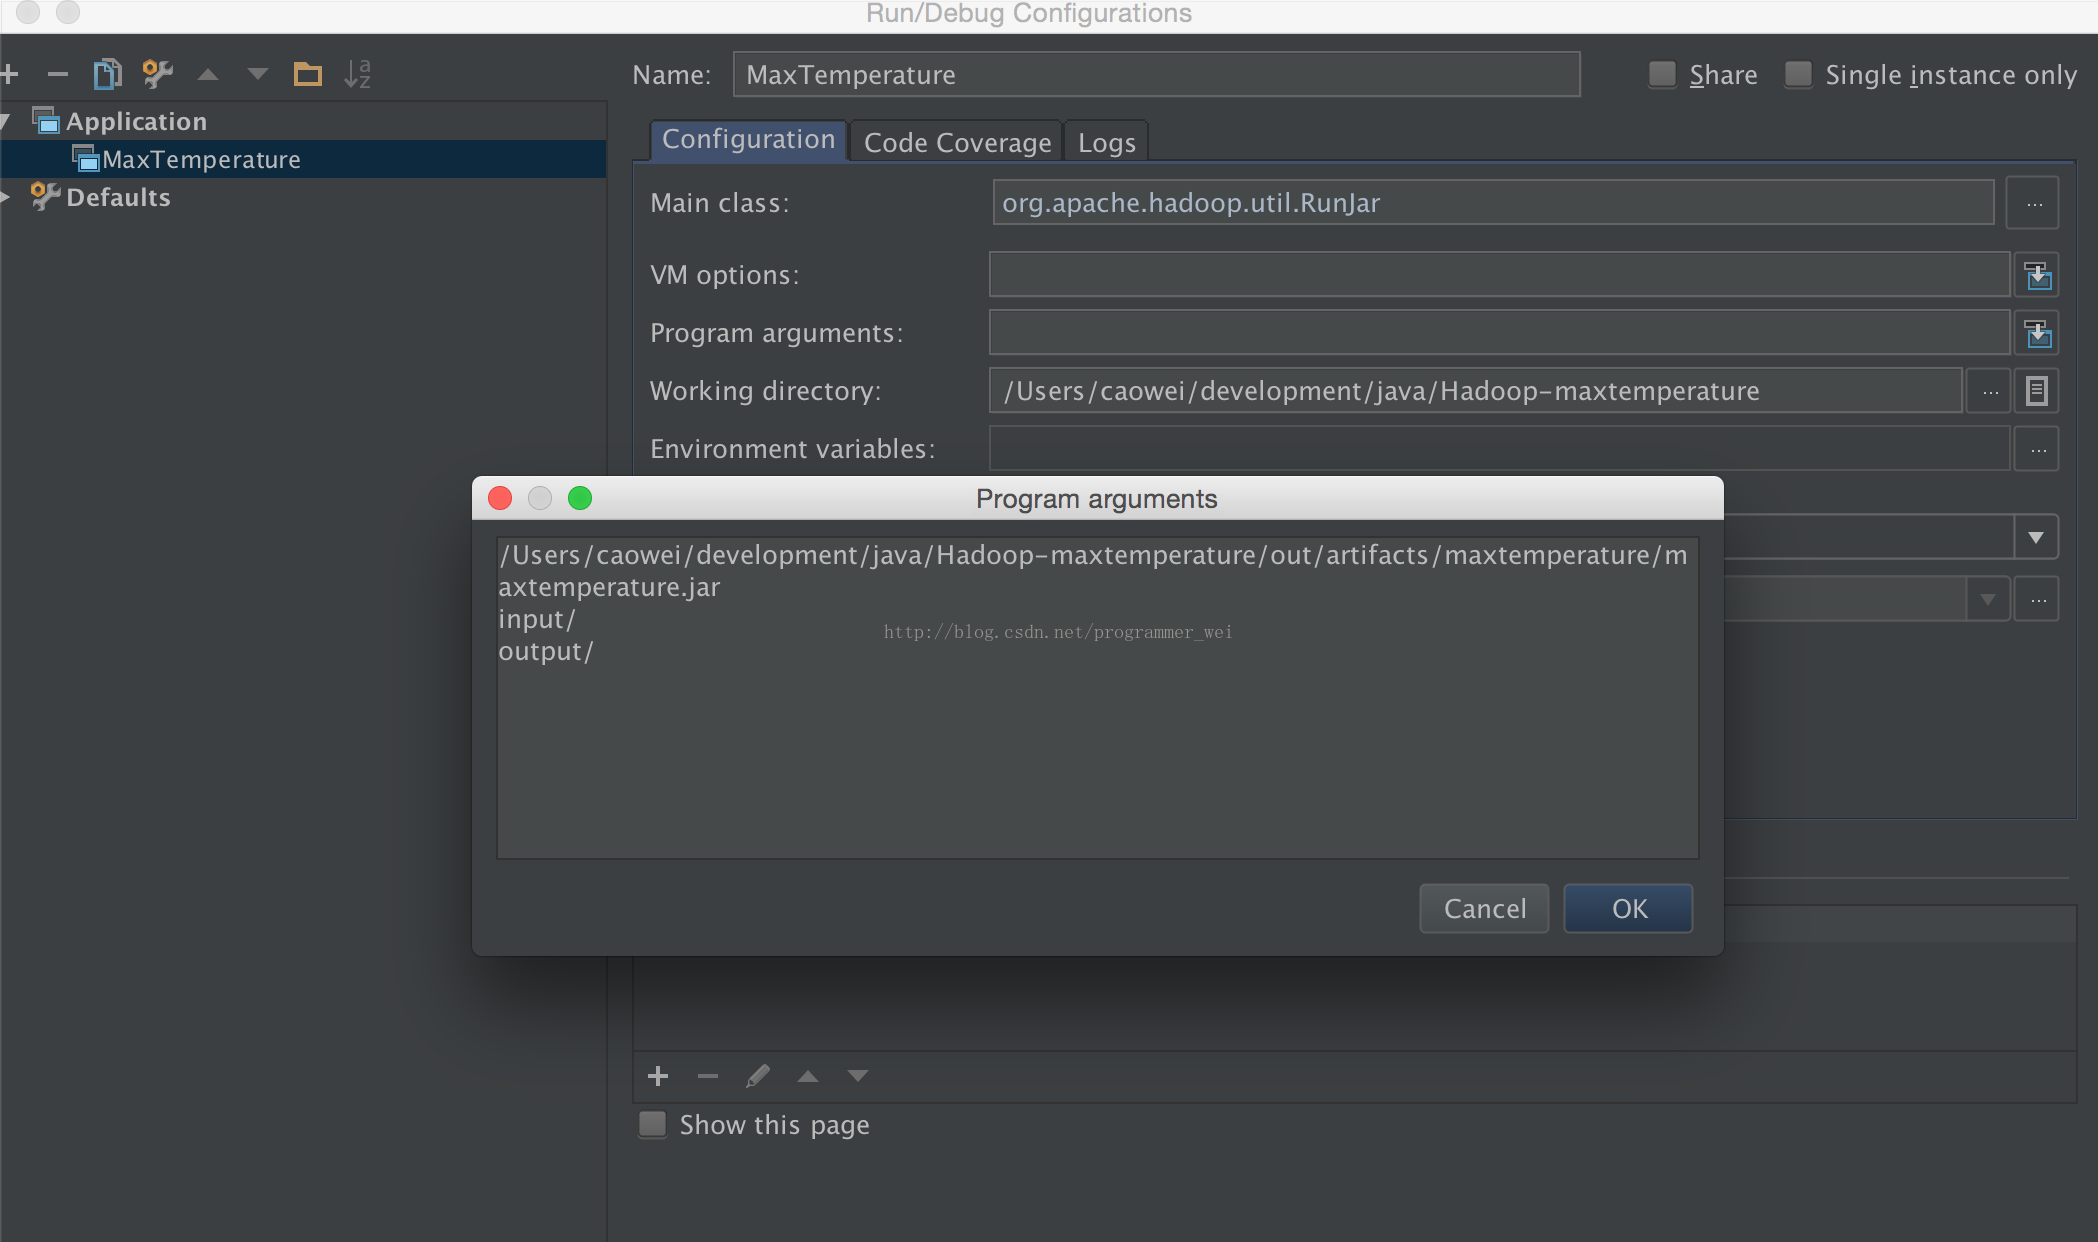
9、接下来,点击右上角的edit configurations,如果当前没有application则新建一个application

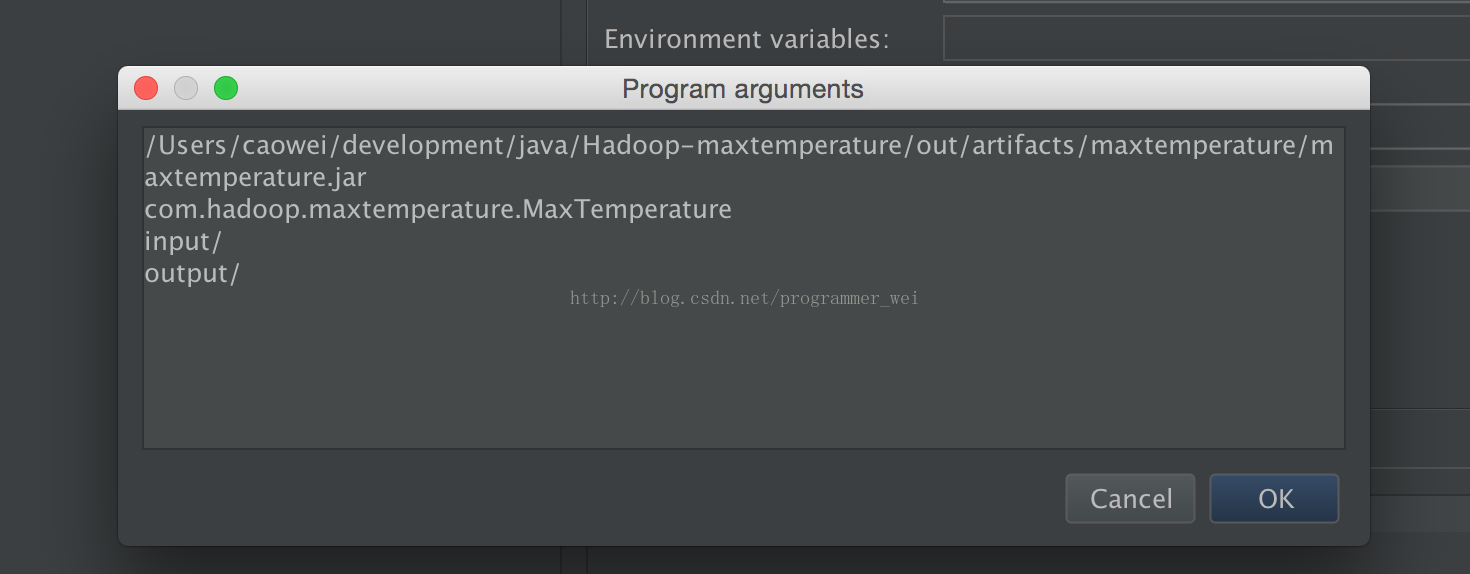
10、application的名字我们这里取MaxTemperature,然后main class需要输入org.apache.hadoop.util.RunJar,再点击program arguments,填写参数,如下:
其中,第一个参数之前在project structure中填写的jar文件路径,第二个参数是输入文件的目录,第二个参数是输出文件的路径
11、然后,我们需要新建一个输入路径,并将输入文件放进去,(输出文件不要创建,这个由系统自己创建)
12、点击运行,却发现有错误提示,显示找不到类:
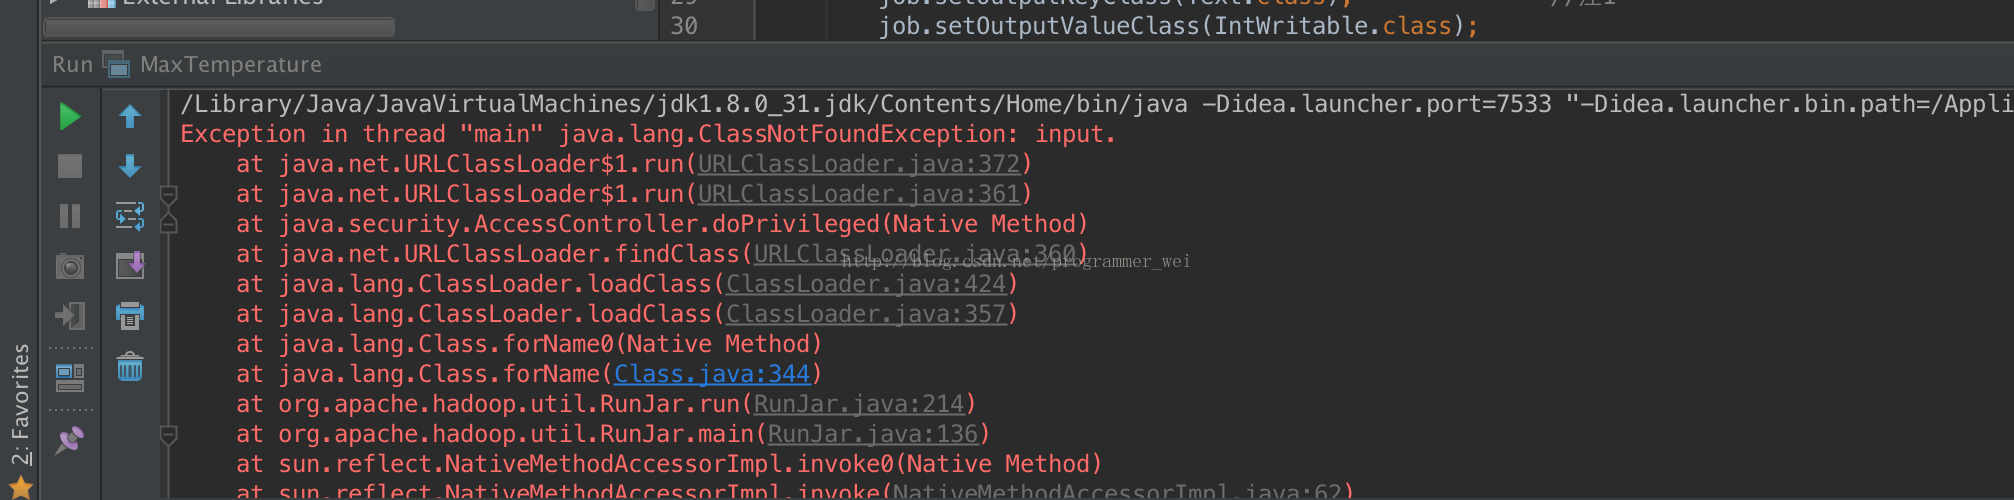
13、经过查阅资料,发现刚才填写参数的地方着了一个参数,需要将main函数所在类的路径添加进去:
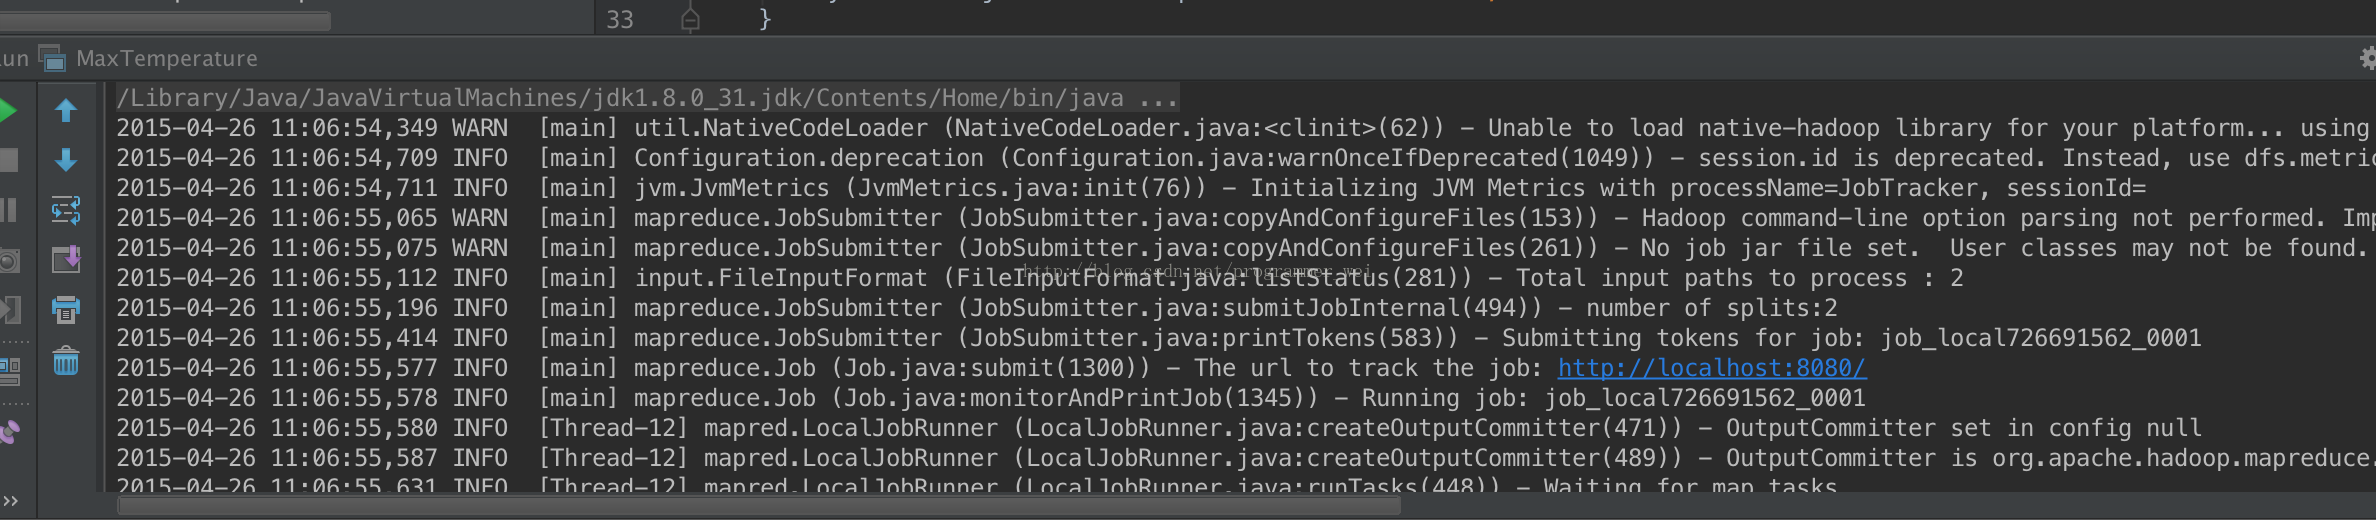
14、再点击运行,发现运行成功
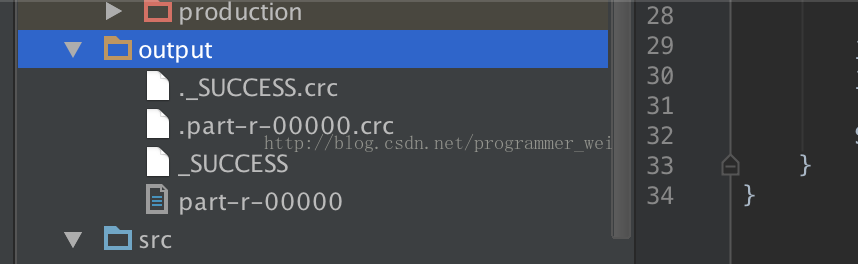
15、这时候,在项目目录下面生成了一个output目录,里面则存放了运行结果
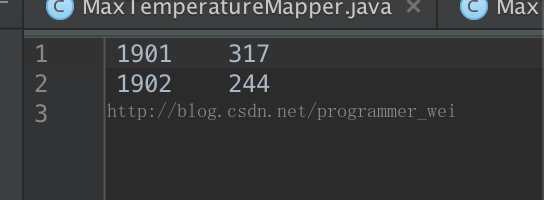
转载请注明出处: http://blog.csdn.net/programmer_wei/article/details/45286749
6.eclipse 中运行 Hadoop2.7.3 map reduce程序 出现错误(null) entry in command string: null chmod 0700
环境:windows
Hadoop版本:hadoop2.7.3
开发工具:eclispe-hadoop-plugin
运行map reduce任务报错:
(null) entry in command string: null chmod 0700
解决办法:
在https://github.com/SweetInk/hadoop-common-2.7.1-bin
中下载winutils.exe,libwinutils.lib 拷贝到%HADOOP_HOME%\bin目录 。
再次执行程序,报错:
Exception in thread "main" java.lang.UnsatisfiedLinkError: org.apache.hadoop.io.nativeio.NativeIO$Windows.access0(Ljava/lang/String;I)Z
	at org.apache.hadoop.io.nativeio.NativeIO$Windows.access0(Native Method)
	at org.apache.hadoop.io.nativeio.NativeIO$Windows.access(NativeIO.java:609)
	at org.apache.hadoop.fs.FileUtil.canRead(FileUtil.java:977)
	at org.apache.hadoop.util.DiskChecker.checkAccessByFileMethods(DiskChecker.java:187)
	at org.apache.hadoop.util.DiskChecker.checkDirAccess(DiskChecker.java:174)
	at org.apache.hadoop.util.DiskChecker.checkDir(DiskChecker.java:108)
	at org.apache.hadoop.fs.LocalDirAllocator$AllocatorPerContext.confChanged(LocalDirAllocator.java:285)
	at org.apache.hadoop.fs.LocalDirAllocator$AllocatorPerContext.getLocalPathForWrite(LocalDirAllocator.java:344)
	at org.apache.hadoop.fs.LocalDirAllocator.getLocalPathForWrite(LocalDirAllocator.java:150)
	at org.apache.hadoop.fs.LocalDirAllocator.getLocalPathForWrite(LocalDirAllocator.java:131)
	at org.apache.hadoop.fs.LocalDirAllocator.getLocalPathForWrite(LocalDirAllocator.java:115)
	at org.apache.hadoop.mapred.LocalDistributedCacheManager.setup(LocalDistributedCacheManager.java:125)
	at org.apache.hadoop.mapred.LocalJobRunner$Job.<init>(LocalJobRunner.java:163)
	at org.apache.hadoop.mapred.LocalJobRunner.submitJob(LocalJobRunner.java:731)
	at org.apache.hadoop.mapreduce.JobSubmitter.submitJobInternal(JobSubmitter.java:240)
	at org.apache.hadoop.mapreduce.Job$10.run(Job.java:1290)
	at org.apache.hadoop.mapreduce.Job$10.run(Job.java:1287)
	at java.security.AccessController.doPrivileged(Native Method)
	at javax.security.auth.Subject.doAs(Subject.java:422)
	at org.apache.hadoop.security.UserGroupInformation.doAs(UserGroupInformation.java:1698)
	at org.apache.hadoop.mapreduce.Job.submit(Job.java:1287)
	at org.apache.hadoop.mapreduce.Job.waitForCompletion(Job.java:1308)
	at com.jack.hadoop.temperature.MinTemperature.main(MinTemperature.java:37)
在https://github.com/SweetInk/hadoop-common-2.7.1-bin中下载hadoop.dll,并拷贝到c:\windows\system32目录中。
执行map reduce程序, 正常。
注意:程序中的路径都要写windows文件系统中的路径了,不再是hdfs中的路径。