一个设计模式是一个可靠的、可重用的方案,用于解决软件设计中频繁出现的问题。策略设计模式的目标是将算法封装在类中。因此可以很容易的替换一个现有的算法,或者把几个算法组合起来进行更复杂的处理,都会更加容易。而且这种模式能够尽可能地将算法的复杂性隐藏在一个直观的编程接口之后,因而有利于算法的部署。
比方说,我们需要构建一个简单的算法,它可以鉴别图像中含有给定颜色的所有像素。该算法输入的是图像以及颜色,并返回表示含有指定颜色的像素的二值图像。该算法还要指定另外一个参数,用来表示对颜色偏差的容忍度。算法的核心部分实现方法如下:
    //得到迭代器
    cv::Mat_<cv::Vec3b>::const_iterator it=image.begin<cv::Vec3b>();
	cv::Mat_<cv::Vec3b>::const_iterator itend=image.end<cv::Vec3b>();
	cv::Mat_<uchar>::iterator itout=result.begin<uchar>();
//对于每个像素
	for(;it!=itend;++it,++itout)
	{
//处理每个像素
//计算离目标颜色的距离
		if(getDistance(*it)<minDist)
		{
			*itout=255;
		}
		else
		{
			*itout=0;
		}
//结束图像处理
	}
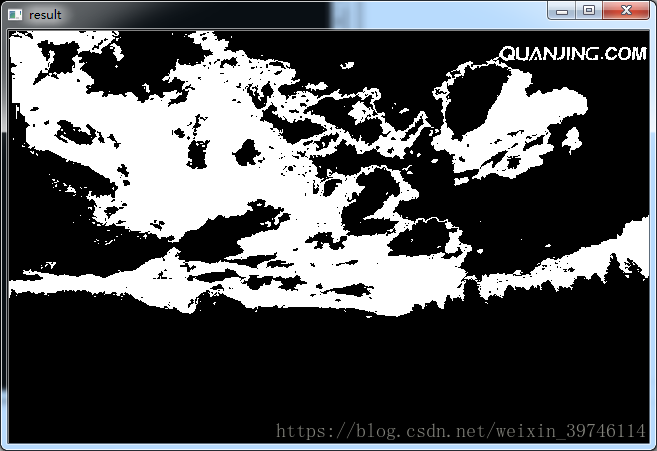
cv::Mat类型的变量image表示输入图像,而result表示的是二值输出图像。因此,第一步包括初始化所需的迭代器,之后的循环遍历很容易实现。每个迭代检查当前像素的颜色与目标颜色的距离,判断是否在minDist所定义的容忍度之内。如果判断为真,那么输出图像中的当前像素赋值为255(白色),否则赋值为0(黑色)。getdistance方法用于计算两个颜色之间的距离。该方法的定义如下:
//计算与目标颜色的距离
int getDistance(const cv::Vec3b& color) const
{
	return abs(color[0]-target[0])+abs(color[1]-target[1])+abs(color[2]-target[2]);
};
下面是一个简单的main函数来运行这个颜色的检测算法:
int main()
{  //1.创建图像处理的对象
	ColorDetector cdetect;
	//2.读取输入图像
	cv::Mat image = imread("8.jpg");
	if (!image.data)
	{
		cout << "picture read failure" << endl;
		return 0;
	} //设置输入参数
	cdetect.setTargetColor(130, 190, 230); //图片的颜色
	cv::namedWindow("result"); //处理并显示结果
	cv::imshow("result", cdetect.process(image));
	cv::waitKey();
	return 0;
}
程序代码如下:
#include<opencv2\core\core.hpp>
#include<opencv2\imgproc\imgproc.hpp>
#include<opencv2\highgui\highgui.hpp>
#include<iostream>

using namespace std;
using namespace cv;


class ColorDetector
{
public:
	ColorDetector() :minDist(100)
	{
		target[0] = target[1] = target[0] = 0;
	};
	void setColorDistanceThreshold(int distance)
	{
		if (distance<0)
			distance = 0;
		minDist = distance;
	};
	int getColorDistanceThreshold() const
	{
		return minDist;
	};
	void setTargetColor(unsigned char red,
		unsigned char green,
		unsigned char blue)
	{
		target[0] = blue;
		target[1] = green;
		target[2] = red;
	};
	void setTargetColor(cv::Vec3b color)
	{
		target = color;
	};
	cv::Vec3b getTargetColor() const
	{
		return target;
	};
//计算机与目标颜色的距离
	int getDistance(const cv::Vec3b& color) const
	{
		return abs(color[0] - target[0]) + abs(color[1] - target[1]) + abs(color[2] - target[2]);
	};
	cv::Mat process(const cv::Mat &image);//核心算法,在类外实现
private:
	int minDist;
	cv::Vec3b target;
	cv::Mat result;
};
cv::Mat ColorDetector::process(const cv::Mat &image)
{
	result.create(image.rows, image.cols, CV_8U);
//得到迭代器
	cv::Mat_<cv::Vec3b>::const_iterator it = image.begin<cv::Vec3b>();
	cv::Mat_<cv::Vec3b>::const_iterator itend = image.end<cv::Vec3b>();
	cv::Mat_<uchar>::iterator itout = result.begin<uchar>();
//对于每个像素
	for (; it != itend; ++it, ++itout)
	{
		if (getDistance(*it)<minDist)
		{
			*itout = 255;
		}
		else
		{
			*itout = 0;
		}
	}
	return result;
}
int main()
{  //1.创建图像处理的对象
	ColorDetector cdetect;
	//2.读取输入图像
	cv::Mat image = imread("8.jpg");
	if (!image.data)
	{
		cout << "picture read failure" << endl;
		return 0;
	} //设置输入参数
	cdetect.setTargetColor(130, 190, 230); //图片的颜色
	cv::namedWindow("result"); //处理并显示结果
	cv::imshow("result", cdetect.process(image));
	cv::waitKey();
	return 0;
}
原始图像:

运行结果: