Thymeleaf模板引擎
Spring Boot中推荐使用Thymeleaf作为模板引擎,因为Thymeleaf提供了完美的Spring MVC的支持。
Thymeleaf是一个Java类库,它是一个xml/xhtml/html5的模板引擎,可以作为MVC的Web应用的View层。Thymeleaf还提供了额外的模块与Spring MVC集成,所以我们可以使用Thymeleaf完全替代JSP。
引入Thymeleaf
<html xmlns:th="http://www.thymeleaf.org">
<!--通过xmlns:th="http://www.thymeleaf.org命名空间,将镜头页面转换为动态的视图。
    需要进行动态处理的元素使用th:标签 -->
<!DOCTYPE html>
<html>
<head>
<meta charset="UTF-8">
<title>Insert title here</title>
<!--通过@{}引用Web静态资源  -->
<script th:src="@{jquery-1.10.2.min.js}" type="text/javascript"></script>
</head>
<body>

</body>
</html>
访问model中的数据
<h3>访问model</h3>
<span th:text="${singlePerson.name}"></span><!--通过${}访问model中的属性  -->
<br />
<span th:text="${singlePerson.age}"></span>
model中的数据迭代
       <div >
            <ul >
                <li  th:each="person:${people}">        <!--person作为迭代元素来使用,与JSP中-->
                                                        <!-- <c:forEach items="${pageBean.data }" var="o">类似,更加简洁  -->
                    <span th:text="${person.name}"></span>
                    <span th:text="${person.age}"></span>
                </li>
            </ul>
        </div>
数据判断
<div th:if="${not #lists.isEmpty(people)}">  <!--判断people是否为空  -->
    <!--Thymeleaf支持>、<、>=、<=、==、!=作为比较条件,同时也支持将SpringEL表达式语言用于条件中-->
 </div>
在JavaScript中访问model
<!--javascript中访问model中的值通过th:inline="javascript"添加到script标签,-->
<!--这样javascript代码即可访问model中的属性通过[[${}]]格式获得实际的值-->
<script th:inline="javascript">
    var single = [[${singlePerson}]];
    console.log(single.name+"/"+single.age)
  </script>
Spring Boot的Thymeleaf支持
Spring Boot通过org.springframework.boot.autoconfigure.thymeleaf包对thymeleaf进行了自动配置。

通过ThymeleafAutoConfiguration类对集成所需要的Bean进行自动配置。通过ThymeleafProperties来配置Thymeleaf,在application.properties中,以spring.thymeleaf开头来配置,通过查看ThymeleafProperties源码,我们可以看出如何设置属性以及默认属性:
ThymeleafProperties.java
@ConfigurationProperties(prefix="spring.thymeleaf")
public class ThymeleafProperties
{
  private static final Charset DEFAULT_ENCODING = Charset.forName("UTF-8");
  private static final MimeType DEFAULT_CONTENT_TYPE = MimeType.valueOf("text/html");
  public static final String DEFAULT_PREFIX = "classpath:/templates/";
  public static final String DEFAULT_SUFFIX = ".html";
  private boolean checkTemplate = true;
  private boolean checkTemplateLocation = true;
  private String prefix = "classpath:/templates/";//前缀设置,放置在classpath:/templates/目录下
  private String suffix = ".html";//后缀,默认为.html
  private String mode = "HTML5";//模式设置,默认为HTML5
  private Charset encoding = DEFAULT_ENCODING;//编码设置,默认为UTF-8
  private MimeType contentType = DEFAULT_CONTENT_TYPE;//媒体类型设置,默认为text/html
  private boolean cache = true;//开启缓存,默认开启
  .....
}
实战
新建Spring Boot项目,添加spring-boot-starter-thymeleaf与spring-boot-starter-web依赖。
注:1.5.14版本的spring-boot-starter-thymeleaf会自动包含spring-boot-starter-web,而2.0.3不会。


Person.java
public class Person {
    private String name;
    private Integer age;

    public Person() {
        super();
    }
    public Person(String name, Integer age) {
        super();
        this.name = name;
        this.age = age;
    }
    public String getName() {
        return name;
    }
    public void setName(String name) {
        this.name = name;
    }
    public Integer getAge() {
        return age;
    }
    public void setAge(Integer age) {
        this.age = age;
    }
}
根据默认原则,脚本样式、图片等静态文件应该放置在src/main/resources/static下:
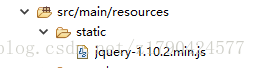
根据默认原则,页面应该放置在src/main/resources/templates下,新建index.html:
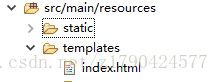
index.html
<html xmlns:th="http://www.thymeleaf.org">
<!--通过xmlns:th="http://www.thymeleaf.org命名空间,将镜头页面转换为动态的视图。需要进行动态处理的元素使用th:标签 -->
<!DOCTYPE html>
<html>
<head>
<meta charset="UTF-8">
<title>Insert title here</title>
<!--通过@{}引用Web静态资源 -->
<script th:src="@{jquery-1.10.2.min.js}" type="text/javascript"></script>
</head>
<body>
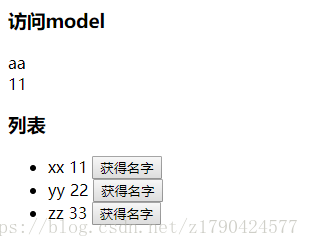
<h3>访问model</h3>
<span th:text="${singlePerson.name}"></span><!--通过${}访问model中的属性 -->
<br />
<span th:text="${singlePerson.age}"></span>
<div th:if="${not #lists.isEmpty(people)}"> <!--判断people是否为空 -->
<div >
<div >
<h3 class="panel-title">列表</h3>
</div>
<div >
<ul >
<li th:each="person:${people}"> <!--person作为迭代元素来使用,与JSP中-->
<!-- <c:forEach items="${pageBean.data }" var="o">类似,更加简洁 -->
<span th:text="${person.name}"></span>
<span th:text="${person.age}"></span>
<button th:onclick="'getName(\'' + ${person.name} + '\');'">获得名字</button>
</li>
</ul>
</div>
</div>
</div>
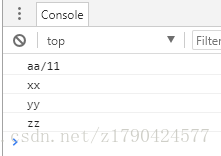
<script th:inline="javascript">
var single = [[${singlePerson}]];
console.log(single.name+"/"+single.age)
function getName(name){
console.log(name);
}
</script>
</body>
</html>ThymeleafApplication.java
@Controller
@SpringBootApplication
public class ThymeleafApplication {
    @RequestMapping("/index")
    public String index(Model model){
        Person single = new Person("aa",11);

        List<Person> people = new ArrayList<Person>();
        Person p1 = new Person("xx",11);
        Person p2 = new Person("yy",22);
        Person p3 = new Person("zz",33);
        people.add(p1);
        people.add(p2);
        people.add(p3);

        model.addAttribute("singlePerson", single);
        model.addAttribute("people", people);

        return "index";
    }

    public static void main(String[] args) {
        SpringApplication.run(ThymeleafApplication.class, args);
    }

}
Web相关配置
自动配置的ViewResolver
1:ContentNegotiatingViewResolver
这是Spring MVC提供的一个特殊的ViewResolver,ContentNegotiatingViewResolver不是自己处理View,而是代理给不同的ViewResolver来处理不同的View,所以它有最高的优先级。
2:BeanNameViewResolver
在控制器中的一个方法的返回值的字符串会根据BeanNameViewResolver去查找Bean的名称为返回字符串的View来渲染视图。例如:
定义BeanNameViewResolver 的Bean:
@Bean
public BeanNameViewResolver beanNameViewResolver()
{
    BeanNameViewResolver resolver = new BeanNameViewResolver();
    return resolver;
}
定义一个View的Bean,名称为jsonView:
@Bean
public MappingJackson2JsonView jsonView ()
{
    MappingJackson2JsonView jsonView = new MappingJackson2JsonView();
    return jsonView;
}
在控制器中,返回值字符串jsonView,它会找Bean名称为jsonView的视图来渲染:
@RequestMapping(value="/json",produces={MediaType.APPLICATION_JSON_VALUE})
    public String json(Model model)
    {
        Person single = new Person("aa",11);
        model.addAllAttributes("single",single);
        return "jsonView";
}3:InternalResourceViewResolver
这是一个非常常用的ViewResolver,主要通过设置前缀、后缀、以及控制器中方法来返回视图名的字符串,以得到实际页面:
@Bean
public InternalResourceViewResolver viewResolver()
{
    InternalResourceViewResolver viewResolver = new InternalResourceViewResolver();
    viewResolver.setPrefix("");
    viewResolver.setSuffix("");
    return viewResolver;
}
自动配置的静态资源
把类路径下的/static、/public、/resource和/META-INF/resource文件夹下的静态文件直接映射为 /**
,可以通过http://localhost:8080/**来访问。
自动配置的Formatter和Converter
只要我们定义了Converter、GenericConverter和Formatter接口的实现类的Bean,这些Bean就会自动注册到Spring MVC中。
自动配置的HttpMessageConverters
在Spring Boot中,如果要新增自定义的HttpMessageConverter,则只需定义一个你自己的HttpMessageConverters的Bean,然后在此Bean中注册自定义HttpMessageConverter即可:
@Bean
public HttpMessageConverters customerConverters()
{
    HttpMessageConverter<?> customerConverter1 = new CustomerConverter1();
    HttpMessageConverter<?> customerConverter2 = new CustomerConverter2();
    return new HttpMessageConverters(customerConverter1,customerConverter2);
}
静态首页的支持
把静态的index.html文件放置在如下目录:
- classpath:/META-INF/resources/index.html
- classpath:/resources/index.html
- classpath:/static/index.html
- classpath:/public/index.html
当我们访问应用根目录http://localhost:8080/时,会直接映射。
接管Spring Boot的Web配置
如果Spring Boot提供的Spring MVC默认配置不符合你的要求,则可以通过一个配置类(注解有@Configuration的类)加上@EnableWebMvc注解来实现完全自己控制的MVC配置。
@Configuration
@EnableWebMvc
public class MyMvcConfig extends WebMvcConfigurerAdapter{
@Override
public void addViewControllers(ViewControllerRegistry registry)
{
    registry.addViewController("/xx").setViewName("/xx");

}
}
在这里重写的addViewController方法,并不会覆盖WebMvcAutoConfiguration中的addViewControllers(在此方法中,Spring Boot将“/”映射至index.html),这也意味着我们自己的配置和Spring Boot的自动配置同时有效,这也是我们推荐添加自己的MVC配置的方式。
注册Servlet、Filter、Listener
直接注册Bean示例:
@Bean
public XxServlet xxServlet()
{
    return new XxServlet();
}

@Bean
public YyFilter yyFilter()
{
    return new YyFilter();
}

@Bean
public ZzListener ZzListener()
{
    return new ZzListener();
}
通过RegistrationBean示例:
@Bean
public ServletRegistrationBean servletRegistrationBean()
{
    return new ServletRegistrationBean(new XxServlet(),"/xx/*");
}

@Bean
public FilterRegistrationBean filterRegistrationBean()
{
    FilterRegistrationBean filterRegistrationBean = new FilterRegistrationBean();
    filterRegistrationBean.setFilter(new YyFilter());
    filterRegistrationBean.setOrder(2);
    return filterRegistrationBean;
}

@Bean
public ServletListenerRegistrationBean listenerRegistrationBean<ZzListener>()
{
    return new ServletListenerRegistrationBean<ZzListener>(new  ZzListener());
}
SSL(Secure Socket Layer)配置
Secure Socket Layer,为Netscape所研发,用以保障在Internet上数据传输之安全,利用数据加密(Encryption)技术,可确保数据在网络上之传输过程中不会被截取及窃听。
SSL协议位于TCP/IP协议与各种应用层协议之间,为数据通讯提供安全支持。SSL协议可分为两层: SSL记录协议(SSL Record Protocol):它建立在可靠的传输协议(如TCP)之上,为高层协议提供数据封装、压缩、加密等基本功能的支持。 SSL握手协议(SSL Handshake Protocol):它建立在SSL记录协议之上,用于在实际的数据传输开始前,通讯双方进行身份认证、协商加密算法、交换加密密钥等。
1:生成证书
每一个JDK或者JRE里都有一个工具叫keytool,它是一个证书管理工具,可以用来生成自签名的证书。
在控制台输入如下命令:
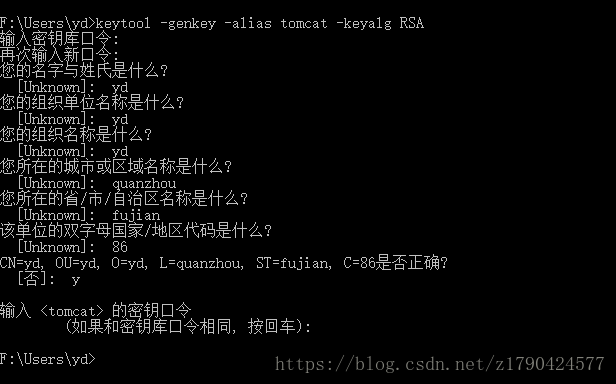
注意:一定要指定keyalg RSA 否则会出现ERR_SSL_VERSION_OR_CIPHER_MISMATCH 错误 导致无法访问
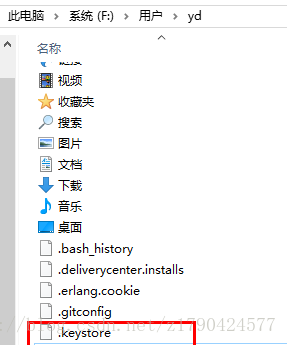
这时在我们当前目录下生成了一个.keystore文件,这就是我们要用的证书文件:
Spring Boot配置SSL
将.keystore复制到项目的根目录(即和你的pom.xml文件的同级目录),然后在application.properties中做如下配置:
server.port=8443
server.ssl.enabled=true
server.ssl.key-password=123456
server.ssl.key-store-type=JKS
server.ssl.key-alias=tomcat
server.ssl.key-store=.keystore
启动Spring Boot,控制台输出效果:

此时访问https://localhost:8443:

http转向https
很多时候我们在地址栏输入的是http,但是会自动转向到https,要实现这个功能,我们需要配置TomcatEmbeddedServletContainerFactory,并且添加Tomccat的connector来实现(2.0.3版本没有TomcatEmbeddedServletContainerFactory这个类,1.5.14有,其他的版本不太清楚)
ThymeleafApplication.java添加如下内容:
@Bean
  public EmbeddedServletContainerFactory servletContainer() {
    TomcatEmbeddedServletContainerFactory tomcat = new TomcatEmbeddedServletContainerFactory() {
        @Override
        protected void postProcessContext(Context context) {
          SecurityConstraint securityConstraint = new SecurityConstraint();
          securityConstraint.setUserConstraint("CONFIDENTIAL");
          SecurityCollection collection = new SecurityCollection();
          collection.addPattern("/*");
          securityConstraint.addCollection(collection);
          context.addConstraint(securityConstraint);
        }
      };

    tomcat.addAdditionalTomcatConnectors(httpConnector());
    return tomcat;
  }
    @Bean
  public Connector httpConnector() {
    Connector connector = new Connector("org.apache.coyote.http11.Http11NioProtocol");
    connector.setScheme("http");
    connector.setPort(8080);
    connector.setSecure(false);
    connector.setRedirectPort(8443);
    return connector;
  }
再次启动Spring Boot,控制台输出效果:

此时访问http://localhost8080会自动转向为https://localhost:8443:

参考书籍:Spring Boot 实战
以上只是学习所做的笔记, 以供日后参考。如有错误请指正,谢谢啦!!!