最近公司业务有一个需求,用户认证时需要手动签名,客户端需要将用户的签名生成图片上传给服务器。于是利用贝赛尔曲线研究了一下手动签名,和大家分享一下。
Demo下载地址:https://github.com/TechAlleyBoy/SignDemo
效果图
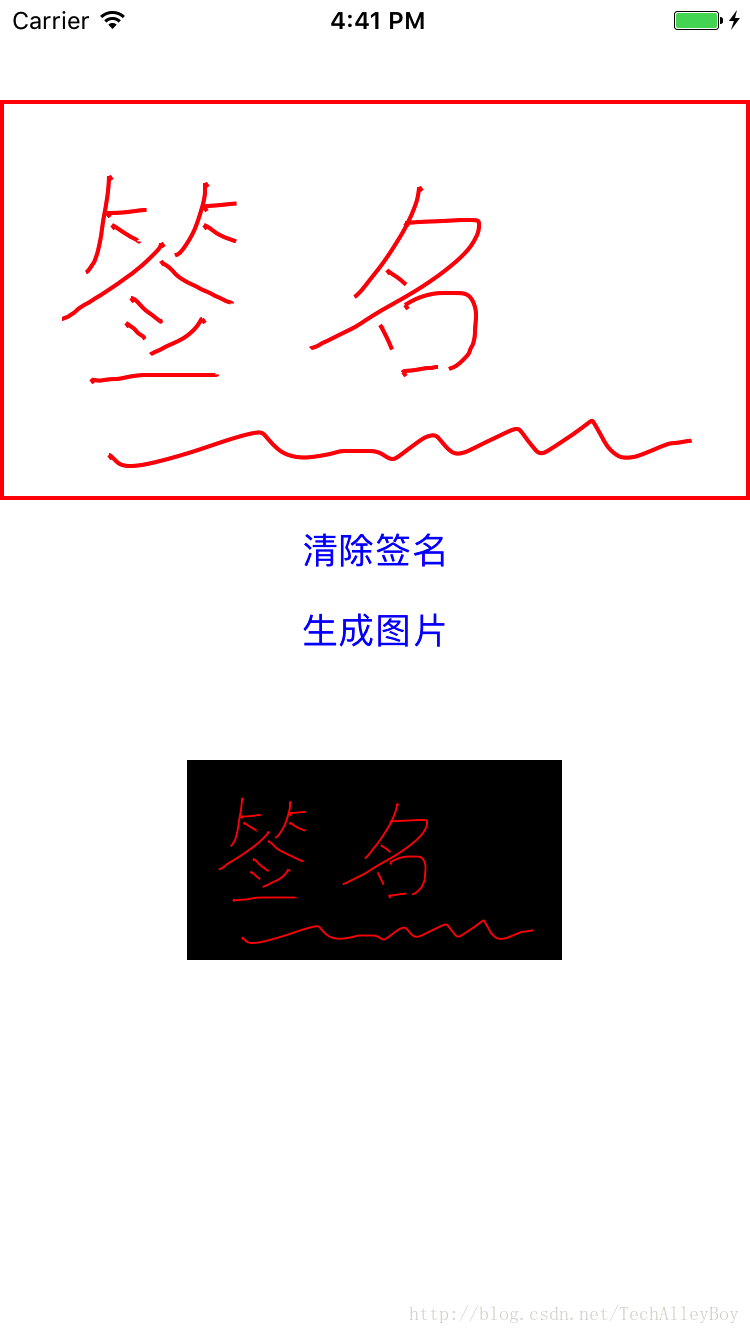
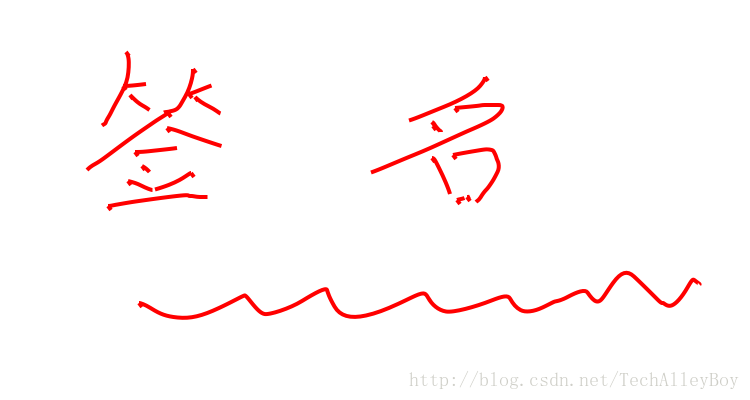
生成的图片,这里制作的是透明的签名
一:绘制操作,主要利用的是贝赛尔曲线
注意:在调用setNeedsDisplay方法后,会在调用drawRect
#pragma mark - 初始化
- (instancetype)initWithFrame:(CGRect)frame
{
    self = [super initWithFrame:frame];
    if (self) {
        self.backgroundColor = [UIColor clearColor];
        [self setMultipleTouchEnabled:NO];
        self.beizerPath = [UIBezierPath bezierPath];
        [self.beizerPath setLineWidth:2];
    }
    return self;
}

#pragma mark - 绘图操作
- (void)drawRect:(CGRect)rect{
    //设置签名的颜色
    UIColor *strokeColor = [UIColor redColor];
    [strokeColor setStroke];

    //签名的路径绘制
    [self.beizerPath stroke];
}

- (void)touchesBegan:(NSSet<UITouch *> *)touches withEvent:(UIEvent *)event{
    self.control = 0;
    UITouch *touch = [touches anyObject];
    points[0] = [touch locationInView:self];
    CGPoint startPoint = points[0];
    CGPoint endPoint = CGPointMake(startPoint.x + 1.5, startPoint.y + 2);
    [self.beizerPath moveToPoint:startPoint];
    [self.beizerPath addLineToPoint:endPoint];
}

- (void)touchesMoved:(NSSet *)touches withEvent:(UIEvent *)event{
    UITouch *touch = [touches anyObject];
    CGPoint touchPoint = [touch locationInView:self];
    _control++;
    points[_control] = touchPoint;

    if (_control == 4){
        points[3] = CGPointMake((points[2].x + points[4].x)/2.0, (points[2].y + points[4].y)/2.0);

        //设置画笔起始点
        [self.beizerPath moveToPoint:points[0]];

        //endPoint终点 controlPoint1、controlPoint2控制点
        [self.beizerPath addCurveToPoint:points[3] controlPoint1:points[1] controlPoint2:points[2]];

        //setNeedsDisplay会自动调用drawRect方法,这样可以拿到UIGraphicsGetCurrentContext,就可以画画了
        [self setNeedsDisplay];

        points[0] = points[3];
        points[1] = points[4];
        _control = 1;
    }
}
二:清除签名
注意:如何需要透明度的图片时,首先view是透明的,然后一定生成png的图片,否则不是黑色背景就是白色背景。
#pragma mark - 清除签名
- (void)clearSignature{
    [self.beizerPath removeAllPoints];
    [self setNeedsDisplay];
}
三:获取图片
#pragma mark - 获取图片
- (UIImage *)getSignatureImage {
    //设置为NO,UIView是透明这里的图片就是透明的
    UIGraphicsBeginImageContextWithOptions(self.bounds.size, NO, [UIScreen mainScreen].scale);
    [self.layer renderInContext:UIGraphicsGetCurrentContext()];

    UIImage *signatureImage = UIGraphicsGetImageFromCurrentImageContext();
    UIGraphicsEndImageContext();
    NSString* docDir = [NSString stringWithFormat:@"%@/Documents/Image", NSHomeDirectory()];
    [[NSFileManager defaultManager] createDirectoryAtPath:docDir withIntermediateDirectories:YES attributes:nil error:nil];
    NSString *path = [NSString stringWithFormat:@"%@/Documents/Image/IMAGE.PNG", NSHomeDirectory()];

    //用png是透明的
    [UIImagePNGRepresentation(signatureImage) writeToFile: path atomically:YES];
    return signatureImage;
}