一、开发工具说明
为了防止代码运行错误,建议使用一致的版本:
开发工具:Eclipse : Version: Neon.3 Release (4.6.3)
开发spring cloud应用推荐使用 idea或者spring官方提供的STS工具,笔者由于公司内部使用习惯等原因,还是选择了Eclipse安装STS插件STS插件 下载地址:http://spring.io/tools/sts/all/
这里注意:STS插件要选择与Eclipse对应的版本:

JDK : jdk1_8_131
MAVEN :maven 3.5
二、创建Eureka注册中心
1、创建一个Maven主项目
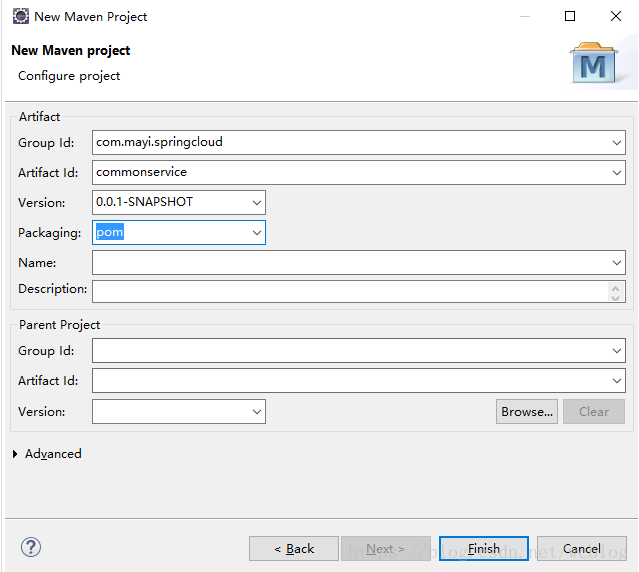
删除其目录下的src包,只剩下pom.xml
这里打包选择pom,最终其子项目重复依赖统一提取到这里,这就是主项目的主要作用
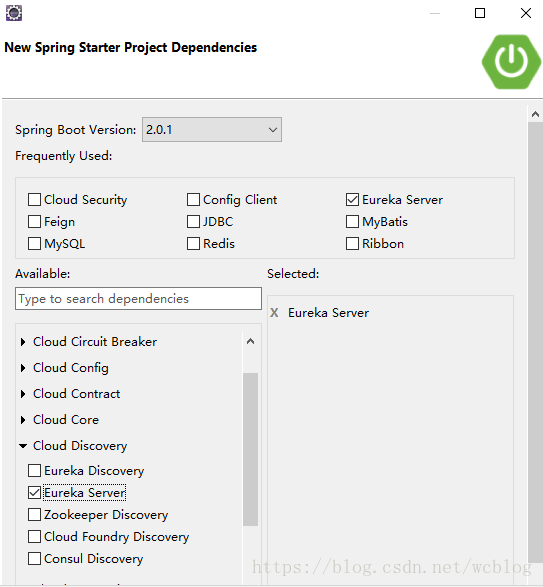
2、在主项目上创建一个springboot项目

选择 Eureka Server ,项目创建完成
此时pom.xml为:
<?xml version="1.0" encoding="UTF-8"?>
<project xmlns="http://maven.apache.org/POM/4.0.0" xmlns:xsi="http://www.w3.org/2001/XMLSchema-instance"
    xsi:schemaLocation="http://maven.apache.org/POM/4.0.0 http://maven.apache.org/xsd/maven-4.0.0.xsd">
    <modelVersion>4.0.0</modelVersion>

    <groupId>com.mayi.springcloud</groupId>
    <artifactId>commonservice-eureka</artifactId>
    <version>0.0.1-SNAPSHOT</version>
    <packaging>jar</packaging>

    <name>commonservice-eureka</name>
    <description>eureka 注册中心</description>

    <parent>
        <groupId>org.springframework.boot</groupId>
        <artifactId>spring-boot-starter-parent</artifactId>
        <version>2.0.1.RELEASE</version>
        <relativePath/> <!-- lookup parent from repository -->
    </parent>

    <properties>
        <project.build.sourceEncoding>UTF-8</project.build.sourceEncoding>
        <project.reporting.outputEncoding>UTF-8</project.reporting.outputEncoding>
        <java.version>1.8</java.version>
        <spring-cloud.version>Finchley.M9</spring-cloud.version>
    </properties>

    <dependencies>
        <dependency>
            <groupId>org.springframework.cloud</groupId>
            <artifactId>spring-cloud-starter-netflix-eureka-server</artifactId>
        </dependency>

        <dependency>
            <groupId>org.springframework.boot</groupId>
            <artifactId>spring-boot-starter-test</artifactId>
            <scope>test</scope>
        </dependency>
    </dependencies>

    <dependencyManagement>
        <dependencies>
            <dependency>
                <groupId>org.springframework.cloud</groupId>
                <artifactId>spring-cloud-dependencies</artifactId>
                <version>${spring-cloud.version}</version>
                <type>pom</type>
                <scope>import</scope>
            </dependency>
        </dependencies>
    </dependencyManagement>

    <build>
        <plugins>
            <plugin>
                <groupId>org.springframework.boot</groupId>
                <artifactId>spring-boot-maven-plugin</artifactId>
            </plugin>
        </plugins>
    </build>

    <repositories>
        <repository>
            <id>spring-milestones</id>
            <name>Spring Milestones</name>
            <url>https://repo.spring.io/milestone</url>
            <snapshots>
                <enabled>false</enabled>
            </snapshots>
        </repository>
    </repositories>


</project>
3、配置bootstrap.yml
将resources目录下的application.properties改名为bootstrap.yml(建议使用格式化ymal语言,好处自己琢磨吧^_^),ymal 校验比较严格,我的是换行空两格,保持统一,编辑器也是有提示的
server:
  port: 8761
spring:
  application:
    name: service-registry
eureka:
  instance:
    prefer-ip-address: true
  client:
    fetch-registry: false
    register-with-eureka: false
  server:
    wait-time-in-ms-when-sync-empty: 0
解释:
- 配置为server :
fetch-registry: false
register-with-eureka: false
4、启动类配置
添加@EnableEurekaServer注解即可
package com.mayi.springcloud;


import org.springframework.boot.SpringApplication;
import org.springframework.boot.autoconfigure.SpringBootApplication;
import org.springframework.cloud.netflix.eureka.server.EnableEurekaServer;

@SpringBootApplication
@EnableEurekaServer
public class CommonserviceEurekaApplication {

    public static void main(String[] args) {
        SpringApplication.run(CommonserviceEurekaApplication.class, args);
    }
}
使用SpringBootApp启动,访问地址:localhost:8761
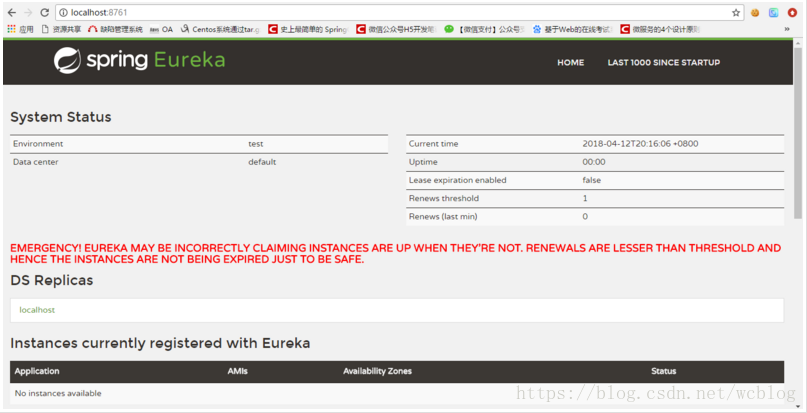
正常打开以上网页,说明Eureka注册中心配置成功。
三、创建客户端项目
1、pom.xml 同上,bootstrap.yml简单代码如下:
spring:
  application:
    name: service-eureka-client
server:
  port: 8800
2、启动类添加@EnableEurekaClient注解
这里建议使用@EnableEurekaClient注解来声明客户端,因为我们使用的是Eureka注册中心,如果使用zookeeper或其他注册中心使用@EnableDiscoveryClient,而对于Eureka注册中心来说两者都可
package com.mayi.springcloud;
import org.springframework.boot.SpringApplication;
import org.springframework.boot.autoconfigure.SpringBootApplication;
import org.springframework.cloud.netflix.eureka.EnableEurekaClient;
@SpringBootApplication
@EnableEurekaClient
public class CommonserviceEurekaClientApplication {
public static void main(String[] args) {
SpringApplication.run(CommonserviceEurekaClientApplication.class, args);
}
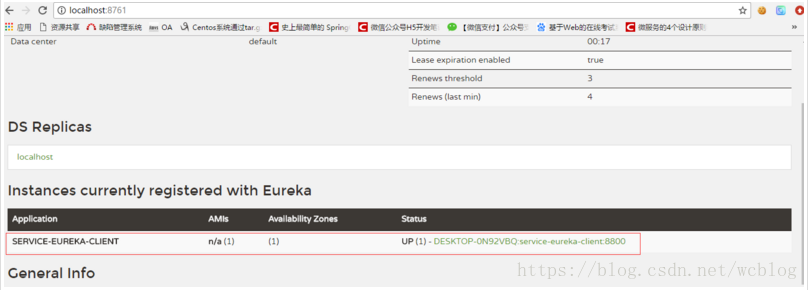
}3、启动项目
如图,客户端注册成功:
接下来,我会依次整新文章,直至整个架构完成,如有兴趣的朋友加我微信加入spring cloud社区群

或关注微信公众号:java架构师修行