元素水平+垂直居中
昨天的用户页的用户头像,是根据已知的像素大小,设置固定的值,达到居中的效果。
今日切换机型进行适配,发现对不同尺寸大小的屏幕不匹配。所以对wxss进行修改,真正达到水平+垂直居中。
参考博客:https://blog.csdn.net/qq_32623363/article/details/77101971
修改部分的wxss代码:
.portrait-user {
  position: absolute;
  width: 64px;
  height: 94px;
  /* 水平+垂直居中 */
  margin: auto;
  top: 0;
  bottom: 0;
  left: 0;
  right: 0; justify-content: center; }
/* 该元素的父元素,需要设置position: relative; */
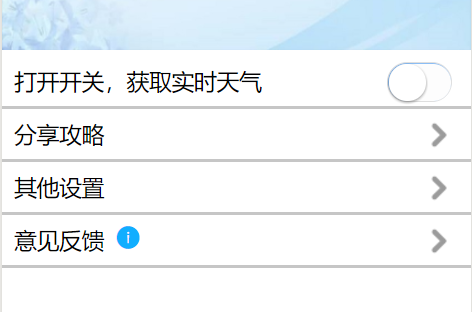
用户页--设置模块
暂时只做了四个部分:
wxml+wxss代码:
<view class='settingMod'>
  <view class='settingItem'>
    <text class='settingText'>{{weather}}</text>
    <switch class='switch-weather' color='#8CBEF5' bindchange='switchChange'></switch>
  </view>
  <view class='settingItem' bindtap='toEdit'>
    <text class='settingText'>分享攻略</text>
    <image class='arrow' src='{{arrowUrl}}'></image>
  </view>
  <view class='settingItem'>
    <text class='settingText'>其他设置</text>
    <image class='arrow' src='{{arrowUrl}}'></image>
  </view>
  <view class='settingItem'>
    <text class='settingText'>意见反馈</text>
    <icon class='settingIcon' type='info' size='18'></icon>
    <image class='arrow' src='{{arrowUrl}}'></image>
  </view>
</view>
.settingItem {
  height: 35px;
  border-bottom: solid #7676776b;
  padding-top: 5px;
}
.settingText,.settingIcon {
  font-size: 18px;
  vertical-align: middle;/*垂直对齐方式*/
  padding-left: 10px;
}
.switch-weather {
  float: right;
  padding-right: 10px;
}
.arrow {
  float: right;
  width: 32px;
  height: 32px;
  padding-right: 10px;
}
开关获取天气
开关用了switch组件,通过bindchange属性来触发开关事件。
天气信息,是从和风天气获取的实时天气信息。
js代码:
  /**
   * 获取实时天气数据
   */
  switchChange: function(e){
    // console.log(e);
    if(e.detail.value){
      wx.request({
        url: 'https://free-api.heweather.com/s6/weather/now?parameters',
        data: {
          location: "上海",
          key: "***"
        },
        success:(res)=>{
          console.log(res);
          var location = res.data.HeWeather6[0].basic.location;
          var weather = res.data.HeWeather6[0].now.cond_txt;
          var tmp = res.data.HeWeather6[0].now.tmp;
          this.setData({
            weather: location + " " + weather + " " + tmp + "度"
          })
        }
      })
    }
    else{
      this.setData({
        weather: "打开开关,获取实时天气"
      })
    }
  }
location,这里暂时设定为固定城市,后续会根据获取的位置信息而改变。
key,需要到和风天气的网站注册后获取。
分享攻略页面
点击分享攻略,会跳转到分享编辑页面。该页面有上传图片、发送位置信息等功能。
用wx.navigateTo进行页面跳转;当然,用navigator组件也是同样的效果。
攻略编辑页面,是一个form表单,里面的数据都要向服务器传输。
第一部分,文字输入框 + 图片输入框
wxml+wxss代码:
<view class='editMod'>
      <textarea name="blog" placeholder='分享你的美食'></textarea>
      <image src='{{PicUrl}}' class='addPic' wx:if="{{upImg}}"></image>
      <image src='{{addPicUrl}}' class='addPic' bindtap='addImg'></image>
  </view>
.editMod {
  border-bottom: solid #7676776b;
  padding-top: 5px;
}
.editMod textarea {
  padding: 20px;
}
.addPic {
  width: 80px;
  height: 80px;
  padding-left: 20px;
  padding-bottom: 20px;
}
在对图片进行添加后,因为要上传到服务器进行保存,所以我们在腾讯云上,来搭建小程序的服务器。