本文来自博客园,原网址为:http://www.cnblogs.com/archisama/p/5503526.html
PyQt5教程——组件 Ⅱ(八)
这部分的教程将会继续介绍PyQt5的组件。我们这节教程的内容将包括像素图(QPixmap),单行文本框(QLineEdit)和下拉列表框(QComboBox)
像素图(QPixmap)
像素图(QPixmap)是各种用于处理图像的组件中的一个。它是在屏幕上显示图片的最佳选择。在我们代码例子中,我们将使用像素图来在窗口上显示一个图片。
| 1 2 3 4 5 6 7 8 9 10 11 12 13 14 15 16 17 18 19 20 21 22 23 24 25 26 27 28 29 30 31 32 33 34 35 36 37 38 39 40 41 42 43 44 45 46 47 48 49 |
|
运行这个例子,我们会把一个图片显示在窗口上。
| 1 |
|
创建QPixmap对象。该对象构造方法传入一个文件的名字作为参数。
| 1 2 |
|
我们把像素图对象设置给标签,从而通过标签来显示像素图。
单行文本编辑框(QLineEdit)
单行文本编辑框组件允许输入单行的纯文本数据 。这个组件支持撤销、重做、剪切、粘贴、拖拽、拖动方法。
| 1 2 3 4 5 6 7 8 9 10 11 12 13 14 15 16 17 18 19 20 21 22 23 24 25 26 27 28 29 30 31 32 33 34 35 36 37 38 39 40 41 42 43 44 45 46 47 48 49 50 51 52 53 54 |
|
这个例子显示了一个单行编辑文本框和一个标签。我们在单行文本编辑框中输入文本时会同步把文本显示在标签中。
| 1 |
|
创建单行文本编辑框(QLineEdit)组件。
| 1 |
|
如果单行文本编辑框框内文本被改变,调用onChanged()方法。
| 1 2 3 4 |
|
上面是onChanged()方法的实现,我们设置了标签的显示文本。我们调用了adjustSize()方法来调整标签相对于显示的文本的长度。
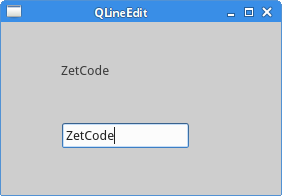 Figure: QLineEdit
分割框(QSplitter)
分割框组件让我们通过拖拽分割线来控制子组件的大小。在我们的例子中,我们显示由两个分割框组件约束的三个QFrame组件。
| 1 2 3 4 5 6 7 8 9 10 11 12 13 14 15 16 17 18 19 20 21 22 23 24 25 26 27 28 29 30 31 32 33 34 35 36 37 38 39 40 41 42 43 44 45 46 47 48 49 50 51 52 53 54 55 56 57 58 59 60 61 62 63 64 65 66 67 68 |
|
在我们的例子中,我们有三个框架组件和两个分割框组件。注意在某些主题下,分割框组件可能不会被显示。
| 1 2 |
|
我们使用了一个样式框架,为了让框架组件之间的分割线看的明显。
| 1 2 3 |
|
我们创建了一个分割框组件并且在这个分割框中添加进入两个框架组件。
| 1 2 |
|
我们把第一个分割框添加进另一个分割框组件中。
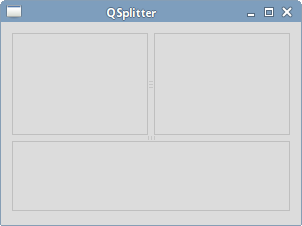 Figure: QSplitter widget
下拉列表框(QComboBox)
下拉列表框组件允许用户从列表中选择一个列表项。
| 1 2 3 4 5 6 7 8 9 10 11 12 13 14 15 16 17 18 19 20 21 22 23 24 25 26 27 28 29 30 31 32 33 34 35 36 37 38 39 40 41 42 43 44 45 46 47 48 49 50 51 52 53 54 55 56 57 58 59 |
|
例子中显示了一个下拉列表框和一个标签。下拉列表框有五个列表项。这五个列表项都是Linux发行版的名字。标签组件显示在下拉列表框中选中的列表项的文本。
| 1 2 3 4 5 6 |
|
我们创建一个下拉列表框并填充了五个列表项。
| 1 |
|
一旦列表项被选中,会调用onActivated()方法。
| 1 2 3 4 |
|
上面的方法,我们把下拉列表框中选中的列表项的文本显示在标签组件上。并且根据标签文本调整了标签大小。
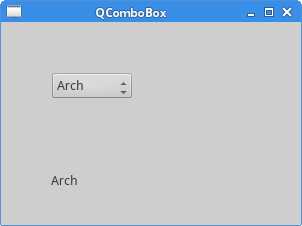 Figure: QComboBox
PyQt的入门教程就到这里结束了,下面该自己上官网了解更多的WIDGET的使用和QT更强大的功能了。
建议有C/C++基础的同学,不妨直接下手QT,很简单的,QT只要大概能写个聊天室或者其他的小软件,基本上PyQt就没问题了,毕竟PyQt的核心还是Qt库。