由于caffe在训练时,默认只会打印准确率和loss等相关信息,但是在特定任务中,可能还想看下训练过程,每一类的精确率和召回率是怎么变化的,所以这里添加一个自定义层,用于打印precision-recall信息,但是由于当类别多时,每个类都输出P、R的话,有点杂乱,所以这里,我们计算精确率和召回率的调和平均,F1值,这样的话,当有10个类别时,一到测试阶段,就打印出10个类各自的F1值。
按照添加自定义层的标准步骤,我们按照以下步骤:
(1)创建头文件 precision_recall_layer.hpp
因为这个功能,跟caffe里自带的Accuracy层很相似,所以,我们可以参考accuracy_layer.hpp文件的框架,编写我们需要的头文件precision_recall_layer.hpp
#ifndef CAFFE_PRECISION_RECALL_LAYER_HPP_
#define CAFFE_PRECISION_RECALL_LAYER_HPP_

#include <vector>
#include "caffe/blob.hpp"
#include "caffe/layer.hpp"
#include "caffe/proto/caffe.pb.h"
#include "caffe/layers/loss_layer.hpp"

namespace caffe {

template <typename Dtype>
class PrecisionRecallLayer : public Layer<Dtype> {
 public:

  explicit PrecisionRecallLayer(const LayerParameter& param)
      : Layer<Dtype>(param) {}

  virtual void Reshape(const vector<Blob<Dtype>*>& bottom,
      const vector<Blob<Dtype>*>& top);

  virtual inline const char* type() const { return "PrecisionRecall"; }
  virtual inline int ExactNumBottomBlobs() const { return 2; }   //需要两个输入
  virtual inline int ExactNumTopBlobs() const { return 1; }   //产生一个输出


 protected:
  virtual void Forward_cpu(const vector<Blob<Dtype>*>& bottom,
      const vector<Blob<Dtype>*>& top);

  virtual void Backward_cpu(const vector<Blob<Dtype>*>& top,
	  const vector<bool>& propagate_down, const vector<Blob<Dtype>*>& bottom) {}
};

}  // namespace caffe

#endif // CAFFE_PRECISIONRECALL_LAYER_HPP_(2)创建源文件 precision_recall_layer.cpp
#include <functional>
#include <utility>
#include <vector>
#include "caffe/layers/precision_recall_layer.hpp"
#include "caffe/util/math_functions.hpp"

namespace caffe {

template <typename Dtype>
void PrecisionRecallLayer<Dtype>::LayerSetUp(
  const vector<Blob<Dtype>*>& bottom, const vector<Blob<Dtype>*>& top) {
}

template <typename Dtype>
void PrecisionRecallLayer<Dtype>::Reshape(
  const vector<Blob<Dtype>*>& bottom, const vector<Blob<Dtype>*>& top) {
	const int num_label=bottom[0]->channels();    //种类数,如 mnist 是10类
  	vector<int> top_shape(2);  //有十个类,每一类对应的F1值-精确率和召回率的调和平均
	top_shape[0]=num_label;
	top_shape[1]=1;
  	top[0]->Reshape(top_shape);   //设置top的维度是 num_label*1
}

template <typename Dtype>
void PrecisionRecallLayer<Dtype>::Forward_cpu(const vector<Blob<Dtype>*>& bottom,
    const vector<Blob<Dtype>*>& top) {

	Dtype* output=top[0]->mutable_cpu_data();  //我们需要计算的F1值  维度是num_label*1

	const int num_label=bottom[0]->channels();    //种类数,如 mnist 是10类
	const int batch_size=bottom[0]->num();            //一个batch的图片数量,比如 100张
	for(int k=0;k<num_label;++k){    //将类k作为正例,其它作为反例
		Dtype TP,FN,FP,TN;
		TP=FN=FP=TN=0;
		for(int i=0;i<batch_size;++i){
			int realLabel=static_cast<int>(bottom[1]->data_at(i,0,0,0));   //该图片的真实标签
			int predictLabel;          //预测标签
			Dtype mmax=-1000000;
			for(int j=0;j<num_label;++j){
				Dtype tmp=bottom[0]->data_at(i,j,0,0);
				if(tmp>mmax){
					mmax=tmp;
					predictLabel=j;
				}
			}
			if(realLabel==k&&predictLabel==k)
				TP++;
			else if(realLabel==k&&predictLabel!=k)
				FN++;
			else if(realLabel!=k&&predictLabel==k)
				FP++;
			else
				TN++;
		}
		int index=top[0]->offset(k,0);
		output[index]=2*TP/(batch_size+TP-TN);
	}
}

INSTANTIATE_CLASS(PrecisionRecallLayer);
REGISTER_LAYER_CLASS(PrecisionRecall);

}  // namespace caffe
(3) 修改caffe_master/src/caffe/proto/caffe.proto文件
我们需要将我们定义的层,写进注册文件里,定位到310行
// NOTE
// Update the next available ID when you add a new LayerParameter field.
//
// LayerParameter next available layer-specific ID: 148 (last added: center_loss_param)
optional PrecisionRecallParameter precision_recall_param = 148;// LayerParameter next available layer-specific ID: 149 (last added: precision_recall_param)接下来,虽然我们的这个自定义层,是没有参数的,但我们仍然要定义该层,可以直接在该文件末尾添加
message PrecisionRecallParameter {}
(4)因为修改了caffe.proto文件,我们回到caffe根目录下
make clean
make all -j
(5)调用实例,结合mnist数据集的例子
layer {
   name: "F1"
   type: "PrecisionRecall"
   bottom: "ip2"
   bottom: "label"
   top: "F1"
   include {
     phase: TEST
   }
}
训练过程中,各阶段效果如下:

刚开始时
迭代500次后

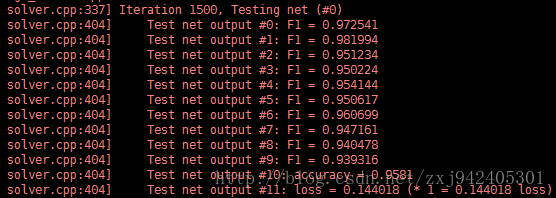
迭代1500次
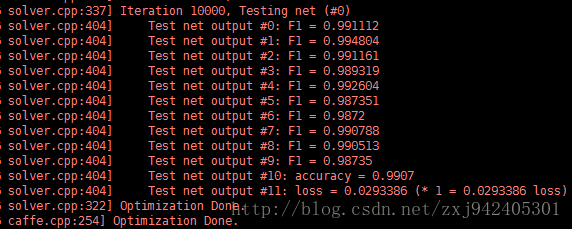
1W次后
其中的十个F1值,分别代表10个类的F1值(测试的时候,比如计算数字1类的F1值,则把标签为1的图片为正样本,其他9个类别的未负样本)
最后,该代码进行计算F1值,默认的上一层是全连接层,所以没有像caffe中标准层的代码那么严格检查维度信息,也不是最高效的计算方法,只是为了直观而编写的(caffe中各层的计算,都是用封装好的线性代数库的函数计算的)。