需要用到的工具:
NERDTree
Cscope
ctags
vundle
homebrew(for mac)
目录:
软件介绍
NERDTree
NERDTree是一款vim插件,可以显示树形目录:
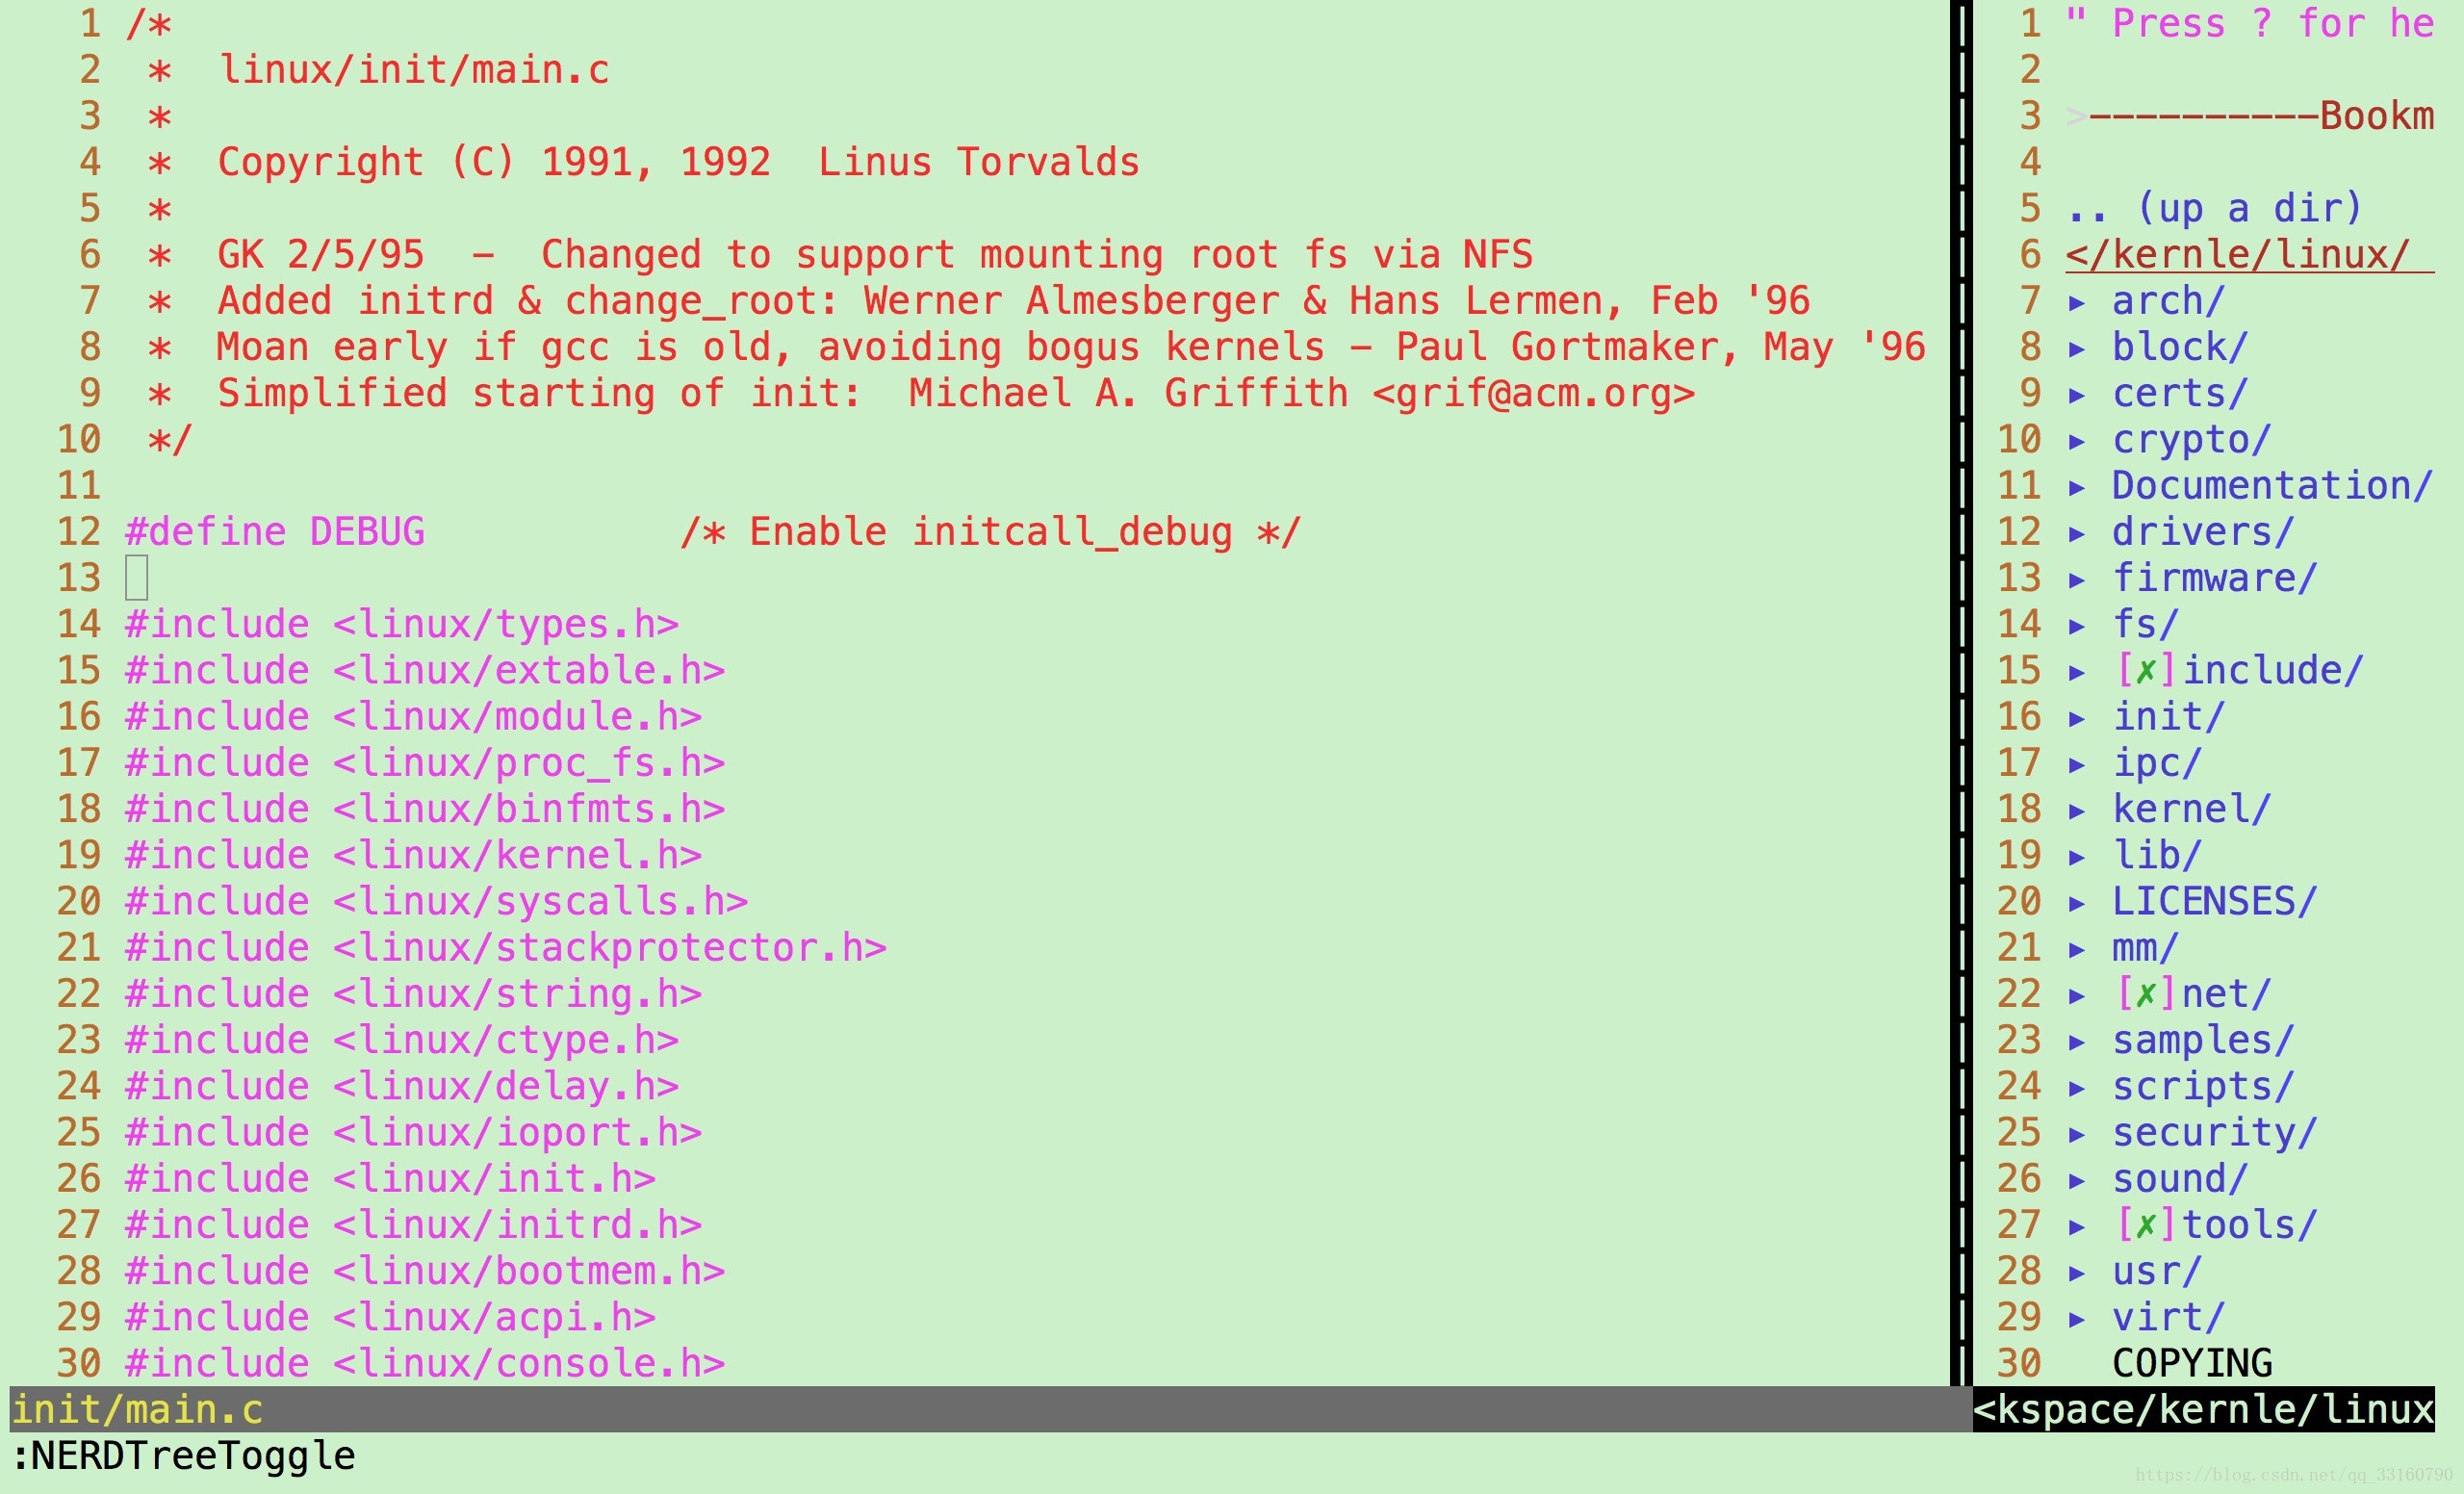
进入当前目录的树形界面,通过小键盘”上下”键,能移动选中的目录或文件。目录前面有”+”号,按Enter会展开目录,文件前面是”-“号,按Enter会在右侧窗口展现该文件的内容,并光标的焦点focus右侧。”ctr+w+h”光标focus左侧树形目录,”ctrl+w+l”光标focus右侧文件显示窗口。按”ctrl+w+w”,光标自动在左右侧窗口切换。光标focus左侧树形窗口,按”?”弹出NERDTree的帮助,再次按”?”关闭帮助显示。输入”:q”回车,关闭光标所在窗口。
NERDTree更详细的快捷键可以参考:
https://www.linuxidc.com/Linux/2017-03/141699.htm
(在NERDTree中输入?也能查看帮助)
Cscope
Cscope是VIM适用的工具和插件,通过Cscope可以方便的获取某个函数的定义以及被那些函数调用 。
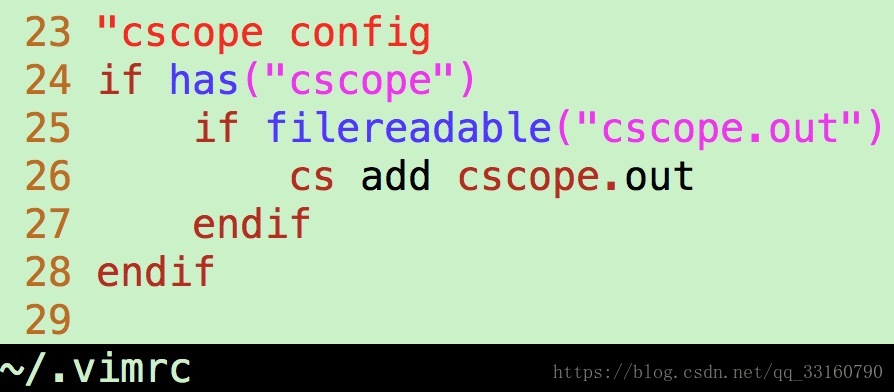
cscope使用之前需要生成缓存文件,cscope -R之后就可以看到有名为cscope.out的文件,vim中执行
:cs add cscope.out就可以加载这个文件。另外也可以在脚本中指定预加载缓存文件。
功能演示:
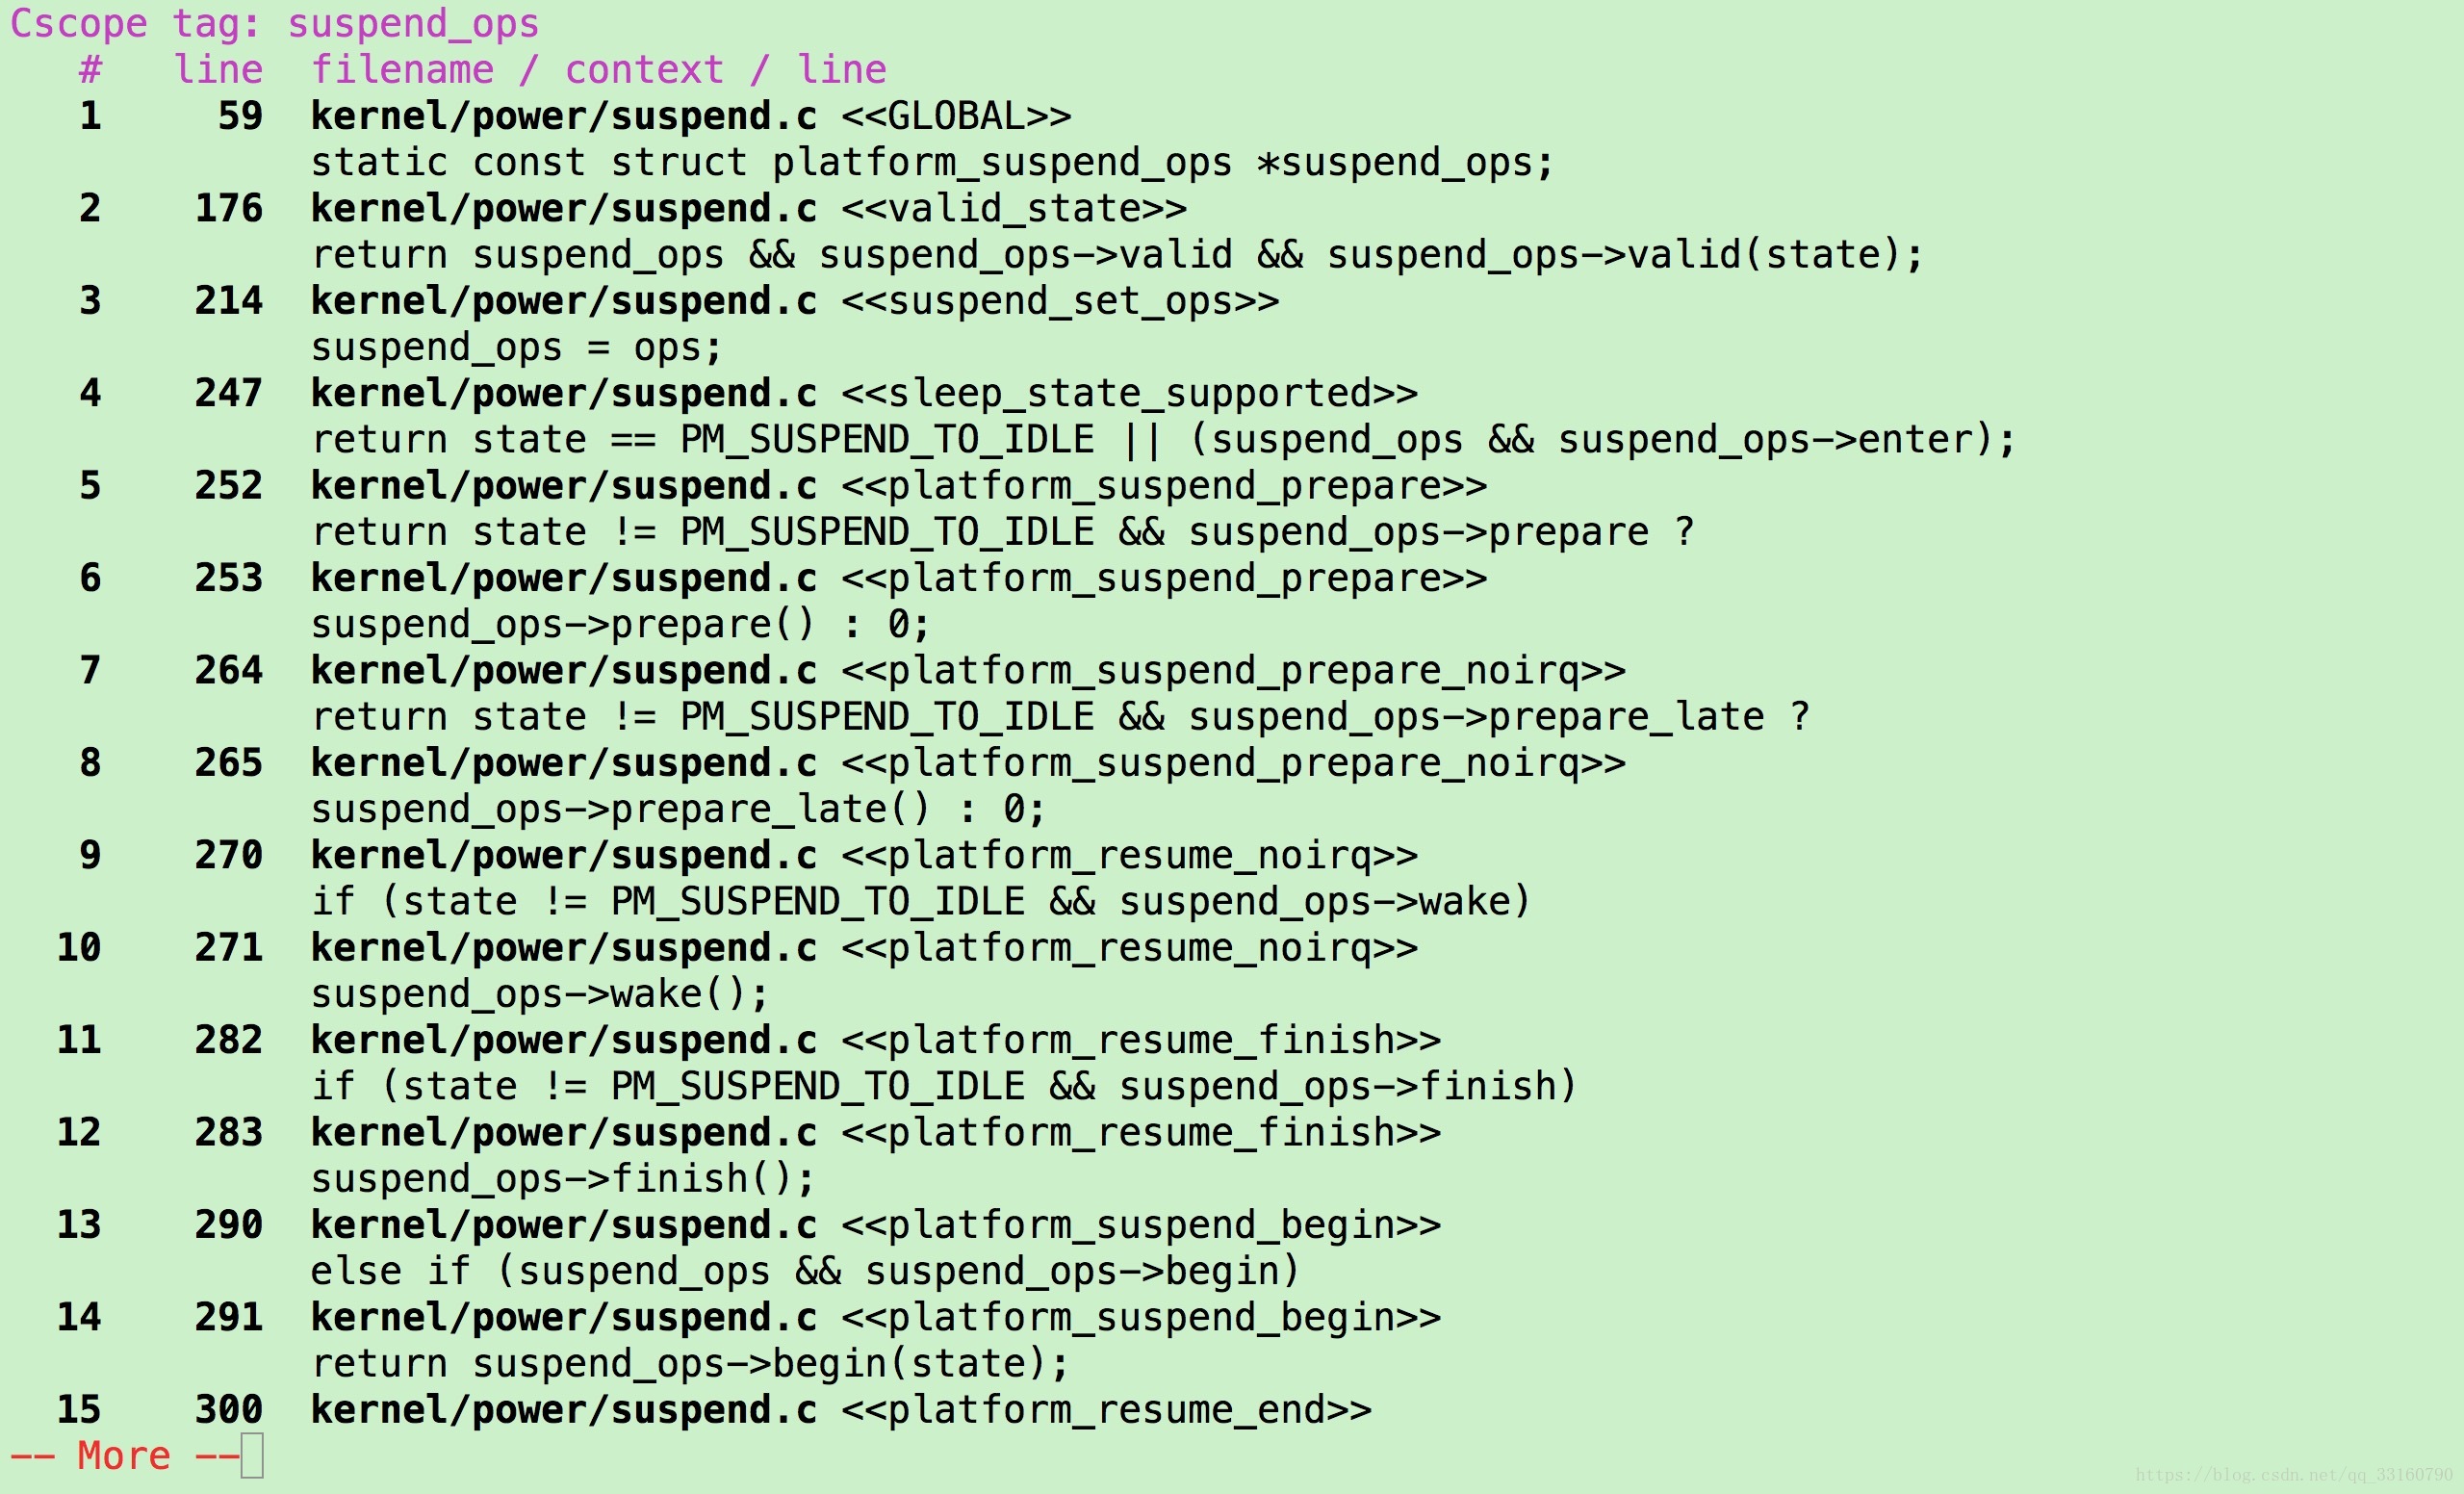
(使用f/b/q等快捷键可以快速移动,可以在函数中进行选择,输入对应数字序号后就可以跳转到相应位置。)
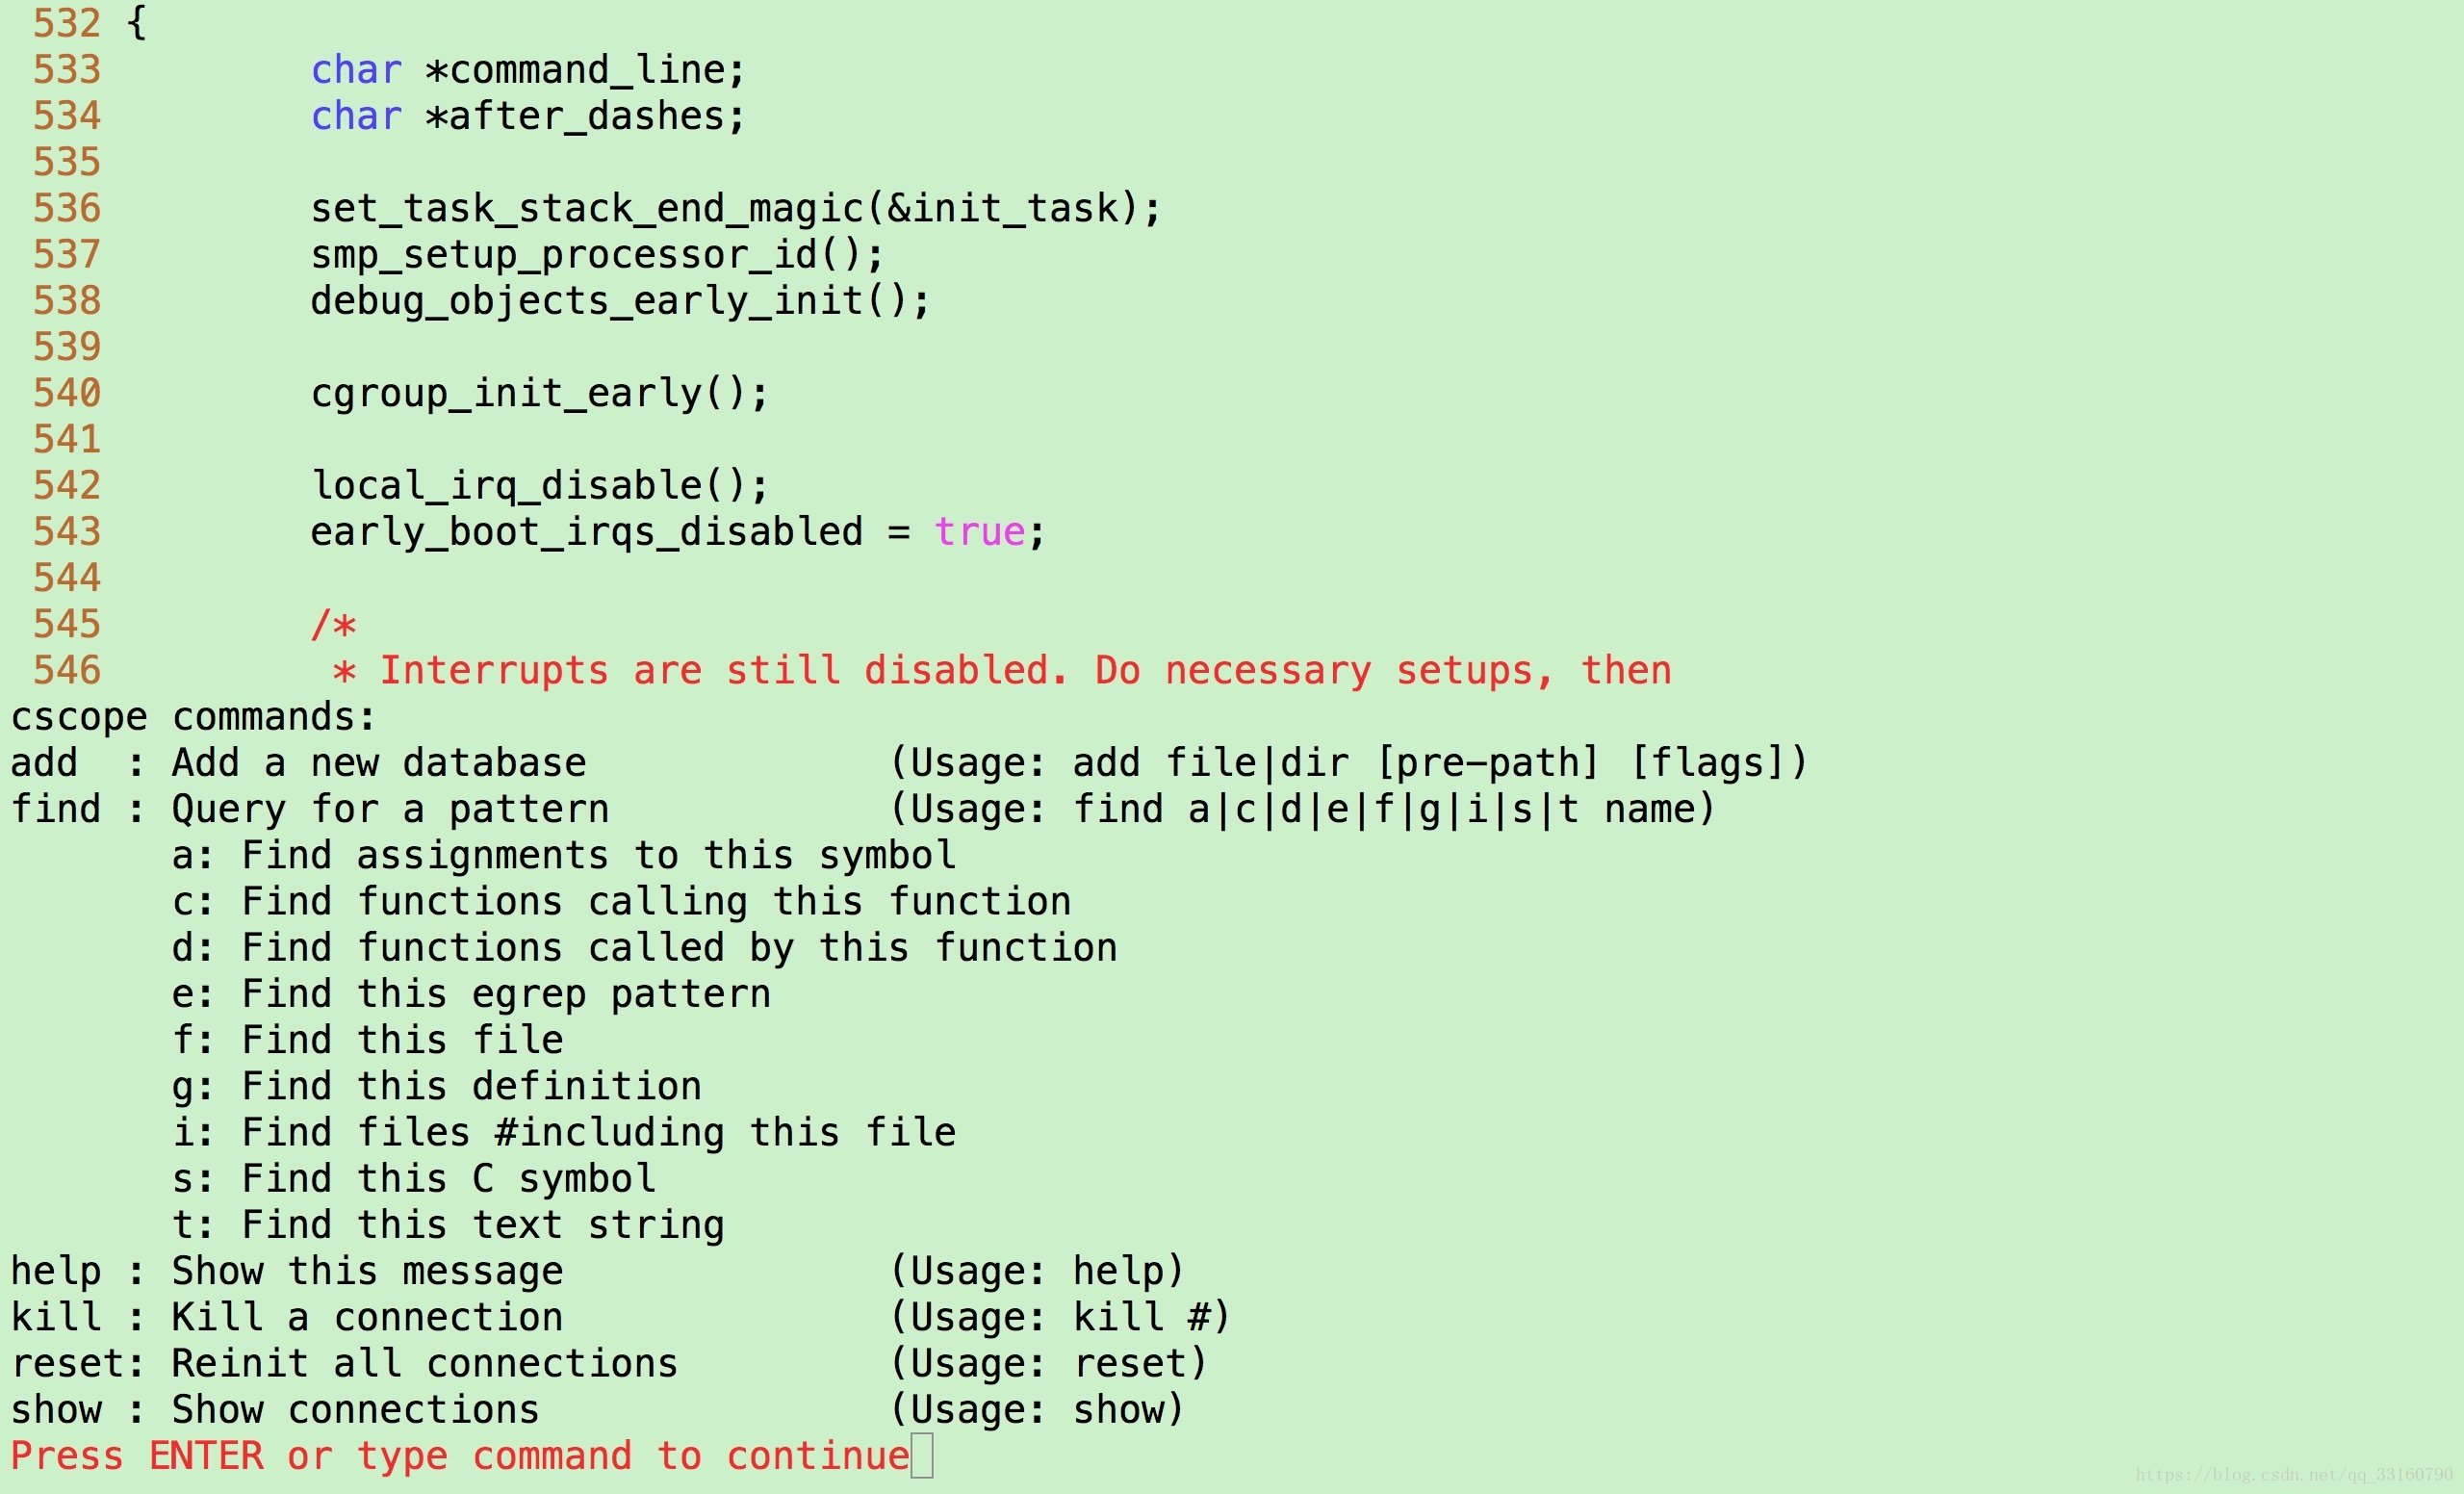
在命令行输入
:cs -h可以查看帮助文件:
ctags
ctags是一款方便函数跳转的插件,在功能上比不过cscope,但胜在使用方便。
生成tags文件后就可以使用快捷键ctrl+]和ctrl+t进行跳转和返回。
详细的使用可以参考:
https://blog.csdn.net/gangyanliang/article/details/6889860
vundle
Vim本身能够满足开发人员的很多需求,但是它的可扩展性也极强,并且已经有一些杀手级的扩展,可以让Vim拥有“现代”集成开发环境的特性。所以,你所需要的第一件东西就是一个好用的扩展管理器。
虽说有其他很多方式对vim进行扩展,Vim也有多个插件管理器,但是我们强烈推荐Vundle,它能够搜索、安装、更新和移除vim插件,再也不需要手动管理vim插件,你可以把它想象成Vim的pip。有了Vundle,安装和更新包这种事情不费吹灰之力。
下载vundle:
git clone https://github.com/gmarik/Vundle.vim.git ~/.vim/bundle/Vundle.vim修改配置文件使vundle生效(vim ~/.vimrc),把这段话粘贴到顶部:
set nocompatible              " required
filetype off                  " required

" set the runtime path to include Vundle and initialize
set rtp+=~/.vim/bundle/Vundle.vim
call vundle#begin()
" alternatively, pass a path where Vundle should install plugins
"call vundle#begin('~/some/path/here')
" let Vundle manage Vundle, required
Plugin 'gmarik/Vundle.vim'

" Add all your plugins here (note older versions of Vundle used Bundle instead of Plugin)
" All of your Plugins must be added before the following line
call vundle#end()            " required
filetype plugin indent on    " required
homebrew
homebrew是一个mac软件,通过Homebrew可以安装Apple没有预装但需要的东西。
官方网址:
https://brew.sh/index_zh-cn
使用方法:
/usr/bin/ruby -e "$(curl -fsSL https://raw.githubusercontent.com/Homebrew/install/master/install)"然后就可以通过它安装卸载软件了:
brew install xxx
brew uninstall xxx
mac安装
mac搭建vim环境基于homebrew和vundle,按上文说明安装好这两个软件。
1.通过homebrew安装软件
brew install ctags
brew install cscope
2.通过vundle安装插件及配置
安装vim插件的一般步骤可归结为:
1.在配置文件~/.vimrc中,将希望安装的插件写入call vundle#begin()和call vundle#end()行之间:Plugin '插件名'

2.然后打开Vim编辑器,运行下面的命令::PluginInstall,Vundle就会自动下载安装对应的插件

3.在.vimrc中对插件进一步做详细配置
~/.vimrc杂项配置:
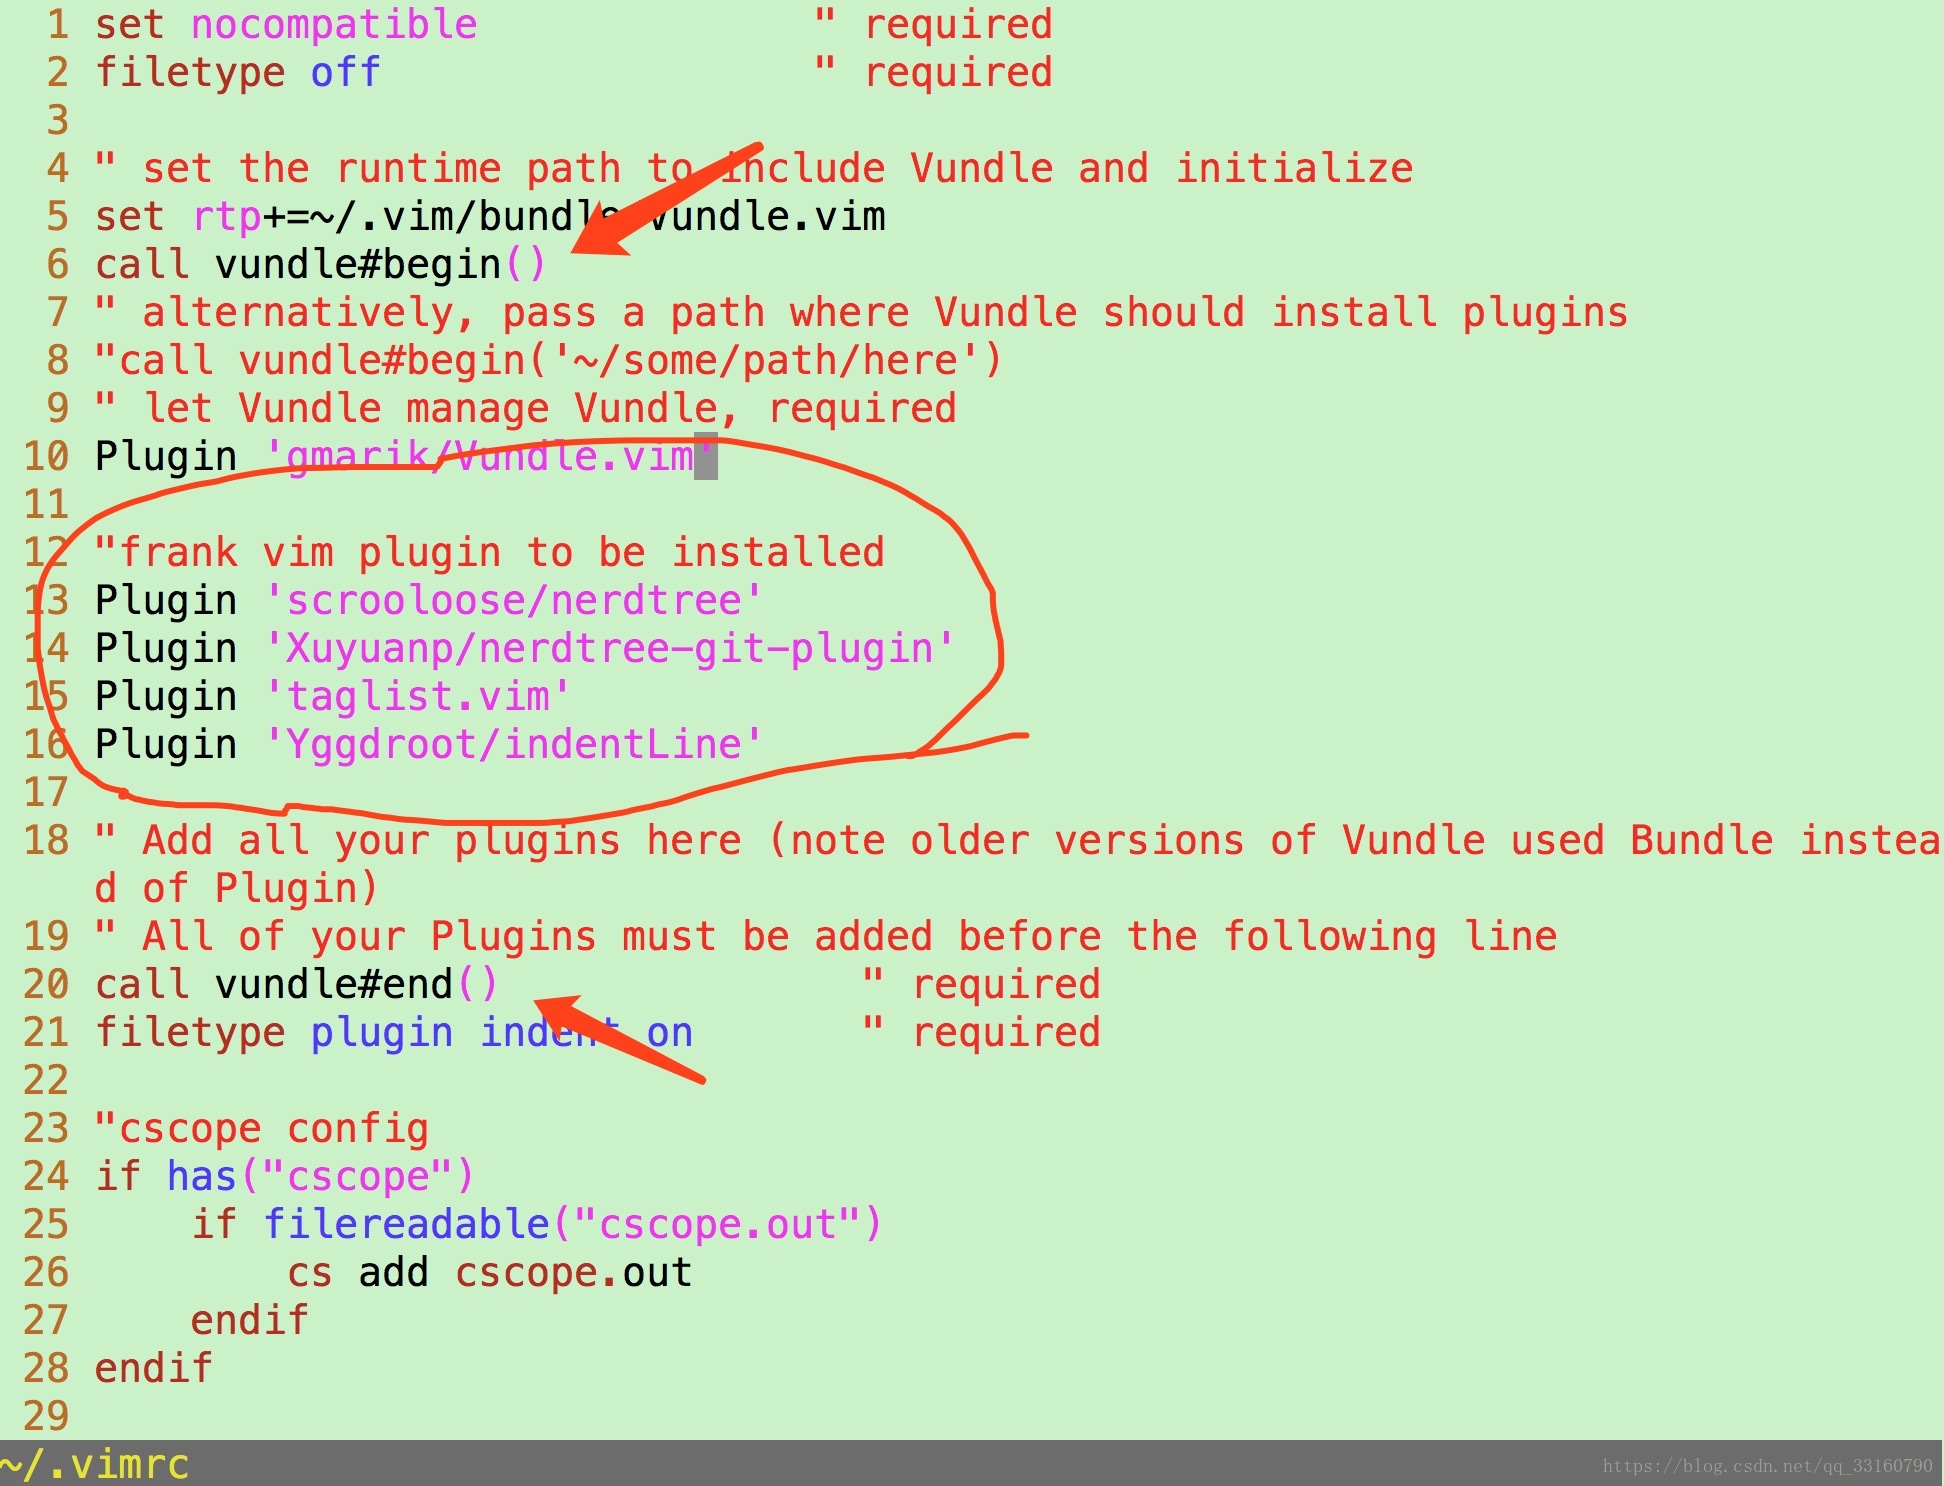
其他如NERDTree、Tlist等太长不截图了,直接贴上整个~/.vimrc文件:
set nocompatible " required
filetype off " required
" set the runtime path to include Vundle and initialize
set rtp+=~/.vim/bundle/Vundle.vim
call vundle#begin()
" alternatively, pass a path where Vundle should install plugins
"call vundle#begin('~/some/path/here')
" let Vundle manage Vundle, required
Plugin 'gmarik/Vundle.vim'
"frank vim plugin to be installed
Plugin 'scrooloose/nerdtree'
Plugin 'Xuyuanp/nerdtree-git-plugin'
Plugin 'taglist.vim'
Plugin 'Yggdroot/indentLine'
" Add all your plugins here (note older versions of Vundle used Bundle instead of Plugin)
" All of your Plugins must be added before the following line
call vundle#end() " required
filetype plugin indent on " required
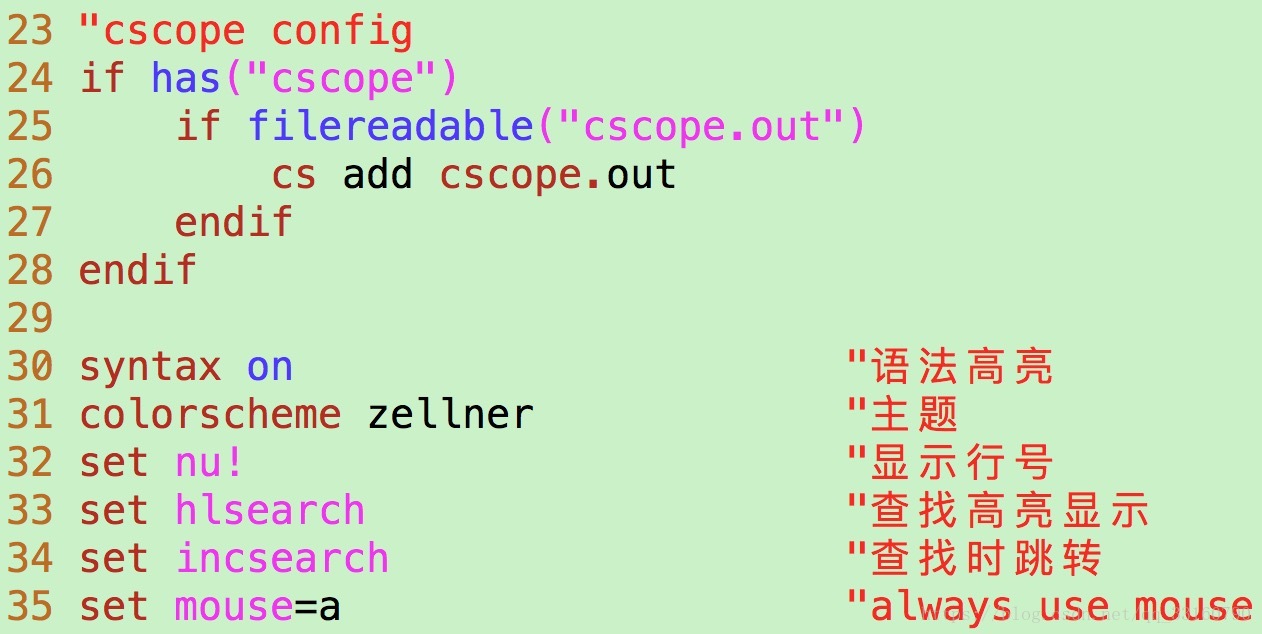
"cscope config
if has("cscope")
if filereadable("cscope.out")
cs add cscope.out
endif
endif
syntax on "语法高亮
colorscheme zellner "主题
set nu! "显示行号
set hlsearch "查找高亮显示
set incsearch "查找时跳转
set mouse=a "always use mouse
" frank mvim plugin config
" -------- pulgin NERDTree
"使用F12键快速调出和隐藏它
map <F12> :NERDTreeToggle<CR>
let NERDTreeChDirMode=1
"显示书签"
let NERDTreeShowBookmarks=1
"设置忽略文件类型"
let NERDTreeIgnore=['\~$', '\.pyc$', '\.swp$']
"窗口大小"
let NERDTreeWinSize=20 "25
" 修改默认箭头
let g:NERDTreeDirArrowExpandable = '▸'
let g:NERDTreeDirArrowCollapsible = '▾'
"How can I open a NERDTree automatically when vim starts up if no files were specified?
autocmd StdinReadPre * let s:std_in=1
autocmd VimEnter * if argc() == 0 && !exists("s:std_in") | NERDTree | endif
" 打开vim时自动打开NERDTree
"autocmd vimenter * NERDTree
"How can I open NERDTree automatically when vim starts up on opening a directory?
autocmd StdinReadPre * let s:std_in=1
autocmd VimEnter * if argc() == 1 && isdirectory(argv()[0]) && !exists("s:std_in") | exe 'NERDTree' argv()[0] | wincmd p | ene | endif
" 关闭vim时,如果打开的文件除了NERDTree没有其他文件时,它自动关闭,减少多次按:q!
autocmd bufenter * if (winnr("$") == 1 && exists("b:NERDTree") && b:NERDTree.isTabTree()) | q | endif
" 开发的过程中,我们希望git信息直接在NERDTree中显示出来, 和Eclipse一样,修改的文件和增加的文件都给出相应的标注, 这时需要安装的插件就是 nerdtree-git-plugin,配置信息如下
let g:NERDTreeIndicatorMapCustom = {
\ "Modified" : "✹",
\ "Staged" : "✚",
\ "Untracked" : "✭",
\ "Renamed" : "➜",
\ "Unmerged" : "═",
\ "Deleted" : "✖",
\ "Dirty" : "✗",
\ "Clean" : "✔︎",
\ "Unknown" : "?"
\ }
" 显示行号
let NERDTreeShowLineNumbers=1
let NERDTreeAutoCenter=1
" 在终端启动vim时,共享NERDTree
let g:nerdtree_tabs_open_on_console_startup=1
" 显示在右边
let NERDTreeWinPos=1
" -------- plugin Tlist
"let Tlist_Use_Right_Window = 1 "让taglist窗口出现在Vim的右边
let Tlist_File_Fold_Auto_Close = 1 "当同时显示多个文件中的tag时,设置为1,可使taglist只显示当前文件
"tag,其它文件的tag都被折叠起来。
let Tlist_Show_One_File = 1 "只显示一个文件中的tag,默认为显示多个
let Tlist_Sort_Type ='name' "Tag的排序规则,以名字排序。默认是以在文件中出现的顺序排序
let Tlist_GainFocus_On_ToggleOpen = 1 "Taglist窗口打开时,立刻切换为有焦点状态
let Tlist_Exit_OnlyWindow = 1 "如果taglist窗口是最后一个窗口,则退出vim
let Tlist_WinWidth = 23 "设置窗体宽度为32,可以根据自己喜好设置
let Tlist_Ctags_Cmd='/usr/local/bin/ctags' "这里比较重要了,设置ctags的位置,不是指向MacOS自带的那个,>而是我们用homebrew安装的那个
"自动打开Tlist
autocmd vimenter * TlistToggle
"使用F10键快速调出和隐藏它
map <F10> :TlistToggle<CR>
"map t :TlistToggle<CR> "热键设置,我设置成Leader+t来呼出和关闭Taglist
" -------- plugin indentline
"" 支持任意ASCII码,也可以使用特殊字符:¦, ┆, or │ ,但只在utf-8编码下有效
let g:indentLine_char='¦'
" 使indentline生效
let g:indentLine_enabled = 1
最终效果:

F9和F11可以开启和关闭侧栏。
ubuntu安装
ubuntu可以直接使用现成的工具:
https://download.csdn.net/download/qq_33160790/10556797
这三个文件移动到~/目录下:
将vim.7z中vim文件夹也移动到~/目录下,并重命名为.vim。

最终效果:
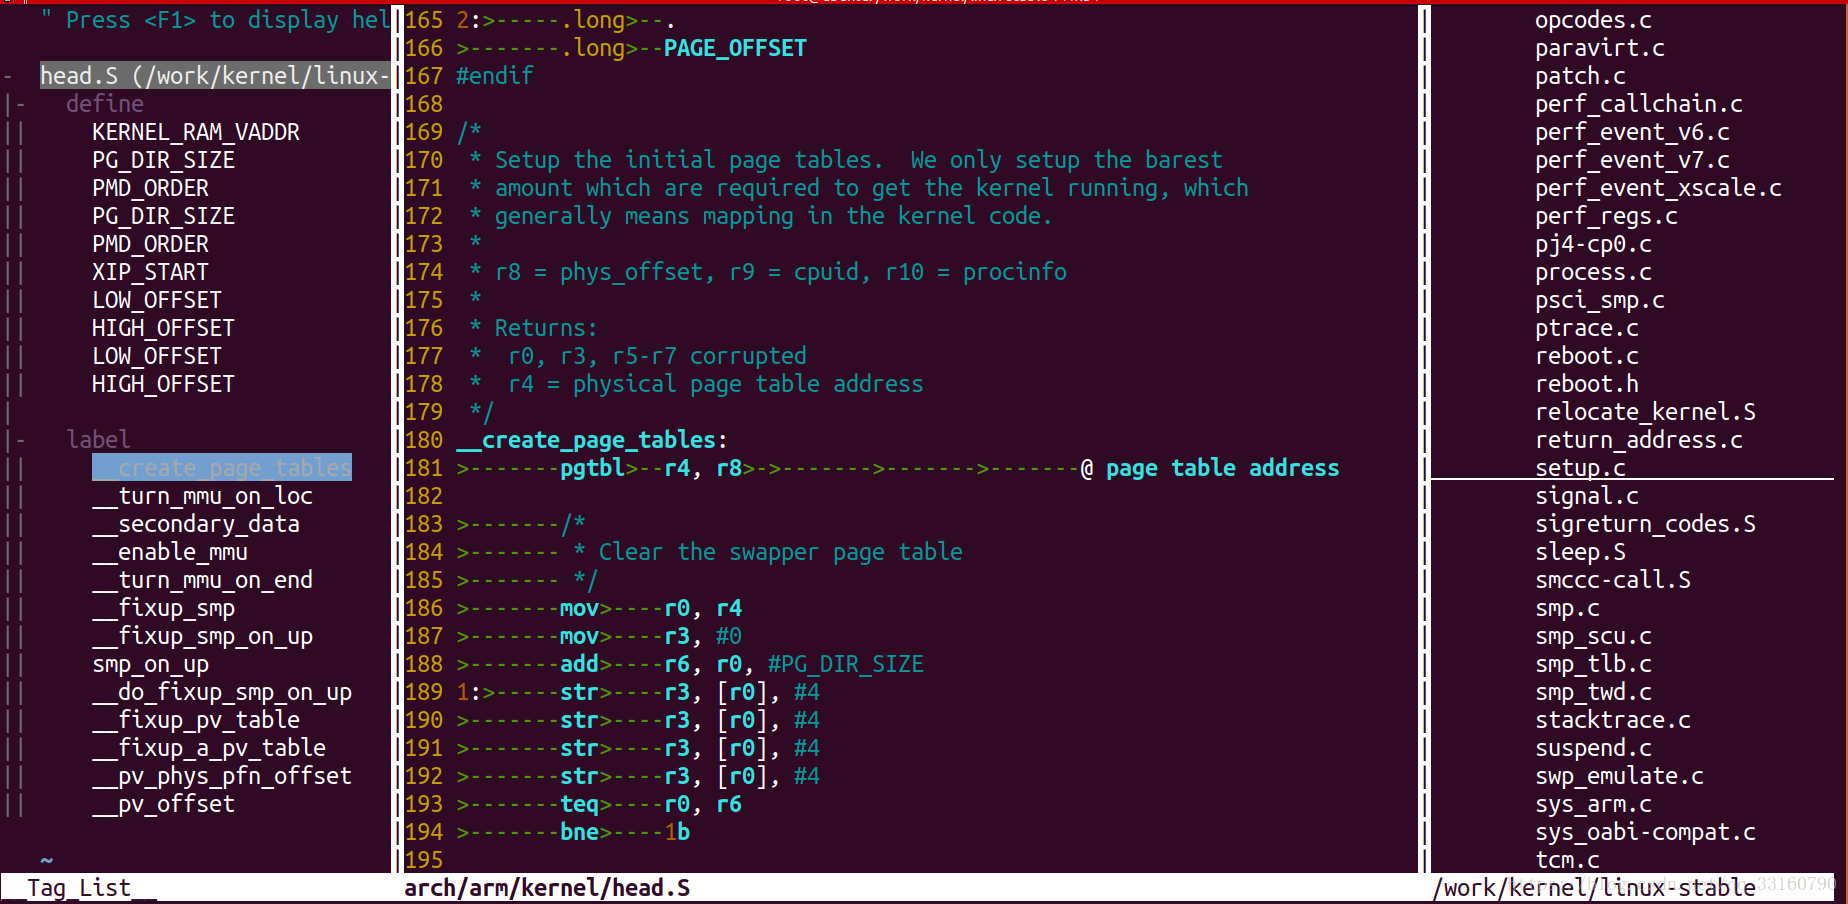
(按F1和F2可以控制侧栏)
参考文章:
https://blog.csdn.net/weixin_40539892/article/details/79252927