!
!!首先注意一点,私有项目或者公司的业务项目千万要慎重,就不要上传到这些开放源代码的库中了,可以上传到公司自己搭建的nexus服务器。
- 我们需要在 bintray.com 上注册账号,注意要选“For an Open Source Account Sign Up Here”,否则无法上传。
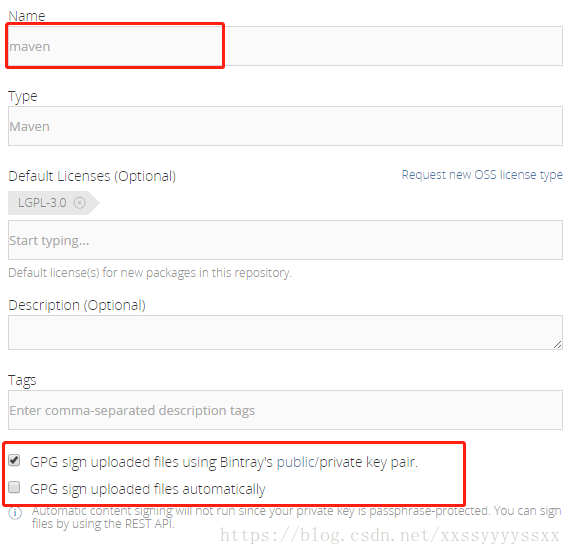
- 登录之后Edit Profile,Add New Repository, 创建一个repository。此repository的名字很重要,在后来的gradle脚本中需要指明。创建之后Edit,选中bintray来自动签名。我们可以选bintray的公私玥或者上传我们的公私玥(此时才会出现以下的两个选项)来加密。此签名机制是gpg。我不知道为什么用sign插件加密总是缺少pom文件的签名。
- 在刚才的repository中创建一个package,这就代表一个上传的项目。填写必要的信息。
- 从Edit Profile中获取apikey,脚本中使用。
- gradle脚本。
group 'cn.zytx.common' version '1.0' buildscript { repositories { jcenter() } dependencies { //classpath "com.novoda:bintray-release:0.3.4" classpath 'com.jfrog.bintray.gradle:gradle-bintray-plugin:1.6' } } //用于上传到jcenter apply plugin: 'com.jfrog.bintray' //用于签名 //apply plugin: 'signing' tasks.withType(JavaCompile) { options.encoding = 'UTF-8' } def gitUrl = 'https://gitee.com/xxssyyyyssxx/utils.git' def siteUrl = 'https://gitee.com/xxssyyyyssxx/utils' install { repositories.mavenInstaller { // This generates POM.xml with proper parameters pom { project { packaging 'jar' name 'utils' description 'the project provides common utils that you can use in server endpoint development.' url siteUrl licenses { license { name 'The Apache Software License, Version 2.0' url 'http://www.apache.org/licenses/LICENSE-2.0.txt' } } developers { developer { id 'xxssyyyyssxx' name 'xiongshiyan' email '[email protected]' } } scm { connection gitUrl developerConnection gitUrl url siteUrl } } } } } task sourcesJar(type: Jar, dependsOn: classes) { classifier = 'sources' from sourceSets.main.allSource } task javadocJar(type: Jar, dependsOn: javadoc) { classifier = 'javadoc' from javadoc.destinationDir } artifacts { archives sourcesJar archives javadocJar } /*signing { sign configurations.archives }*/ tasks.withType(Javadoc) { /*options.encoding = 'UTF-8'*/ options{ encoding "UTF-8" charSet 'UTF-8' links "http://docs.oracle.com/javase/7/docs/api" } options.addStringOption('Xdoclint:none', '-quiet') } bintray { Properties properties = new Properties() boolean isHasFile = false if (project.rootProject.file('local.properties') != null){ isHasFile = true properties.load(project.rootProject.file('local.properties').newDataInputStream()) } user = isHasFile ? properties.getProperty("bintray.user") : System.getenv("bintray.user") key = isHasFile ? properties.getProperty("bintray.apikey") : System.getenv("bintray.apikey") configurations = ['archives'] pkg { repo = "maven" name = "utils" //项目名称 websiteUrl = siteUrl vcsUrl = gitUrl licenses = ["Apache-2.0"] publish = true } } - 使用gradle clean build bintrayUpload即可上传。注意检查必须满足条件。jar、sources、doc、pom及各自的签名文件。
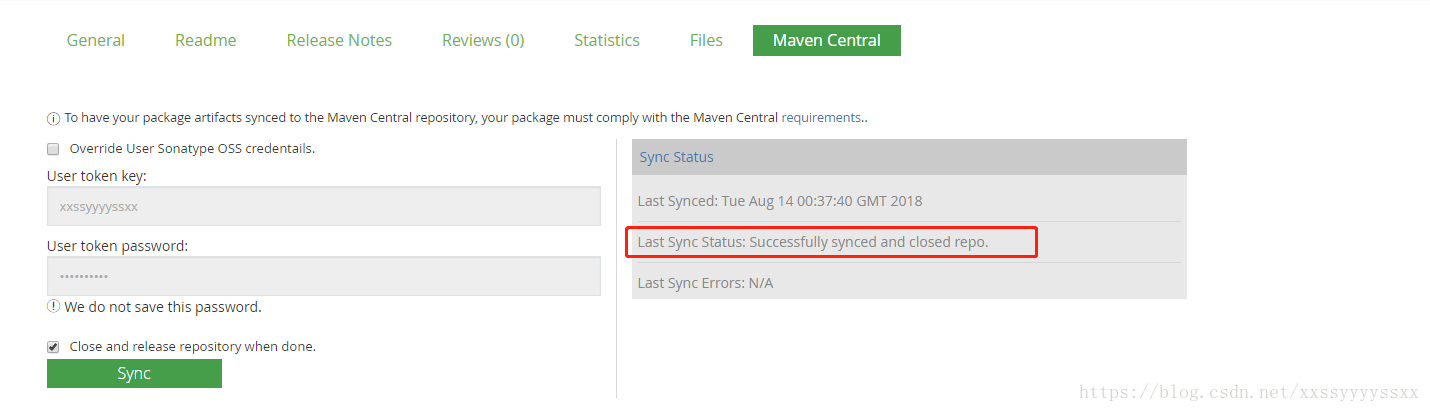
- 上传之后,进package主页,点击add to jcenter。等待审核。jcenter审核通过后才可以同步到maven central。
- 同步到maven central需要在sonatype上注册账号,同步的时候填写用户名和密码或者用户名和token。
-
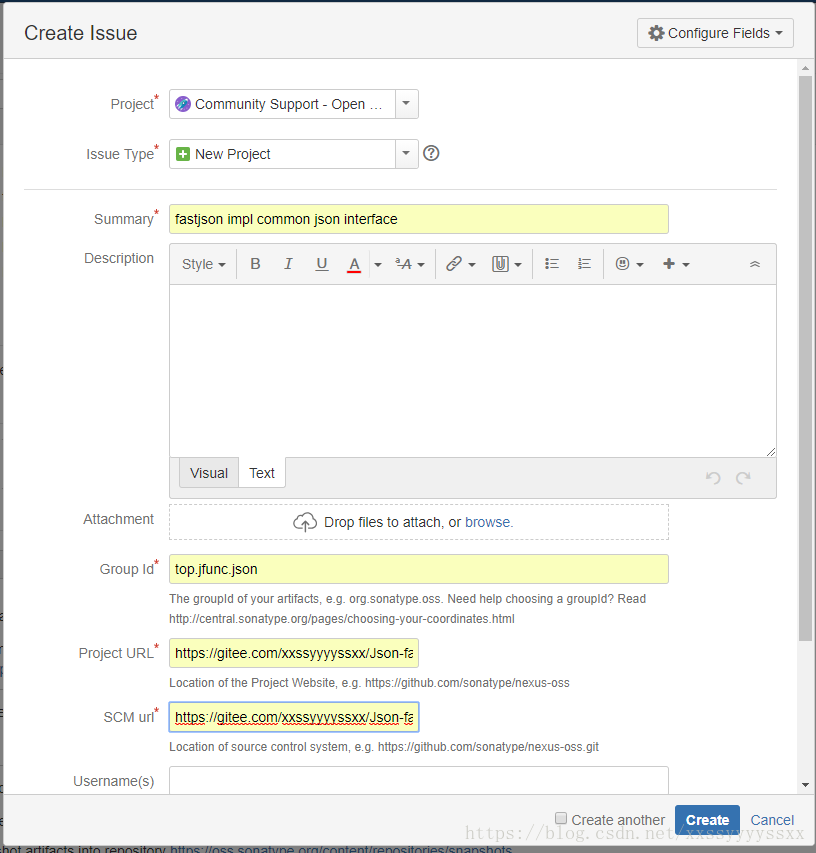
在 https://issues.sonatype.org/login.jsp 上注册账号,并create一个Issue。
-
然后就是等待回复,一般第一个都会问你你拥有groupidde 域名吗?
- 只有你拥有该域名才可以,然后等待状态改变为RESOLVED。
- 此时就可以发布构件儿至maven仓库了。
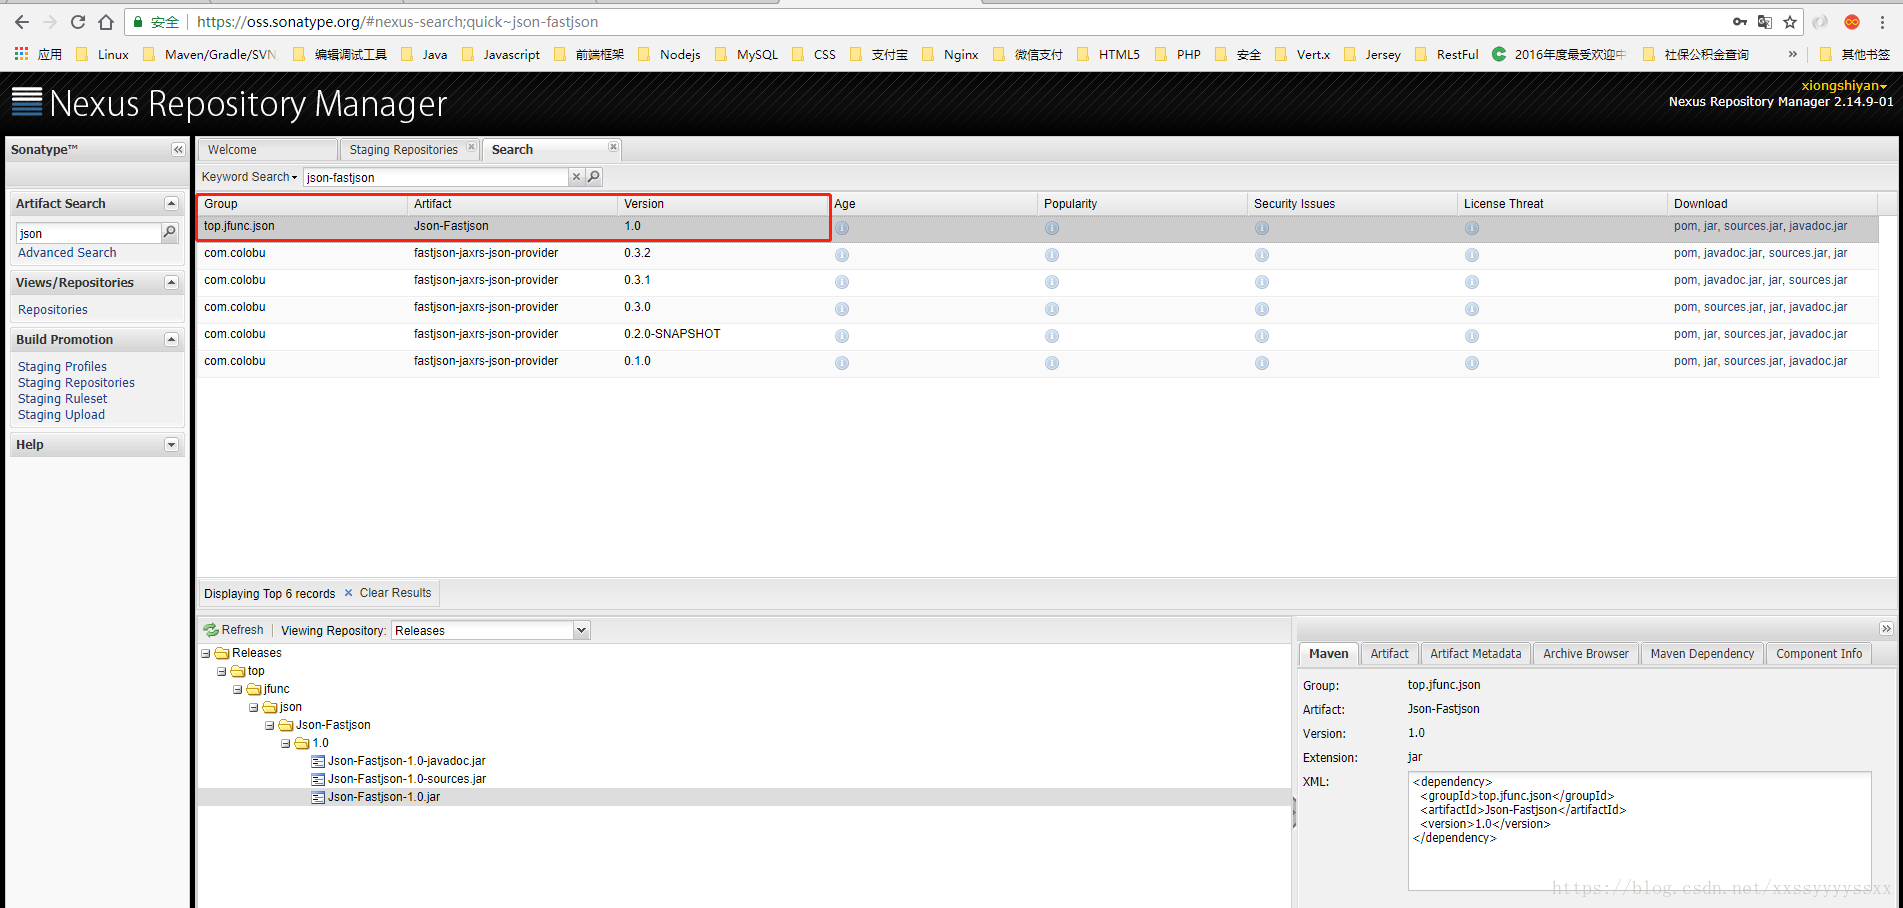
- 上传之后大约10分钟就可以在https://oss.sonatype.org/#stagingRepositories上看到刚刚发布的,确认状态为released。
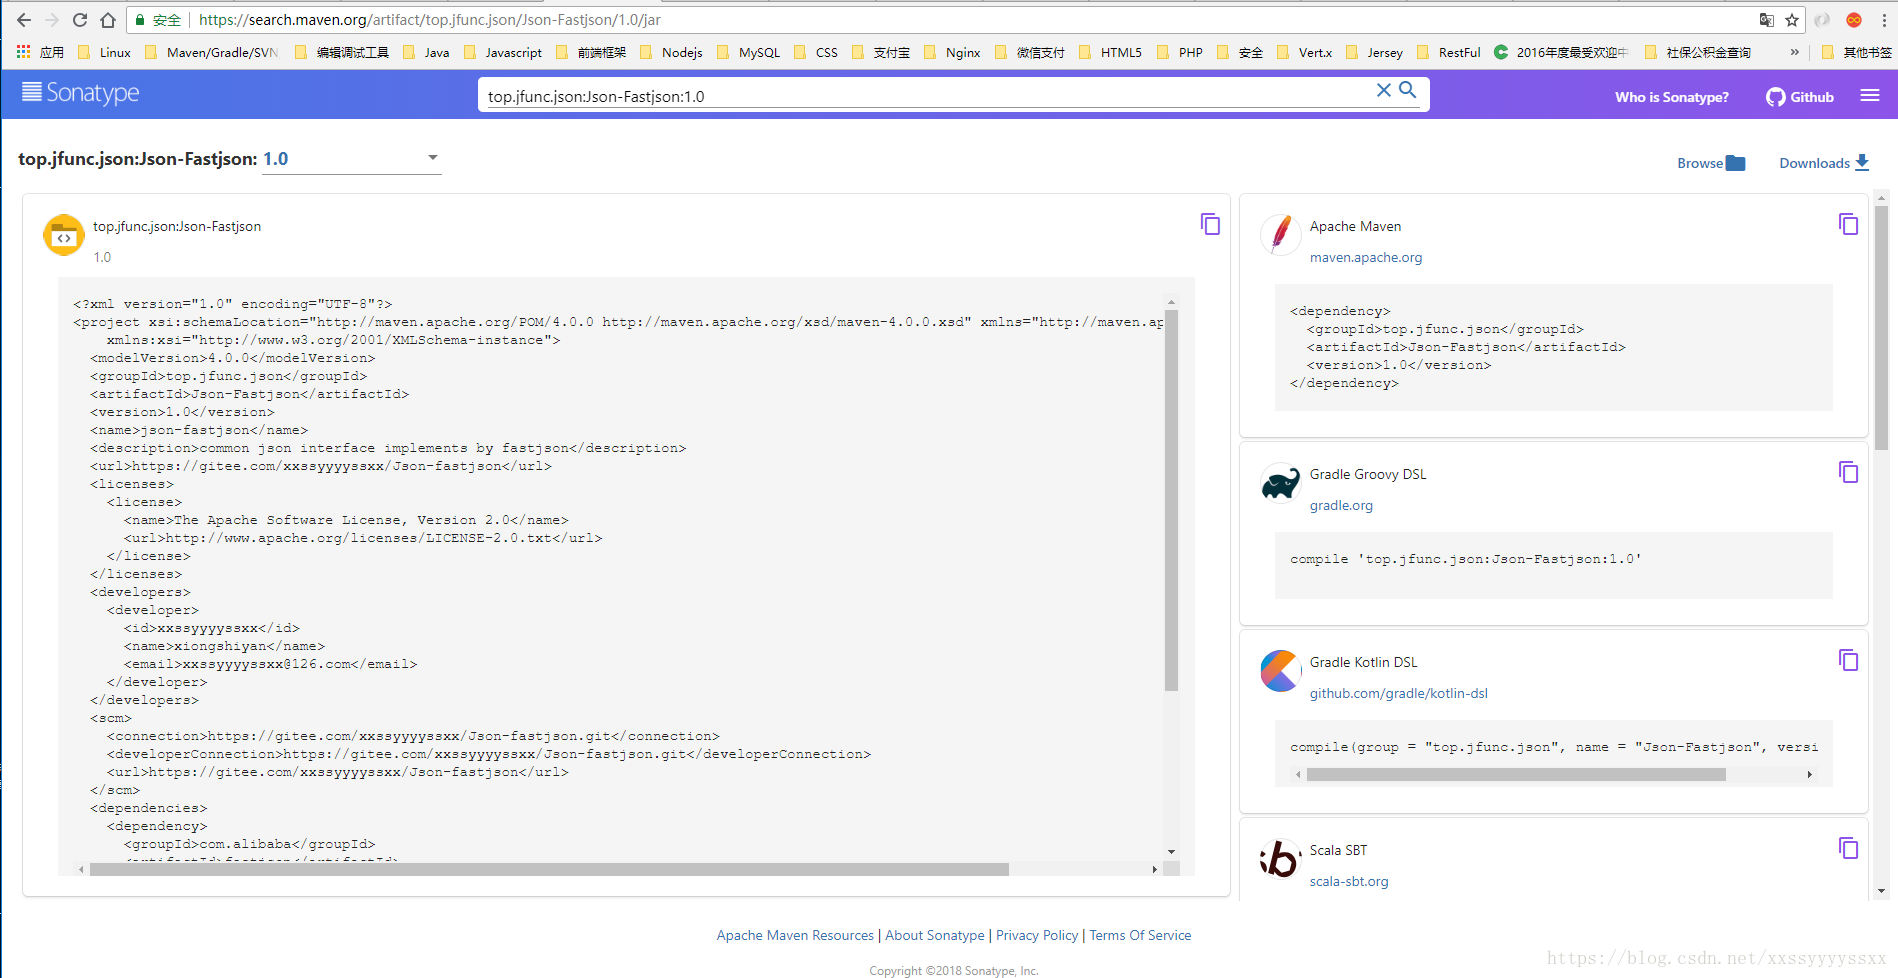
- 再等待过2小时就会同步到maven仓库。https://search.maven.org 上就可以搜索到。
- 如此,你的构件就可以被大众享用了,是不是感觉高大上?
- 参考文章:


https://issues.sonatype.org/login.jsp
https://oss.sonatype.org/#stagingRepositories
https://issues.sonatype.org/secure/Signup!default.jspa
https://github.com/msdx/gradle-publish/blob/master/bintray.gradle
https://github.com/azhon/RatingBar/blob/master/ratingbar/build.gradle
http://springcloud.cn/view/246
https://github.com/SpringCloud/spring-cloud-gray/blob/master/pom.xml
http://www.arccode.net/publish-artifact-to-maven-central-repository.html
https://www.jianshu.com/p/5f6135e1925f
https://my.oschina.net/looly/blog/270767
http://www.baikeyang.com/code/985.html
http://soft.chinabyte.com/database/130/12977130.shtml
https://www.cnblogs.com/gaoxing/p/4359795.html