类上的配置
@RestController
public class SpringdemoApplication {
    ...
}
``
其中@RestController表示返回string或者json内容(即直接返回内容),而如果是@Controller则表示可以返回一个跳转的页面(jsp或者html)

想在一个类中既能返回string或者json又能进行页面跳转怎么办?

其实@RestController = @Controller + @ResponseBody。

所以,以后定义controller的时候,可以直接使用@Controller,如果需要返回json可以直接在方法中添加@ResponseBody即可。
@SpringBootApplication
@Controller
public class SpringdemoApplication {
@RequestMapping("/")
@ResponseBody
public String greeting() {
    return "Hello World!";
}

// 可变子路径,访问时http://127.0.0.1:8080/users/hello对应参数username的值就是hello
// URL中的变量可以用{variableName}来表示,同时在方法的参数中加上
// @PathVariable("variableName"),那么当请求被转发给该方法处理时,
// 对应的URL中的变量会被自动赋值给被@PathVariable注解的参数
@RequestMapping("/users/{username}")
@ResponseBody
public String userProfile(@PathVariable("username") String username) {
    return String.format("user %s", username);
}

// 设置请求方式
 @RequestMapping(value = "/login", method = RequestMethod.GET)
@ResponseBody
public String loginGet() {
    return "Login Get Page";
}

@RequestMapping(value = "/login", method = RequestMethod.POST)
@ResponseBody
public String loginPost() {
    return "Login Post Request";
}

// 返回Html页面
@RequestMapping("/hello/{name}")
public String hello(@PathVariable("name") String name, Model model) {
    model.addAttribute("name", name); // 设置参数
    return "hello";
    // 返回hello表示寻找名字为hello的模板进行渲染
    // Thymeleaf模板引擎进行模板渲染需要引入spring-boot-starter-thymeleaf
    // 默认的模板文件夹src/main/resources/templates/目录下添加一个模板文件hello.html
}

public static void main(String[] args) {
    SpringApplication.run(SpringdemoApplication.class, args);
}
}
####项目中多个Controller
项目中如果针对不同的业务划分不同的Controller,则可以直接在不同的类上使用@Controller或者@RestController即可
工程结构如下:
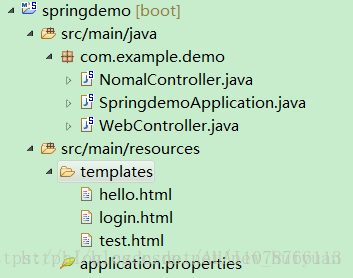
注意Html页面要放在src\main\resources\templates\文件夹下
如:添加一个RestController返回string/json
@RestController
public class NomalController {
…
@RequestMapping(“/test”)
public String testParam(String name, String psw) {
return name + ” | ” + psw;
}
}
添加一个可以返回Thymeleaf模板引擎渲染的Html页面
@Controller
public class WebController {
…
@RequestMapping(“/testHtml”)
public String test(ModelMap model,String name,String psw){
model.addAttribute(“name”, name);
return “test”;
}
}
注意:Thymeleaf模板渲染需要在pom.xml中添加依赖
```
<!-- Thymeleaf模板引擎,渲染Html页面 -->
<dependency>
    <groupId>org.springframework.boot</groupId>
    <artifactId>spring-boot-starter-thymeleaf</artifactId>
</dependency>注意:Thymeleaf模板渲染需要在pom.xml中添加依赖<!-- Thymeleaf模板引擎,渲染Html页面 -->
<dependency>
<groupId>org.springframework.boot</groupId>
<artifactId>spring-boot-starter-thymeleaf</artifactId>
</dependency>此时Application中可以不用做Controller的处理,作为一个普通的入口即可
@SpringBootApplication
public class SpringdemoApplication {
public static void main(String[] args) {
SpringApplication.run(SpringdemoApplication.class, args);
}
}请求中的参数处理
返回内容是string或者json
@RequestMapping("/test")
@ResponseBody
public String testParam(String name,String psw){
    return name+" | "+psw;
}
这里的参数名和客户端请求的参数名一致,客户端请求如:
http://127.0.0.1:8080/test?name=abc&psw=123如果请求结果是跳转到某个jsp/html页面,则可以借助Model/ModelMap传递参数,其中:
- Model是包含四个addAttribute 和一个 merAttribute方法的接口。
- ModelMap是实现了Map接口,包含Map方法。视图层通过request找到ModelMap中的数据
- ModelAndView:是包含ModelMap和视图对象的容器。既包含模型也包含视图,而ModelMap只是包含模型的信息。
ModelMap/Model对象主要用于传递控制方法传递数据到结果页面。类似于request的setAttribute方法的作用。
所以我们要想在jsp页面获取数据,只要将数据放到ModelMap对象中即可。如都将参数name以及psw的值传递到login.hml页面,表示如下(2种方式)
@RequestMapping("/testLogin")
    public ModelAndView testModel(String name, String psw) {
        ModelAndView model = new ModelAndView("login");
        model.getModelMap().addAttribute("name", name);
        model.getModelMap().addAttribute("psw", psw);
        return model;
    }

    @RequestMapping("/testLogin1")
    public String testModel(ModelMap model,String name,String psw){
        model.addAttribute("name", name);
        model.addAttribute("psw", psw);
        return "login";
    }
建议所有的参数都用包装类型,别用原始类型,原始类型如果不传的话为null,如:参数是int类型那么不传参数会收到null,然而null无法转为int会出现异常
在Html页面上可以直接通过${model参数名}获取参数
<!DOCTYPE html>
<html xmlns:th="http://www.thymeleaf.org">
<head>
<meta charset="UTF-8" />
<title>LoginTest</title>
</head>
<body>
    <h1>LoginTest</h1>
    <p th:text="'name=' + ${name} + ' and psw='+${psw}" />
</body>
</html>
当前的工程结构:
