修改homestead(5.2.0)的php版本:
1⃣️ 首先我们得先知道我们homgstead的PHP放在哪里(可以使用phpinfo(),如何使用不再赘述,作为一个phper,请自行查找,或者是在vagrant ssh后输入ps -ef |grep php-fpm可以查看)
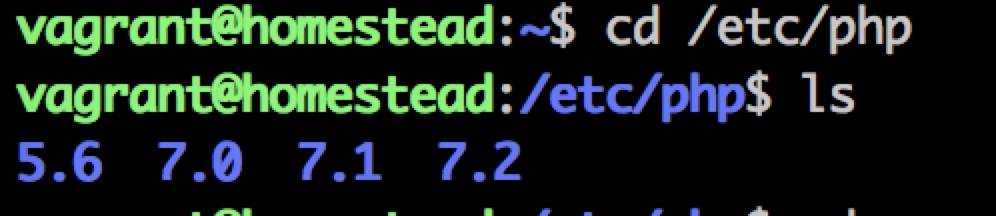
2⃣在终端中我们输入
(1)vagrant up 成功后通过vagrant ssh进入命令行:
(2)cd xxxx(xxxx是PHP所在目录,博主对的是在/etc/php)
(3)ls (可以看到PHP下的版本号,博主版本有:5.6 7.0 7.1 7.2)
(4)cd /etc/nginx/sites-available/ 查看虚拟主机信息

(5)sudo vi homestead.test 去编辑虚拟主机配置文件
配置文件内容如下:
server {
listen 80;
listen 443 ssl http2;
server_name .homestead.test;
root "/home/vagrant/code/public";
index index.html index.htm index.php;;
charset utf-8;
location / {
try_files $uri $uri/ /index.php?$query_string;
}
location = /favicon.ico { access_log off; log_not_found off; }
location = /robots.txt { access_log off; log_not_found off; }
access_log off;
error_log /var/log/nginx/homestead.test-error.log error;
sendfile off;
client_max_body_size 100m;
location ~ \.php$ {
fastcgi_split_path_info ^(.+\.php)(/.+)$;
fastcgi_pass unix:/var/run/php/php7.1-fpm.sock;
fastcgi_index index.php;
include fastcgi_params;
fastcgi_param SCRIPT_FILENAME $document_root$fastcgi_script_name;
fastcgi_intercept_errors off;
fastcgi_buffer_size 16k;
fastcgi_buffers 4 16k;
fastcgi_connect_timeout 300;
fastcgi_send_timeout 300;
fastcgi_read_timeout 300;
}
location ~ /\.ht {
deny all;
}
ssl_certificate /etc/nginx/ssl/homestead.test.crt;
ssl_certificate_key /etc/nginx/ssl/homestead.test.key;
}
我们修改的地方是配置文件里fastcgi_pass unix后面的PHP版本(红色部分,博主是改成php7.1噢),记得修改完成后记得保存(重启homestead)