最近接触python看了 python CGI 编程,原来python也可以和php一页在网页上访问的,教程有简单的教程,但是我的apache配置设置php多站点的,按他们的教程怎么配置都不行,经过自己的研究,附上如下的方法:
一、先配置apache
1、apache安装目录:D:\Program Files\Apache24,打开D:\Program Files\Apache24\conf下的httpd.conf文件,找到把前面的#去掉
LoadModule cgi_module modules/mod_cgi.so2、 设置cig文件目录
ScriptAlias /cgi-bin/ "D:/wwwroot/python"3、搜索:AddHandler 会找打下面这句话,如果是注释掉的话,同样我们去掉注释,后面的.pl .py .sh是自己追加的
AddHandler cgi-script .cgi .py .pl .sh4、我的apache开启多站点的
Include conf/extra/httpd-vhosts.conf5、配置apache的 D:\Program Files\Apache24\conf\extra\httpd-vhosts.conf文件,将下面内容加到文件最底部
Listen 81
<VirtualHost *:81>
    DocumentRoot "D:\wwwroot\python"
    ServerName www.python.com
    ScriptAlias /cgi-bin/ "D:/wwwroot/python"
    ErrorLog "|bin/rotatelogs.exe logs/python_error_%Y_%m_%d.log 86400 480"
 	 	CustomLog "|bin/rotatelogs.exe logs/python_access_%Y_%m_%d.log 86400 480" common
    <Directory "D:\wwwroot\python">
        Options +ExecCGI -MultiViews +SymLinksIfOwnerMatch
        AllowOverride None
        Order deny,allow
        Allow from all
    </Directory>
</VirtualHost>
二、添加hosts 路径:C:\Windows\System32\drivers\etc\hosts
以管理员身份打开hosts文件,追加一行
127.0.0.1 www.python.com三、配置nginx的安装目录D:\nginx-1.12.0
1、打开配置文件D:\nginx-1.12.0\conf\nginx.conf加入以下内容,感兴趣https配置的下期更新

############ 设定虚拟主机配置 www.python.com ##############
server {
         #侦听80端口
         listen		80;
         #定义使用 www.nginx.cn访问
         server_name www.python.com;

         #定义服务器的默认网站根目录位置
         #root html;

         #http自动跳转到https
         #rewrite ^(.*) https://$server_name$1 permanent;

         #设定本虚拟主机的访问日志
         #access_log  D:/nginx-1.12.0/logs/access.log  main;
         #error_page  404              /404.html;

         location / {
                #设置主机头和客户端真实地址,以便服务器获取客户端真实IP
                proxy_set_header Host $host;
                proxy_set_header X-Real-IP $remote_addr;
                proxy_set_header X-Forwarded-For $proxy_add_x_forwarded_for;

                #禁用缓存
                proxy_buffering off;

                #设置反向代理的地址
                proxy_pass  http://localhost:81;
        }
}

server {
		listen      443 ssl;
		server_name www.python.com;

	        ssl_certificate      D:/nginx-1.12.0/ssl/lifes.crt;
		ssl_certificate_key  D:/nginx-1.12.0/ssl/lifes.key;

	location / {
		#设置反向代理的地址
		proxy_pass  http://localhost:81;

		#设置主机头和客户端真实地址,以便服务器获取客户端真实IP
		proxy_set_header Host $host;
		proxy_set_header        X-Real-IP $remote_addr;
		proxy_set_header        X-Forwarded-For $proxy_add_x_forwarded_for;
	}
}
############ 设定虚拟主机配置 www.python.com END ##############我们使用Python创建第一个CGI程序,文件名为hello.py,文件位于D:\wwwroot\python目录中,内容如下:
#!/usr/bin/python
# -*- coding: UTF-8 -*-

print "Content-type:text/html"
print                               # 空行,告诉服务器结束头部
print '<html>'
print '<head>'
print '<meta charset="utf-8">'
print '<title>Hello World - 我的第一个 CGI 程序!</title>'
print '</head>'
print '<body>'
print '<h2>Hello World! 我是来自菜鸟教程的第一CGI程序</h2>'
print '</body>'
print '</html>'
注意:#!/user/bin/python 这个是linux系统的python目录,我们在windows下的目录要改成:C:\Python27\python.exe最终代码为:
#!C:\Python27\python.exe
# -*- coding: UTF-8 -*-
print "Content-type:text/html"
print # 空行,告诉服务器结束头部
print '<html>'
print '<head>'
print '<meta charset="utf-8">'
print '<title>Hello World - 我的第一个 CGI 程序!</title>'
print '</head>'
print '<body>'
print '<h2>Hello World! 我是来自菜鸟教程的第一CGI程序</h2>'
print '</body>'
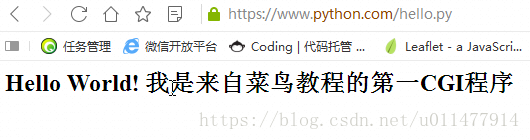
print '</html>'最后在浏览器输入http://www.python.com/hello.py显示如下: