关闭防火墙和selinux
IP:192.168.199.115
一. 准备 Python3 和 Python 虚拟环境
yum -y install wget sqlite-devel xz gcc automake zlib-devel openssl-devel epel-release git
wget https://www.python.org/ftp/python/3.6.1/Python-3.6.1.tar.xz
tar xvf Python-3.6.1.tar.xz  && cd Python-3.6.1
./configure && make && make install
cd /opt
python3 -m venv py3
source /opt/py3/bin/activate

# 看到下面的提示符代表成功,以后运行 Jumpserver 都要先运行以上 source 命令,以下所有命令均在该虚拟环境中运行
(py3) [root@localhost py3]
二. 安装 Jumpserver 1.0.0
2.1 下载或 Clone 项目
项目提交较多 git clone 时较大,你可以选择去 Github 项目页面直接下载zip包,我是下载安装包之后安装
cd /opt/
#git clone --depth=1 https://github.com/jumpserver/jumpserver.git && cd jumpserver && git checkout master   (从官网下载直接安装)
下载安装包之后把下载的jumpserver-master.zip上传到 /opt目录
unzip jumpserver-master.zip
mv jumpserver-master  jumpserver
2.2 安装依赖 RPM 包
cd /opt/jumpserver/requirements
yum -y install $(cat rpm_requirements.txt)  # 如果没有任何报错请继续
2.3 安装 Python 库依赖
pip install -r requirements.txt # 不要指定-i参数,因为镜像上可能没有最新的包,如果没有任何报错请继续
2.4 安装 Redis, Jumpserver 使用 Redis 做 cache 和 celery broke
yum -y install redis
systemctl start redis
systemctl enable redis
2.5 安装 MySQL
yum -y install mariadb mariadb-devel mariadb-server # centos7下安装的是mariadb
systemctl start mariadb
systemctl enable mariadb
2.6 创建数据库 Jumpserver 并授权
$ mysql
> create database jumpserver default charset 'utf8';
> grant all on jumpserver.* to 'jumpserver'@'127.0.0.1' identified by 'jason_zhang';
2.7 修改 Jumpserver 配置文件
$ cd /opt/jumpserver
$ cp config_example.py config.py
$ vi config.py  # 修改其中 DevelopmentConfig的配置,因为默认jumpserver是使用该配置,它继承自Config
(py3) [root@jason jumpserver]# cat config.py |grep -Ev '^$|^#'
"""
    jumpserver.config
    ~~~~~~~~~~~~~~~~~
    Jumpserver project setting file
    :copyright: (c) 2014-2017 by Jumpserver Team
    :license: GPL v2, see LICENSE for more details.
"""
import os
BASE_DIR = os.path.dirname(os.path.abspath(__file__))
class Config:
    # Use it to encrypt or decrypt data
    # SECURITY WARNING: keep the secret key used in production secret!
    SECRET_KEY = os.environ.get('SECRET_KEY') or '2vym+ky!997d5kkcc64mnz06y1mmui3lut#(^wd=%s_qj$1%x'
    # Django security setting, if your disable debug model, you should setting that
    ALLOWED_HOSTS = ['*']
    # Development env open this, when error occur display the full process track, Production disable it
    DEBUG = os.environ.get("DEBUG") or True
    # DEBUG, INFO, WARNING, ERROR, CRITICAL can set. See https://docs.djangoproject.com/en/1.10/topics/logging/
    LOG_LEVEL = os.environ.get("LOG_LEVEL") or 'DEBUG'
    LOG_DIR = os.path.join(BASE_DIR, 'logs')
    # Database setting, Support sqlite3, mysql, postgres ....
    # See https://docs.djangoproject.com/en/1.10/ref/settings/#databases
    # SQLite setting:
    DB_ENGINE = 'sqlite3'
    DB_NAME = os.path.join(BASE_DIR, 'data', 'db.sqlite3')
    # MySQL or postgres setting like:
    # DB_ENGINE = os.environ.get("DB_ENGINE") or 'mysql'
    # DB_HOST = os.environ.get("DB_HOST") or '127.0.0.1'
    # DB_PORT = os.environ.get("DB_PORT") or 3306
    # DB_USER = os.environ.get("DB_USER") or 'jumpserver'
    # DB_PASSWORD = os.environ.get("DB_PASSWORD") or 'weakPassword'
    # DB_NAME = os.environ.get("DB_NAME") or 'jumpserver'
    # When Django start it will bind this host and port
    # ./manage.py runserver 127.0.0.1:8080
    HTTP_BIND_HOST = '0.0.0.0'
    HTTP_LISTEN_PORT = 8080
    # Use Redis as broker for celery and web socket
    REDIS_HOST = os.environ.get("REDIS_HOST") or '127.0.0.1'
    REDIS_PORT = os.environ.get("REDIS_PORT") or 6379
    REDIS_PASSWORD = os.environ.get("REDIS_PASSWORD") or ''
    REDIS_DB_CELERY = os.environ.get('REDIS_DB') or 3
    REDIS_DB_CACHE = os.environ.get('REDIS_DB') or 4
    def __init__(self):
        pass
    def __getattr__(self, item):
        return None
class DevelopmentConfig(Config):
    DEBUG = True
    DB_ENGINE = 'mysql'
    DB_HOST = '127.0.0.1'
    DB_PORT = 3306
    DB_USER = 'jumpserver'
    DB_PASSWORD = 'jason_zhang'
    DB_NAME = 'jumpserver'
class TestConfig(Config):
    pass
class ProductionConfig(Config):
    pass
config = DevelopmentConfig()
2.8 生成数据库表结构和初始化数据
cd /opt/jumpserver/utils
bash make_migrations.sh
2.9 运行 Jumpserver
cd /opt/jumpserver
python run_server.py all      (这个xshell界面不能停止运行,另打开一个进行接下来的操作)
运行不报错,请浏览器访问 http://192.168.199.115:8080/
账号: admin 密码: admin
三. 安装 SSH Server 和 WebSocket Server: Coco
新开一个终端,运行Python3虚拟环境
source /opt/py3/bin/activate
3.1 下载或 Clone 项目
cd /opt
git clone https://github.com/jumpserver/coco.git && cd coco && git checkout master
3.2 安装依赖
cd /opt/coco/requirements
yum -y  install $(cat rpm_requirements.txt)
pip install -r requirements.txt
3.3 查看配置文件并运行
cd /opt/coco
cp conf_example.py conf.py
python run_server.py
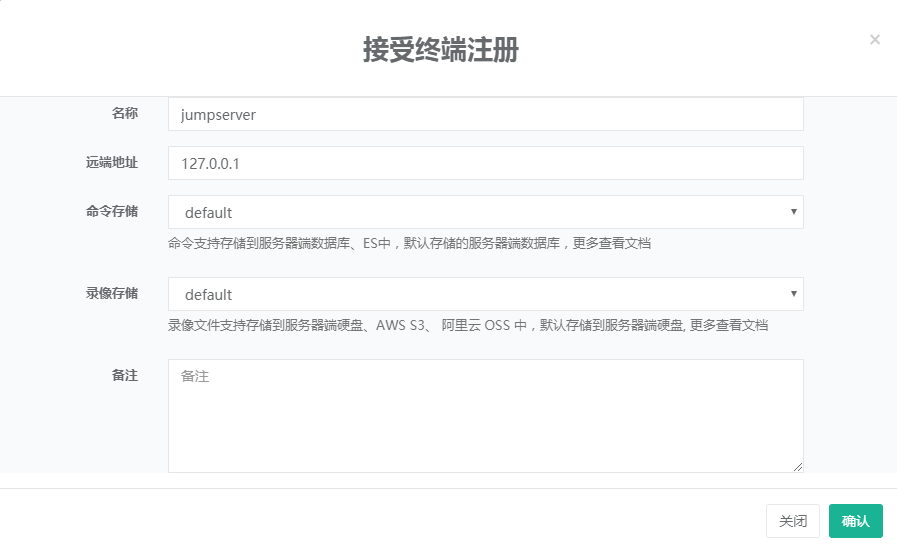
这时需要去 Jumpserver 管理后台-会话管理-终端管理,(http://192.168.199.115:8080/terminal/terminal/)接受 Coco 的注册

四. 安装 Web Terminal 前端: Luna
另开一个终端,运行Python3虚拟环境
Luna 已改为纯前端,需要 Nginx 来运行访问
访问(https://github.com/jumpserver/luna/releases)下载对应版本的 release 包,放在/opt目录下,直接解压,不需要编译
4.1 解压 Luna
tar xvf luna.tar.gz