由于最近有个相关项目,所以就没写读书笔记了,现在写一篇文记录一下学习webpy
本来是想随便做一下整合一下功能就算了,但还是觉得学一下吧,就想多学一下了
参考文章:web.py 0.3 新手指南
一般做啥程序都是从Hello world开始的是吧
test.py
import web

urls = (
    '/', 'hello'
)
app = web.application(urls, global())

class hello:
    def GET(self):
        return 'Hello world'

if __name__ == '__main__':
    app.run()
这就是一个web的简单例程了,是不是很简洁,我就是看到这么简洁就想继续深入一下了
GET和POST: 区别
浅谈HTTP中Get与Post的区别
HTTP中最基本的方法有四种,HET, POST, PUT, DELETE,对应查,改,增,删
GET一般用于获取/查询资源信息,POST一般用于更新资源信息
GET是我们都熟悉的,它用于请求网页文本,当你在浏览器输入www,baidu.com,它会直接访问baidu的web服务器,去GET/
POST经常被用在提交form,比如请求买什么东西,每当提交一个去做什么事情(像使用信用卡处理一笔交易)的请求时,你可以使用POST
当我们web.py的代码中,我们将这两个方法明确区分:
class hello:
    def GET(self):
        return 'Hello world'
当有人用GET请求/时,这个GET函数随时会被web.py调用
启动服务
因为我是用pycahrm的所以都是直接点运行,但如果在命令行执行的是可以更改端口号的
python test.py 1234 #默认8080,现在改成1234模板
可以在python中写HTML,也可以在HTML中写python
在工程目录下新建目录(templates),在该目录下存储.html文件
test.html
<!DOCTYPE html>
<html lang="en">
<head>
    <meta charset="UTF-8">
    <title>test</title>
</head>
<body>
    <em>Hello</em>, world!
</body>
</html>
要是有参数输入就这样写
$def with (name)
<!DOCTYPE html>
<html lang="en">
<head>
<meta charset="UTF-8">
<title>test</title>
</head>
<body>
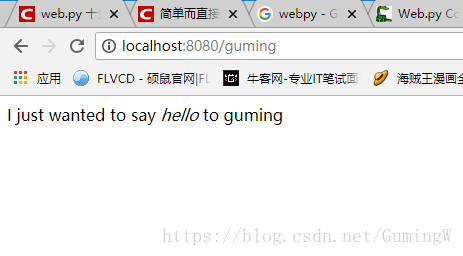
I just wanted to say <em>hello</em> to $name
</body>
</html>这时py文件就要这样改
class hello:
    def GET(self):
        name = 'Bob'
        return render.test('Bob')
经过中午我试了几种形式
class hello:
    # def GET(self, name):
    #     i = web.input(name=None)
    #     return render.test(i.name)
    def GET(self, name):
        return render.test(name)
$def with (name)
<!DOCTYPE html>
<html lang="en">
<head>
<meta charset="UTF-8">
<title>test</title>
</head>
<body>
$if name:
I just wanted to say <em>hello</em> to $name
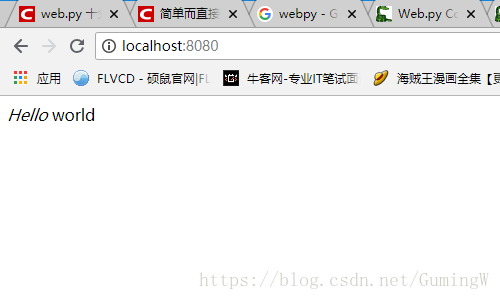
$else:
<em>Hello</em> world
</body>
</html>这个HTML根据有无name输入选择性输出,要是没有输入就显示else后的语句,要是有就显示if后的语句,也就是一个python的语句
不过第一种形式时,网址的输入是:localhost:8080/?name=guming
第二种网址输入是:localhost:8080/guming
输入localhost:8080就是
由于工作内容需要用到上传文件方面的内容,所以就不按顺序来学了,直接跳到上传文件部分
import web

urls = ('/upload', 'Upload')

class Upload:
    def GET(self):
        return """<html><head></head><body>
                <form method="POST" enctype="multipart/form-data" action="">
                <input type="file" name="myfile" />
                <br/>
                <input type="submit" />
                </form>
                </body></html>"""

    def POST(self):
        x = web.input(myfile={})
        web.debug(x['myfile'].filename) # 这里是文件名
        web.debug(x['myfile'].value) # 这里是文件内容
        web.debug(x['myfile'].file.read()) # 或者使用一个文件对象
        raise web.seeother('/upload')


if __name__ == "__main__":
   app = web.application(urls, globals())
   app.run()
GET中就是要打开的网页界面,也可以用到模板templates
render = web.templates.render('templates')  #templates是存放模板的文件夹

def GET(self):
    return render.index()     #index()是模板文件名
我贴一个我正在用的提交页面upload.html
<h1>file upload demo</h1>
<form method="POST" action="/upload" enctype="multipart/form-data">
    <p>file upload</p>

    <input name="file" type="file" />
    <br/>
    <select name="function">
        <option value="0"> </option>
        <option value="1">a</option>
        <option value="2">b</option>
        <option value="3">c</option>
        <option value="4">d</option>
        <option value="5">e</option>
        <option value="6">f</option>
        <option value="7">g</option>
        <option value="8">h</option>
    </select>
    <br/>
    <button type="submit">submit</button>
</form>
upload.py
import web
from img_multiple import ImgMultiple

urls = (
    '/upload', 'upload',
)

render = web.template.render('templates/')


def function(num, pic_name):
    #ImgMultiple是我写的一个功能函数,可以换成你们想要实现的任何功能函数,我放在这里是为了示范
    dir_name = pic_name.split('.')[0]
    a = ImgMultiple(pic_name, dir_name)
    if num == '1':
        a.rotate()
    elif num == '2':
        a.flip_left_right()
    elif num == '3':
        a.flip_top_bottom()
    elif num == '4':
        a.zoom_random()
    elif num == '5':
        a.zoom()
    elif num == '6':
        a.random_distortion()
    elif num == '7':
        a.random_erasing()
    elif num == '8':
        a.gaussian_distortion()

class upload:
    def GET(self):
        return render.upload()    #打开upload界面

    def POST(self):
        x = web.input(file={})
        #<Storage {'file': FieldStorage('file', '1.png', 'xxxxxx'), 'function': '1'}>,这里的xxxx是文件内容,是字节流,由于太大了我就不贴出来了用这个代替
        pic = x['file']    #Storage我个人认为就像一个字典,x['file']就表示键file的值
        func = x['function']    #这里就是键function的值,也就是1,对应html文件就是选项a
        pic_value = pic.value    #xxxx,文件内容
        pic_name = pic.filename    #1.png,文件名字

        with open(pic_name, 'wb')as f:
            f.write(pic_value)               #这两句就是文件保存,因为是字节流所以是wb,pic_name是要保存的文件名,pic_value是文件的字节流内容

        function(func, pic_name)

        raise web.seeother('/upload')    #括号里面的表示行为进行后跳转的页面,我这里是提交后还是回到提交页面


if __name__ == '__main__':
    app = web.application(urls, globals())
    app.run()