上一篇中已经写过一个类似的文章,采用的方法是通过组合控件,调整布局中各控件的位置实现的。
本篇文章是自定义view中的另外一种方法,继承一个现有的类来实现,本文中继承ProgressBar。
题外话:自定义view的三种方法
(一)组合控件
组合控件,顾名思义就是将一些小的控件组合起来形成一个新的控件,这些小的控件多是系统自带的控件。比如很多应用中普遍使用的标题栏控件,其实用的就是组合控件。
(二)自绘控件
自绘控件的内容都是自己绘制出来的,在View的onDraw方法中完成绘制。
(三)继承控件
就是继承已有的控件,创建新控件,保留继承的父控件的特性,并且还可以引入新特性。
网上有很多详细介绍,我在这里就不多说啦。
下面回到今天的主题上:
直接上代码,代码不多,应该能看懂,和上篇有类似的地方,对应的图片文件自己替换一下
public class PbView extends ProgressBar {
    private static final String TAG = "PbView";
    private Paint mPaint;
    private Bitmap bitmap;
    private int progress;
    private int offset;

    public PbView(Context context) {
        super(context);
        Log.i(TAG, "PbView: 1");
        init();
    }

    public PbView(Context context, @Nullable AttributeSet attrs) {
        super(context, attrs);
        Log.i(TAG, "PbView: 2");
        init();
    }

    public PbView(Context context, @Nullable AttributeSet attrs, int defStyleAttr) {
        super(context, attrs, defStyleAttr);
        Log.i(TAG, "PbView: 3");
        init();
    }

    private void init() {
        mPaint = new Paint();
        mPaint.setAntiAlias(true);
        mPaint.setStyle(Paint.Style.FILL_AND_STROKE);
        mPaint.setColor(Color.WHITE);
        mPaint.setTextSize(20);
        mPaint.setTextAlign(Paint.Align.CENTER);
        bitmap = BitmapFactory.decodeResource(getResources(), R.drawable.love);


    }

    @Override
    protected synchronized void onMeasure(int widthMeasureSpec, int heightMeasureSpec) {
        super.onMeasure(widthMeasureSpec, heightMeasureSpec);
        setMeasuredDimension(widthMeasureSpec, bitmap.getHeight());
    }

    @Override
    protected void onSizeChanged(int w, int h, int oldw, int oldh) {
        super.onSizeChanged(w, h, oldw, oldh);
        Log.i(TAG, "onSizeChanged: " + w);

    }

    @Override
    protected void onDraw(Canvas canvas) {
        super.onDraw(canvas);
        Log.i(TAG, "onDraw: ");
        progress = this.getProgress();
        Log.i(TAG, "progress: " + progress);
        offset = (int) (progress * 1.0 / getMax() * this.getWidth());
        int halfWidth = bitmap.getWidth() / 2;
        int maxOffset = this.getWidth() - bitmap.getWidth();
        //防止移除屏幕外
        if (offset < halfWidth) {
            offset = 0;
        } else if (offset >= halfWidth && offset < maxOffset) {
            offset -= halfWidth;
        } else if (offset > maxOffset) {
            offset = maxOffset;
        }
        canvas.drawBitmap(bitmap, offset, 0, mPaint);
        String text = progress + "%";
        //获取文字的高度
        Rect bounds = new Rect();
        mPaint.getTextBounds(text, 0, text.length(), bounds);
        canvas.drawText(text, bitmap.getWidth() / 2 + offset, bitmap.getHeight() / 2 + bounds.height() / 2, mPaint);
    }
}
使用:布局文件中直接使用
<com.cloudcns.demo.PbView
    android:id="@+id/pb"
    style="@style/Base.Widget.AppCompat.ProgressBar.Horizontal"
    android:layout_width="match_parent"
    android:layout_height="wrap_content"
    android:max="100"
    android:progress="30"/>
也可以在代码中设置进度
final PbView viewById = findViewById(R.id.pb);
viewById.setProgress(viewById.getProgress() + 1);
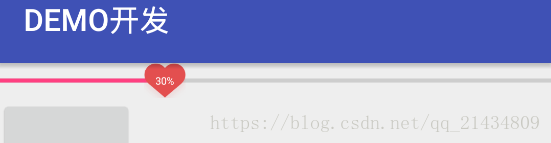
效果图
文章只是作为参考,有不足的地方希望读者朋友们见谅,并能互相交流,相互学习,谢谢大家!!!