一、Spring Security简介
在 Web 应用开发中,安全一直是非常重要的一个方面。安全虽然属于应用的非功能性需求,但是应该在应用开发的初期就考虑进来。如果在应用开发的后期才考虑安全的问题,就可能陷入一个两难的境地:一方面,应用存在严重的安全漏洞,无法满足用户的要求,并可能造成用户的隐私数据被攻击者窃取;另一方面,应用的基本架构已经确定,要修复安全漏洞,可能需要对系统的架构做出比较重大的调整,因而需要更多的开发时间,影响应用的发布进程。因此,从应用开发的第一天就应该把安全相关的因素考虑进来,并在整个应用的开发过程中。
那么我们为什么需要安全权限管理呢?
1.安全性:误操作、人为破坏、数据泄漏等
2.数据隔离:不同的权限能看到及操作不同的数据
3.明确职责:运营、客服等不同角色
在安全权限管理方面,有两个十分优秀的安全权限框架,他们是Apache公司的Shiro框架,和Spring公司的Spring Security框架,今天我们主要讲解Spring Security框架的入门,不比较两者的优缺点
Spring Security 设计是基于框架内大范围的依赖的,可以被划分为以下几块。
-
Web/Http 安全:这是最复杂的部分。通过建立 filter 和相关的 service bean 来实现框架的认证机制。当访问受保护的 URL 时会将用户引入登录界面或者是错误提示界面。
-
业务对象或者方法的安全:控制方法访问权限的。
-
AuthenticationManager:处理来自于框架其他部分的认证请求。
-
AccessDecisionManager:为 Web 或方法的安全提供访问决策。会注册一个默认的,但是我们也可以通过普通 bean 注册的方式使用自定义的 AccessDecisionManager。
-
AuthenticationProvider:AuthenticationManager 是通过它来认证用户的。
-
UserDetailsService:跟 AuthenticationProvider 关系密切,用来获取用户信息的。
-
二、Spring Security + Spring MVC入门应用
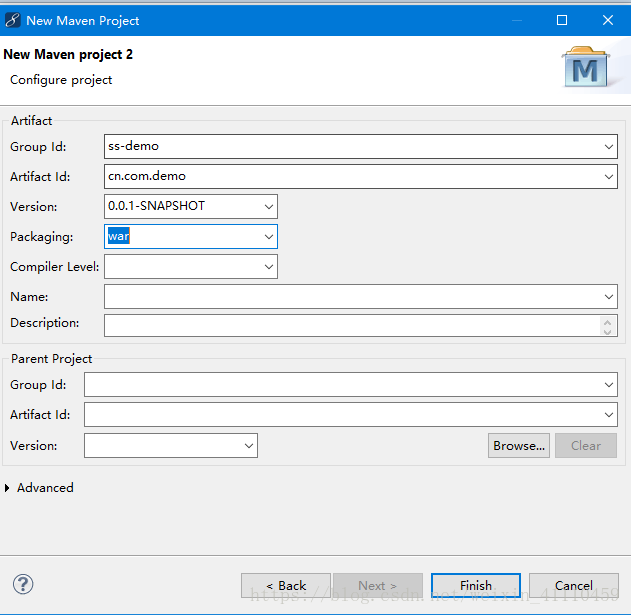
2.1创建一个maven工程,选择war
2.2配置pom.xml
<dependencies>

		<dependency>
			<groupId>org.springframework</groupId>
			<artifactId>spring-core</artifactId>
			<version>${spring.version}</version>
		</dependency>
		<dependency>
			<groupId>org.springframework</groupId>
			<artifactId>spring-web</artifactId>
			<version>${spring.version}</version>
		</dependency>

		<dependency>
			<groupId>org.springframework</groupId>
			<artifactId>spring-webmvc</artifactId>
			<version>${spring.version}</version>
		</dependency>

		<dependency>
			<groupId>org.springframework</groupId>
			<artifactId>spring-context-support</artifactId>
			<version>${spring.version}</version>
		</dependency>

		<dependency>
			<groupId>org.springframework</groupId>
			<artifactId>spring-test</artifactId>
			<version>${spring.version}</version>
		</dependency>

		<dependency>
			<groupId>org.springframework</groupId>
			<artifactId>spring-jdbc</artifactId>
			<version>${spring.version}</version>
		</dependency>

		<dependency>
			<groupId>org.springframework.security</groupId>
			<artifactId>spring-security-web</artifactId>
			<version>4.1.0.RELEASE</version>
		</dependency>

		<dependency>
			<groupId>org.springframework.security</groupId>
			<artifactId>spring-security-config</artifactId>
			<version>4.1.0.RELEASE</version>
		</dependency>

		<dependency>
			<groupId>javax.servlet</groupId>
			<artifactId>servlet-api</artifactId>
			<version>2.5</version>
			<scope>provided</scope>
		</dependency>


	</dependencies>
	<build>
	  <plugins>
	      <!-- java编译插件 -->
		  <plugin>
				<groupId>org.apache.maven.plugins</groupId>
				<artifactId>maven-compiler-plugin</artifactId>
				<version>3.2</version>
				<configuration>
					<source>1.7</source>
					<target>1.7</target>
					<encoding>UTF-8</encoding>
				</configuration>
		  </plugin>
	      <plugin>
				<groupId>org.apache.tomcat.maven</groupId>
				<artifactId>tomcat7-maven-plugin</artifactId>
				<configuration>
					<!-- 指定端口 -->
					<port>9090</port>
					<!-- 请求路径 -->
					<path>/</path>
				</configuration>
	  	  </plugin>
	   </plugins>
    </build>
2.3创建web.xml
<?xml version="1.0" encoding="UTF-8"?>
<web-app xmlns:xsi="http://www.w3.org/2001/XMLSchema-instance"
	xmlns="http://java.sun.com/xml/ns/javaee"
	xsi:schemaLocation="http://java.sun.com/xml/ns/javaee http://java.sun.com/xml/ns/javaee/web-app_2_5.xsd"
	version="2.5">

  	 <context-param>
		<param-name>contextConfigLocation</param-name>
		<param-value>classpath:spring-security.xml</param-value>
	 </context-param>
	 <listener>
		<listener-class>
			org.springframework.web.context.ContextLoaderListener
		</listener-class>
	 </listener>

    <!--配置spring security-->
	 <filter>
		<filter-name>springSecurityFilterChain</filter-name>
		<filter-class>org.springframework.web.filter.DelegatingFilterProxy</filter-class>
	 </filter>
	 <filter-mapping>
		<filter-name>springSecurityFilterChain</filter-name>
		<url-pattern>/*</url-pattern>
	 </filter-mapping>

</web-app>
2.4创建spring-security.xml文件
<?xml version="1.0" encoding="UTF-8"?>
<beans:beans xmlns="http://www.springframework.org/schema/security"
	xmlns:beans="http://www.springframework.org/schema/beans" xmlns:xsi="http://www.w3.org/2001/XMLSchema-instance"
	xsi:schemaLocation="http://www.springframework.org/schema/beans http://www.springframework.org/schema/beans/spring-beans.xsd
						http://www.springframework.org/schema/security http://www.springframework.org/schema/security/spring-security.xsd">

	<!-- 页面拦截规则 -->
	<http use-expressions="false">
		<intercept-url pattern="/**" access="ROLE_USER" />
		<form-login/>
	</http>

	<!-- 认证管理器 -->
	<authentication-manager>
		<authentication-provider>
			<user-service>
				<user name="admin" password="123456" authorities="ROLE_USER"/>
			</user-service>
		</authentication-provider>
	</authentication-manager>
</beans:beans>
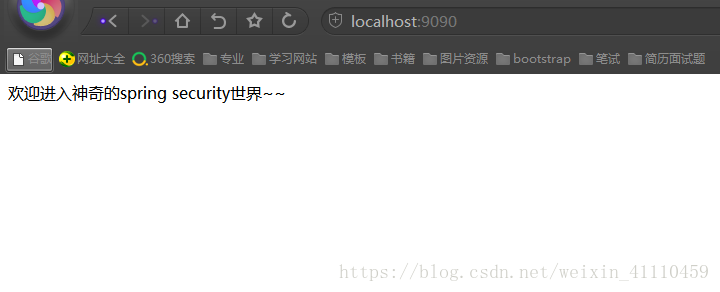
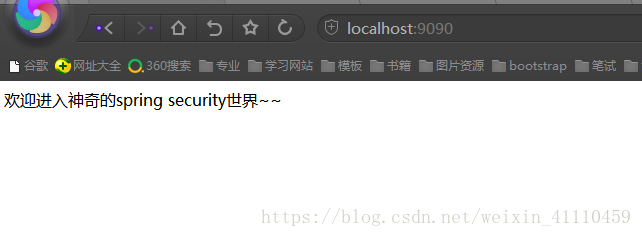
2.5创建一个index.html,在里面随便输入一句话,我这里是 欢迎进入神奇的spring security世界~~
2.6运行maven,这里我们没有写登录页,spring security会自动为我们创建一个登陆页面
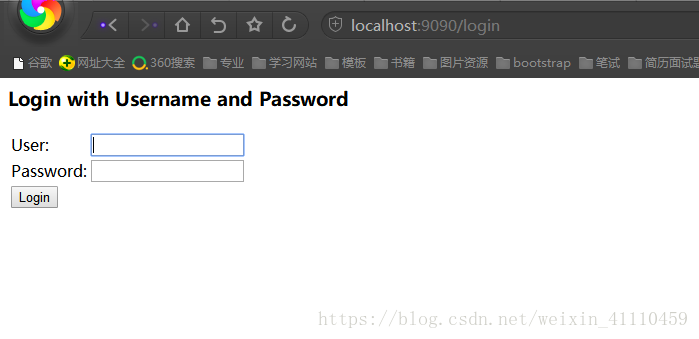
我们随便输入账号密码
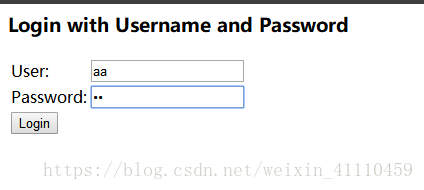
输入正确的admin和123456

这里有可能会报这么一个错误,那是因为spring security自带的图标没有加载到,重新登陆即可
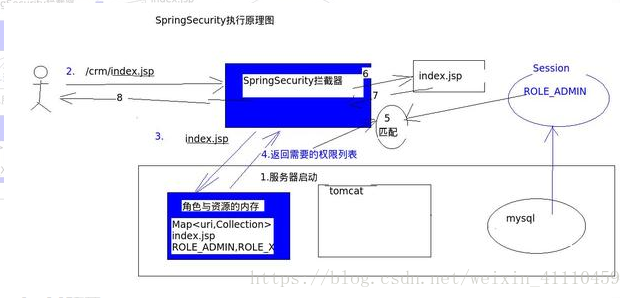
这样,我们的入门小demo就完成了,仔细想想,我们好像没有做什么事情,甚至连登陆页面也没有画,那么spring security框架究竟为我们做了哪些事情呢?这里我们详细讲解一下spring-security.xml文件
intercept-url 表示拦截页面
/* 表示的是该目录下的资源,只包括本级目录不包括下级目录
/** 表示的是该目录以及该目录下所有级别子目录的资源
form-login 为开启表单登陆
use-expressions 为是否使用使用 Spring 表达式语言( SpEL ),默认为true ,如果开启,则拦截的配置应该写成以下形式
这里我们来自己定义一个登陆页面,spring-security配置文件如下
<?xml version="1.0" encoding="UTF-8"?>
<beans:beans xmlns="http://www.springframework.org/schema/security"
xmlns:beans="http://www.springframework.org/schema/beans" xmlns:xsi="http://www.w3.org/2001/XMLSchema-instance"
xsi:schemaLocation="http://www.springframework.org/schema/beans http://www.springframework.org/schema/beans/spring-beans.xsd
http://www.springframework.org/schema/security http://www.springframework.org/schema/security/spring-security.xsd">
<!--设置页面不登陆也可以访问 -->
<http pattern="/login.html" security="none"></http>
<http pattern="/login_error.html" security="none"></http>
<!-- 页面的拦截规则 是否启用SPEL表达式 true/false 默认为true-->
<!-- 如果为true,access格式需为hasRole('ROLE_USER') -->
<http use-expressions="false">
<!--/** 根目录与其子目录全部拦截 access:角色名称 ROLE_ -->
<!-- 当前用户必须用ROLE_USER的角色才可以访问根目录及其子目录所有资源 -->
<intercept-url pattern="/**" access="ROLE_USER"/>
<!-- 开启表单登陆功能 default-target-url:登陆成功去到那个页面,authentication-failure-url:登陆失败渠道那个页面-->
<form-login login-page="/login.html" default-target-url="/index.html" authentication-failure-url="/login_error.html"/>
<!-- 这里不设置会被反复重定向 -->
<csrf disabled="true"/>
</http>
<!-- 认证管理器 -->
<authentication-manager>
<authentication-provider>
<user-service>
<!-- 用来配置当前系统的用户 authorities:用户属于哪一个角色-->
<user name="admin" password="123456" authorities="ROLE_USER"/>
</user-service>
</authentication-provider>
</authentication-manager>
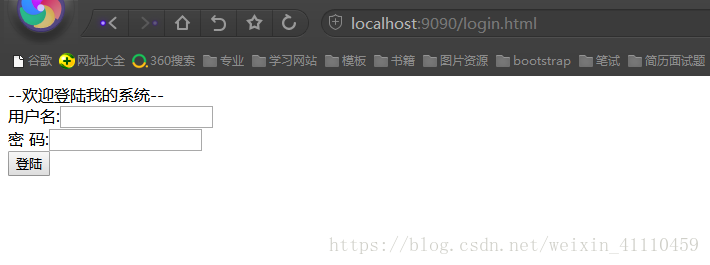
</beans:beans>自定义一个login.html页面
<body>
--欢迎登陆我的系统--
<form action="/login" method="post">
用户名:<input type="text" name="username"><br>
密 码:<input type="password" name="password"><br>
<button>登陆</button>
</form>
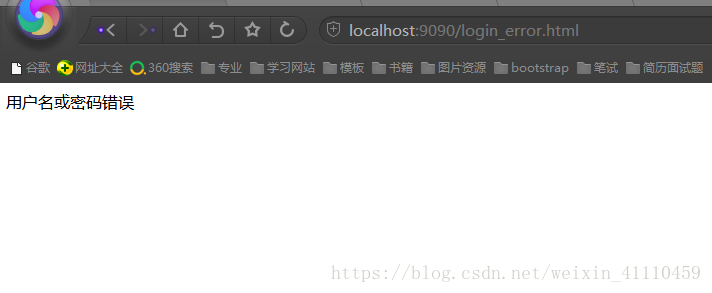
</body>在自定义一个login_error.html页面
  <body>
		用户名或密码错误
  </body>
登陆
输入错误的账号密码
输入正确的账号密码
注意:
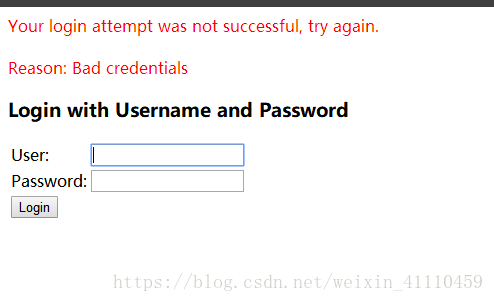
spring-security.xml中 <csrf disabled="true"/> 这个配置我们不写的话,我们将出现如下错误

我们输入正确的账号密码

原因:CSRF(Cross-site request forgery)跨站请求伪造,也被称为“One Click Attack”或者Session Riding,通常缩写为CSRF或者XSRF,是一种对网站的恶意利用。如果不配置,这里会造成一直重定向